THTEN kobalt 623432 knob
THTEN KTHA 1040-03 String Trimmer Bump Knob Instruction Manual
Model: kobalt 623432 knob
1. Introduction
This manual provides essential information for the installation, operation, and maintenance of your THTEN KTHA 1040-03 String Trimmer Bump Knob. This product is designed as a direct replacement part for compatible Kobalt string trimmers, ensuring proper line feeding and continued performance of your outdoor power tool.
1.1 Product Overview
The THTEN KTHA 1040-03 bump knob is a durable plastic component that forms the bottom part of the string trimmer head. It is crucial for the bump-feed mechanism, allowing the user to advance the trimmer line by tapping the head on the ground during operation.

Image 1.1: Four THTEN KTHA 1040-03 String Trimmer Bump Knobs. These knobs are designed as direct replacements for various Kobalt string trimmer models.
1.2 Compatibility
This bump knob is compatible with a range of Kobalt string trimmer models. Please verify your trimmer's model number against the list below to ensure proper fitment:
- Kobalt 80V String Trimmers: items 623432 and 620250
- Kobalt 40V String Trimmers: KST 1040A-03, KST 1040B-03, KST 2540-06, KST 2580-06, KST 1540-06, KST-1341
- Kobalt 24V String Trimmers: KST 224A-03, KST 224B-03
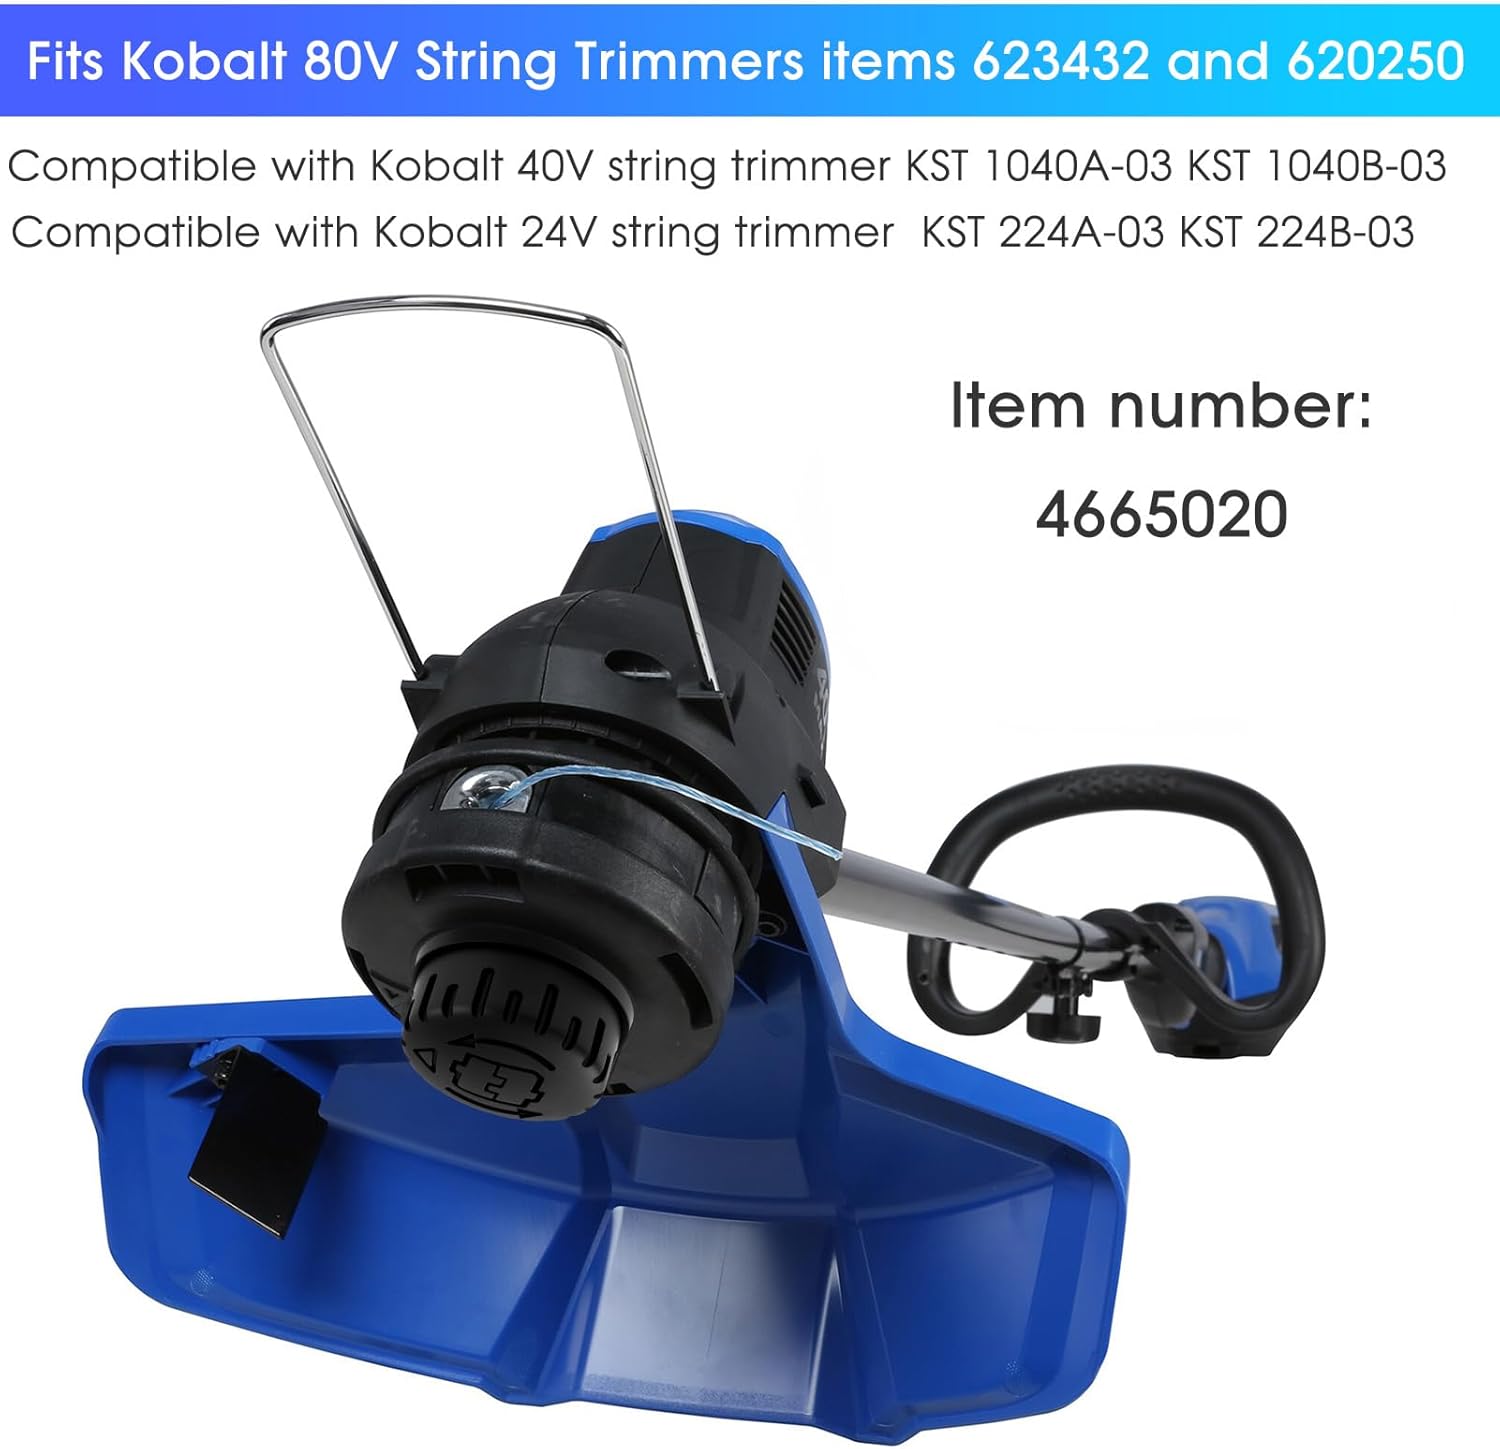
Image 1.2: A Kobalt string trimmer head, illustrating the type of equipment this bump knob is compatible with. The image highlights compatibility with 80V, 40V, and 24V Kobalt string trimmers.
2. Safety Information
Always prioritize safety when working with power tools and their components. While replacing the bump knob is a relatively simple task, adherence to safety guidelines is crucial.
- Disconnect Power: Before attempting any installation or maintenance, ensure the string trimmer's battery is removed or the power cord is unplugged to prevent accidental startup.
- Wear Protective Gear: Always wear appropriate personal protective equipment (PPE), including safety glasses, gloves, and sturdy footwear.
- Read Trimmer Manual: Refer to your specific string trimmer's original instruction manual for detailed safety warnings and procedures related to its head assembly.
- Inspect Components: Before and after installation, inspect the bump knob and surrounding trimmer head components for any damage, cracks, or wear. Replace any damaged parts immediately.
- Keep Children Away: Ensure children and bystanders are kept at a safe distance during any maintenance or operation.
3. Parts List
The THTEN KTHA 1040-03 package typically includes:
- 1 x THTEN KTHA 1040-03 String Trimmer Bump Knob (Note: Product may be sold in multi-packs; refer to your purchase details for quantity.)
4. Setup and Installation
Replacing the bump knob is a straightforward process, often requiring no special tools. Follow these general steps:
- Prepare the Trimmer: Ensure the string trimmer is turned off and the battery pack is removed (for cordless models) or the power cord is unplugged (for corded models).
- Remove Old Bump Knob:
- Most bump knobs are threaded onto the trimmer head shaft. Turn the old knob counter-clockwise to unscrew it.
- If the knob is stuck, you may need to hold the trimmer head or shaft to prevent it from spinning. Consult your trimmer's manual for specific removal instructions if needed.
- Inspect Trimmer Head: Once the old knob is removed, inspect the internal components of the trimmer head, including the spring and spool, for any damage or debris. Clean as necessary.
- Install New Bump Knob:
- Align the new THTEN KTHA 1040-03 bump knob with the threads on the trimmer head shaft.
- Turn the knob clockwise to screw it on. Tighten it firmly by hand until it is secure. Do not overtighten.
- Verify Installation: Gently pull on the bump knob to ensure it is securely attached and does not wobble.

Image 4.1: The THTEN bump knob, highlighting its durable plastic construction and tool-free installation design. The image shows the top and bottom views of the knob.

Image 4.2: A close-up view of a string trimmer head with the bump knob properly installed, showing the green trimmer line extending from the head.
5. Operating the Bump Knob
The bump knob is an integral part of the trimmer's line feeding system. Once installed, its operation is simple:
- Line Advancement: To advance the trimmer line, start the trimmer and allow the head to reach full operating speed.
- Bumping Action: Lightly tap the bump knob on a firm surface, such as the ground or a sidewalk. The impact will cause the internal mechanism to release a small amount of additional trimmer line.
- Blade Cut-off: Most trimmers have a line cut-off blade on the guard that will automatically trim the line to the correct length after it has been advanced.
- Avoid Excessive Bumping: Only bump the knob as needed to advance the line. Excessive bumping can lead to wasted line and unnecessary wear on the knob and trimmer head.

Image 5.1: A person operating a string trimmer to edge a lawn, demonstrating the typical use case where the bump knob would be utilized for line advancement.
6. Maintenance
Regular maintenance of the bump knob and trimmer head will extend the life of your product and ensure optimal performance.
- Cleaning: After each use, clean any grass, dirt, or debris from the bump knob and the surrounding trimmer head. A damp cloth can be used. Ensure the area is dry before storage.
- Inspection: Periodically inspect the bump knob for signs of wear, cracks, or damage. The knob is designed to withstand repeated impacts, but over time, it may show signs of abrasion.
- Line Management: Ensure the trimmer line is properly wound on the spool. Tangled or improperly wound line can hinder the bump-feed mechanism.
- Storage: Store the trimmer in a clean, dry place, protected from extreme temperatures.
7. Troubleshooting
If you encounter issues with your trimmer's line feeding after replacing the bump knob, consider the following:
| Problem | Possible Cause | Solution |
|---|---|---|
| Line does not advance when bumping. |
|
|
| Bump knob wears out quickly. |
|
|
For issues not listed here, or if problems persist, please refer to your original trimmer's instruction manual or contact THTEN customer support.
8. Specifications
| Attribute | Detail |
|---|---|
| Product Name | THTEN KTHA 1040-03 String Trimmer Bump Knob |
| Model Number (THTEN) | KTHA 1040-03 |
| Compatible Kobalt Model Number | kobalt 623432 knob |
| Item Numbers (Kobalt Cross-reference) | 2908503, 1315053, 4665020, 2127552 |
| Material | Durable Plastic |
| Product Dimensions (Approx.) | 6 cm (2.36 in) diameter, 2.5 cm (0.98 in) height |
| Item Weight (Approx.) | 4.2 ounces |

Image 8.1: A diagram illustrating the approximate dimensions of the THTEN KTHA 1040-03 bump knob, showing a diameter of 6cm (2.36in) and a height of 2.5cm (0.98in).
9. Warranty and Support
THTEN is committed to providing quality products and customer satisfaction. While specific warranty details for this replacement part are not provided in this manual, THTEN offers world-class customer support.
If you have any questions regarding the installation, compatibility, or performance of your THTEN KTHA 1040-03 String Trimmer Bump Knob, or if you encounter any issues, please do not hesitate to contact the THTEN support team. They are available to provide quick solutions and assistance.
For support, please visit the official THTEN store on Amazon or contact them through the platform where you purchased the product. You can find more information about THTEN products and support at the THTEN Amazon Store.
Ask a question about this manual
Ask about setup, troubleshooting, compatibility, parts, safety, or missing instructions. Manuals+ will review the question and use this page’s manual context to help answer it.