1. Introduction
Thank you for choosing the ACMER S1 2.5W Laser Engraver Machine. This manual provides essential information for the safe and efficient operation of your device. Please read it thoroughly before use and retain it for future reference.
The ACMER S1 2.5W is a high-precision laser engraving and cutting machine designed for various materials, offering a compact and user-friendly experience for DIY enthusiasts and professionals.
2. Safety Information
WARNING: Laser radiation can cause eye damage and skin burns. Always wear protective eyewear and ensure proper ventilation during operation.
- Eye Protection: Always wear the provided laser safety glasses when the machine is operating. Never look directly at the laser beam.
- Ventilation: Operate the machine in a well-ventilated area to dissipate fumes and smoke produced during engraving and cutting.
- Fire Hazard: The laser can ignite flammable materials. Keep a fire extinguisher nearby and never leave the machine unattended during operation.
- Material Compatibility: Only engrave or cut materials specified as safe. Avoid reflective or transparent materials without proper preparation.
- Children and Pets: Keep children and pets away from the operating area.
- Emergency Stop: Familiarize yourself with the location of the power switch for immediate shutdown in case of an emergency.
3. Package Contents
The ACMER S1 2.5W Laser Engraver Machine comes pre-assembled for quick setup. Please verify that all components are present:
- ACMER S1 2.5W Laser Engraver Machine (main unit)
- Laser Module (pre-installed or requires simple attachment)
- Power Adapter
- USB Cable
- Laser Safety Glasses
- Sample Materials (e.g., wood plate)
- User Manual

Image: The ACMER S1 2.5W Laser Engraver Machine shown in its packaging, ready for unboxing.
4. Setup Instructions
The ACMER S1 2.5W is designed for quick and easy setup, arriving largely pre-assembled.
- Unpack the Machine: Carefully remove all components from the packaging.
- Place the Machine: Position the engraver on a stable, level surface in a well-ventilated area.
- Install Laser Module (if not pre-installed): Attach the laser head to the designated slot on the gantry. Ensure it is securely fastened.
- Connect Power: Plug the power adapter into the machine's power input (DC 12V 2A) and then into a wall outlet.
- Connect to Computer: Use the provided USB cable to connect the machine to your computer.
- Software Installation: Download and install compatible software such as LightBurn or LaserGRBL from their official websites. Follow the software's installation guide.
- Focusing the Laser: Adjust the laser module's height to achieve the optimal focal length (2mm) for your material. This is crucial for precise engraving and cutting.

Image: The ACMER S1 2.5W Laser Engraver machine, showcasing its compact design and potential applications.
5. Operating Instructions
The ACMER S1 2.5W offers versatile engraving and cutting capabilities. Always wear safety glasses during operation.
5.1 Software Compatibility
The machine is compatible with popular laser control software:
- LightBurn: A powerful, feature-rich software for laser control.
- LaserGRBL: A free, open-source software for GRBL-based laser engravers.
Supported operating systems include macOS, Windows, and Linux. Supported file formats are NC, DXF, BMP, JPG, and PNG.
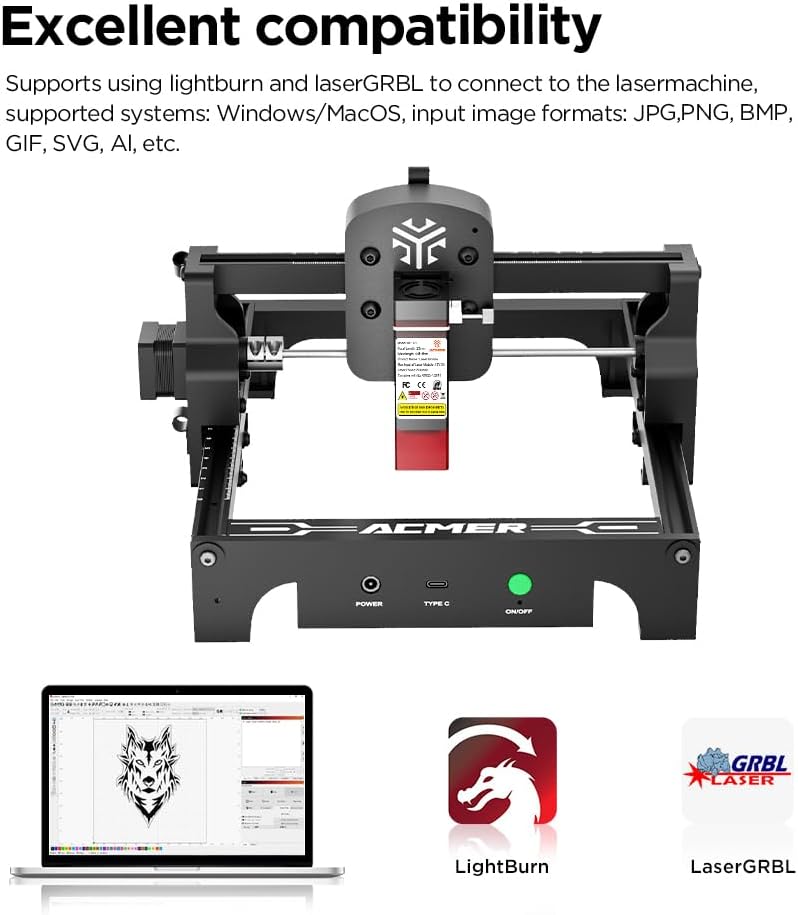
Image: The laser engraver connected to a laptop, demonstrating compatibility with LightBurn and LaserGRBL software.
5.2 Engraving and Cutting Materials
The ACMER S1 2.5W can engrave and cut a wide range of materials:
- Engraving: Wood, bamboo, leather, plastic, PCB, aluminum oxide, coated metals, ceramics, cork, rock, glass, paper, and more.
- Cutting: Thin plywood (up to 6mm), MDF, and opaque acrylic (up to 5mm).

Image: A visual guide to the materials suitable for engraving and cutting with the ACMER S1 2.5W.
5.3 Workflow
- Prepare Your Design: Create or import your design into LightBurn or LaserGRBL.
- Place Material: Secure your material within the 130x130mm working area.
- Adjust Focus: Ensure the laser is properly focused on the material surface.
- Set Parameters: Configure laser power, speed, and passes based on your material and desired effect. Refer to software documentation for detailed settings.
- Start Operation: Initiate the engraving or cutting process from the software. Monitor the machine closely.
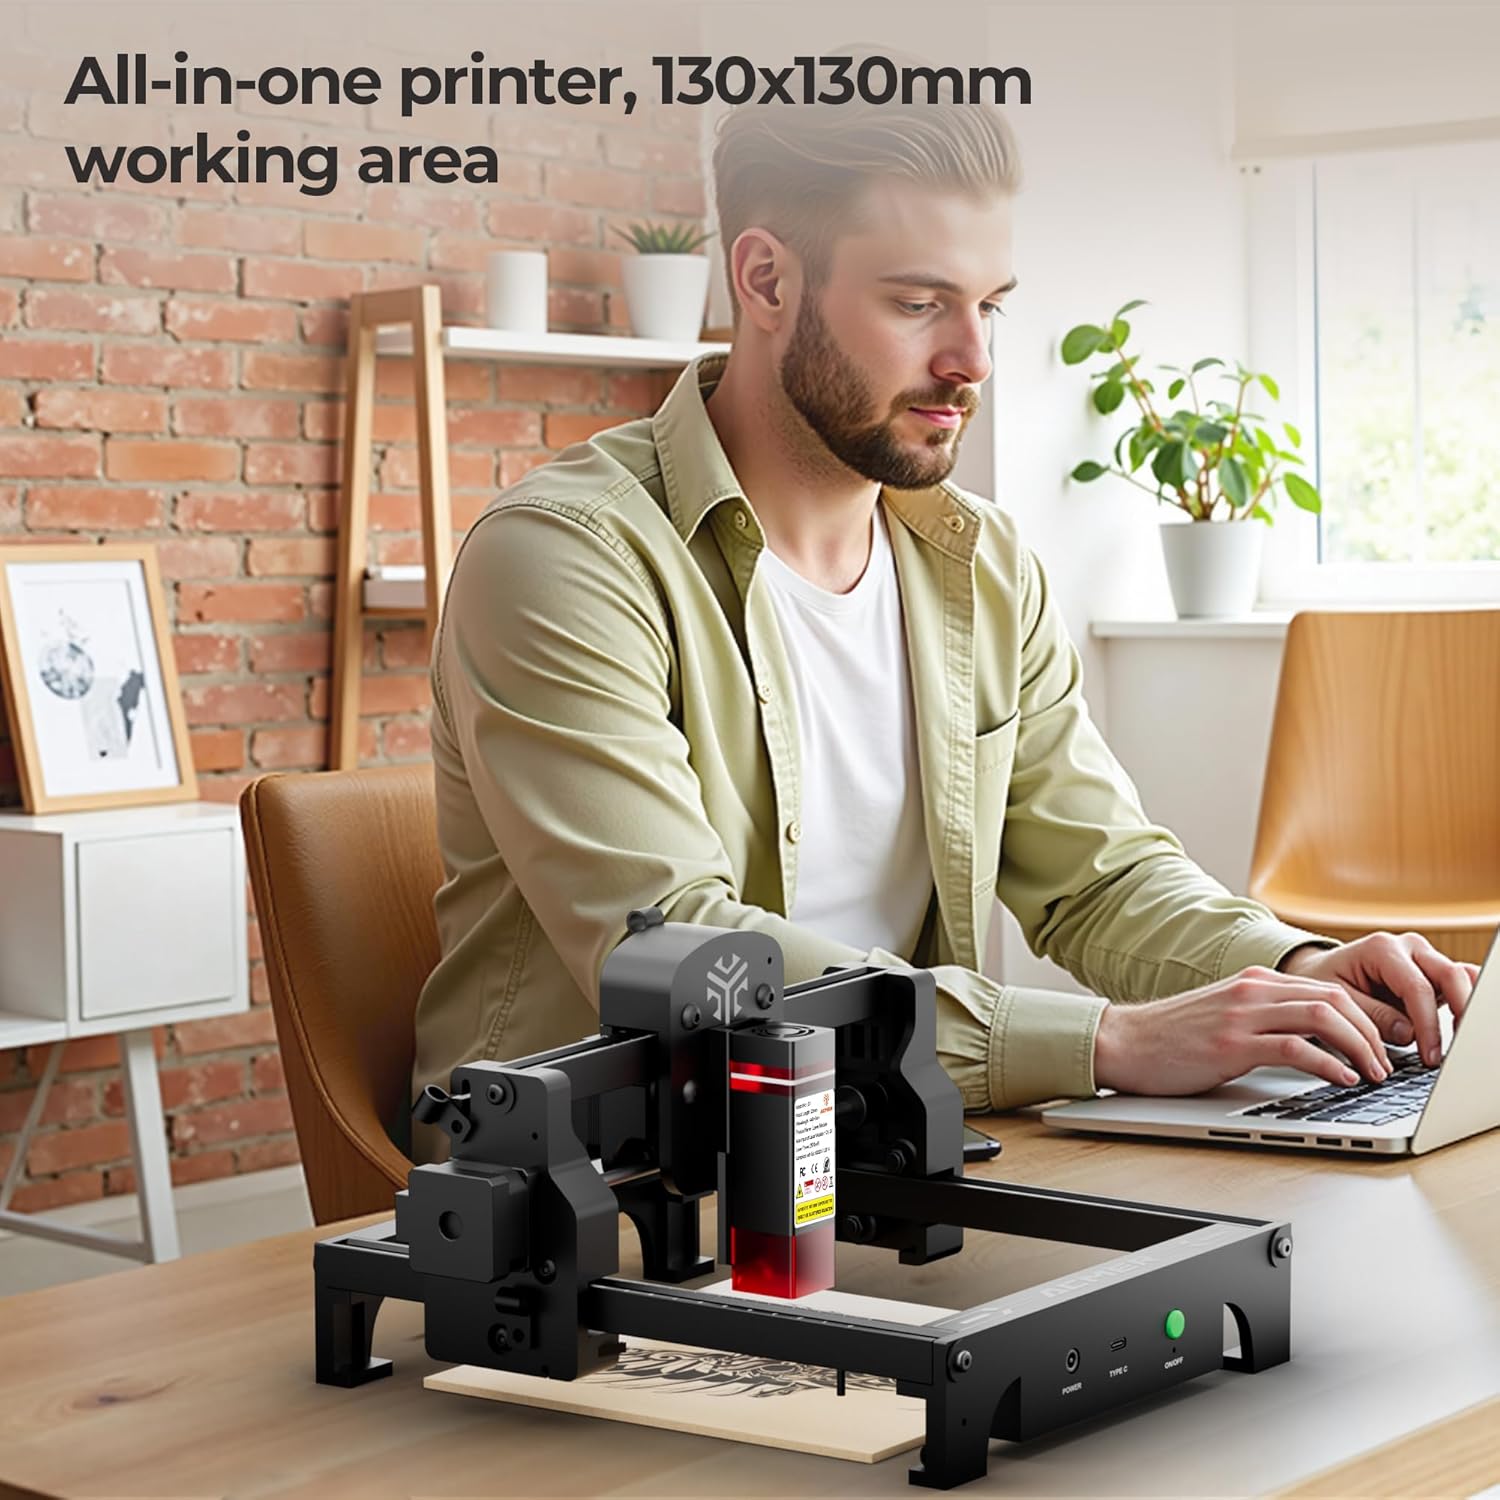
Image: A user demonstrating the operation of the ACMER S1 2.5W laser engraver in a home workshop setting.
6. Maintenance
Regular maintenance ensures optimal performance and longevity of your ACMER S1 2.5W Laser Engraver.
- Clean the Lens: Periodically clean the laser lens with a soft, lint-free cloth and lens cleaning solution to maintain laser precision.
- Clear Debris: Remove any dust, debris, or residue from the working area and machine frame after each use.
- Inspect Belts and Rails: Check the drive belts for tension and the guide rails for smooth movement. Lubricate if necessary according to manufacturer recommendations.
- Software Updates: Keep your laser control software updated to the latest version for improved features and bug fixes.
7. Troubleshooting
This section addresses common issues you might encounter with your ACMER S1 2.5W Laser Engraver.
- Machine Not Powering On:
- Ensure the power adapter is securely connected to both the machine and a working power outlet.
- Check the power switch on the machine. - Laser Not Firing/Weak Output:
- Verify the laser module is correctly installed and connected.
- Check laser power settings in your software.
- Ensure the laser lens is clean and free of obstructions.
- Re-focus the laser for the material being used. - Engraving/Cutting Inaccurate or Incomplete:
- Check material placement and ensure it is flat and secure.
- Verify laser focus.
- Adjust speed and power settings in the software.
- Inspect drive belts for proper tension and ensure no mechanical obstructions. - Software Connection Issues:
- Ensure the USB cable is securely connected to both the machine and the computer.
- Restart the software and the machine.
- Check device manager (Windows) or system information (macOS/Linux) to confirm the machine is recognized.
- Reinstall the software drivers if necessary. - Unusual Noises During Operation:
- Power off the machine immediately.
- Inspect for any loose parts or obstructions in the moving components.
If you encounter persistent issues not covered here, please contact ACMER customer support.
8. Specifications
| Feature | Specification |
|---|---|
| Model Number | S1 2.5W |
| Laser Output Power | 2500mW |
| Overall Machine Power | Up to 24W |
| Laser Type | Diode Laser with Harmonic Lens Technology |
| Laser Wavelength | 455±5nm |
| Focal Length | 2mm |
| Laser Spot Size | 0.04mm*0.04mm |
| Working Area | 130mm x 130mm (5.1 x 5.1 inches) |
| Working Speed | Up to 10000mm/min |
| Machine Dimensions | 250mm × 250mm × 162mm (9.84 x 9.84 x 6.38 inches) |
| Product Dimensions (Packaged) | 23.43 x 13.39 x 6.3 inches |
| Item Weight | 4.09 pounds |
| Power Input | DC 12V 2A |
| Supported OS | macOS, Windows, Linux |
| Supported File Formats | NC, DXF, BMP, JPG, PNG |

Image: Illustration of the compact 130x130mm working area, ideal for various projects.

Image: A visual comparison demonstrating the ultra-fine laser spot size of the S1 for detailed engraving.
9. Warranty Information
ACMER products are manufactured to high-quality standards. For specific warranty terms and conditions, please refer to the warranty card included with your product or visit the official ACMER website. Typically, a limited warranty covers manufacturing defects for a specified period from the date of purchase.
10. Customer Support
For technical assistance, troubleshooting, or any inquiries regarding your ACMER S1 2.5W Laser Engraver, please contact our customer support team.
- Online Support: ACMER offers 24/7 online support. Please visit the official ACMER website for contact details and support resources.
- Seller Information: This product is sold by Acmer Official.
- Brand Store: Explore more ACMER products and resources at the ACMER Brand Store.

Image: ACMER provides 24/7 online support for customer assistance.