1. Introduction
Thank you for choosing the KEENSTAR Electric Meat Grinder JSMG-203. This appliance is designed for efficient and convenient meat grinding, sausage stuffing, and kubbe making in your home kitchen. Please read this manual thoroughly before first use to ensure safe operation and optimal performance. Keep this manual for future reference.

Image: The KEENSTAR Electric Meat Grinder processing meat, highlighting its efficiency for various textures.
2. Important Safety Instructions
- Always ensure the appliance is unplugged before assembling, disassembling, or cleaning.
- Do not grind meat with bones, large tendons, or skin, as this can jam or damage the machine.
- Keep hands and utensils away from the feeding tube and grinding plates during operation. Always use the provided meat pusher.
- All accessories that come into contact with food are made of food-grade materials to prevent contamination.
- The locking knob ensures the head of the machine is securely attached during use.
- The grinder features overload protection, a thermostat system, and an automatic built-in circuit breaker to prevent motor overheating. If the motor stops, unplug the unit and allow it to cool down before restarting.
- Do not immerse the motor unit in water or any other liquid.
- This appliance is for household use only. Do not use outdoors or for commercial purposes.
- Supervise children when the appliance is in use.
3. Package Contents
Verify that all items are present in the package:
- KEENSTAR Electric Meat Grinder Main Unit
- Stainless Steel Blade (1)
- Stainless Steel Grinding Plates (3 sizes: 3mm, 5mm, 7mm)
- Sausage Stuffer Tube (1)
- Kubbe Kit (2 parts)
- Meat Pusher (1)
- Food Tray (1)
4. Assembly
Follow these steps to assemble your meat grinder before use:
- Place the main unit on a stable, flat surface.
- Insert the grinding head into the motor unit opening. Rotate it counter-clockwise until it locks securely into place with the locking knob.
- Insert the feeding screw (auger) into the grinding head.
- Place the cutting blade onto the end of the feeding screw, ensuring the sharp edges face outwards towards the grinding plate.
- Select the desired grinding plate (3mm, 5mm, or 7mm) and place it over the cutting blade.
- Screw the fixing ring onto the grinding head clockwise until it is tight. Do not overtighten.
- Place the food tray on top of the grinding head.

Image: Visual guide for assembling the meat grinder components and product dimensions.
5. Operation
5.1. Grinding Meat
- Ensure the grinder is correctly assembled with the desired grinding plate.
- Cut meat into small pieces (approximately 1-inch cubes) that fit easily into the feeding tube. Remove any bones, large tendons, or excessive fat.
- Place the cut meat onto the food tray.
- Plug the appliance into a 120V power outlet.
- Turn the ON/OFF switch to the "ON" position.
- Feed the meat into the feeding tube using the meat pusher. Do not force the meat or use your fingers.
- Collect the ground meat in a bowl placed under the grinding head.
- After grinding, turn the switch to "OFF" and unplug the appliance.

Image: The three available grinding plate sizes and their respective meat textures.
5.2. Making Sausages
- Assemble the grinder with the sausage stuffer tube. Remove the cutting blade and grinding plate, then attach the sausage stuffer tube to the grinding head with the fixing ring.
- Prepare your seasoned ground meat mixture.
- Slide a pre-soaked sausage casing onto the sausage stuffer tube, leaving a small overhang at the end.
- Plug in the appliance and turn it to "ON".
- Feed the meat mixture into the feeding tube using the meat pusher.
- Guide the casing as it fills, ensuring even distribution and avoiding air pockets. Twist the sausage at desired lengths to create links.
- After stuffing, turn the switch to "OFF" and unplug the appliance.
5.3. Making Kubbe
- Assemble the grinder with the Kubbe kit. Remove the cutting blade and grinding plate, then attach the Kubbe kit components to the grinding head with the fixing ring.
- Prepare your Kubbe mixture according to your recipe.
- Plug in the appliance and turn it to "ON".
- Feed the Kubbe mixture into the feeding tube using the meat pusher.
- The Kubbe attachment will form hollow tubes. Cut these tubes to your desired length and fill them as per your recipe.
- After forming, turn the switch to "OFF" and unplug the appliance.

Image: The sausage and Kubbe attachments, demonstrating their use and the resulting food products.
5.4. Reverse Function
If the machine becomes clogged during grinding, press the "R" (Reverse) button. This will reverse the direction of the feeding screw, helping to clear any blockages. Once cleared, switch back to "ON" to resume operation. If the clog persists, turn off and unplug the unit, then disassemble and clean the components.
6. Cleaning and Maintenance
Proper cleaning ensures the longevity and hygiene of your meat grinder.
- Always unplug the appliance before cleaning.
- Disassemble all removable parts: food tray, grinding head, feeding screw, blade, grinding plate, fixing ring, sausage stuffer tube, and Kubbe kit.
- Soak all accessories (except the motor unit) in warm water with a neutral detergent for a few minutes.
- Wash them thoroughly with a clean brush to remove any food residue.
- Rinse all parts under running water until clean.
- Dry all parts immediately and thoroughly to prevent rust, especially for stainless steel components.
- Wipe the motor unit with a damp cloth. Do not immerse it in water.
- Important: All parts are NOT dishwasher safe. Hand wash only.
- For prolonged service life, wipe all metal accessories with a vegetable oil-wet cloth after drying.
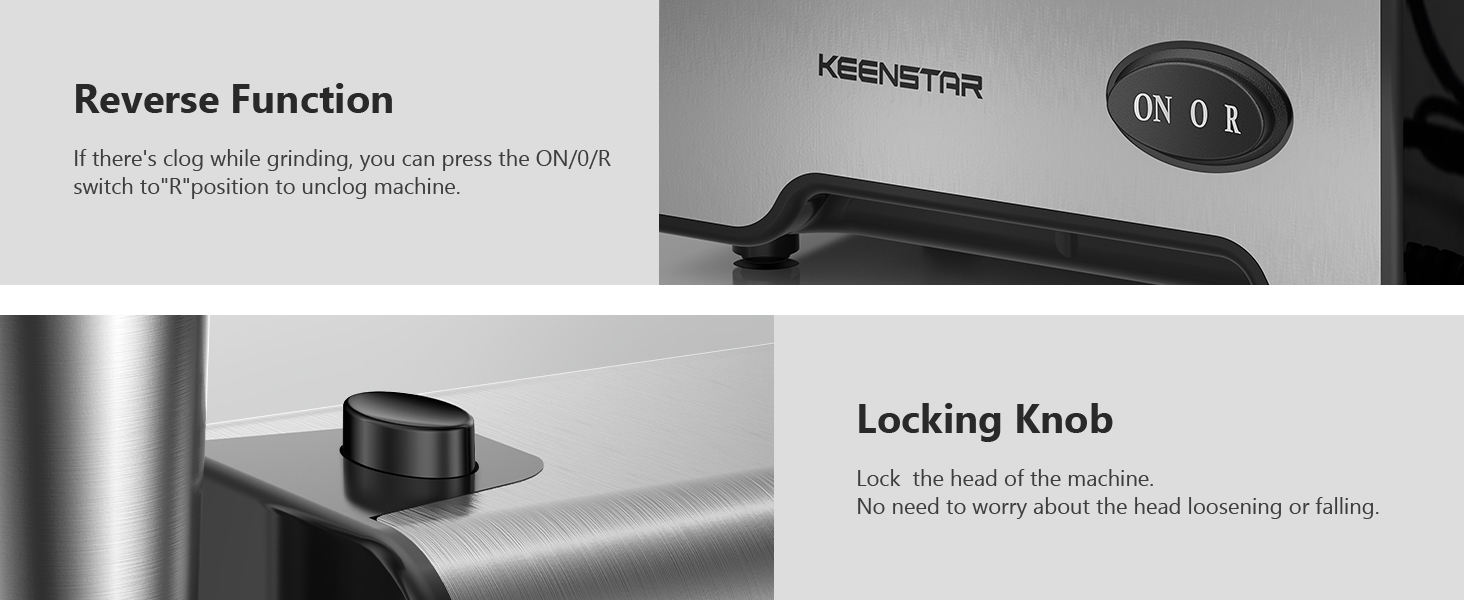
Image: Step-by-step guide for cleaning the meat grinder accessories by hand.
7. Troubleshooting
If you encounter any issues, refer to the table below for common problems and solutions.
| Problem | Possible Cause | Solution |
|---|---|---|
| Motor does not start | Not plugged in; Power outage; Overload protection activated. | Check power connection; Check circuit breaker; Unplug, let cool for 30 minutes, then restart. |
| Meat is not grinding or machine jams | Meat pieces too large; Bones/tendons present; Grinding plate clogged; Overfeeding. | Cut meat smaller; Ensure meat is boneless/tendon-free; Use Reverse function; Disassemble and clean components. |
| Loud noise during operation | Normal operation; Components not assembled correctly; Foreign object inside. | Some noise is normal for powerful motors; Reassemble components carefully; Unplug and check for foreign objects. |
| Ground meat is mushy | Meat is too warm; Blade is dull or incorrectly installed. | Ensure meat is chilled before grinding; Check blade orientation (sharp edge out); Replace blade if dull. |
8. Specifications
| Feature | Specification |
|---|---|
| Model Number | JSMG-203 |
| Brand | KEENSTAR |
| Rated Wattage | 450W |
| Max Locked Power | 3000W |
| Voltage | 120 Volts |
| Material | Stainless Steel |
| Product Dimensions (L x W x H) | 7.31" x 5.11" x 11.69" (18.5cm x 13cm x 29.7cm) |
| Item Weight | 6.35 pounds |
| Recommended Uses | Grinding, Chopping, Mincing |
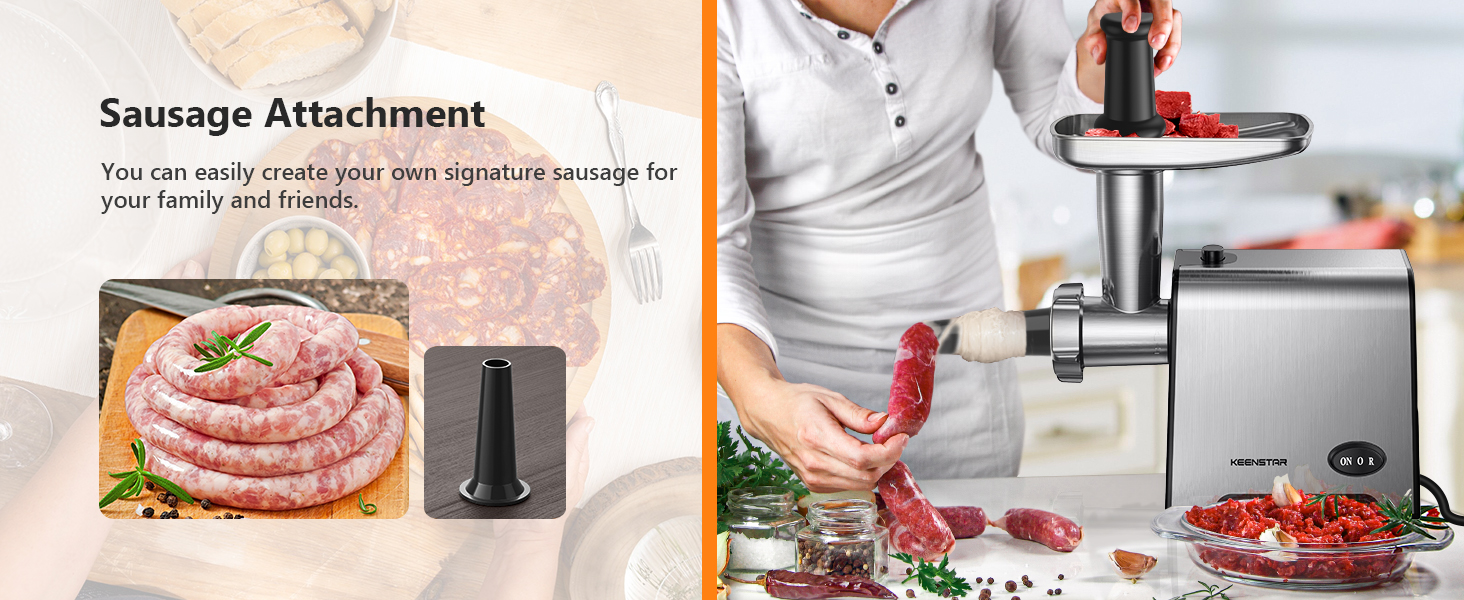
Image: Internal view of the motor and its features.
9. Warranty and Customer Support
KEENSTAR is committed to providing high-quality products and excellent customer service. If you have any questions, concerns, or require assistance with your Electric Meat Grinder, please do not hesitate to contact our customer service team.
Our customer service is available 24 hours to assist you. For warranty details and claims, please refer to the product packaging or contact KEENSTAR customer support directly through the retailer where you purchased the product or via our official website.


