
1. Introduction
This manual provides essential instructions for the safe operation, setup, and maintenance of your Msuiiixcccc L900PRO GPS 4K Dual Camera Foldable Drone. Please read this manual thoroughly before operating the drone to ensure proper function and to avoid damage or injury.
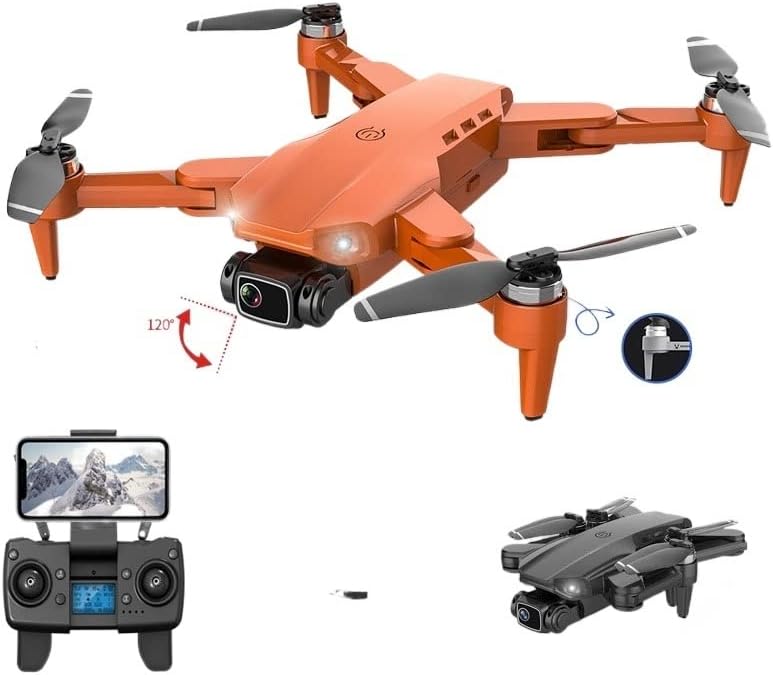
Image 1.1: The Msuiiixcccc L900PRO drone, remote controller, and folded drone for transport.
2. Safety Guidelines
Adherence to these safety guidelines is crucial for preventing accidents and ensuring a safe flight experience.
- Pre-Flight Check: Always inspect the drone, remote controller, and batteries for any damage before each flight.
- Environmental Conditions: Do not fly in strong winds, rain, snow, or fog. Avoid flying near power lines, buildings, or crowded areas.
- Line of Sight: Maintain visual line of sight with the drone at all times during flight.
- Battery Safety: Use only approved batteries and chargers. Do not overcharge or puncture batteries.
- Propeller Safety: Keep hands, face, and loose clothing away from rotating propellers. Ensure propellers are securely attached before flight.
- Respect Privacy: Be mindful of privacy laws when using the camera.
- Age Recommendation: This product is not suitable for children without adult supervision.
3. Package Contents
Verify that all items listed below are included in your package. If any items are missing or damaged, please contact customer support.
- Msuiiixcccc L900PRO Drone (without battery)
- Remote Controller
- Flight Battery (x1, x2, or x3 depending on package)
- Spare Propellers (set of 4)
- USB Charging Cable
- Screwdriver
- User Manual (this document)
- Foam Box (for storage/transport)

Image 3.1: Contents of the Msuiiixcccc L900PRO drone package.
4. Drone Components
Familiarize yourself with the main parts of your L900PRO drone.
- Foldable Arms: For compact storage and transport.
- Propellers: Generate lift for flight.
- Brushless Motors: Provide efficient and powerful propulsion.
- 4K HD Dual Camera: Front-facing camera for aerial photography and video, with electronic image stabilization.
- Optical Flow Sensor: Assists with stable hovering, especially indoors.
- GPS Module: Enables precise outdoor positioning and intelligent flight modes.
- Battery Compartment: Houses the flight battery.

Image 4.1: Detail of the drone's electronic image stabilization camera.

Image 4.2: Components of the 4K aerial camera, highlighting its optical design.
5. Remote Controller Overview
Understand the functions of each button and indicator on your remote controller.

Image 5.1: Remote controller layout with key functions labeled.
| Control | Function |
|---|---|
| Phone Stand | Holds your smartphone for FPV viewing via the app. |
| Left Joystick | Controls throttle (up/down) and yaw (rotate left/right). |
| Right Joystick | Controls pitch (forward/backward) and roll (left/right). |
| Switch | Power ON/OFF for the remote controller. |
| Photo/Video Button | Press to take a photo, hold to start/stop video recording. |
| One Key Return | Initiates automatic return to home point (requires GPS signal). |
| GPS Switch | Activates/deactivates GPS positioning mode. |
| Geomagnetic Calibration | Button to initiate geomagnetic calibration. |
| Gyro Calibration | Button to initiate gyroscope calibration. |
| Headless Mode | Activates headless flight mode. |
| One-Key Start/Landing | Press to automatically take off or land. |
| Wheel: Speed Conversion | Adjusts flight speed modes. |
| Wheel: Camera Adjustment | Adjusts the camera's tilt angle. |
| LCD Display | Shows flight status, battery level, and other information. |
| Charging Indicator | Indicates charging status of the remote controller. |
| Power Indicator | Indicates remote controller power status. |
| Headless Indicator | Indicates if headless mode is active. |
| GPS Indicator | Indicates GPS signal status. |
6. Setup
Follow these steps to prepare your drone for its first flight.

Image 6.1: All components ready for assembly and setup.
6.1 Battery Installation and Charging
- Drone Battery: Insert the fully charged flight battery into the drone's battery compartment until it clicks securely into place.
- Remote Controller Battery: Open the battery cover on the back of the remote controller and insert the required batteries (usually AA, check markings) with correct polarity.
- Charging: Use the provided USB charging cable to charge the flight battery. Connect the cable to a USB power adapter (not included). The indicator light on the battery will change when fully charged.
6.2 Propeller Installation
Ensure propellers are installed correctly. Each propeller is marked (A or B) and must match the corresponding motor arm.
- Match the propeller type (A or B) to the motor arm.
- Place the propeller onto the motor shaft.
- Secure the propeller with the provided screws using the screwdriver. Do not overtighten.
6.3 Unfolding the Drone
Gently unfold the drone arms until they are fully extended and locked into position.
6.4 App Download and Connection
- Scan the QR code in the manual or search for the designated app (e.g., 'L900PRO' or similar) in your smartphone's app store.
- Install the app on your smartphone.
- Power on the drone and then the remote controller.
- On your smartphone, go to Wi-Fi settings and connect to the drone's Wi-Fi network (e.g., 'L900PRO-XXXXXX').
- Open the app. You should see the live camera feed from the drone.
6.5 Calibration
Perform these calibrations before the first flight and whenever you change flight locations significantly.
- Geomagnetic Calibration: Press the Geomagnetic Calibration button on the remote. Follow the on-screen instructions in the app or the drone's indicator lights to rotate the drone horizontally and vertically until calibration is complete.
- Gyro Calibration: Place the drone on a flat, level surface. Press the Gyro Calibration button on the remote. The drone's lights will indicate when calibration is complete.
- GPS Signal Acquisition: For outdoor flights, ensure the GPS indicator on the remote shows a strong signal (usually 7+ satellites) before takeoff.
7. Operating
7.1 Pre-Flight Checks
- Ensure batteries are fully charged in both drone and remote.
- Propellers are correctly installed and secure.
- Drone arms are fully unfolded and locked.
- Fly in an open area, away from obstacles and people.
- GPS signal is strong (for outdoor flight).
7.2 Take-off and Landing
- One-Key Take-off: Press the One-Key Start/Landing button on the remote. The drone will automatically take off and hover at a safe altitude.
- Manual Take-off: Push both joysticks to the bottom-outer corners to unlock the motors. Then, slowly push the left joystick up to increase throttle and take off.
- One-Key Landing: Press the One-Key Start/Landing button again. The drone will automatically descend and land.
- Manual Landing: Slowly pull the left joystick down to decrease throttle and land the drone. Once landed, push both joysticks to the bottom-outer corners to stop the motors.
7.3 Basic Flight Controls
- Left Joystick (Throttle/Yaw):
Up/Down: Increase/Decrease altitude.
Left/Right: Rotate drone left/right (yaw). - Right Joystick (Pitch/Roll):
Up/Down: Fly forward/backward (pitch).
Left/Right: Fly left/right (roll).
7.4 Advanced Flight Functions (via App)
Connect your smartphone to the drone's Wi-Fi and use the app for advanced features:
- GPS Tracking: The drone can follow you automatically.
- Waypoint Flight: Draw a path on the app map, and the drone will fly along the designated route.
- Point of Interest: Select a point on the map, and the drone will circle around it.
- Headless Mode: In this mode, the drone's orientation is relative to the pilot, simplifying control regardless of the drone's front direction.
- Altitude Hold: The drone maintains a stable altitude automatically.
7.5 Camera Operation
- Take Photo: Press the Photo/Video button on the remote controller once.
- Record Video: Press and hold the Photo/Video button to start recording. Press and hold again to stop.
- Camera Angle Adjustment: Use the Camera Adjustment wheel on the remote to tilt the camera up or down.
- Viewing Media: Photos and videos are saved to your smartphone via the app or to an inserted SD card (if applicable, check drone specifications).
8. Maintenance
Regular maintenance ensures the longevity and optimal performance of your drone.
- Cleaning: Use a soft, dry cloth to clean the drone body and camera lens. Avoid using liquids or solvents.
- Propeller Replacement: If propellers are damaged or bent, replace them immediately with new ones from the spare parts kit. Ensure correct A/B matching.
- Battery Care: Store batteries in a cool, dry place. Do not fully discharge batteries for extended periods. Charge them periodically if not in use.
- Motor Inspection: Periodically check motors for any debris or obstructions.
9. Troubleshooting
Refer to this section for solutions to common issues.
| Problem | Possible Cause | Solution |
|---|---|---|
| Drone does not respond to remote. | Not paired; low battery; interference. | Re-pair drone and remote; charge batteries; move to an area with less interference. |
| Drone drifts during flight. | Improper calibration; windy conditions. | Perform Gyro and Geomagnetic calibration; avoid flying in strong winds. |
| No image on smartphone app. | Wi-Fi not connected; app error. | Ensure phone is connected to drone's Wi-Fi; restart app and drone. |
| Drone cannot get GPS signal. | Indoor flight; obstructed view of sky. | Fly outdoors in an open area with clear sky view. |
| Short flight time. | Battery not fully charged; old battery. | Ensure battery is fully charged; consider replacing old batteries. |
10. Specifications
| Feature | Detail |
|---|---|
| Brand | Msuiiixcccc |
| Model Number | rr1/8649 |
| Connectivity | APP Controller, Remote Control, Wi-Fi |
| Camera Pixels | 16 Million (effective) |
| Video Recording Resolution | 1080p HD, 4K HD |
| WIFI Image Transmission Distance | 300M-600M |
| GPS | Yes |
| Flight Time | Approximately 27 minutes |
| Motor Type | Brushless Motor |
| Aircraft Operating Frequency | 2.4 GHz |
| Material | High-quality ABS |
| UPC | 750165689502 |
11. Warranty and Support
For warranty information, please refer to the purchase documentation or contact your retailer. For technical support or inquiries regarding spare parts, please contact Msuiiixcccc customer service through their official channels.
Note: Information regarding spare parts availability is currently unavailable.