1. Introduction
This manual provides detailed instructions for the installation, operation, maintenance, and troubleshooting of your AINAVITO 10" QLED Android 13 Car Stereo. Please read this manual thoroughly before installation and use to ensure proper function and safety.
2. Package Contents
Verify that all items listed below are included in your package:
- 1x Car Stereo Radio with Frame
- 1x RCA Cable
- 1x Power Cable
- 1x Car Microphone
- 1x GPS Antenna
- 1x Frame Removal Tool
- 1x 1080P AHD Backup Camera
- 2x USB Cables
- 1x Reversing Control Extension Cable
- 1x Detailed Installation Picture Guide
- 1x Product User Manual (this document)

Figure 2.1: All components included in the AINAVITO car stereo package.
Video 2.1: Unboxing the AINAVITO 10" Single Knob Keybutton Silverado Radio. This video demonstrates the contents of the product package.
3. Setup and Installation
This section guides you through the installation process. It is recommended to consult a professional if you are unsure about any steps.
3.1 Pre-Installation Check
- Ensure your vehicle is a Chevy Silverado 1500, 2500, or 3500, or a GMC Sierra 1500, 2500, or 3500 manufactured between 2014 and 2018.
- Verify the shape of your truck's dashboard before proceeding.
- Disconnect the vehicle's battery before starting any electrical work.
3.2 Removing the Factory Radio
- Use the provided frame removal tool to carefully pry off the main frame surrounding the factory radio.
- Once the frame is loose, gently pull out the corresponding cables and remove the air conditioning control panel.
- Use a 7mm socket wrench to remove the screws securing the factory radio.
- Carefully remove the CD play machine and disconnect its cables.
Video 3.1: Detailed instructions on how to install the Silverado car radio, including removal of the old unit.
Video 3.2: Installation guide for Silverado models equipped with Fiber-Optic or Bose sound systems.
3.3 Connecting the New Stereo
- Connect the OEM power and speaker cables to the new stereo's harness.
- Connect the OEM CANBUS cable.
- For vehicles with a factory Bose amplifier Fiber Optics system, ensure correct fiber optic connection as shown in the detailed installation guide. No extra adapters are required.
- Connect the GPS antenna and route it to a suitable location for optimal signal reception.
- Connect the USB cables and route them to your preferred location (e.g., glove box, center console).
- Connect the 1080P AHD Backup Camera. Route the camera extension cable from the vehicle's chassis to the car radio compartment. Connect the blue wire from the camera extension cable to the "Rear CAM control" wire on the device's power cable. Connect the yellow plug to the reverse signal input cable.
- Connect the steering wheel control cable. Remove the OEM steering wheel cover and connect the steering wheel control cable according to the video instructions.
Video 3.3: Installation guide for the 1080P rearview camera for Pickup Trucks.
Video 3.4: DIY guide for connecting the Silverado Steering Wheel Control wiring.

Figure 3.1: Comparison of the dashboard before and after installing the AINAVITO car stereo.
4. Operating Instructions
4.1 Basic Functions
- QLED Touchscreen: The 1280x720 QLED display offers high color saturation and anti-glare technology for clear visibility.
- Physical Volume Knob and Keybuttons: Use the tactile controls for "blind operation" while driving, adjusting volume or switching apps safely.
- Android 13.0 System: Navigate through apps and settings with the optimized Android 13.0 operating system.
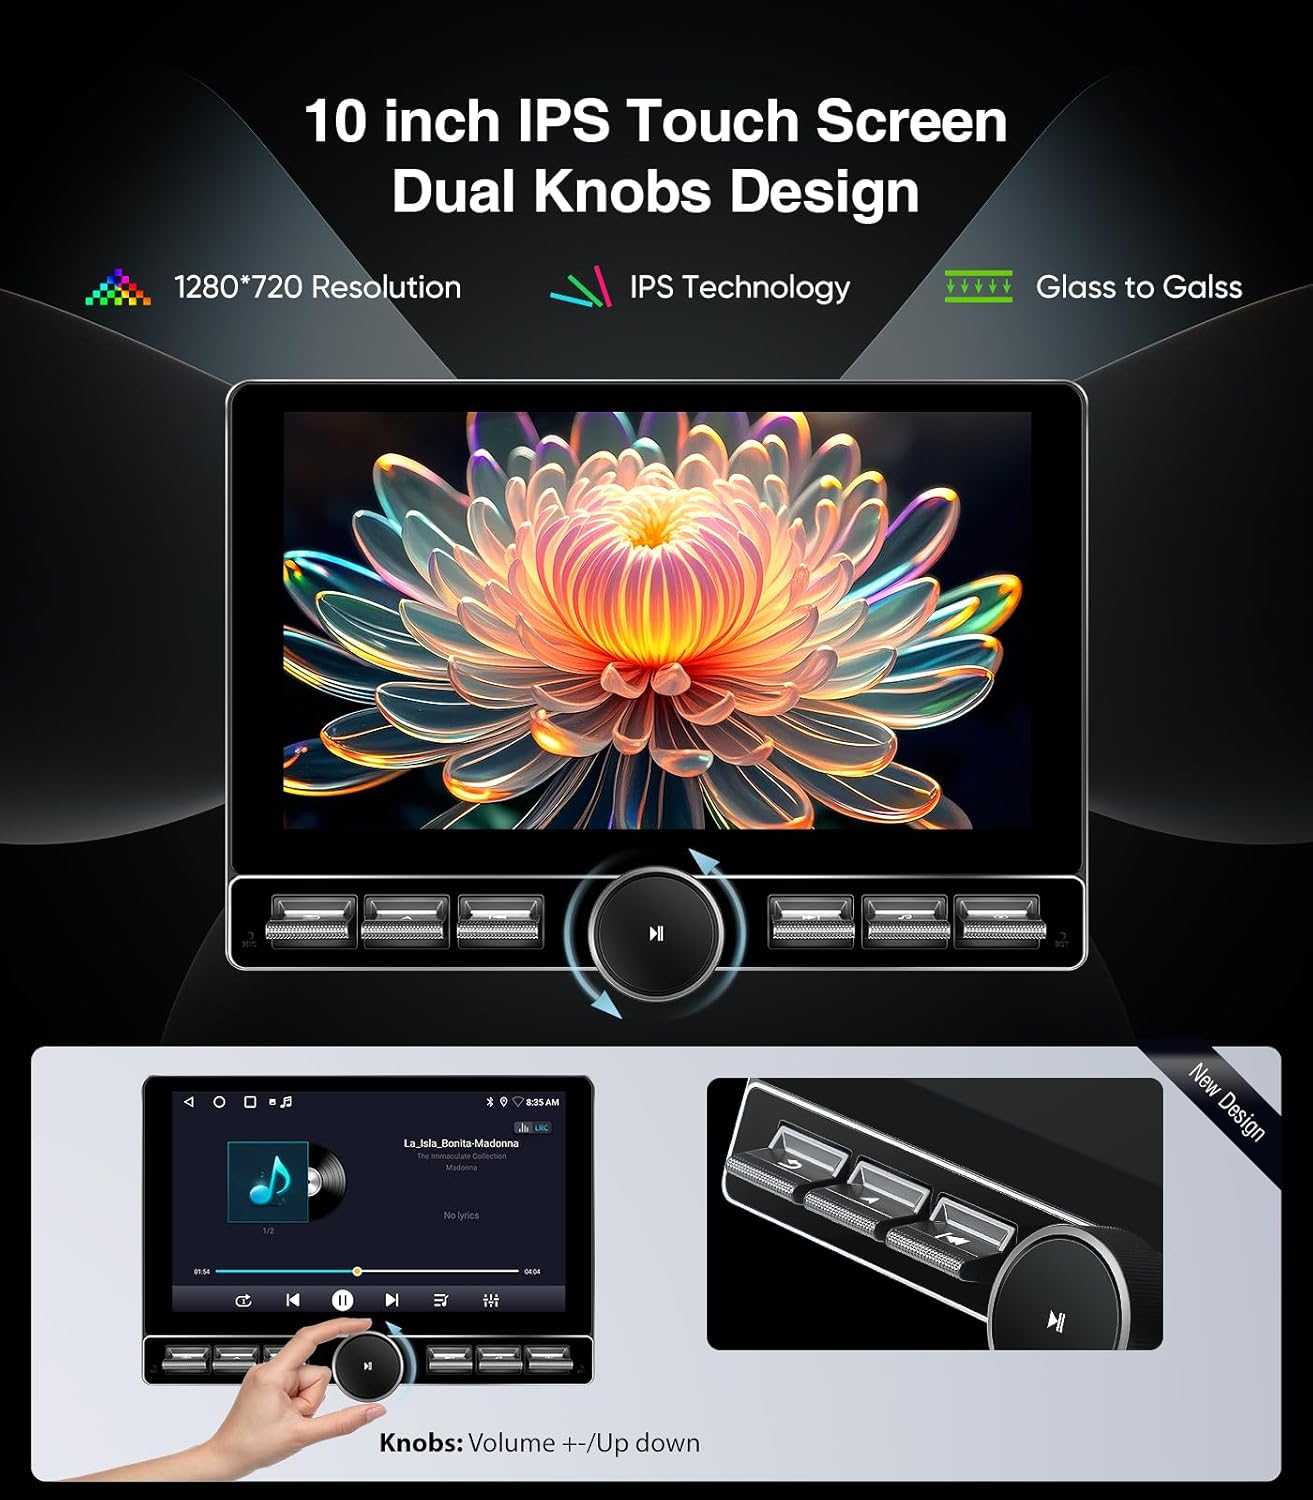
Figure 4.1: The 10-inch QLED touchscreen with physical knob and keybuttons for intuitive control.

Figure 4.2: Overview of key features including Android 13, CarPlay, Android Auto, and connectivity options.
4.2 Wireless CarPlay & Android Auto
Connect your smartphone via Bluetooth 5.4 and 5G Wi-Fi for seamless Wireless CarPlay and Android Auto functionality. Access navigation, music, and communication apps directly from the stereo display.
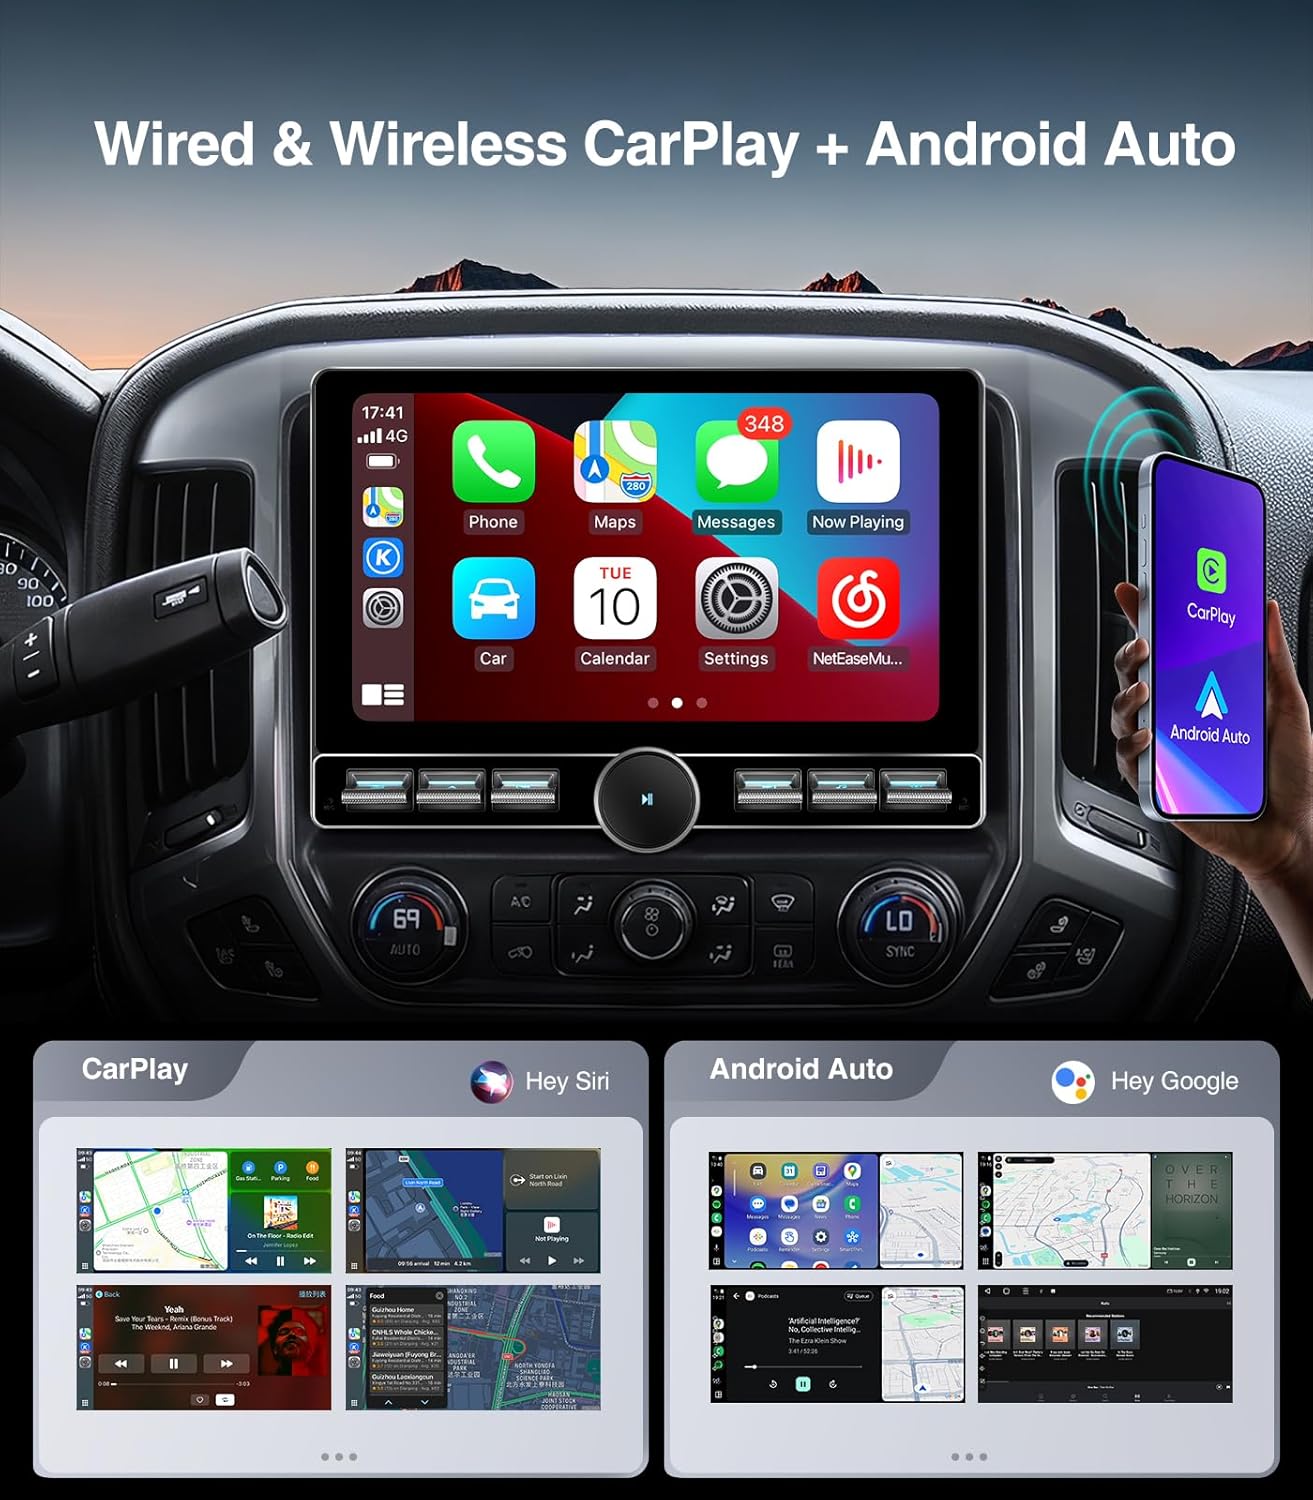
Figure 4.3: Wireless CarPlay and Android Auto interfaces displayed on the car stereo.
Video 4.1: Demonstration of Wireless CarPlay connection.
4.3 Fan Settings
The device includes a cooling fan to manage CPU temperature. You can configure its operation:
- Always On: The fan runs continuously at normal speed.
- Start According to CPU Temperature: The fan activates only when the CPU reaches a set temperature threshold (e.g., 75°C).
- Start According to Volume: The fan activates based on audio volume levels.
- Always Off: The fan remains off.
It is generally recommended to keep the fan setting at "Always On" for optimal performance and longevity.
Video 4.2: Explanation of the radiator (cooling fan) startup settings.
4.4 Customizing Keybutton Functions
The physical keybuttons on the stereo can be programmed to perform various functions:
- Go to "Apps" then "Settings".
- Navigate to "Factory" settings and enter the password (usually "123456" or "0000").
- Select "Panel keys".
- You can reset all key functions or program individual keys by selecting a function (e.g., Play/Pause, Next, Previous, Navigation, Music, Apps) and then pressing the desired physical button.
Video 4.3: Guide on how to customize the single keybutton shortcut functions.
5. Maintenance
To ensure the longevity and optimal performance of your AINAVITO car stereo, follow these maintenance guidelines:
- Keep the screen clean using a soft, lint-free cloth. Avoid abrasive cleaners.
- Ensure proper ventilation around the unit, especially if the cooling fan is not set to "Always On".
- Regularly check cable connections to ensure they are secure.
- Keep the software updated to the latest version for improved features and bug fixes.
6. Troubleshooting
This section addresses common issues you might encounter:
6.1 No Sound When Playing Music (Bose Audio System)
If your Silverado is equipped with a BOSE audio system and you experience no sound, ensure the AUX audio setting is correctly selected within the FM setup options on your vehicle's dashboard menu.
- Use your steering wheel controls to navigate the dashboard menu.
- Go to "Radio / Media" and select "AUX Input".
- If the AUX option is not found, check the AUX audio cable connection in the center armrest area. Unplug and re-plug the cable firmly.
Video 6.1: Troubleshooting method for Silverado AUX Error Fault (AUX menu not displaying or Media audio unavailable).
6.2 Backup Camera Image Not Displaying
If the backup camera image is not appearing, follow these steps:
- Check Camera Cable Connection: Ensure the camera extension cable is correctly connected to the Backup Camera Video Input cable on the RCA harness. Do not plug the camera cable into the CVBS cable in the RCA harness.
- Check Reverse Signal Wire: Locate the third wire in the power harness (counting from the black ground wire) and ensure it is connected to the reverse control wire. This connection should be a "T-splice".
- Extension Cable to Camera: Verify the extension cable is securely plugged into the camera.
- Power and Ground Wires (Extension Cable): The power and ground wires on the camera extension cable should NOT be connected to any other wires. Separate and insulate them individually to prevent short circuits.
- System Selection: In the stereo's settings, navigate to the "Reverse" menu. Find "Reversing System Selection" and select "AUTO".
Video 6.2: Troubleshooting method for AHD 1080P Back Up Camera issues.
7. Specifications
| Feature | Detail |
|---|---|
| Model Number | 10 inch-Single Knob-Keybutton-4+64G |
| Display | 10" QLED Touchscreen, 1280x720 Resolution |
| Operating System | Android 13.0 |
| Memory/Storage | 4GB RAM + 64GB ROM |
| Connectivity | Bluetooth 5.4, 5G Wi-Fi, FM+AM+AUX, Wireless/Wire CarPlay, Wireless/Wire Android Auto, Wireless/Wire Mirroring + Airplay |
| Controller Type | Android 13.0, Mechanical Knob, Keybuttons |
| Special Features | AM/FM Tuner, Apple CarPlay, Android Auto, Cooling Fan, GPS Navigation, Support for Bose System |
| Compatible Devices | AMP, DSP, Smartphone, Speaker, iPhone |
| Audio Output Mode | Surround/Bass Boost/Bass Filter/Sound Field |
| Surround Sound Config | 7.1 |
| Video Encoding | H.264, H.265/HEVC |
| Item Weight | 5.33 pounds |
| Package Dimensions | 15.51 x 13.7 x 5.63 inches |
8. Support
For any questions, technical assistance, or after-sale service, please contact AINAVITO customer support:
- Contact Method: Message us via your order center (Click our Store -> "Sold By" -> "Spexnav" -> "ASK a Question").
- Response Time: We aim to reply within 24 hours.
- Hotline: +1 888 502 7557
- Working Hours: 3:00 PM - 3:00 AM PDT
- Email: info@ainavito.com