1. Introduction
This manual provides detailed instructions for the assembly, operation, and maintenance of your new Generic Chapella 2-Drawer Sideboard. Please read this manual thoroughly before beginning assembly and retain it for future reference. This sideboard is designed to offer functional storage and display space, featuring two drawers and two cabinets with internal shelving, all finished in a dark walnut hue.

Figure 1: Front view of the assembled Chapella 2-Drawer Sideboard.
2. Safety Information
Please observe the following safety precautions during assembly and use of this product:
- Read all instructions carefully before assembly. Failure to follow instructions may result in injury or damage to the product.
- Keep children and pets away from the assembly area. Small parts can be a choking hazard.
- Assemble on a soft, clean surface (e.g., carpet or cardboard) to prevent scratching the furniture.
- Ensure all connections are secure before using the product. Periodically check and tighten all fasteners.
- Do not overload drawers or shelves. Distribute weight evenly.
- Use anti-tip hardware if provided, to secure the sideboard to a wall. This prevents tipping and serious injury.
- Do not stand or climb on the sideboard.
- Dispose of all packaging materials responsibly.
3. Setup & Assembly
3.1 Package Contents
Before beginning, verify that all parts and hardware are present. Refer to the included parts list (not provided in this document) to ensure nothing is missing. If any parts are damaged or missing, contact customer support.
3.2 Tools Required
The following tools are typically required for assembly (not included):
- Phillips Head Screwdriver
- Hammer (for dowels/back panel nails)
- Measuring Tape (optional, for placement)
3.3 Assembly Steps
Follow these general steps for assembly. Specific diagrams and part numbers would be found in the physical manual accompanying the product.
- Unpack and Identify Parts: Carefully remove all components from the packaging. Lay them out on a soft, clean surface. Identify each part using the provided labels or diagrams.
- Assemble the Base Frame: Attach the bottom panel to the side panels using the designated fasteners (e.g., cam locks, dowels, screws). Ensure the structure is stable.
- Install Internal Shelves and Dividers: Insert the fixed and adjustable shelves into the cabinet sections. Secure any central dividers as instructed.
- Assemble Drawers: Construct the two drawers by attaching the sides, front, and back panels, then securing the bottom panel. Install drawer slides onto the drawer boxes and the sideboard frame.
- Attach Back Panel: Secure the back panel to the main frame using small nails or screws. Ensure it is flush and square.
- Mount Doors: Attach the cabinet doors to the sideboard frame using the provided hinges. Adjust hinges for proper alignment and smooth operation.
- Install Handles: Attach the handles to the drawers and cabinet doors.
- Attach Feet/Legs: Secure the support feet to the bottom of the sideboard.
- Final Inspection and Placement: Check all connections for tightness. Carefully move the assembled sideboard to its desired location.
- Secure with Anti-Tip Hardware: If applicable, install the anti-tip hardware to secure the sideboard to a wall, preventing accidental tipping.
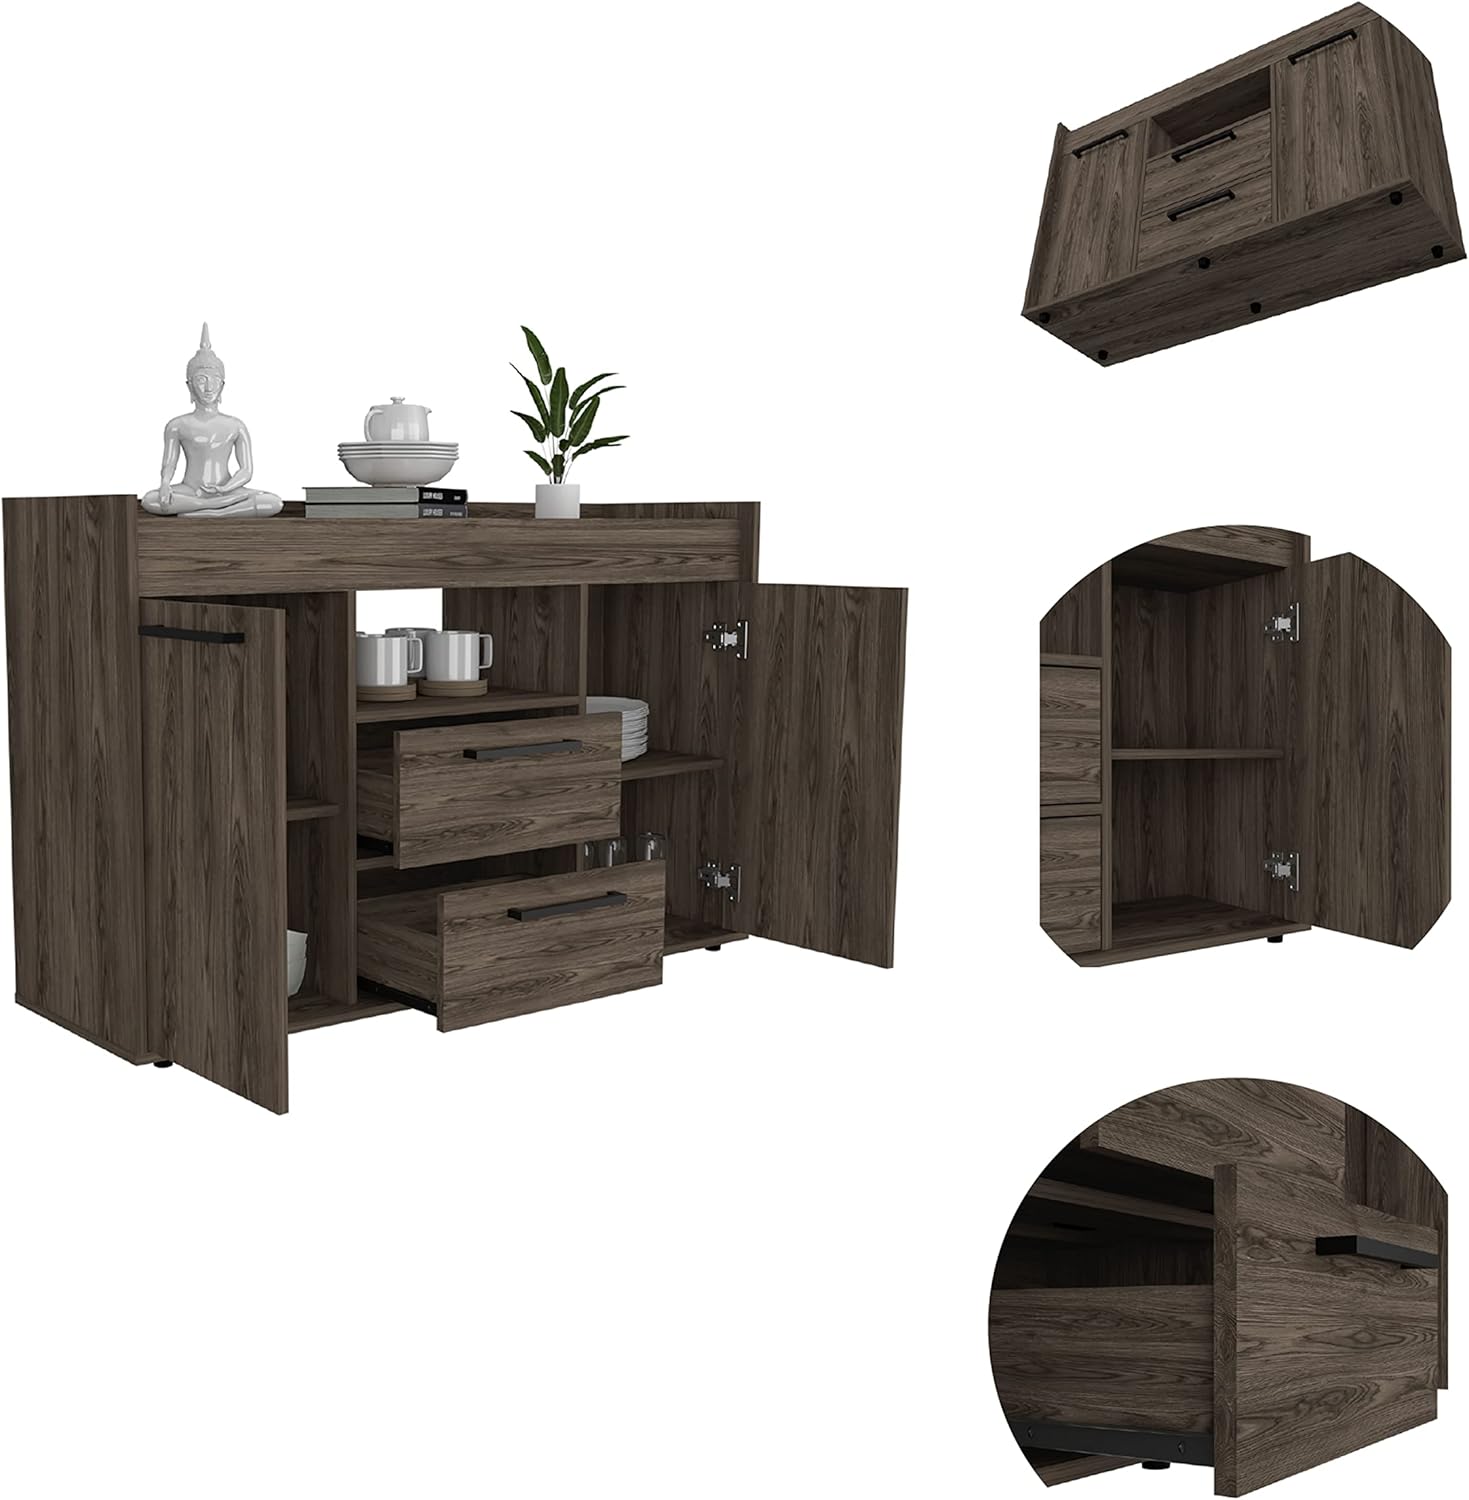
Figure 2: Detailed view showing the internal structure, drawers, and shelves of the sideboard.

Figure 3: The sideboard in a typical room setting, demonstrating its storage capabilities with open doors and drawers.
4. Operating Instructions
4.1 Using Drawers and Cabinets
- Drawers: Gently pull the handles to open the drawers. Push firmly to close them completely. Avoid slamming drawers to prevent damage to the slides and contents.
- Cabinets: Pull the handles to open the cabinet doors. Push firmly to close. Ensure doors are fully closed to protect contents from dust and maintain a neat appearance.
- Shelves: The internal shelves are designed for organized storage of various items. Distribute weight evenly across shelves to prevent warping or damage.
4.2 Display Surface
The spacious top surface can be used to display decorative items, lamps, or other functional objects. Avoid placing excessively heavy items on the top surface. Use coasters under drinks or hot items to protect the finish.
5. Maintenance
5.1 Cleaning
- Dusting: Regularly dust the sideboard with a soft, dry, lint-free cloth.
- Cleaning Spills: Immediately wipe up spills with a slightly damp cloth, then dry thoroughly. Avoid abrasive cleaners or harsh chemicals, as they can damage the dark walnut finish.
- Avoid Excessive Moisture: Do not use excessive water when cleaning, as engineered wood can swell or warp.
5.2 General Care
- Sunlight Exposure: Avoid prolonged exposure to direct sunlight, which can cause fading or discoloration.
- Heat and Humidity: Keep the sideboard away from direct heat sources and areas with extreme humidity fluctuations to prevent warping or cracking.
- Fastener Checks: Periodically check all screws, bolts, and other fasteners to ensure they remain tight. Tighten as necessary to maintain stability.
6. Troubleshooting
| Problem | Possible Cause | Solution |
|---|---|---|
| Sideboard is wobbly or unstable. | Loose fasteners; uneven floor. | Ensure all screws and bolts are tightened. If floor is uneven, use shims under the feet. |
| Drawers do not slide smoothly or get stuck. | Improperly installed drawer slides; obstruction; overloaded drawer. | Check that drawer slides are correctly aligned and installed. Remove any obstructions. Reduce weight in the drawer. |
| Cabinet doors are misaligned or do not close properly. | Hinges are loose or improperly adjusted. | Adjust the screws on the hinges to align the doors. Tighten all hinge screws. |
| Scratches or minor damage to the finish. | Accidental impact; abrasive cleaning. | For minor scratches, use a furniture repair marker or wax stick that matches the dark walnut finish. |
7. Specifications
| Feature | Detail |
|---|---|
| Product Dimensions (Overall) | 14.96 inches (Depth) x 47.24 inches (Width) x 30.31 inches (Height) |
| Item Weight | 96.3 pounds |
| Brand | Generic |
| Color | Brown (Dark Walnut finish) |
| Material | Engineered Wood (Particle Board) |
| Mounting Type | Floor Mount |
| Door Style | Slab |
| Storage Features | 2 Drawers, 2 Cabinets with 6 internal shelves |

Figure 4: Overall dimensions of the Chapella 2-Drawer Sideboard.

Figure 5: Detailed internal dimensions of the Chapella 2-Drawer Sideboard, showing shelf and drawer spacing.

Figure 6: Technical line drawing illustrating the dimensions of the Chapella 2-Drawer Sideboard.
8. Warranty & Support
For warranty information, please refer to the documentation included with your purchase or contact the retailer. If you require assistance with assembly, missing parts, or have any questions regarding your Chapella 2-Drawer Sideboard, please contact customer support through your point of purchase. Please have your model number (Chapella 2-Drawer Sideboard) and purchase date available when contacting support.
Customer Support: Refer to your purchase receipt or the retailer's website for contact information.


