Alondy 76464e8a-7330-4f63-add9-5553b51fc29f
Alondy Single DIN Car Radio with 7-inch Adjustable Touchscreen User Manual
Model: 76464e8a-7330-4f63-add9-5553b51fc29f
1. Product Overview
The Alondy Single DIN Car Radio features a 7-inch adjustable HD touchscreen, offering a versatile and user-friendly interface for your vehicle. This unit supports wireless Apple CarPlay and Android Auto, enabling seamless integration with your smartphone for navigation, communication, and entertainment. It also includes Bluetooth connectivity, a Type-C USB port for fast charging, and input for a rear view backup camera.

Image 1.1: Alondy Single DIN Car Radio unit with included accessories: backup camera, external microphone, remote control, and a visual representation of wireless CarPlay/Android Auto functionality.
Key Features:
- Wireless/Wired Apple CarPlay & Android Auto: Access smartphone features for navigation, calls, messages, and music.
- 7-inch HD Touchscreen: 1280*600 resolution with adjustable height for optimal viewing.
- Bluetooth 5.2: Hands-free calling and audio streaming with an external microphone for clear voice input.
- Type-C USB Fast Charge: Dedicated 3A max Type-C port for rapid device charging.
- Rear View Backup Camera: Includes a night vision, 170° wide-angle, waterproof camera for enhanced safety.
- AM/FM Radio with RDS: Stable radio reception with station information display.
- Phone Mirror Link: Supports mirroring for both iOS and Android devices via USB.
2. What's in the Box
Verify that all components are present before installation.

Image 2.1: Visual representation of the package contents.
- Alondy Single DIN Car Radio Unit
- Remote Control
- External Microphone
- Rear View Camera
- Power Cable (ISO Harness)
- Backup Camera Cable
- Release Keys
- User Manual (this document)
3. Installation and Setup
Professional installation is recommended. Ensure the vehicle's battery is disconnected before beginning installation.
3.1 Wiring Diagram
Refer to the detailed wiring diagram for correct connections. Incorrect wiring can damage the unit or vehicle electrical system.

Image 3.1: Wiring diagram and dimensions of the car radio unit.
3.2 Mounting the Unit
- Remove the existing car stereo from the dashboard.
- Connect the wiring harness from the vehicle to the Alondy unit's ISO harness, following the wiring diagram.
- Slide the Alondy unit into the single DIN slot. Secure it using the provided mounting brackets or screws.
- Connect the external microphone and route it to a suitable location for clear voice pickup.
- Install the backup camera at the rear of the vehicle and route its cable to the unit's video input.
- Reconnect the vehicle's battery and test the unit.
3.3 Screen Adjustment
The 7-inch touchscreen can be adjusted vertically to optimize viewing angle and avoid obstruction of other vehicle controls.

Image 3.2: Adjustable screen height for optimal positioning.
4. Operating Instructions
4.1 Basic Operation
- Power On/Off: Press the power button on the unit or remote.
- Volume Control: Use the rotary knob or remote control buttons.
- Menu Navigation: Tap icons on the touchscreen to access different functions (Radio, CarPlay, Android Auto, USB, SD, BT, etc.).

Image 4.1: Practical volume knob for easy audio adjustment.
4.2 Wireless Apple CarPlay / Android Auto
This unit supports both wireless and wired connections for Apple CarPlay and Android Auto.

Image 4.2: Wireless CarPlay and Android Auto interface on the car stereo.
- On the car radio, select the 'CarPlay' or 'Android Auto' icon.
- On your smartphone, enable Bluetooth and search for available devices.
- Select the car radio's Bluetooth name (e.g., 'CarPlay BT') from your phone's list and pair.
- Confirm the pairing code on both devices.
- Once paired, CarPlay or Android Auto will launch automatically on the car radio screen.
Video 4.1: Demonstration of connecting a smartphone to the Alondy car radio for wireless Apple CarPlay and Android Auto functionality, showing the pairing process and interface display.
4.3 Phone Mirror Link
Mirror Link allows you to display your smartphone's screen directly on the car radio via a wired USB connection.
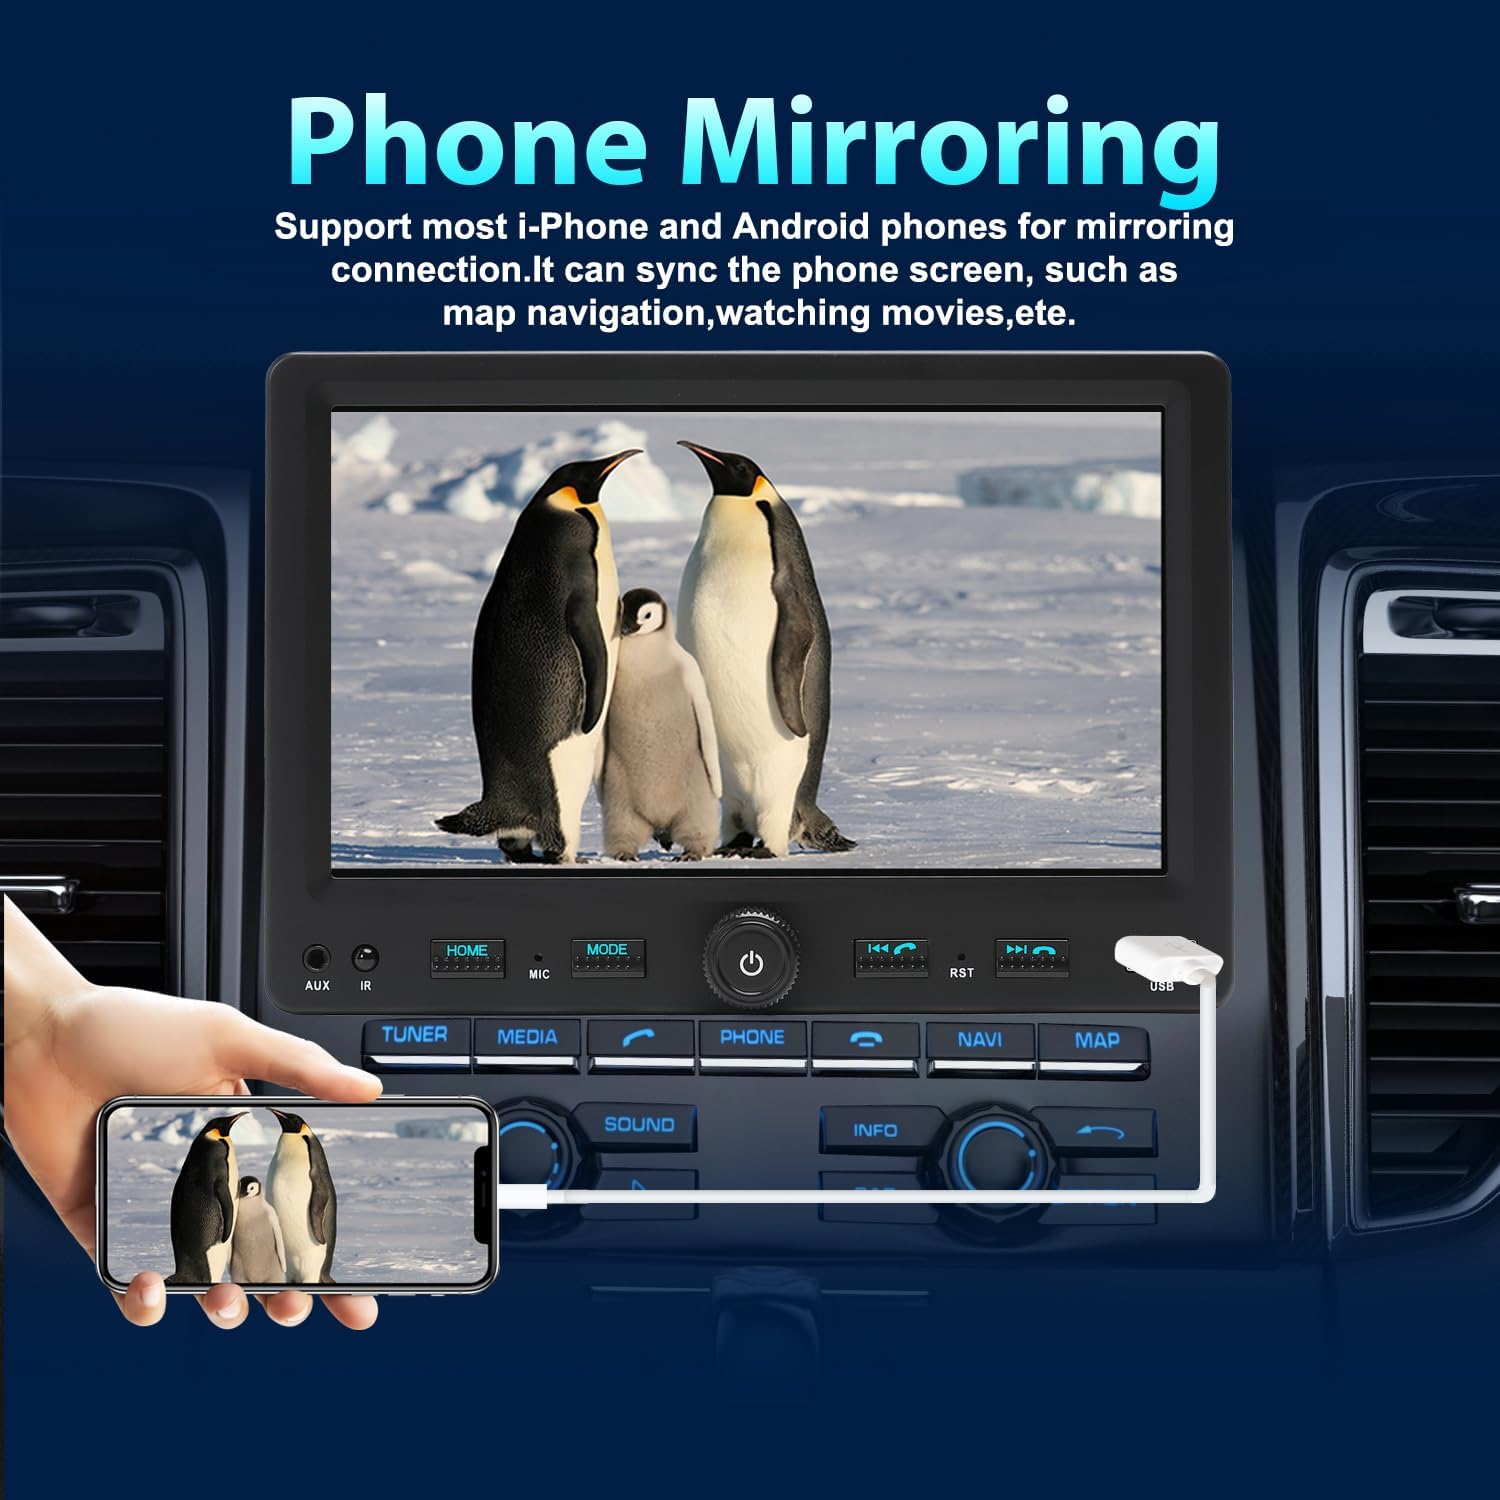
Image 4.3: Phone mirroring functionality for displaying smartphone content.
- On the car radio, select the 'Mirror Link' or 'PhoneLink' icon.
- Connect your smartphone to the unit's front USB port using a high-quality USB cable.
- Follow any on-screen prompts on your phone to allow screen mirroring.
4.4 Bluetooth Functions
Connect your phone via Bluetooth for hands-free calls and audio streaming.

Image 4.4: Bluetooth connectivity for wireless audio and calls.
- Hands-Free Calling: Make and receive calls directly from the car radio screen using the external microphone.
- Audio Streaming: Play music from your smartphone through the car's speakers.
4.5 AM/FM Radio
Access local radio stations with clear reception.

Image 4.5: AM/FM radio interface.
- Select the 'Radio' icon from the main menu.
- Use the touchscreen controls to scan for stations, save presets, and switch between AM/FM bands.
- RDS (Radio Data System) provides additional information like station name and song titles where available.
4.6 USB/SD Media Playback & Charging
- Media Playback: Insert a USB drive or SD card into the designated slots to play audio or video files.
- Type-C Fast Charging: Use the dedicated Type-C USB port (left side) for fast charging compatible devices (up to 3A). The front USB port is primarily for data transmission and standard charging.

Image 4.6: USB-C port for fast charging and SD card slot for media.
4.7 Rear View Backup Camera
The unit automatically displays the rear view when the vehicle is shifted into reverse.

Image 4.7: Rear view camera display with parking assistance lines.
4.8 Steering Wheel Control
The unit is compatible with existing steering wheel controls. Configuration may be required in the settings menu.

Image 4.8: Steering wheel control configuration interface.
5. Maintenance
- Cleaning the Screen: Use a soft, lint-free cloth to gently wipe the touchscreen. Avoid abrasive cleaners or solvents.
- General Cleaning: Keep the unit free from dust and debris. Use a soft, dry cloth for the exterior.
- Software Updates: Check the manufacturer's website periodically for any available firmware updates to ensure optimal performance and compatibility.
6. Troubleshooting
If you encounter issues, refer to the following common solutions before contacting support.
| Problem | Possible Cause | Solution |
|---|---|---|
| No Power | Incorrect wiring, blown fuse, loose connection. | Check power cable connections (Yellow: +12V constant, Red: +12V ignition, Black: Ground). Inspect vehicle fuses. |
| No Sound | Speaker wiring incorrect, volume too low, mute activated. | Verify speaker connections. Increase volume. Check if mute is active. |
| Bluetooth/CarPlay/Android Auto not connecting | Bluetooth not enabled, incorrect pairing, device not discoverable. | Ensure Bluetooth is on for both devices. Delete previous pairings and re-pair. Restart both devices. |
| Backup Camera not displaying | Camera cable loose, reverse trigger wire not connected. | Check camera video cable and power connection. Ensure the reverse trigger wire is correctly connected to the vehicle's reverse light circuit. |
| Touchscreen unresponsive or slow | Temporary software glitch, extreme temperatures. | Restart the unit. Allow the unit to reach a stable operating temperature. |
7. Specifications
| Feature | Detail |
|---|---|
| Product Dimensions | 3.46 x 7.01 x 4.92 inches (5.6"D x 7"W x 4.9"H) |
| Item Weight | 1.76 pounds |
| Item Model Number | 76464e8a-7330-4f63-add9-5553b51fc29f |
| Connectivity Technology | Auxiliary, Bluetooth, USB |
| Controller Type | Hand Control, Mechanical knob |
| Special Features | AM Tuner, Android Auto, Apple CarPlay, Rear View Camera Input, UP & Down adjustable height touchscreen |
| Compatible Devices | Amplifier, Smartphone, Speaker |
| Connector Type | RCA, USB Type A |
| Audio Output Mode | Stereo |
| Surround Sound Channel Configuration | 5.1 |
| Video Encoding | H.263 |
8. Warranty and Support
This Alondy product is covered by a manufacturer's warranty. For specific warranty terms, duration, and to register your product, please refer to the warranty card included in your package or visit the official Alondy website.
For technical support, troubleshooting assistance, or service inquiries, please contact Alondy customer service through the contact information provided on their official website or your purchase platform.
Related Documents - 76464e8a-7330-4f63-add9-5553b51fc29f
 |
DUELL 7330 Installation Instructions - Hudson Valley Lighting Installation instructions and safety warnings for the DUELL 7330 lighting fixture by Hudson Valley Lighting. Includes component diagram, parts list, and assembly steps. |
 |
Dell Latitude 7330 & 7330 2-in-1 Service Manual: Component Replacement & Troubleshooting Guide Detailed service manual for Dell Latitude 7330 and Latitude 7330 2-in-1 laptops (models P133G/P134G). Covers safety, component removal/installation, BIOS setup, and troubleshooting. Essential guide for hardware maintenance. |
 |
Janome Schoolmate S-7330 Sewing Machine Instruction Manual This comprehensive instruction manual guides users through the operation, maintenance, and features of the Janome Schoolmate S-7330 sewing machine, covering setup, basic and decorative stitches, safety instructions, and troubleshooting. |
 |
Dell Latitude 7330/7330 2-in-1 Service Manual This service manual provides detailed instructions for the Dell Latitude 7330 and Latitude 7330 2-in-1 laptops, covering component removal, installation, safety, troubleshooting, and BIOS setup for technicians and advanced users. |
 |
Dell Latitude 7330 Rugged Extreme: 13-inch 5G Rugged Laptop Technical Specifications and Features Detailed specifications and features for the Dell Latitude 7330 Rugged Extreme, a 13-inch fully rugged laptop designed for harsh environments. Includes information on performance, durability (IP-65, MIL-STD-810H), 5G connectivity, FirstNet Ready support, security, and optional accessories. |
 |
Mesko MS 7330 Fan User Manual This document provides comprehensive instructions for the safe and effective use of the Mesko MS 7330 fan, including assembly, operation, cleaning, and maintenance guidelines. |
Ask a question about this manual
Ask about setup, troubleshooting, compatibility, parts, safety, or missing instructions. Manuals+ will review the question and use this page’s manual context to help answer it.