Introduction
This manual provides comprehensive instructions for the installation, operation, and maintenance of your LICAEVEY Smart Thermostat, Model LICAEVEYd10rhps6kb. This device is designed to regulate your home's temperature efficiently, offering control via its intuitive knob, a 1.32-inch TFT screen, Bluetooth connectivity for smartphone control, and smart voice commands. Please read this manual thoroughly before use to ensure proper functionality and safety.
Product Overview
The LICAEVEY Smart Thermostat combines modern design with advanced functionality to provide precise temperature control and enhance your home environment.
Key Features:
- Modern Design: Features a two-way rotating knob for a smooth user experience and an aesthetic appeal.
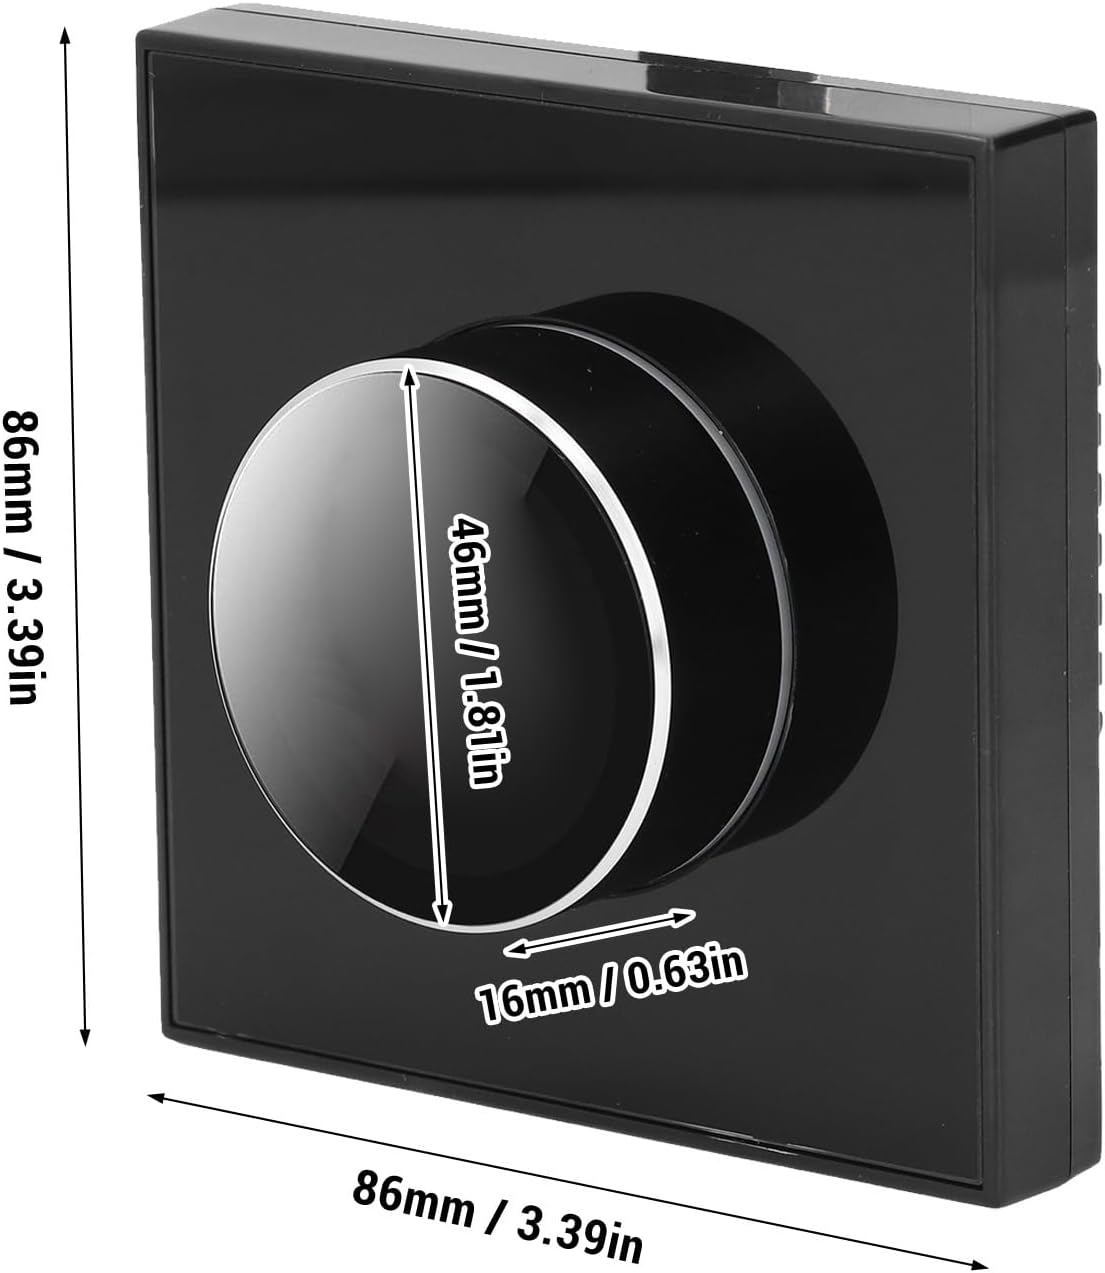
- Easy to Use: Equipped with a 1.32-inch TFT screen and a 1.81-inch diameter knob for straightforward programming and temperature adjustments.
- Smart Voice Control: Integrates with smart home systems, allowing temperature adjustments via smartphone or voice commands.
- Unique Ambient Light: Offers a seven-color ambient aperture that changes synchronously with the function area, adding a modern artistic touch.
- Accurate Control: Ensures precise temperature setting and maintenance for consistent comfort.
Components and Display:

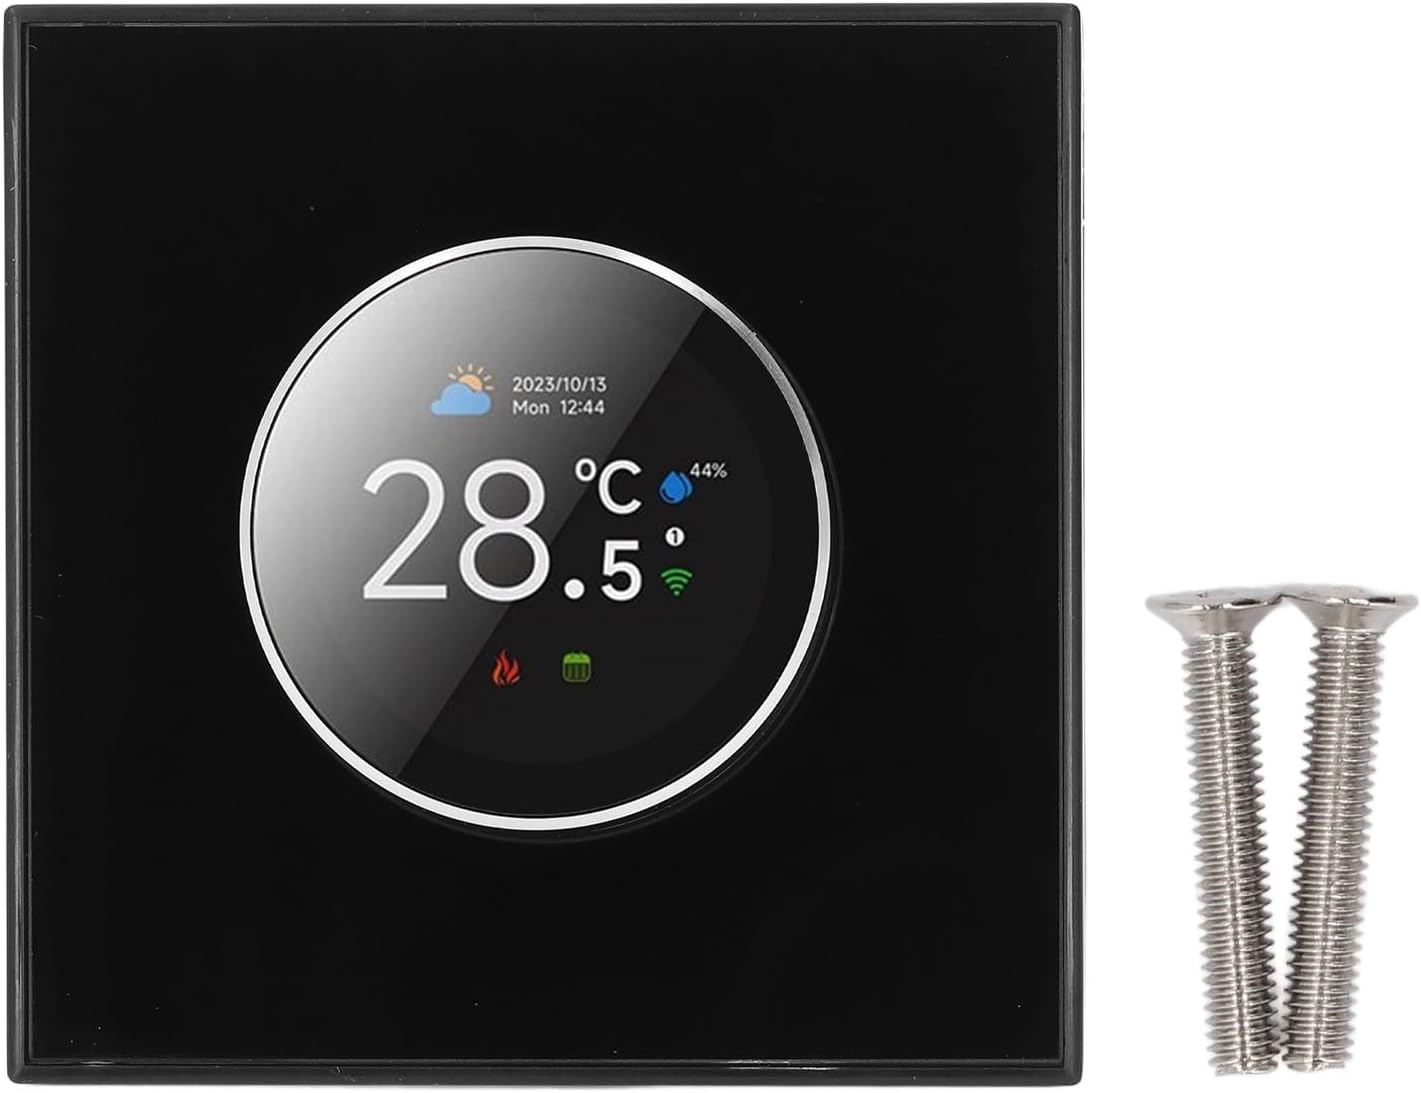
The thermostat features a central knob with an integrated 1.32-inch TFT screen. This screen displays current temperature, date, time, weather, programming cycle, and connectivity status (Wi-Fi, Bluetooth).

The rotary control knob allows for intuitive adjustments, complemented by voice and remote control options. The ambient light feature provides visual feedback and aesthetic enhancement.

The home screen provides essential environmental information at a glance. The main control interface, accessed via the knob, allows configuration of various settings.
Setup and Installation
Proper installation is crucial for the optimal performance of your smart thermostat. It is recommended that installation be performed by a qualified electrician if you are unfamiliar with electrical wiring.
1. Safety Precautions:
- Turn off power to your HVAC system at the circuit breaker before beginning installation.
- Ensure your existing wiring is compatible with a smart thermostat. This model typically requires a C-wire for continuous power.
2. Mounting the Thermostat:
- Remove your old thermostat's faceplate.
- Label the wires connected to your old thermostat before disconnecting them.
- Mount the new thermostat's backplate to the wall using the provided screws.
- Connect the wires to the corresponding terminals on the new backplate. Refer to your HVAC system's wiring diagram if unsure.
- Attach the thermostat faceplate to the mounted backplate.
3. Initial Power-On and Network Connection:
- Restore power to your HVAC system at the circuit breaker.
- The thermostat screen will power on. Follow the on-screen prompts for initial setup, including language selection and date/time.
- To enable smart features, download the companion mobile application (e.g., "Smart Life" or similar, check product packaging for specific app name) from your device's app store.
- Open the app, create an account, and follow the in-app instructions to add your thermostat. This typically involves putting the thermostat into pairing mode (often indicated by a flashing Wi-Fi icon) and connecting it to your home Wi-Fi network.
- Once connected, you can link the thermostat to smart voice assistants like Alexa or Google Assistant through their respective apps.
Operating Instructions
Your LICAEVEY Smart Thermostat offers multiple ways to control your home's temperature.
1. Knob Control and Screen Interface:
- Adjusting Temperature: Rotate the central knob clockwise to increase the temperature and counter-clockwise to decrease it. The desired temperature will be displayed on the TFT screen.
- Accessing Menus: Press the knob to enter the main control interface. Rotate the knob to navigate through options like Language, Sensor Type, Clock, Program Mode, Luminance, and Temperature Calibration. Press again to select an option.
- Power On/Off: Select the "Power Source" option in the main control interface to turn the thermostat on or off.

The rotary control provides a responsive and tactile way to interact with the thermostat's settings.
2. Smartphone App Control:
- Open the companion app on your smartphone.
- From the app's main screen, you can view the current temperature, adjust the setpoint, change modes (heating/cooling/auto), and access programming schedules.
- The app also allows for sharing device control with family members, enabling multiple users to manage the thermostat.

3. Smart Voice Control:
- Ensure your thermostat is linked to your preferred smart voice assistant (e.g., Amazon Alexa, Google Assistant).
- Use voice commands such as:
- "Hey [Assistant Name], set the thermostat to 72 degrees."
- "Hey [Assistant Name], what is the temperature in the living room?"
- "Hey [Assistant Name], turn on the thermostat."

4. Programming Schedules:
Access the "Program Mode" through the thermostat's main control interface or the smartphone app to set custom heating/cooling schedules for different times of the day and week. This allows for energy savings and consistent comfort.
5. Ambient Light Customization:
The thermostat features a customizable seven-color ambient aperture. Navigate to the relevant setting in the main control interface or app to select your preferred color, which will synchronize with the active function area.

Maintenance
To ensure the longevity and optimal performance of your LICAEVEY Smart Thermostat, follow these simple maintenance guidelines:
- Cleaning: Gently wipe the screen and outer casing with a soft, dry, or slightly damp cloth. Avoid using abrasive cleaners, solvents, or chemical sprays, as these can damage the finish or internal components.
- Dust Removal: Periodically remove any dust accumulation around the thermostat, especially near vents or sensors, to ensure accurate temperature readings.
- Software Updates: Keep the thermostat's firmware updated through the companion mobile app. Updates often include performance improvements and new features.
Troubleshooting
If you encounter issues with your thermostat, refer to the following common problems and solutions:
| Problem | Possible Cause | Solution |
|---|---|---|
| Thermostat has no power/screen is blank. | No power from HVAC system; circuit breaker tripped; loose wiring. | Check circuit breaker for your HVAC system. Ensure all wires are securely connected. Verify C-wire connection. |
| Incorrect temperature reading. | Thermostat located near heat source/draft; sensor obstruction; calibration needed. | Relocate thermostat if possible. Ensure no objects block sensors. Perform temperature calibration via the main control interface or app. |
| Cannot connect to Wi-Fi/Bluetooth. | Incorrect Wi-Fi password; router too far; interference; thermostat not in pairing mode. | Verify Wi-Fi password. Move thermostat closer to router or use a Wi-Fi extender. Ensure thermostat is in pairing mode (flashing Wi-Fi icon). Restart router and thermostat. |
| Voice control not responding. | Not linked to voice assistant; incorrect commands; internet connectivity issue. | Confirm thermostat is linked in your voice assistant app (Alexa/Google Home). Use correct voice commands. Check internet connection. |
| HVAC system not responding to thermostat. | Wiring issue; HVAC system problem; thermostat mode incorrect. | Double-check wiring connections. Ensure thermostat is set to the correct mode (Heat/Cool). If issues persist, consult an HVAC professional. |
Specifications
Below are the technical specifications for the LICAEVEY Smart Thermostat, Model LICAEVEYd10rhps6kb:
- Brand: LICAEVEY
- Model Name: LICAEVEYd10rhps6kb
- Controller Type: Mechanical Knob
- Special Feature: Portable (Note: Refers to its compact design, not intended for frequent relocation after installation)
- Specific Uses: Air Conditioner (and heating systems)
- Manufacturer: LICAEVEY
- Package Dimensions: 4.13 x 3.5 x 2.87 inches
- Item Weight: 7.4 ounces
- Item Model Number: LICAEVEYd10rhps6kb
- Date First Available: December 24, 2024
Warranty and Support
For warranty information, technical support, or service inquiries, please refer to the contact details provided with your product packaging or visit the official LICAEVEY website. Keep your purchase receipt as proof of purchase for warranty claims.