Introduction
This manual provides detailed instructions for the installation, operation, maintenance, and troubleshooting of your ETLFUCyber 1 DIN Car Stereo. Please read this manual thoroughly before using the product to ensure proper function and safety.
Package Contents
Verify that all items listed below are included in your package. If any items are missing or damaged, please contact customer support.
- 1 DIN Car Stereo Unit with 9-inch Touchscreen
- Power Cable
- Horn Cable
- User Manual
- Microphone
- Rear View Camera
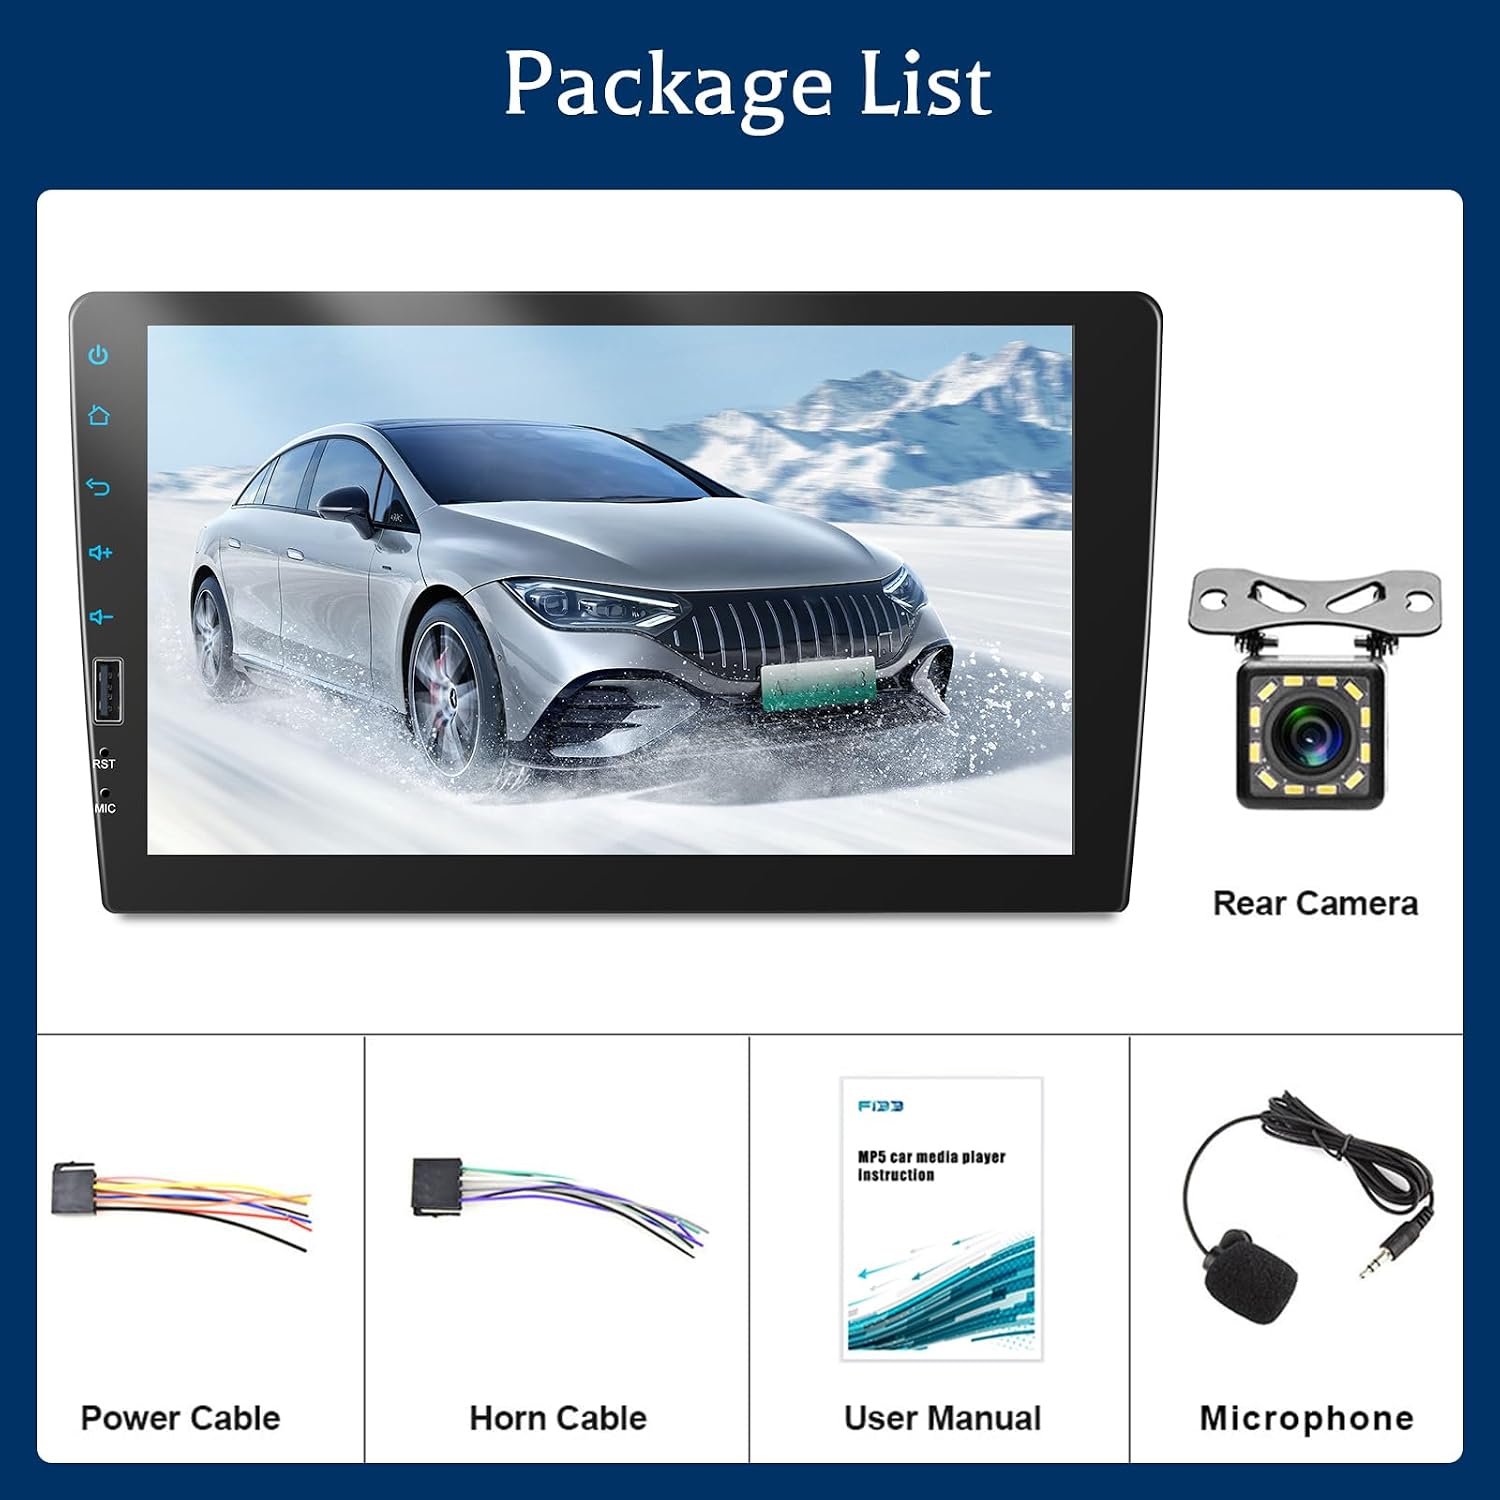
Figure 1: Included components in the package.
Setup and Installation
This section covers the physical installation and wiring of the car stereo. Professional installation is recommended.
Dimensions and Mounting
The car stereo has an installation size of 178 mm x 50 mm (7.0 x 1.97 inches), designed to fit most 1 DIN car dashboards. Ensure your vehicle's dashboard opening is compatible before installation.
Rear Interface Definition
Refer to the diagram below for the rear interface connections. Correct wiring is crucial for proper operation.

Figure 2: Rear Interface Definition and Dimensions.
- 1. ISO Power Cable Interface: Connects to the vehicle's power harness.
- 2. Fuse (10A): Overcurrent protection.
- 3. Microphone: External microphone input.
- 4. Left Audio Output: RCA output for left audio channel.
- 5. Video Output 1: RCA video output.
- 6. Rear View Camera Input: RCA input for backup camera video.
- 7. Right Audio Output: RCA output for right audio channel.
- 8. Video Output 2: RCA video output.
- 9. Video Input: RCA video input.
- 10. Radio Antenna: Connects to the vehicle's FM/AM antenna.
Backup Camera Connection
To connect the backup camera, follow these steps:
- Connect the Red Cable (1) of the camera to the positive pole of the car's reversing light cable.
- Connect the Black Cable (2) of the camera to the negative pole of the car's reversing light cable.
- Connect the Reversing Trigger Wire Cable (4) (usually pink) to the red cable (3) which is an extension of the video input wire.
- Connect the camera's video output to the Rear View Camera Input (6) on the stereo's rear interface.

Figure 3: Backup Camera Wiring Diagram.
Operating Instructions
CarPlay and Android Auto
The car stereo supports both wired CarPlay and Android Auto. Connect your smartphone via a USB data cable to access these features. This allows you to control navigation, music, calls, and messages directly from the stereo's touchscreen or via voice commands.
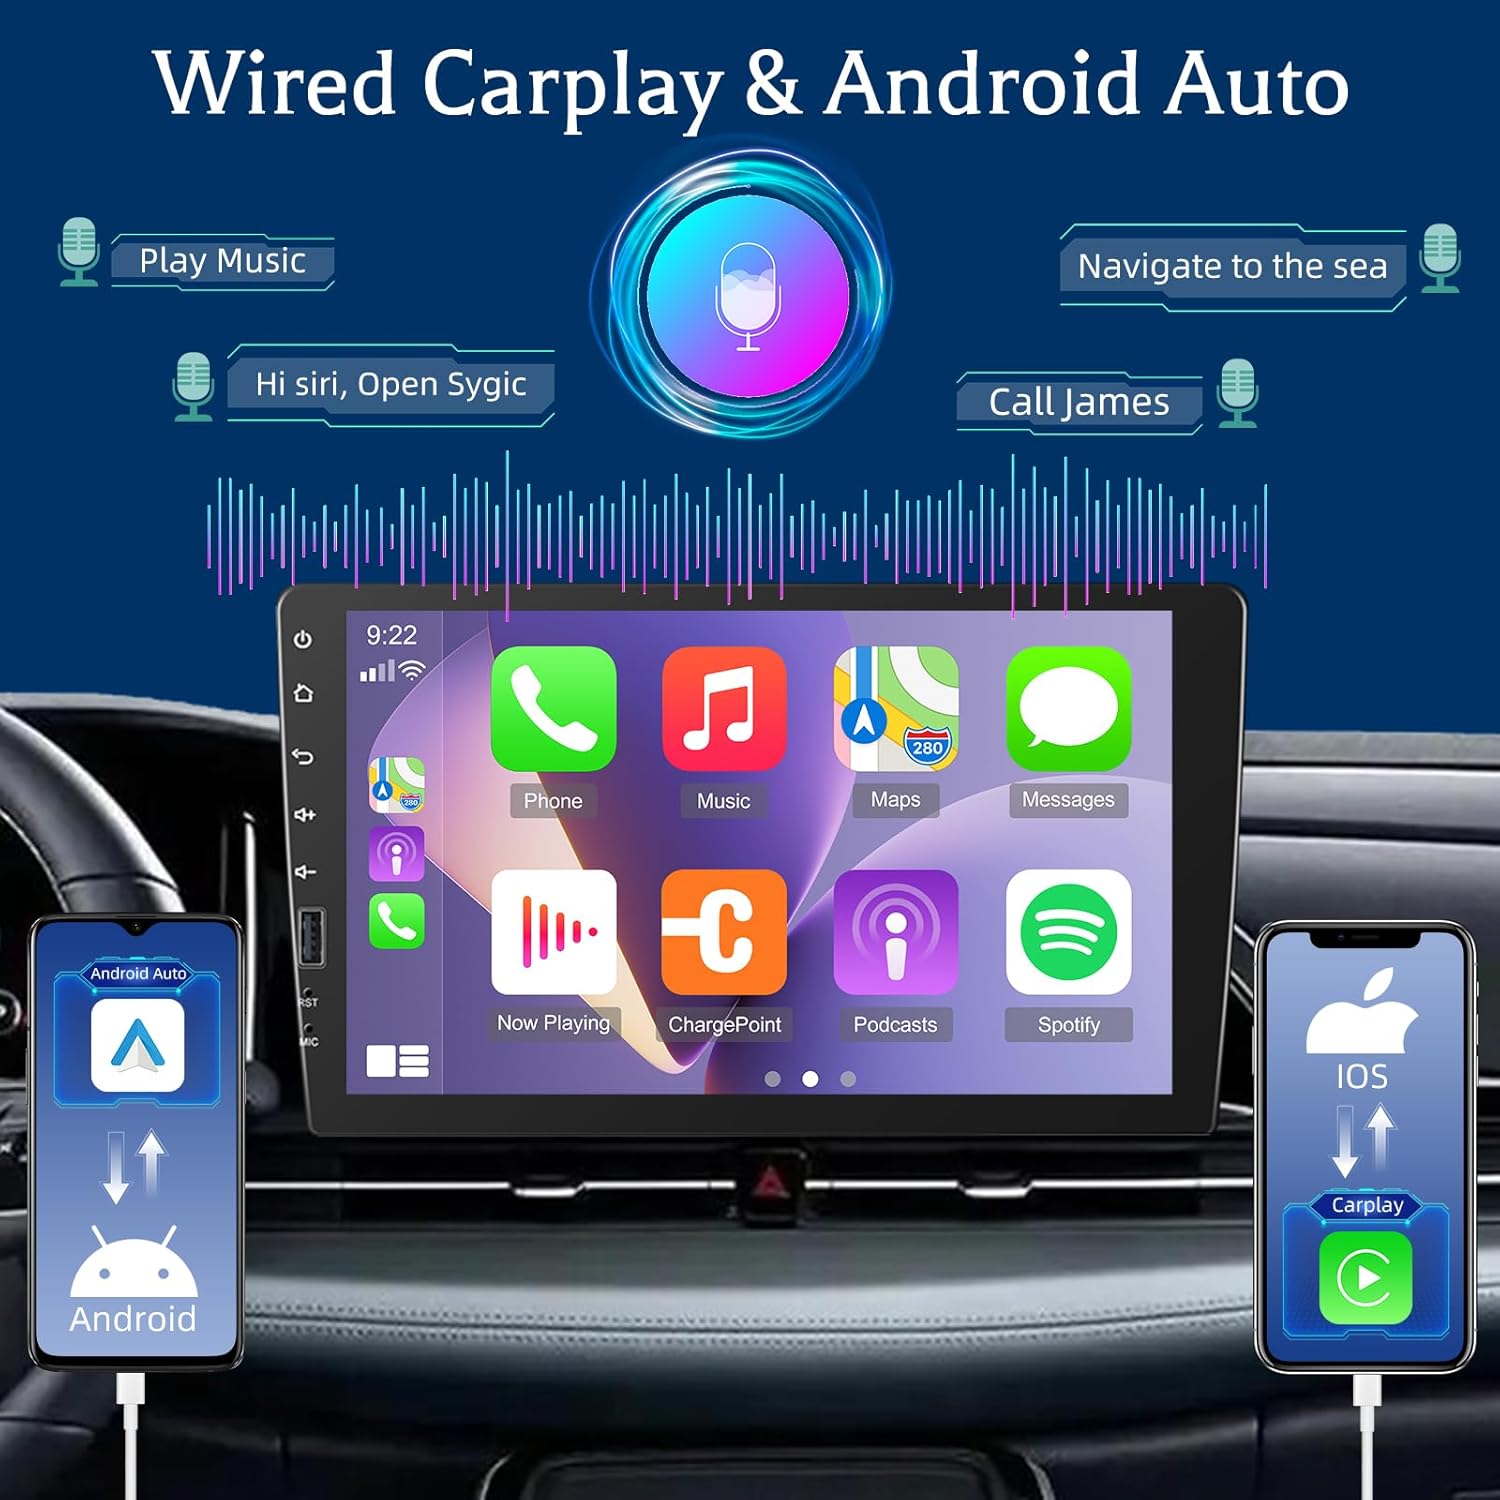
Figure 4: CarPlay and Android Auto Interface.
Bluetooth Connectivity
Pair your phone via Bluetooth for hands-free calling and audio streaming. You can answer and make calls directly from the stereo and play music stored on your device.

Figure 5: Bluetooth Calling and FM Radio Interface.
FM Radio
The 1 DIN radio supports automatic searching for FM stations and allows you to save up to 18 stations for quick access. Tune in to news, weather forecasts, and real-time traffic information.
Equalizer (EQ) Settings
Adjust the audio output using the built-in equalizer. The multiband graphic equalizer allows you to customize sound profiles for various music genres or personal preferences, enhancing bass, midrange, and treble.

Figure 6: Equalizer Settings Interface.
Mirror Link
Connect your phone via USB cable to mirror its screen onto the car stereo display. This feature allows you to view your phone's content, such as videos or navigation apps, on the larger 9-inch screen.

Figure 7: Mirror Link Functionality.
Voice Control
Utilize voice control through CarPlay or Android Auto to manage various functions. Activate your phone's assistant (Siri or Google Assistant) to play music, get navigation directions, make calls, and send messages, all while keeping your focus on the road.

Figure 8: Voice Control Interface.
Steering Wheel Control (SWC)
After installing the car stereo, you need to configure the steering wheel buttons in the system settings. Navigate to Setting > Steer to learn the buttons. This allows you to control functions like volume, track changes, and calls directly from your steering wheel for safer operation.

Figure 9: Steering Wheel Control Setup.

Figure 10: Learning Steering Wheel Buttons.
Backup Camera Functionality
When the vehicle is shifted into reverse, the connected rear camera automatically activates, displaying a clear view on the 9-inch screen. This assists in safe parking and maneuvering.
Figure 11: Backup Camera View (part of image 711-0hPa5tL).
Maintenance
- Cleaning the Screen: Use a soft, lint-free cloth to gently wipe the touchscreen. Do not use abrasive cleaners or solvents.
- General Cleaning: Keep the unit free from dust and debris. Use a dry cloth for external surfaces.
- Software Updates: Check the manufacturer's website periodically for any available software updates to ensure optimal performance and compatibility.
- Avoid Extreme Temperatures: Do not expose the unit to extreme heat or cold, as this can affect its performance and lifespan.
Troubleshooting
| Problem | Possible Cause | Solution |
|---|---|---|
| No power | Incorrect wiring; Blown fuse; Vehicle power issue. | Check power cable connections. Inspect and replace fuse if necessary. Verify vehicle's power supply. |
| No sound | Volume too low; Mute activated; Incorrect speaker wiring. | Increase volume. Check if mute is on. Verify speaker connections. |
| CarPlay/Android Auto not connecting | Faulty USB cable; Phone not compatible; Software issue. | Use a high-quality USB data cable. Ensure your phone's OS is up to date. Restart both phone and stereo. |
| Backup camera not displaying | Incorrect camera wiring; Camera malfunction; Trigger wire issue. | Check all camera connections, especially the trigger wire. Test camera with another display if possible. |
| Steering Wheel Control not working | Not configured; Incorrect wiring. | Perform the SWC learning procedure in settings. Verify SWC wiring. |
If the problem persists after attempting these solutions, please contact customer support.
Specifications
| Brand | ETLFUCyber |
| Model Number | 43439307-23bc-4fe1-805d-d83da78b6766 |
| Display | 9-inch Touchscreen |
| Installation Size | 1 DIN (178 mm x 50 mm) |
| Connectivity Technology | Bluetooth, USB, 3.5mm Jack |
| Special Features | CarPlay, Android Auto, Mirror Link, Backup Camera Support, EQ, FM Radio, Steering Wheel Control, Microphone |
| Compatible Devices | Smartphone, Tablet |
| Audio Output Mode | Stereo (5.1 Surround Sound Channels) |
| Video Encoding | H.264 |
| Product Weight | 1140 Grams (1.14 kg) |
| Package Dimensions | 23 x 14 x 10 cm |
| Country of Origin | China |
Warranty and Support
Your ETLFUCyber car stereo comes with a 2-year technical support guarantee. We are committed to providing excellent customer service.
- 24-hour Email Response Service: For any inquiries or issues, our customer service team aims to respond within 24 hours.
- 30-day Unconditional Refund Policy: If you are not satisfied with your purchase, you may be eligible for a refund within 30 days.
If you have any questions or encounter problems, please feel free to contact us. We are here to help you resolve any issues.

Figure 12: Service Guarantee Information.