1. Product Overview
This manual provides detailed instructions for the installation, operation, and maintenance of your MekedeTech Android Car Stereo. This 9-inch touch screen head unit is specifically designed for Volkswagen VW Polo Sedan models manufactured between 2008 and 2018, offering advanced features such as Android 12 OS, 8-Core CPU, 8GB RAM, 256GB ROM, 4G LTE connectivity, Wireless CarPlay, and Android Auto.
The system integrates seamlessly with your vehicle's existing controls, including steering wheel controls, and provides a modern multimedia experience with a high-resolution IPS display and built-in DSP sound processing.
2. Setup and Installation
Before beginning installation, ensure your vehicle's ignition is off and the battery is disconnected to prevent electrical damage. The package includes a frame kit and a plug-and-play harness designed to simplify the installation process and retain factory steering wheel controls.
2.1. Pre-Installation Check
- Verify all components are present: head unit, frame kit, wiring harness, GPS antenna, 4G antenna.
- Familiarize yourself with your vehicle's dashboard layout and existing radio removal procedure.
2.2. Removing the Factory Radio
Carefully remove the trim panels surrounding your existing radio. Use appropriate tools to avoid scratching the dashboard. Disconnect all wiring harnesses and the antenna cable from the factory radio.
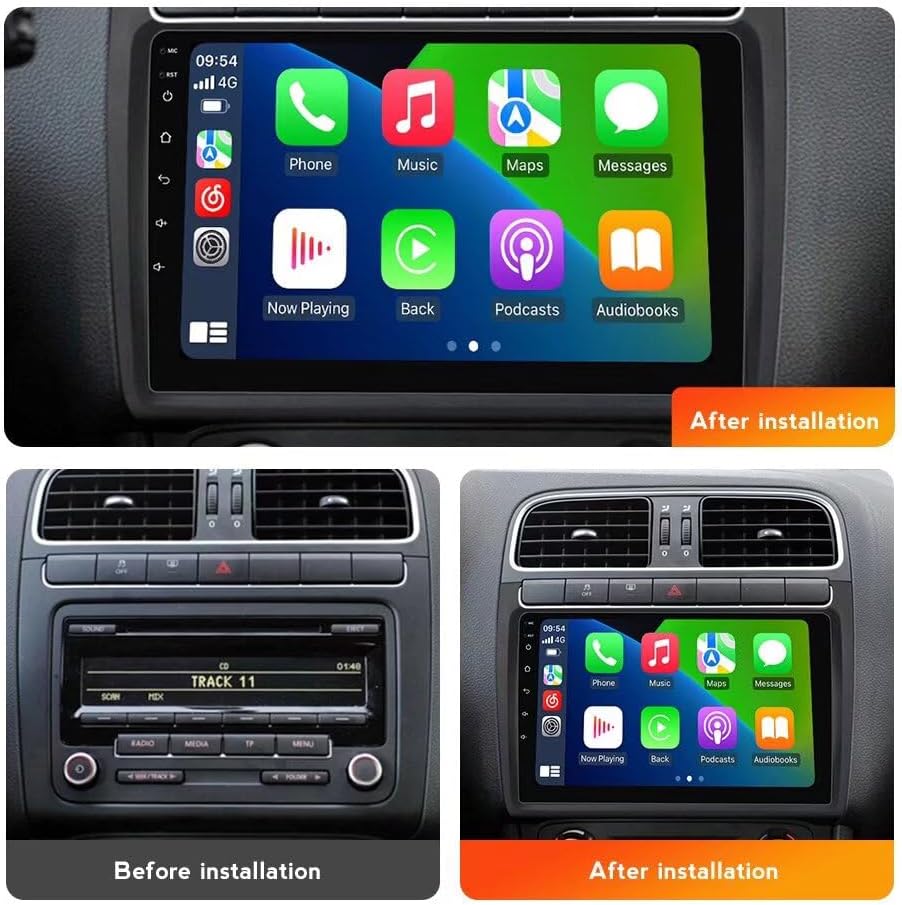
Image: Comparison of the car dashboard before and after the installation of the MekedeTech Android Car Stereo. The top image shows the new 9-inch touch screen installed, while the bottom left shows the original factory radio and the bottom right shows the new unit in place.
2.3. Connecting the New Head Unit
- Connect the provided wiring harness to the new head unit and then to the vehicle's factory wiring. Ensure all connections are secure.
- Connect the GPS antenna and position it in a location with a clear view of the sky (e.g., on the dashboard).
- Connect the 4G antenna. The unit includes a 4G LTE card slot for inserting a SIM card for data access.
- If your unit includes a cooling fan, ensure it is properly connected. Refer to the diagram for setup steps.

Image: This diagram illustrates the internal components of the car stereo, including the Octa-Core CPU, 8GB RAM, and 256GB ROM. It also details the function of the cooling fan, showing how it prevents high temperatures, and provides a four-step guide for connecting and activating the cooling fan.
2.4. Testing and Reassembly
Before fully reassembling the dashboard, reconnect the vehicle battery and turn on the ignition. Test all functions of the head unit, including power, audio, touch screen response, steering wheel controls, GPS, and radio. Once confirmed operational, carefully reassemble the dashboard panels.
3. Operating Instructions
3.1. Basic Operation
- Power On/Off: Press and hold the power button on the unit or use the vehicle's ignition.
- Volume Control: Adjust using the physical buttons on the unit or your steering wheel controls.
- Touch Screen: Navigate through menus and applications by tapping, swiping, and pinching on the 9-inch IPS display.
- Home Screen: Customize with widgets and app shortcuts for quick access.
3.2. Wireless CarPlay and Android Auto
The unit features built-in wireless CarPlay (for iOS devices) and Android Auto (for Android devices), allowing seamless integration of your smartphone for navigation, music, calls, and messages.
- Connection Steps:
- Ensure Bluetooth is enabled on your smartphone and the car stereo.
- On the car stereo, navigate to the "Car Link" or "Phone Link" application.
- Pair your phone via Bluetooth. Once paired, the system will prompt you to activate Wireless CarPlay or Android Auto.
- Follow the on-screen instructions to complete the setup. A USB cable connection can also be used for initial setup or if wireless connection is unstable.

Image: This image illustrates the built-in Wireless CarPlay and Android Auto features. It shows the user interface for both iOS (CarPlay) and Android (Android Auto) systems, along with step-by-step instructions for connecting via Bluetooth and the "Car Link" application. It also notes that a USB cable can be used for connection.
3.3. 4G LTE and Wi-Fi Connectivity
The head unit supports 4G LTE for internet access via a SIM card and has a built-in Wi-Fi module for connecting to Wi-Fi hotspots.
- 4G LTE: Insert a compatible SIM card into the designated 4G LTE card slot. This allows for direct internet access without needing a phone hotspot.
- Wi-Fi: Go to "Settings" > "Network & Internet" > "Wi-Fi" to connect to available Wi-Fi networks.
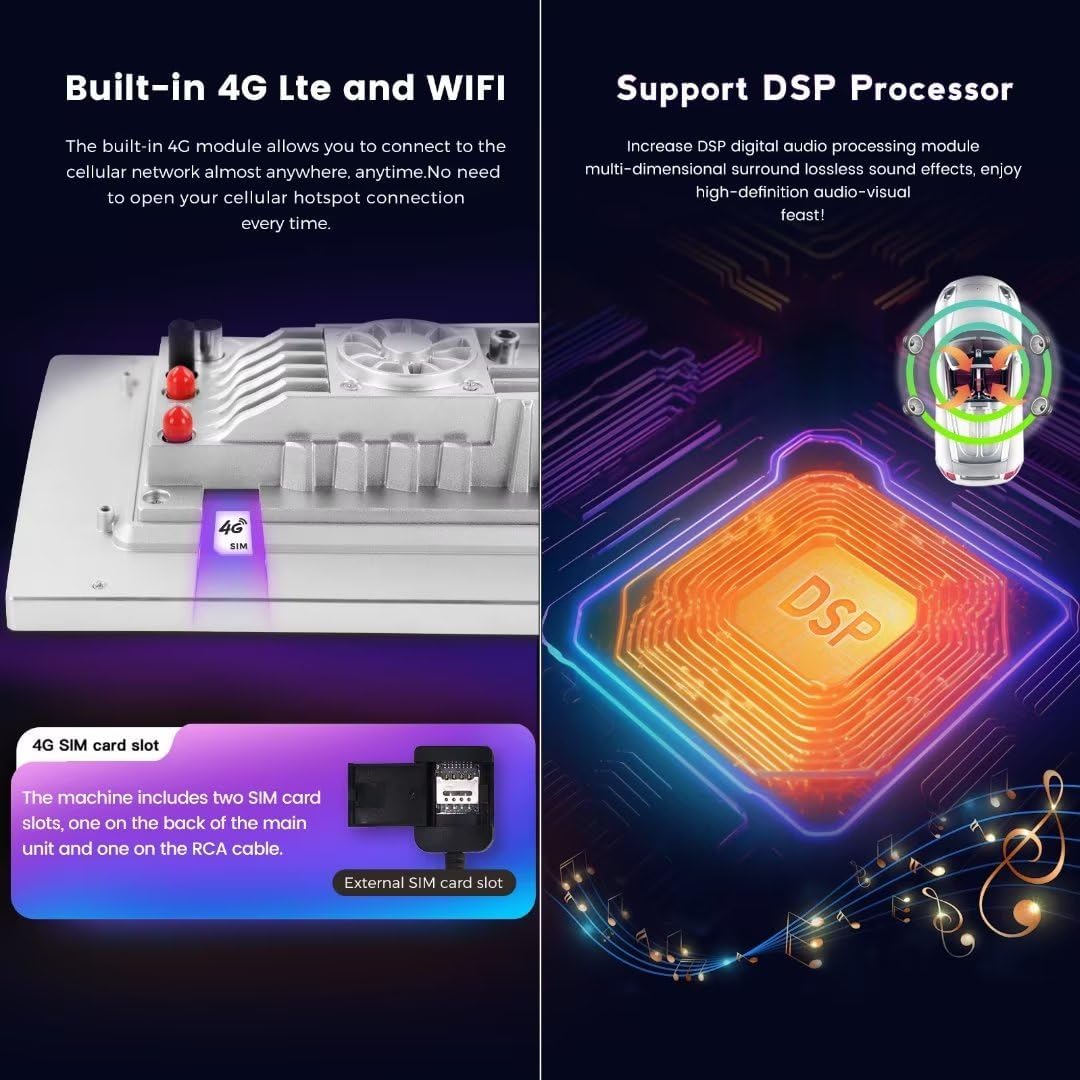
Image: This image highlights the built-in 4G LTE and Wi-Fi capabilities, showing the location of the SIM card slot. It also features the Digital Sound Processor (DSP), explaining its role in enhancing audio quality with multi-dimensional surround sound.
3.4. Digital Sound Processor (DSP)
The integrated DSP processor enhances audio quality, providing multi-dimensional surround lossless sound effects. Access DSP settings through the "Sound" or "Equalizer" application to customize your audio experience.
3.5. GPS Navigation
The unit comes with built-in GPS navigation and pre-installed maps. Ensure the GPS antenna is properly installed for optimal signal reception. You can also download additional navigation apps from the Google Play Store.
4. Maintenance
- Screen Cleaning: Use a soft, lint-free cloth to clean the touch screen. For stubborn smudges, lightly dampen the cloth with water or a screen-safe cleaner. Avoid abrasive materials or harsh chemicals.
- Software Updates: Periodically check for software updates through the system settings to ensure optimal performance and access to new features.
- General Care: Avoid exposing the unit to extreme temperatures, direct sunlight for prolonged periods, or excessive moisture.
5. Troubleshooting
- No Power: Check all power connections and fuses. Ensure the vehicle battery is properly connected.
- No Sound: Verify speaker connections. Check volume levels and audio settings, including DSP settings. Ensure the mute function is not active.
- Touch Screen Unresponsive: Try restarting the unit. If the issue persists, a factory reset might be necessary (note: this will erase all user data).
- GPS Signal Loss: Ensure the GPS antenna is correctly installed and has a clear view of the sky. Avoid placing it under metal objects.
- CarPlay/Android Auto Connection Issues: Ensure Bluetooth is on for both devices. Try forgetting the device on both ends and re-pairing. Check for software updates on your phone and the head unit.
- Slow Performance: Close unnecessary background applications. Clear cache from time to time. If persistent, consider a factory reset.
6. Specifications
| Feature | Specification |
|---|---|
| Brand | MekedeTech |
| Screen Size | 9 Inches |
| Operating System | Android 12 OS |
| CPU | 8-Core A53 1.8GHz |
| Memory (RAM) | 8GB |
| Storage (ROM) | 256GB |
| Screen Resolution | 1280*720 IPS Touch Screen |
| Power Output | 4*50W |
| Connectivity | 4G LTE, Wi-Fi, Bluetooth |
| Special Features | Wireless CarPlay, Wireless Android Auto, Built-in GPS, DSP Sound System, AM/FM Radio |
| Human Interface Input | Touchscreen, Buttons, Steering Wheel Controls |
7. Warranty and Support
This MekedeTech Android Car Stereo comes with a 1-Year Warranty from the date of purchase, covering manufacturing defects. Please retain your proof of purchase for warranty claims.
For technical support, troubleshooting assistance, or warranty inquiries, please contact the seller or MekedeTech customer service through the platform where the product was purchased. Provide your product model number (8-Core 8+256G) and ASIN (B0DR92R5JQ) for faster service.