1. Introduction
This manual provides detailed instructions for the installation, operation, and maintenance of your Rimoody 8 Core 4G+64G Android 13 Car Radio. Please read this manual thoroughly before using the product to ensure proper function and to maximize your user experience. Keep this manual for future reference.
2. Product Overview
2.1 Key Features
- Operating System: Android 13
- Processor: 8 Core CPU
- Memory: 4GB RAM + 64GB ROM
- Display: 9-inch IPS Touchscreen
- Connectivity: Wireless Carplay, Wireless Android Auto, Mirror Link (iOS/Android), Built-in 4G-WiFi, Bluetooth 5.0
- Navigation: Built-in GPS module (supports online/offline maps)
- Audio: FM/RDS Radio, DSP-36 (32-band equalization)
- Compatibility: Ford Focus 2012-2018
- Additional Features: Split Screen, 59 UI Themes, Steering Wheel Control (SWC) support, AHD Backup Camera input
2.2 Package Contents
The following items are typically included in your package:
- Rimoody Android Car Radio Unit
- Backup Camera
- Power Cable
- USB Cables (x2)
- GPS Antenna
- RCA Cable
- Installation Tool
- User Manual
- Rear Camera Input Cable
- Microphone (MIC)
- CANBUS Decoder (if applicable for your vehicle model)
- Emergency Light Conversion Line
- Radio Cable
- Various Parts for installation
- Low to High Wiring
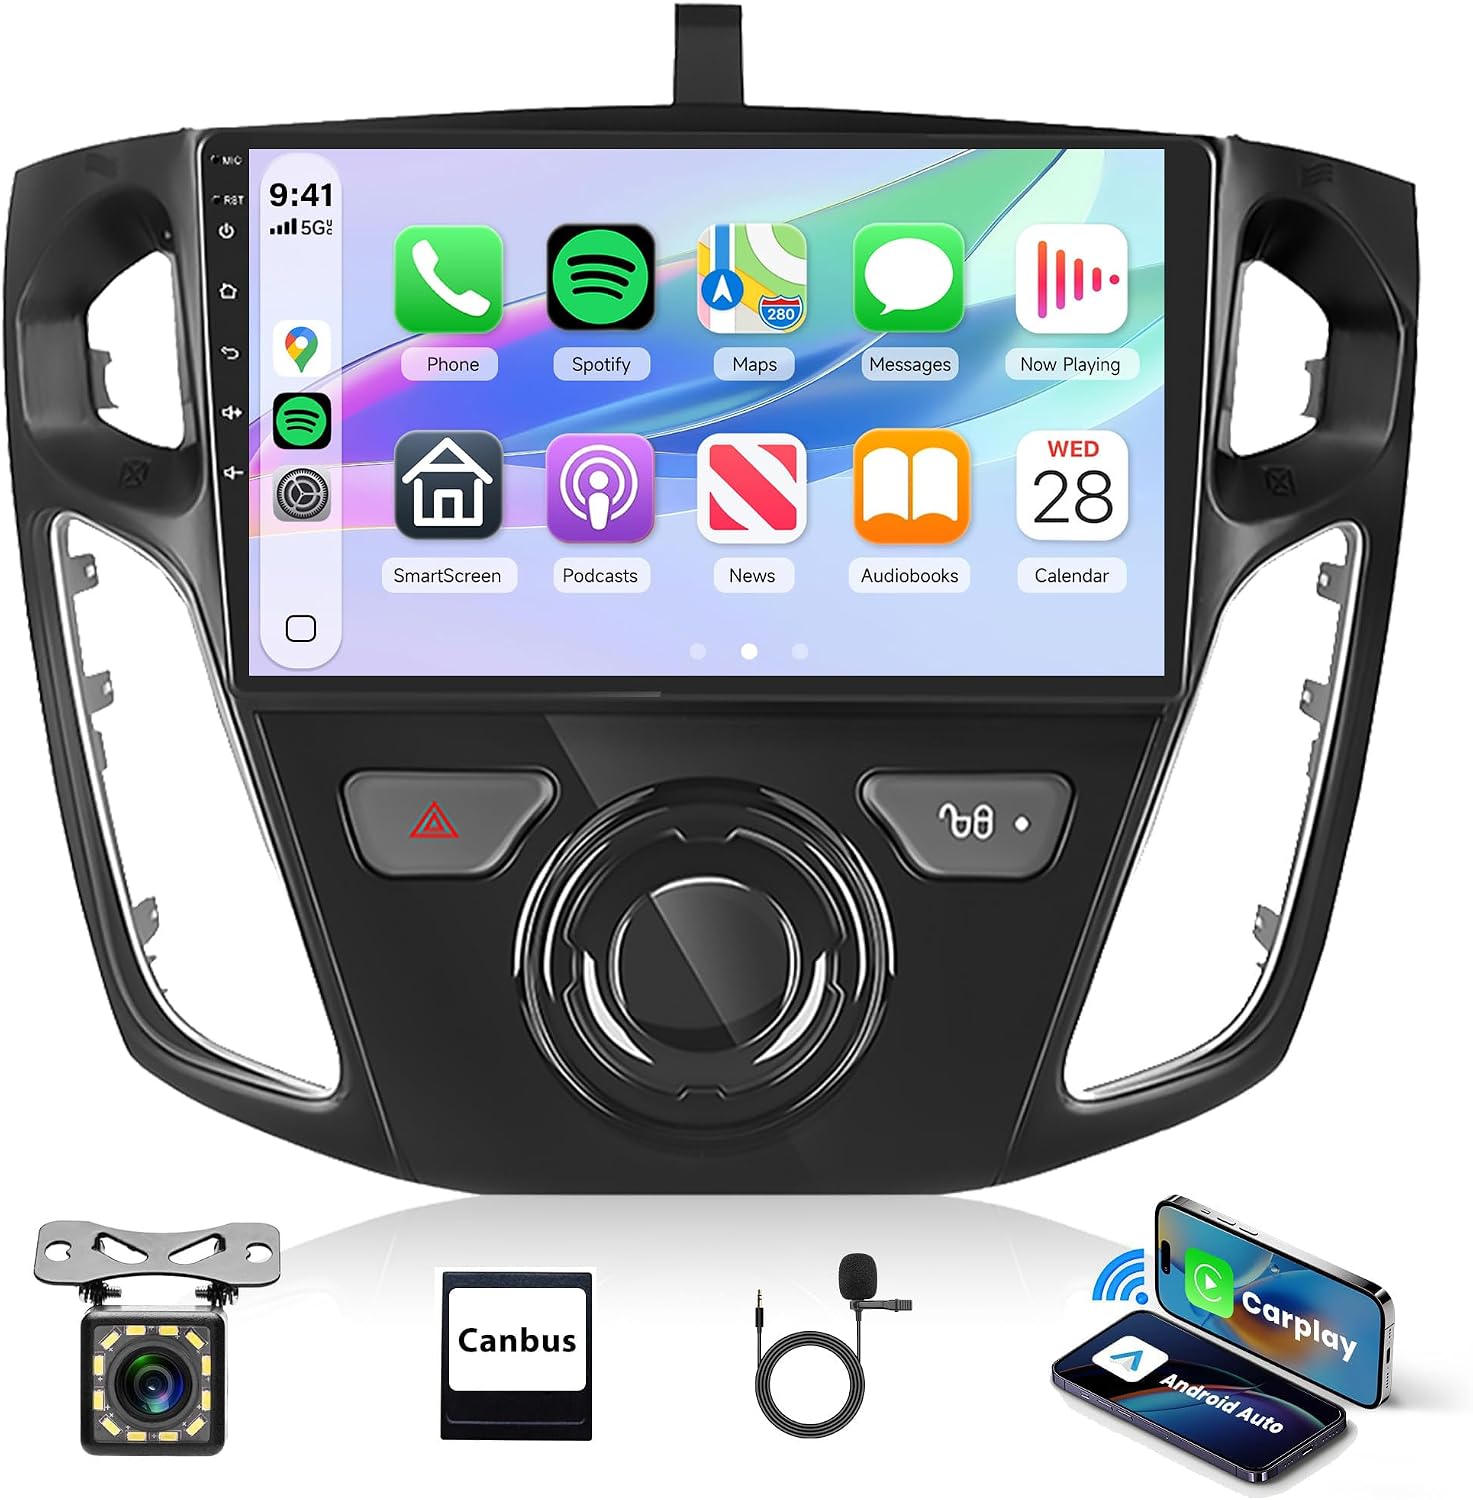
Figure 2.2.1: Rimoody Car Radio unit and its primary accessories.
3. Setup and Installation
Professional installation is recommended for this product. Ensure the vehicle's power is disconnected before beginning installation.
3.1 Vehicle Compatibility
This car radio is designed for Ford Focus models manufactured between 2012 and 2018.
3.2 Wiring and Connections
- Carefully remove the original car radio from your Ford Focus dashboard.
- Connect the provided power cable and RCA cables to the corresponding ports on the new Rimoody unit.
- Connect the GPS antenna and external microphone. Position the GPS antenna in a location with a clear view of the sky for optimal signal reception.
- If your original vehicle is equipped with the SYNC function, ensure the specific interface for this function is connected. If your vehicle does not have the SYNC function, this power interface does not need to be connected. It serves no other purpose.
- Connect the backup camera input cable and install the backup camera (if included and desired).
- Connect the CANBUS decoder (if provided and required for your vehicle's features like steering wheel controls).
- Before fully securing the unit, temporarily connect the main power harness and test basic functions (power on, audio, touch screen response).
- Once confirmed working, carefully mount the unit into the dashboard, ensuring all cables are neatly tucked away and not pinched.

Figure 3.2.1: Installation overview and wiring considerations for Ford Focus 2012-2018.
4. Operating Instructions
4.1 Power On/Off and Basic Interface
Press the power button to turn the unit on or off. The 9-inch IPS touchscreen provides a responsive interface for navigating through applications and settings. The home screen can be customized with various widgets and app shortcuts.
4.2 Wireless Carplay & Android Auto
This unit supports both Wireless Carplay for iPhone users and Wireless Android Auto for Android phone users, allowing seamless integration of your smartphone's features.
- For Carplay Connection:
a. Turn on the 'CPLink' application on the car radio.
b. Connect your iPhone wirelessly via Bluetooth or Wi-Fi, or use a USB cable. - For Android Auto Connection:
a. Install the 'Android Auto' app on your Android phone first.
b. Turn on the 'CPLink' application on the car radio.
c. Connect your Android phone wirelessly via Bluetooth or Wi-Fi, or use a USB cable.
Once connected, you can make calls, send messages, play music, navigate, and access other compatible apps directly from the car radio's display using voice commands or touch.

Figure 4.2.1: Wireless Carplay interface on the car radio.
4.3 GPS Navigation and Wi-Fi Connectivity
The unit features a built-in GPS module for accurate navigation. You can use pre-installed offline maps or download online mapping applications via Wi-Fi.
- GPS Navigation: Open the navigation app from the main menu. Enter your destination to receive turn-by-turn directions and real-time traffic information (requires internet connection for real-time data).
- Wi-Fi Connection: Connect the unit to the internet via a mobile hotspot or a local Wi-Fi network. Go to Settings > Network & Internet > Wi-Fi to select and connect to an available network. This enables online map updates, app downloads, and web browsing.

Figure 4.3.1: GPS Navigation in action.
4.4 Bluetooth 5.0
Connect your smartphone via Bluetooth for hands-free calling and audio streaming.
- Go to the Bluetooth application on the car radio.
- Enable Bluetooth on your smartphone and search for available devices.
- Select the car radio (e.g., "Rimoody Car") from your phone's Bluetooth list and pair.
- Once paired, you can make/receive calls directly from the unit and stream music from your phone. The unit supports automatic loading of your phone book.
4.5 FM/RDS Radio
Access local and regional radio stations with clear reception.
- Open the Radio application.
- Use the scan function to automatically search for and save available stations.
- You can manually tune to frequencies or select from up to 30 preset stations.
- The RDS (Radio Data System) function displays station information such as song titles or program names where available.
4.6 DSP (Digital Sound Processor)
Customize your audio experience with the built-in DSP.
- Access the DSP settings from the main menu or audio settings.
- Adjust the frequency, AE (Audio Enhancement), and utilize the 32-band equalization to fine-tune the sound output to your preference.
- Experiment with different sound presets (e.g., Pop, Rock, Jazz) or create your own custom profile.

Figure 4.6.1: DSP sound customization options.
4.7 Steering Wheel Control (SWC)
Integrate your vehicle's steering wheel buttons for convenient control of the car radio.
- Go to the SWC settings in the unit's menu.
- Follow the on-screen instructions to program each steering wheel button to a specific function (e.g., volume up/down, track skip, mode, answer call). This typically involves pressing a function on the screen and then pressing the corresponding button on your steering wheel.
- Save the settings once programming is complete.
4.8 Split Screen and UI Themes
Enhance multitasking and personalize your user interface.
- Split Screen: To use two applications simultaneously, open one app, then long-press the recent apps button or drag an app from the recent apps list to one side of the screen. Select another app for the other side. You can adjust the size of each app window.
- UI Themes: The unit offers 59 different UI desktop themes. Navigate to the theme settings to browse and select your preferred visual style. You can also customize the home page app display by long-pressing an app icon to switch its position.

Figure 4.8.1: Bluetooth, FM Radio, and UI Theme options.
4.9 Mirror Link
Mirror your smartphone's screen directly onto the car radio display.
- Open the Mirror Link application on the car radio.
- Connect your iOS or Android phone using a USB cable or wirelessly via Wi-Fi.
- Follow the on-screen prompts to establish the connection. Your phone's screen will then be displayed on the car radio, allowing you to interact with your phone's apps, music, and videos.
4.10 AHD Backup Camera
The unit supports an AHD backup camera for enhanced safety during reversing.
- Connect the provided backup camera to the dedicated video input port on the car radio.
- When you shift your vehicle into reverse gear, the car radio display will automatically switch to the rear view, assisting you in parking and avoiding obstacles.
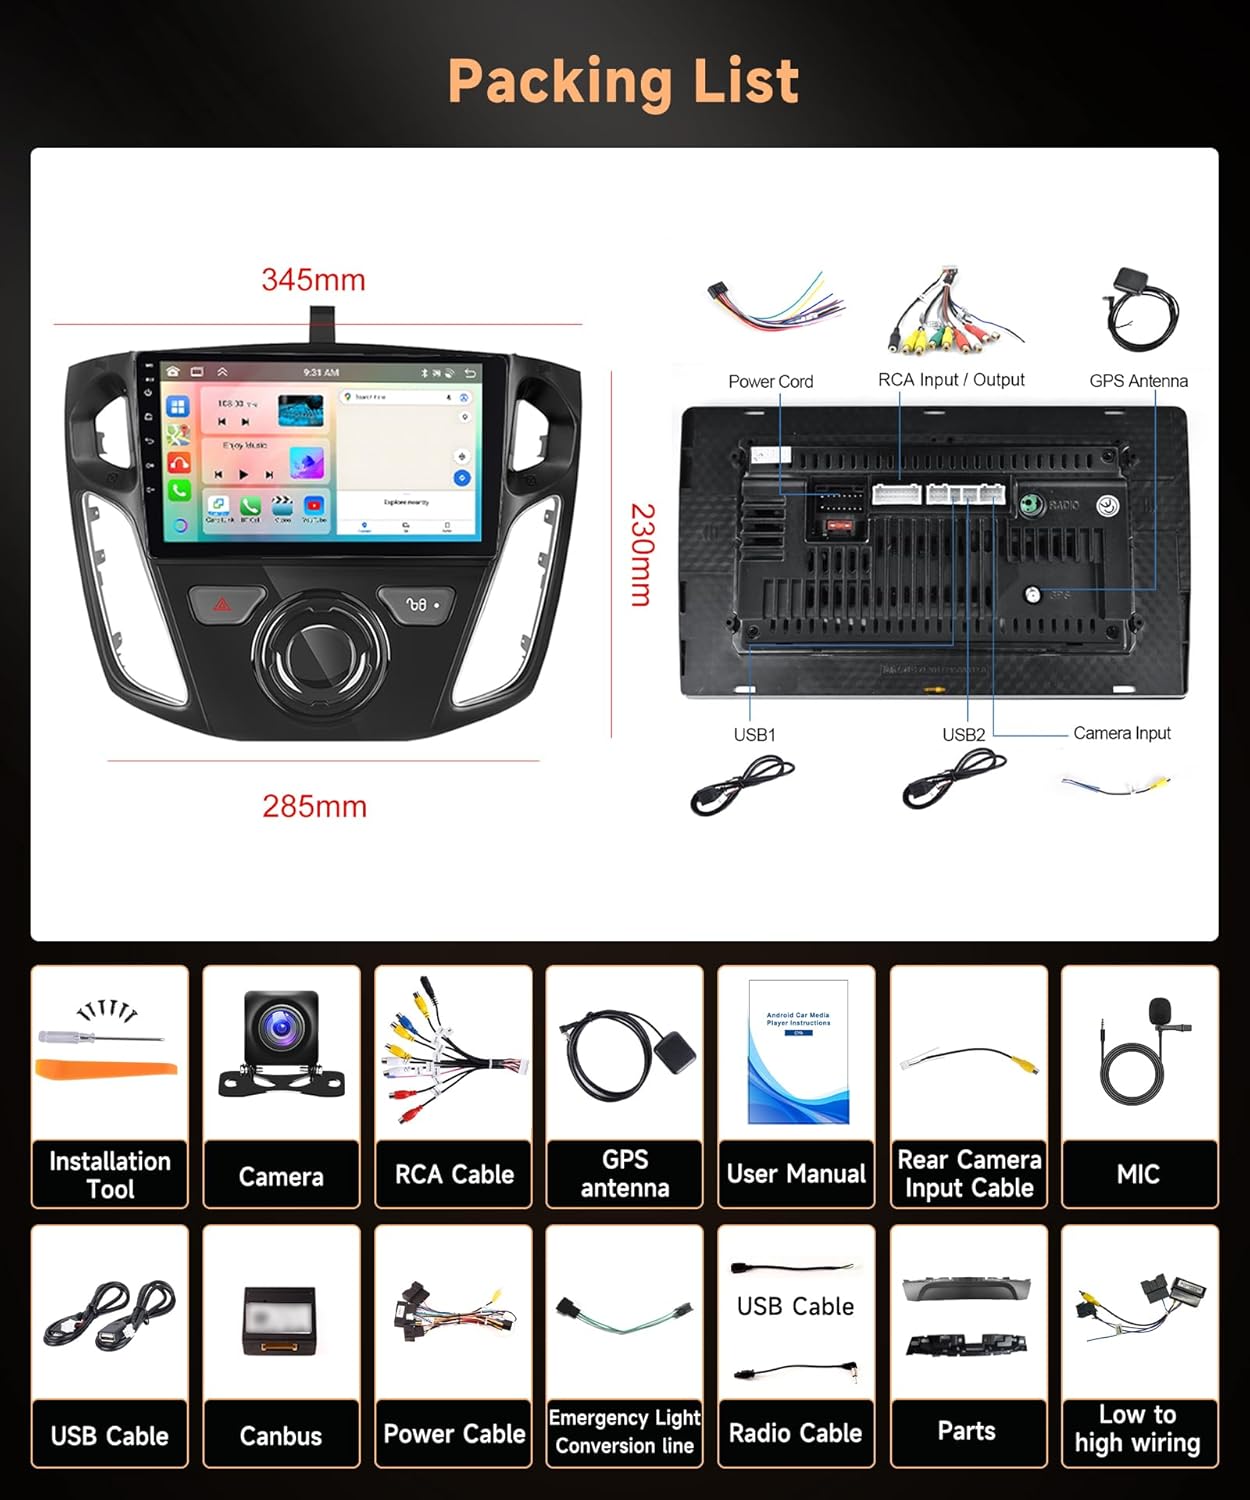
Figure 4.10.1: Backup camera view and Steering Wheel Control setup.
5. Maintenance
To ensure the longevity and optimal performance of your Rimoody car radio, follow these maintenance guidelines:
- Screen Cleaning: Use a soft, lint-free cloth to gently wipe the touchscreen. For stubborn smudges, slightly dampen the cloth with water or a screen-safe cleaner. Avoid harsh chemicals or abrasive materials.
- Dust Removal: Regularly clean dust from the unit's vents and surrounding areas using a soft brush or compressed air.
- Software Updates: Periodically check for software updates through the unit's settings menu (if available) to ensure you have the latest features and bug fixes.
- Avoid Extreme Temperatures: Do not expose the unit to extreme heat or cold for extended periods, as this can affect its electronic components.
- Cable Management: Ensure all cables are securely connected and not exposed to excessive tension or sharp edges.
6. Troubleshooting
If you encounter issues with your car radio, refer to the following common problems and solutions:
| Problem | Possible Cause | Solution |
|---|---|---|
| Unit does not power on. | Loose power connection, blown fuse, vehicle battery issue. | Check power cable connections. Inspect vehicle fuses. Ensure vehicle battery is charged. |
| No sound output. | Volume too low, mute activated, speaker wiring issue, incorrect audio source. | Increase volume. Check if unit is muted. Verify speaker wiring. Select correct audio source. |
| GPS signal is weak or inaccurate. | GPS antenna obstructed, antenna not connected, unit in an area with poor satellite reception. | Ensure GPS antenna has a clear view of the sky. Check antenna connection. Move vehicle to an open area. |
| Bluetooth connection issues. | Bluetooth not enabled, device not paired, interference. | Ensure Bluetooth is enabled on both devices. Re-pair the devices. Move closer to the unit. |
| Touchscreen unresponsive or lagging. | Temporary software glitch, excessive background apps, screen protector interference. | Restart the unit. Close unnecessary background applications. Check if screen protector is causing issues. |
| Carplay/Android Auto not connecting. | Incorrect app launched, phone settings, cable issue (for wired connection). | Ensure 'CPLink' app is open. Check phone's Carplay/Android Auto settings. Try a different USB cable. |
If the problem persists after attempting these solutions, please contact Rimoody customer support for further assistance.
7. Specifications
| Feature | Detail |
|---|---|
| Model Name | DSP-36 |
| Operating System | Android 13 |
| CPU | 8 Core |
| RAM | 4GB |
| ROM | 64GB |
| Display Size | 9 Inches |
| Display Type | IPS Touchscreen |
| Connectivity Technology | Wi-Fi, Bluetooth 5.0 |
| Map Type | North America (pre-installed) |
| Audio Output Mode | Stereo |
| Mounting Type | Dashboard Mount |
| Item Weight | 3.28 pounds |
| Package Dimensions | 10.24 x 6.3 x 2.76 inches |
8. Warranty and Support
8.1 Warranty Information
This Rimoody car radio comes with a 2-year manufacturer's warranty from the date of purchase. This warranty covers defects in materials and workmanship under normal use. It does not cover damage caused by improper installation, accident, misuse, abuse, unauthorized modifications, or natural disasters.
Please retain your proof of purchase for warranty claims.
8.2 Customer Support
For technical assistance, troubleshooting not covered in this manual, or warranty inquiries, please contact Rimoody customer support through the retailer where the product was purchased or visit the official Rimoody website for contact information.


