Introduction
This manual provides essential information for the setup, operation, and maintenance of your ArcticPro 24-inch Gaming Monitor (Model ADE24F3). Please read this manual thoroughly before using the product to ensure correct usage and optimal performance. Keep this manual for future reference.
Package Contents
Verify that all components are present in the package:
- ArcticPro 24-inch Gaming Monitor
- Monitor Stand (Base and Neck)
- Power Adapter and Cable
- DisplayPort (DP) Cable
- HDMI Cable
- User Manual (this document)
- Screws for Stand Assembly
Setup Instructions
1. Assembling the Stand
- Carefully remove the monitor from its packaging, placing it face down on a soft, clean surface to prevent scratches.
- Attach the stand neck to the monitor's rear panel using the provided screws.
- Attach the stand base to the stand neck, securing it with the designated screw.
- Ensure all screws are tightened securely.
2. Connecting to a Device
The monitor supports DisplayPort (DP) and HDMI connections.
- Connect one end of the DP or HDMI cable to the corresponding port on your computer or gaming console.
- Connect the other end of the cable to the DP or HDMI input port on the monitor.
3. Power Connection
- Connect the power adapter to the monitor's power input port.
- Plug the power cable into a power outlet.
4. Initial Power On
- Press the power button on the monitor to turn it on.
- If no image appears, ensure all cables are securely connected and the power outlet is functional.
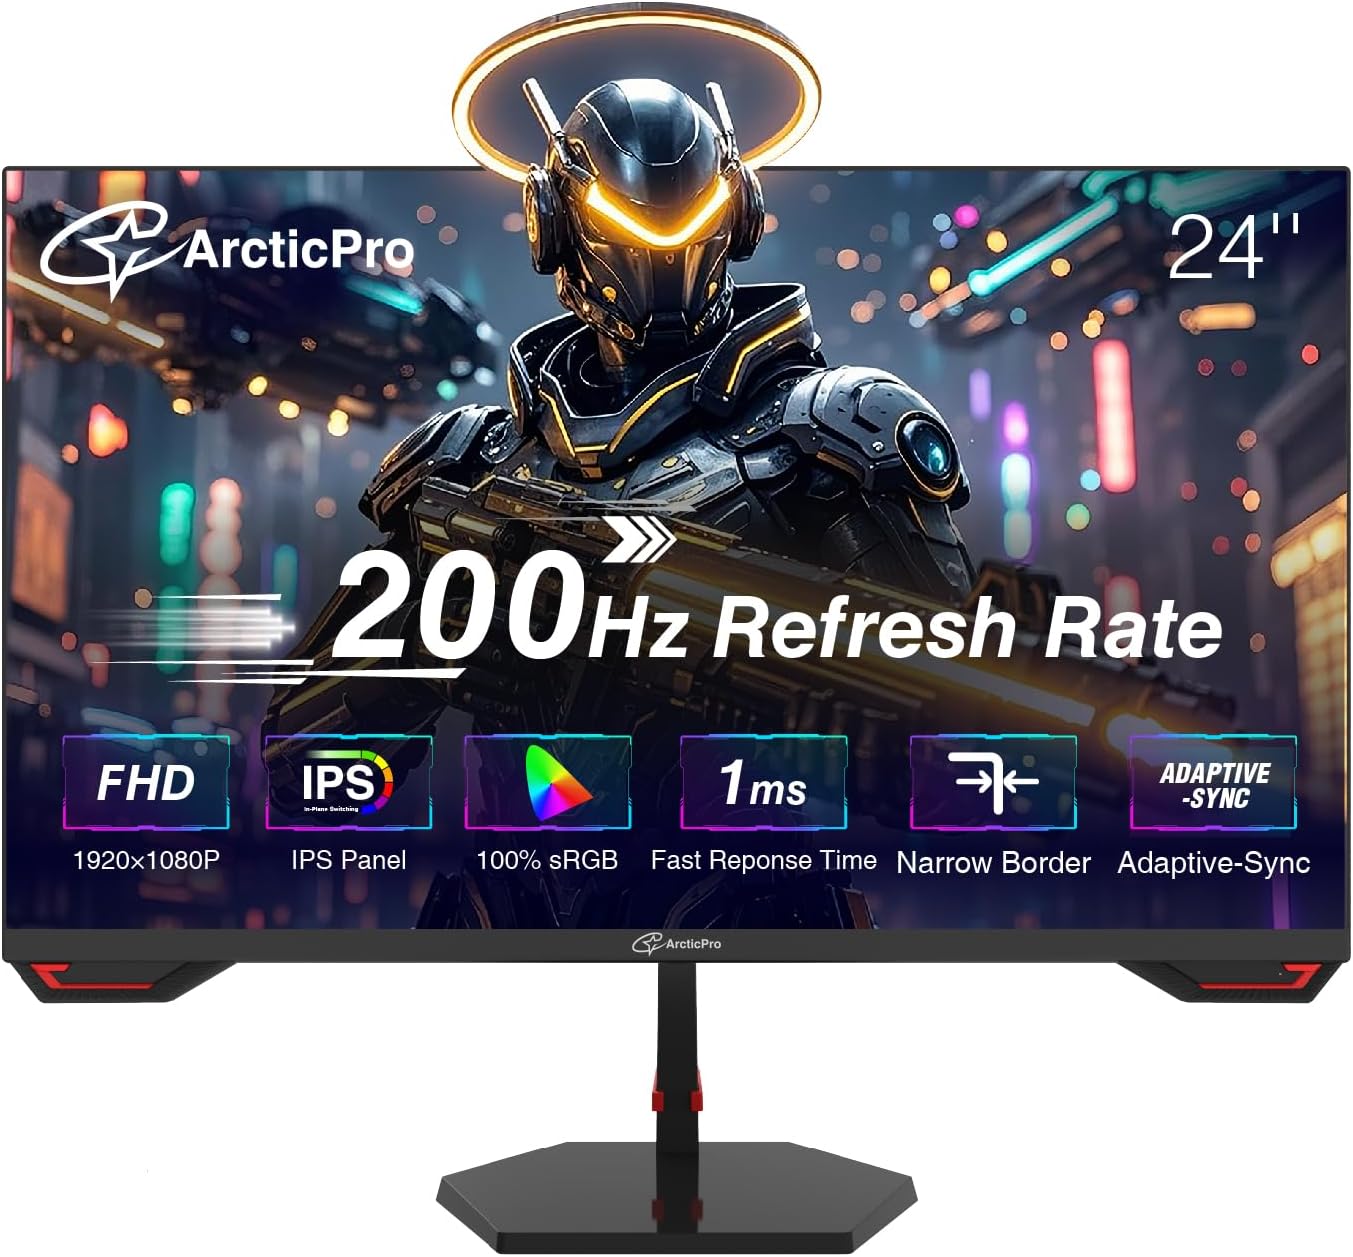
Figure 1: Front view of the ArcticPro 24-inch Gaming Monitor. This image shows the monitor from the front, highlighting its slim bezels and the stand.
Operating Instructions
Monitor Controls
The monitor features a power button that also functions as a navigation control for the On-Screen Display (OSD) menu.
- Power On/Off: Press the button to turn the monitor on or off.
- OSD Menu Access: When the monitor is on, press the button to access the OSD menu.
- Navigation: Use the button's directional movements (up, down, left, right) to navigate through menu options.
- Selection: Press the button to confirm a selection.
OSD Menu Options (Example)
The OSD menu allows adjustment of various display settings:
- Picture Settings: Brightness, Contrast, Sharpness, Color Temperature.
- Color Settings: Gamma, Hue, Saturation.
- Input Source: Select between DisplayPort and HDMI inputs.
- Audio: Volume control (if built-in speakers or audio output are present).
- OSD Settings: Language, OSD Timeout, Transparency.
- Other Settings: Adaptive Sync (On/Off), Low Blue Light, Flicker-Free.
Key Features
- Full HD Resolution (1920x1080p): Provides clear and detailed images for an immersive viewing experience.

Figure 2: Visual comparison demonstrating the clarity of Full HD 1080p resolution versus 720p on the monitor.
- 200Hz Refresh Rate: Delivers smooth visual performance, reducing motion blur and ghosting for a fluid experience.
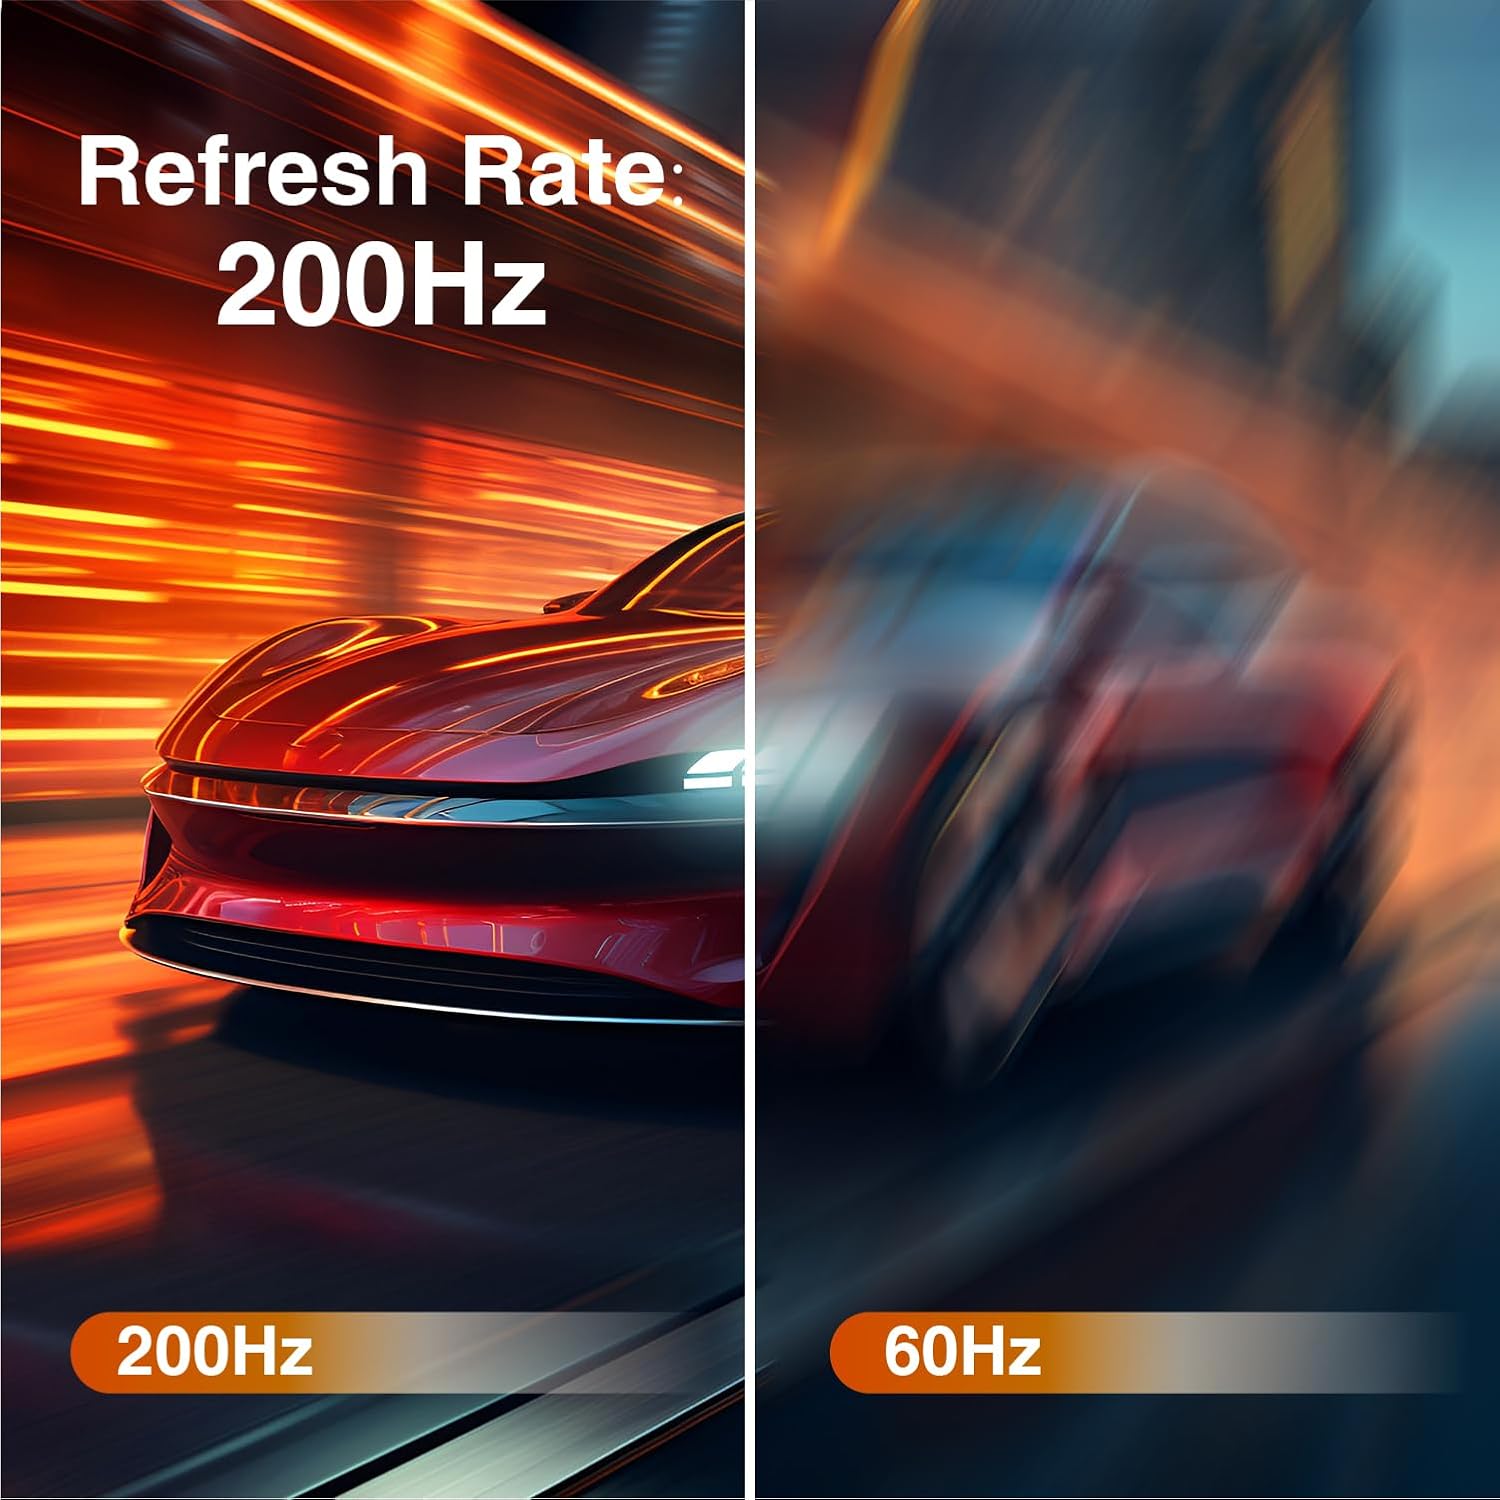
Figure 3: Illustration comparing the smoothness of a 200Hz refresh rate against a 60Hz refresh rate, showing reduced blur.
- 1ms Response Time (MPRT): Minimizes input lag and image smearing, crucial for fast-paced content.

Figure 4: Visual demonstration of 1ms response time, showing sharp images without blurring or ghosting compared to slower response times.
- Adaptive Sync Technology: Synchronizes the monitor's refresh rate with the graphics card's frame rate to eliminate screen tearing and stuttering.
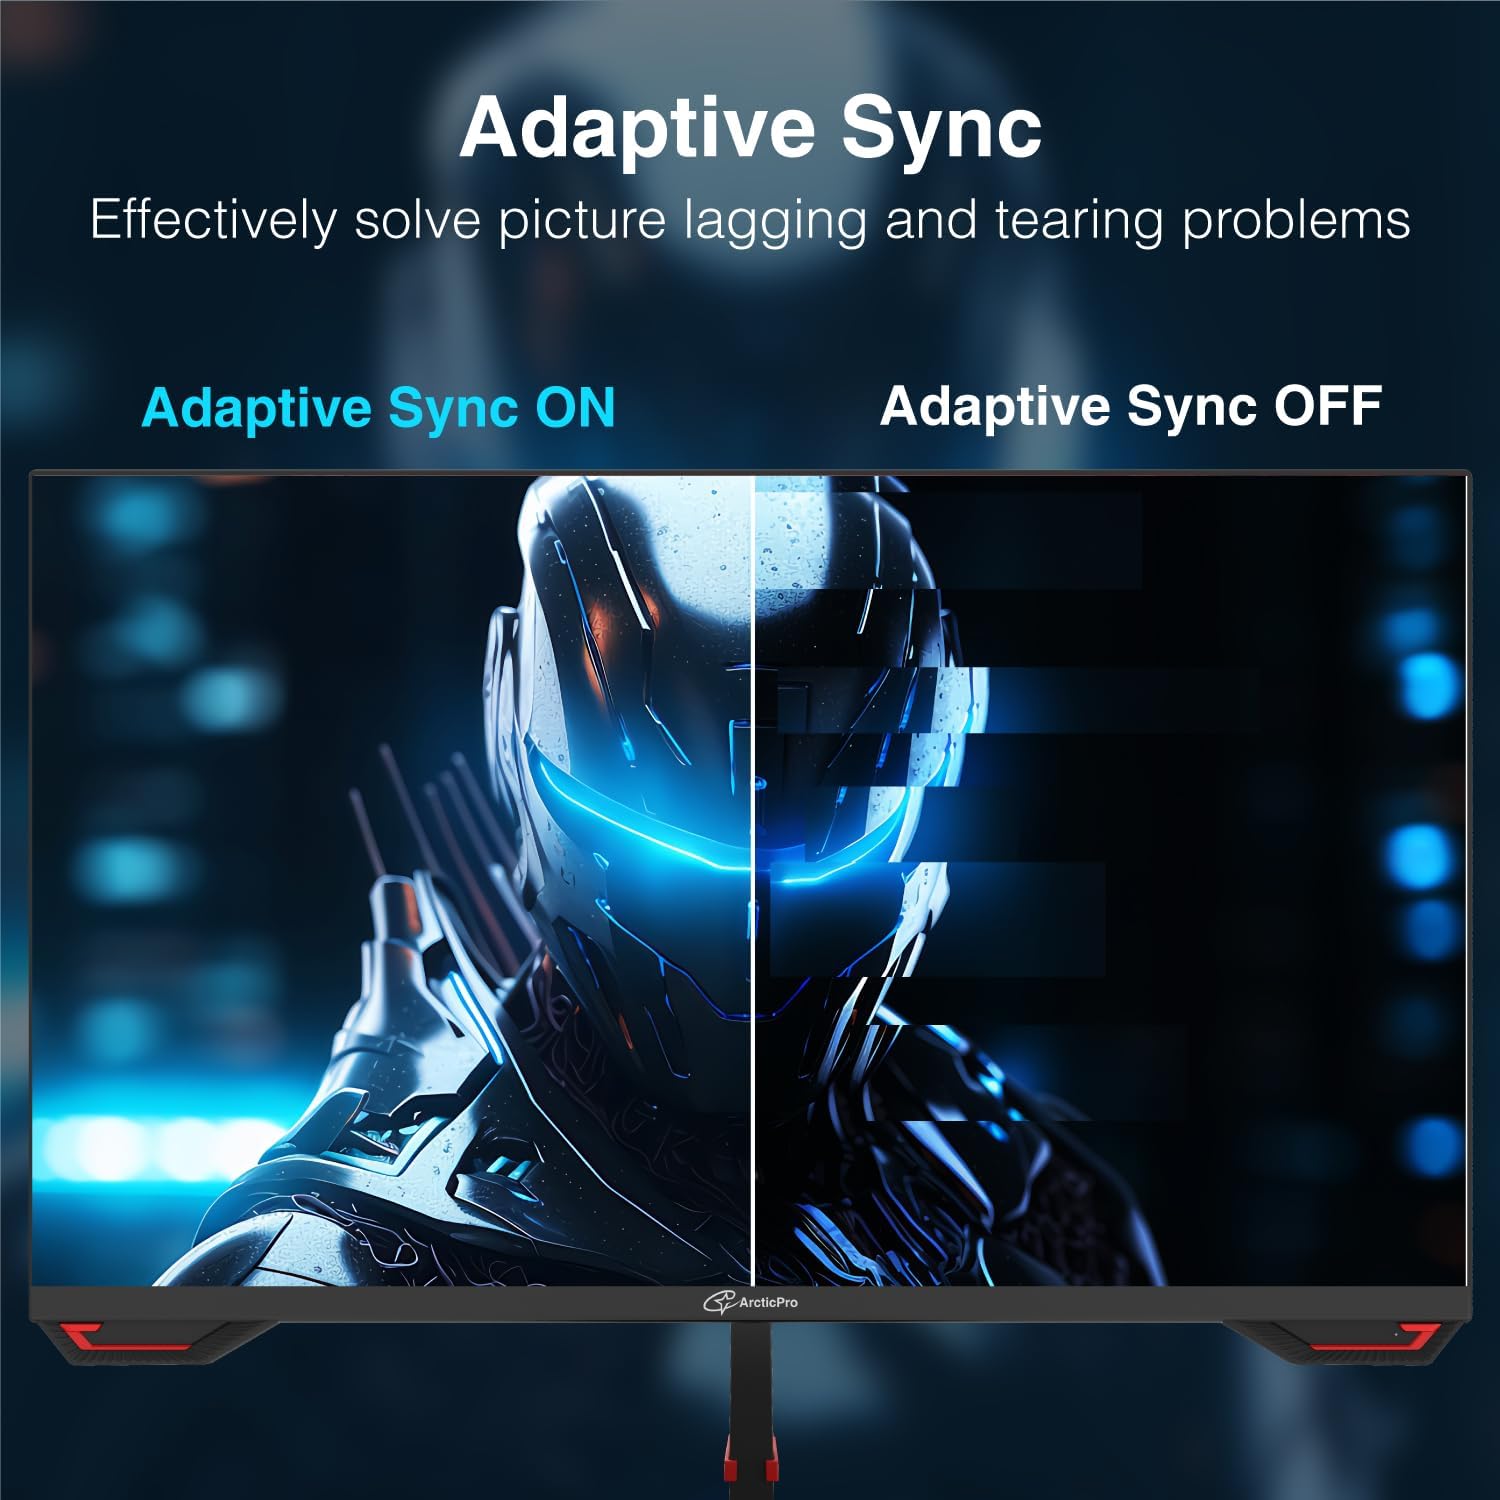
Figure 5: Comparison showing the effect of Adaptive Sync being enabled versus disabled, illustrating how it prevents screen tearing.
- IPS Panel with Wide Color Gamut (125% sRGB): Offers wide viewing angles (178° horizontal & vertical) and accurate color reproduction, meeting professional demands for image texture.

Figure 6: Image illustrating the benefits of an IPS panel with wide color gamut, showing consistent colors from various viewing angles.
- Low Blue Light & Flicker-Free Technology: Designed to reduce eye strain during extended use by minimizing harmful blue light emissions and screen flickering.

Figure 7: Visual representation of Flicker-Free Technology and Low Blue Light, showing a clear image without visible flicker lines.
- 3-Sided Frameless Design: Provides an immersive viewing experience with minimal bezels, ideal for multi-monitor setups.
- Adjustable Tilt Angles: Allows for ergonomic adjustment with -5°±2° to 15°±2° tilt angles.
- VESA Mount Compatible (75x75mm): Supports wall or arm mounting for flexible placement options.
Maintenance
Cleaning the Monitor
- Always power off the monitor and unplug the power cord before cleaning.
- Use a soft, lint-free cloth lightly dampened with water or a non-abrasive screen cleaner.
- Do not spray cleaner directly onto the screen.
- Avoid using alcohol, ammonia, or abrasive cleaners, as they can damage the screen surface.
General Care
- Avoid placing heavy objects on the monitor or its cables.
- Do not expose the monitor to direct sunlight, excessive heat, or extreme cold.
- Keep the monitor away from liquids and excessive dust.
Troubleshooting
| Problem | Possible Cause | Solution |
|---|---|---|
| No image on screen |
|
|
| Image flickering or tearing |
|
|
| Blurred or distorted image |
|
|
| Monitor unexpectedly turns off |
|
|
Specifications
| Feature | Detail |
|---|---|
| Model Number | ADE24F3 |
| Screen Size | 24 Inches |
| Panel Type | IPS |
| Resolution | 1920 x 1080 (FHD 1080p) |
| Refresh Rate | 200Hz |
| Response Time | 1ms (MPRT) |
| Aspect Ratio | 16:9 |
| Color Gamut | 125% sRGB, 90% NTSC |
| Viewing Angles | 178° (Horizontal) / 178° (Vertical) |
| Tilt Angles | -5°±2° / 15°±2° |
| VESA Mount | 75x75mm |
| Connectivity | 1x DisplayPort (DP), 1x HDMI |
| Product Dimensions | 1.59 x 21.23 x 13.37 inches |
| Item Weight | 8.73 pounds |
Warranty and Support
ArcticPro products are designed for reliability and performance. For warranty information, please refer to the warranty card included with your product or visit the official ArcticPro website. For technical support, troubleshooting assistance, or service inquiries, please contact ArcticPro customer support through the contact information provided on the official website or your purchase documentation.
Please retain your proof of purchase for warranty claims.