Cyclysio YHDT-013
Cyclysio YHDT-013 Vanity Desk with Flip Top Mirror and Lights User Manual
Model: YHDT-013
1. Introduction
This manual provides detailed instructions for the assembly, operation, and maintenance of your Cyclysio YHDT-013 Vanity Desk. Please read this manual thoroughly before assembly and use to ensure proper function and safety. The Cyclysio YHDT-013 is a versatile vanity desk featuring a flip-top mirror with integrated LED lighting, ample storage, and a built-in charging station, designed for both beauty routines and as a functional workspace.
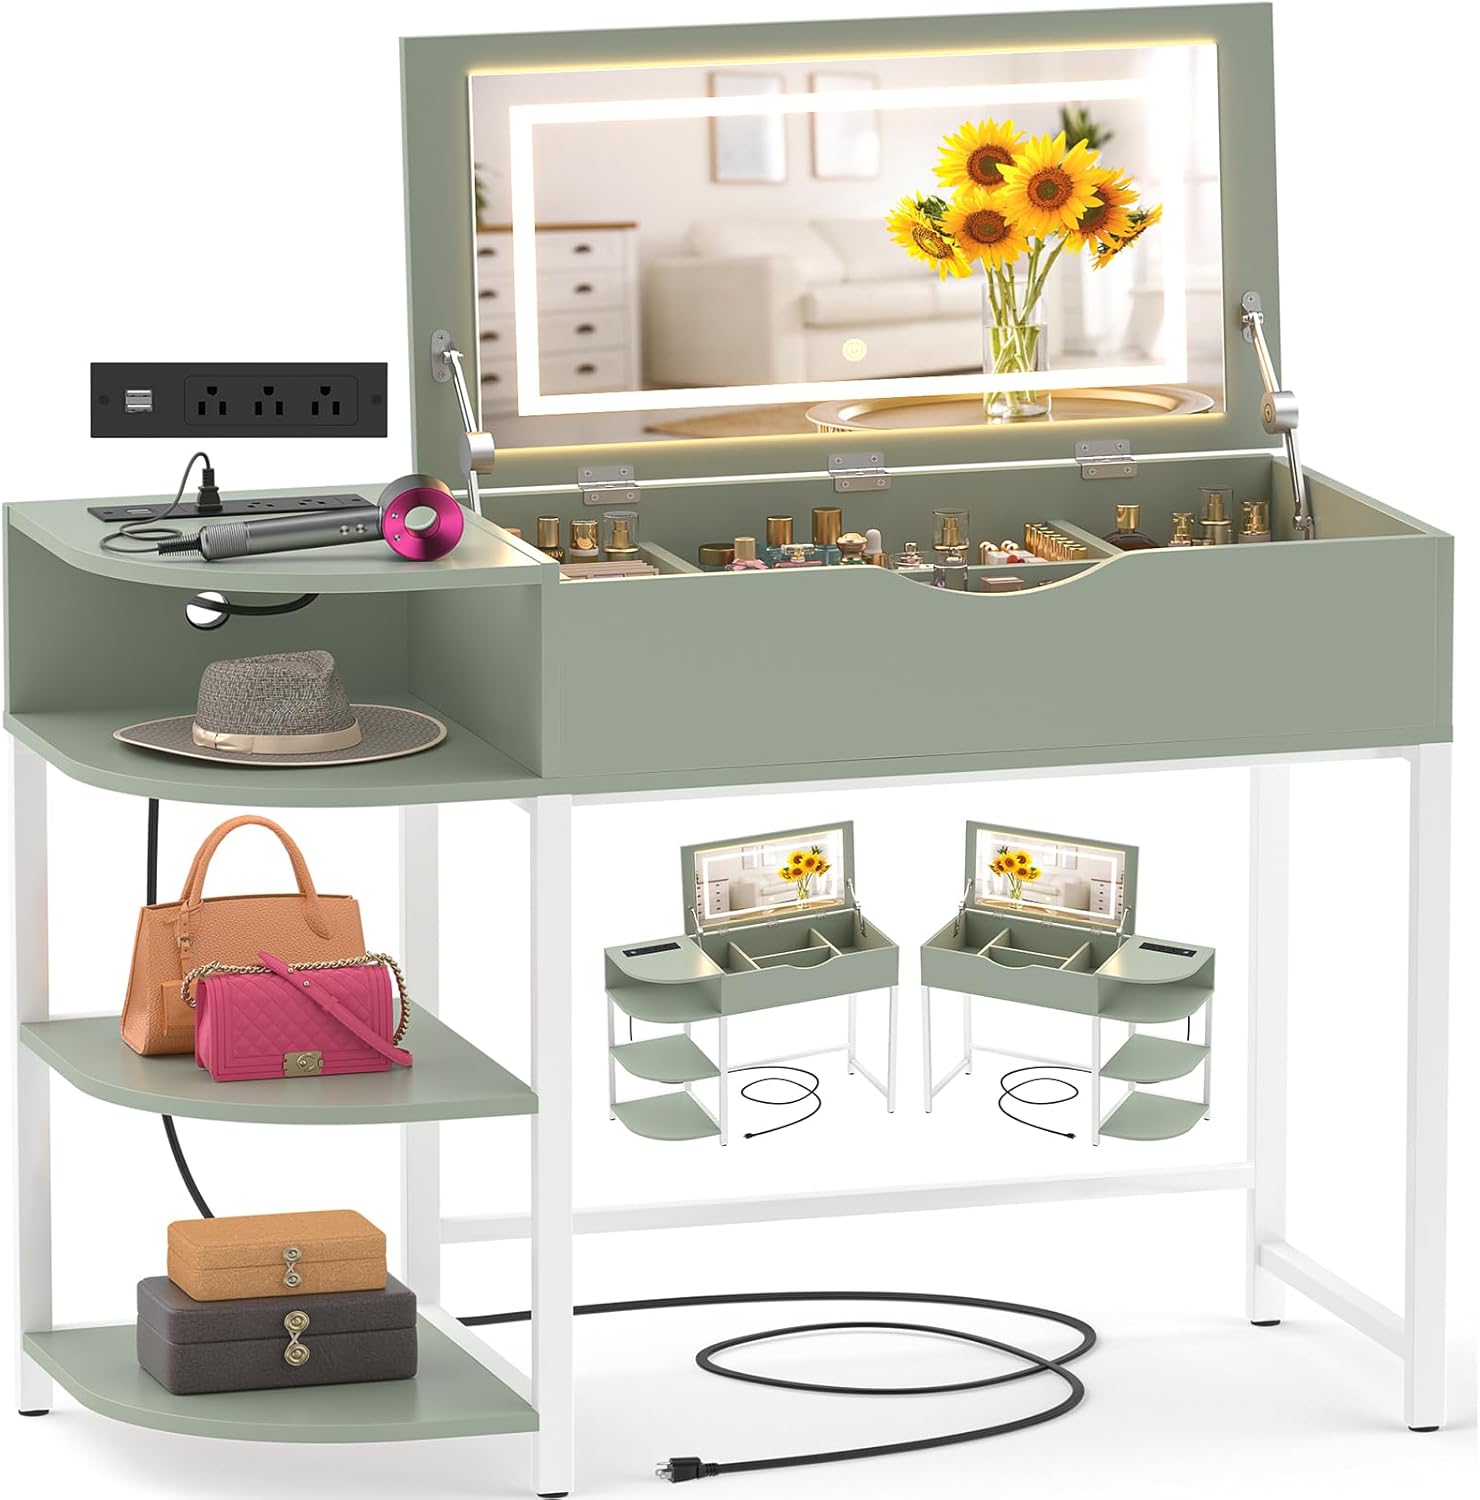
Figure 1: Cyclysio YHDT-013 Vanity Desk (Green)
This image displays the complete Cyclysio YHDT-013 vanity desk in green, showcasing its flip-top mirror, side storage shelves, and integrated charging station.
2. Important Safety Instructions
Please adhere to the following safety guidelines to prevent injury or damage to the product:
- Read all instructions carefully before assembly and use.
- Ensure all parts are present and undamaged before beginning assembly.
- Assemble the unit on a soft, clean surface to prevent scratches.
- Do not overtighten screws during assembly to avoid damaging the material.
- Keep small parts away from children during assembly.
- Only use the provided power cord and charging station for intended electronic devices.
- Avoid exposing the electrical components to water or excessive moisture.
- Do not place excessively heavy items on the desk or shelves.
- Exercise caution when opening and closing the flip-top mirror to prevent pinching.
3. Package Contents
Your Cyclysio YHDT-013 Vanity Desk package includes all necessary components and hardware for assembly. Please refer to the separate detailed instruction manual provided in the box for a complete list of parts and hardware.
4. Assembly Instructions
Assembly of the Cyclysio YHDT-013 Vanity Desk is designed to be straightforward. For efficient and correct assembly, please follow the step-by-step instructions provided in the separate assembly manual. Ensure all parts are correctly oriented before tightening screws.
4.1 Key Assembly Considerations
- Identify all components: Before starting, lay out all parts and compare them with the parts list in your assembly manual.
- Follow sequence: Adhere strictly to the numbered steps in the assembly manual.
- Proper orientation: Pay close attention to the direction of each board and component, especially when attaching the flip-top mirror mechanism and drawer slides.
- Secure connections: Ensure all screws and fasteners are securely tightened, but avoid overtightening.
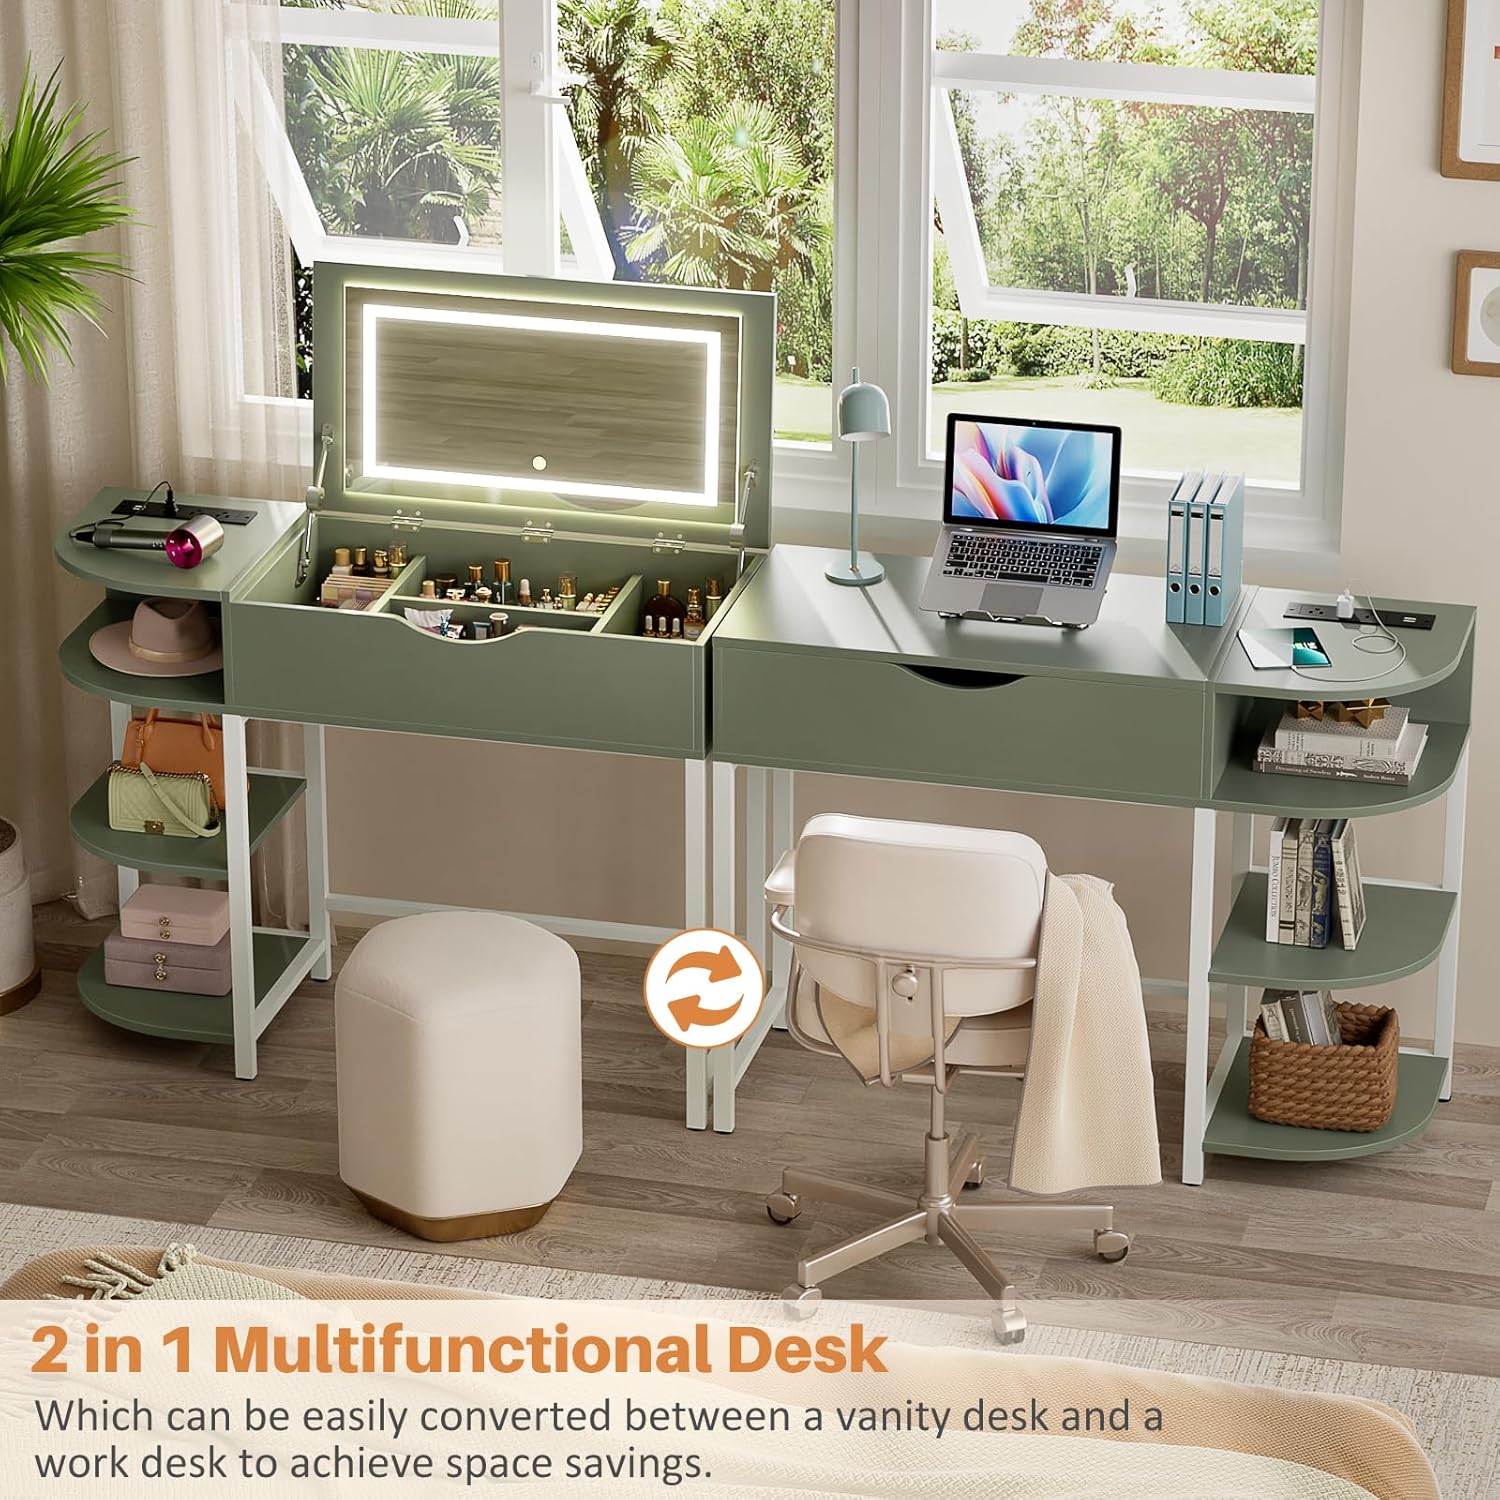
Figure 2: The vanity desk's dual functionality as a makeup vanity and a work desk.
This image illustrates how the Cyclysio vanity desk can be converted between a vanity and a work desk, highlighting its space-saving design.
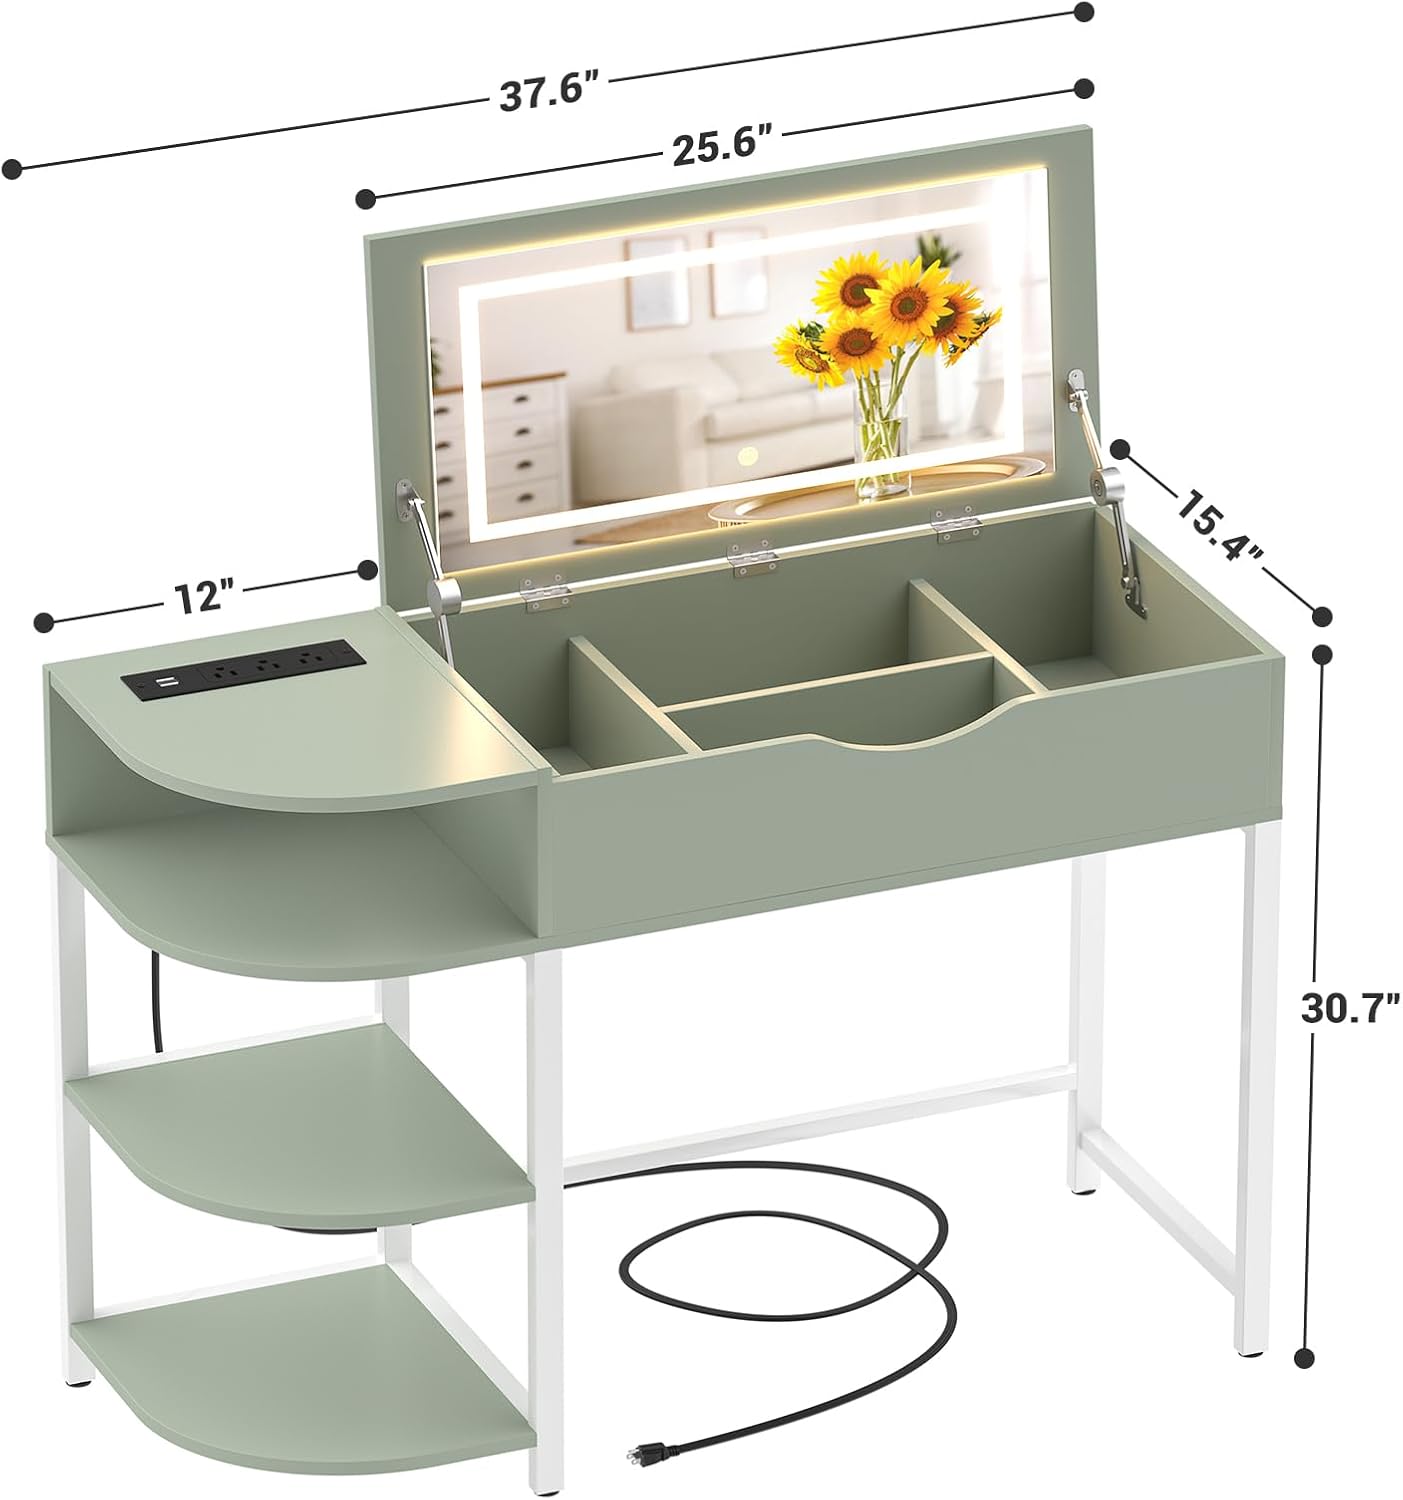
Figure 3: Detailed dimensions of the Cyclysio Vanity Desk.
This diagram provides precise measurements of the vanity desk, including its length, width, and height, crucial for placement and assembly.
5. Operating Instructions
5.1 Flip-Top Mirror and LED Lights
- Opening the Mirror: Gently lift the front edge of the desk top to reveal the mirror. The high-quality metal hinges provide smooth operation.
- Closing the Mirror: Carefully lower the mirror until the lid is flush with the desk surface. The hinges offer a cushioning ability for a soft close.
- Adjusting Light Modes: The mirror features 3 light modes: Cool White, Natural White, and Warm White. Press the touch button on the mirror surface to cycle through these modes.
- Adjusting Brightness: To adjust the brightness, press and hold the touch button on the mirror surface until the desired brightness level is achieved.
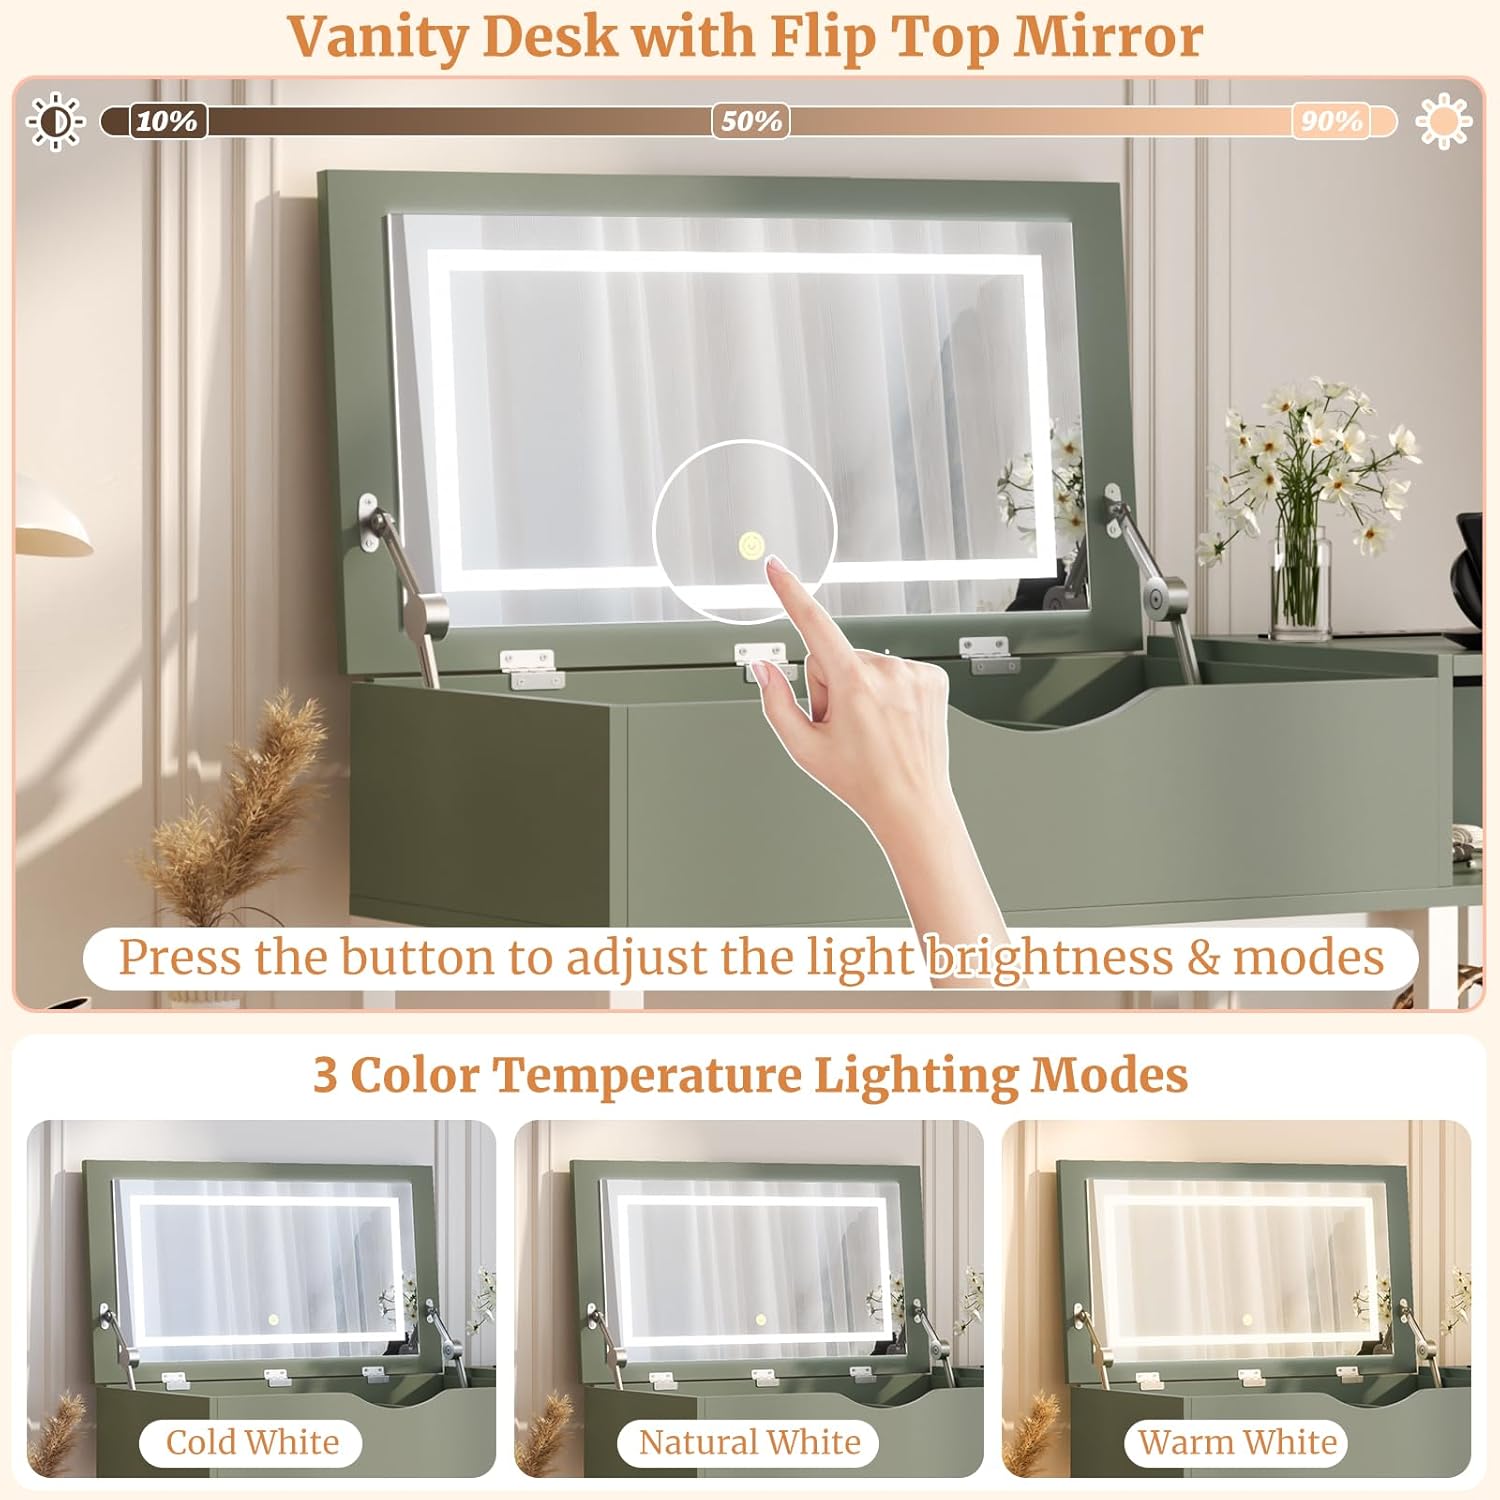
Figure 4: Demonstrating the touch control for mirror light brightness and modes.
This image shows a hand interacting with the touch sensor on the mirror to adjust light settings, with indicators for brightness levels.

Figure 5: The three available color temperature lighting modes.
This graphic illustrates the three distinct lighting options: Cold White, Natural White, and Warm White, available on the vanity mirror.
5.2 Built-in Charging Station
- The charging station is located on the side shelf. It includes 3 standard AC outlets (120V/12A) and 2 USB ports (5V/2A).
- Plug the vanity desk's main power cord into a wall outlet.
- Connect your electronic devices (e.g., curling iron, hair dryer, mobile phone) to the appropriate AC outlets or USB ports.
- Ensure devices are compatible with the provided power specifications.

Figure 6: The integrated charging station with devices connected.
This image shows the charging station on the side of the desk, with a hair dryer and phone plugged into the AC outlets and USB ports.

Figure 7: Details of the built-in charging station.
This graphic highlights the features of the charging station, including 3 AC outlets, 2 USB ports, and the length of the power cord.
5.3 Storage Features
- The main compartment under the flip-top mirror includes dividers for organizing makeup and accessories.
- A drawer is provided for additional storage, featuring an internal divider for better organization.
- Four-tier storage shelves on the side offer space for larger items such as bags, hair dryers, or books.

Figure 8: Overview of the vanity desk's storage capabilities.
This image details the various storage compartments, including the divided sections under the mirror and the multi-tier side shelves, with numbered callouts for different storage areas.
6. Maintenance and Care
- Cleaning the Surface: Wipe the desk surfaces with a soft, damp cloth. Avoid using abrasive cleaners or harsh chemicals, which can damage the finish.
- Mirror Care: Clean the mirror with a glass cleaner and a lint-free cloth. Do not spray cleaner directly onto the mirror to prevent liquid from seeping into the electrical components.
- Electrical Components: Ensure the charging station and mirror lights are unplugged before cleaning. Do not attempt to disassemble or repair electrical parts yourself.
- Regular Checks: Periodically check all screws and connections to ensure they remain tight. Retighten if necessary.
7. Troubleshooting
| Problem | Possible Cause | Solution |
|---|---|---|
| Mirror lights not turning on. | Power cord not fully plugged in; power outlet not active; light switch off; faulty connection. | Ensure the main power cord is securely plugged into a working outlet. Check if the touch button on the mirror is pressed. If issues persist, contact customer support. |
| Charging station (AC outlets/USB ports) not working. | Main power cord unplugged; device not properly connected; device requires more power than available. | Verify the main power cord is connected. Ensure devices are firmly plugged into the charging station. Check device power requirements. |
| Difficulty during assembly. | Incorrect part orientation; missing hardware; unclear instructions. | Carefully review the assembly manual, paying close attention to diagrams and part numbers. Ensure all parts are oriented correctly. If hardware is missing or instructions are unclear, contact customer support. |
| Flip-top mirror does not close smoothly. | Obstruction in the compartment; hinge mechanism issue. | Check for any items obstructing the closing path. Ensure hinges are free of debris. Do not force the lid closed. |
8. Product Specifications
| Feature | Detail |
|---|---|
| Model Number | YHDT-013 |
| Brand | Cyclysio |
| Product Dimensions (L x W x H) | 37.5" x 15.4" x 30.7" (95.25 cm x 39.12 cm x 77.98 cm) |
| Item Weight | 40.9 pounds (18.55 kg) |
| Frame Material | Metal |
| Mirror Type | Flip-top with integrated LED lights |
| LED Light Modes | Cool White, Natural White, Warm White (adjustable brightness) |
| Charging Station | 3 AC Outlets (120V/12A), 2 USB Ports (5V/2A) |
| Power Cord Length | 6.56 feet (2 meters) |
| Storage | 1 drawer with divider, 4-tier side storage shelves, main compartment with dividers |
9. Warranty and Customer Support
Cyclysio products are manufactured with quality and customer satisfaction in mind. For specific warranty details regarding your YHDT-013 Vanity Desk, please refer to the warranty information included with your purchase or contact Cyclysio customer support directly.
If you encounter any issues during assembly or operation, or if you have questions about your product, please do not hesitate to contact the seller, Cyclysio Direct, or visit the official Cyclysio store for assistance.
Cyclysio Store: Visit Cyclysio Store on Amazon
Related Documents - YHDT-013
 |
Cyclysio Headboard Assembly Instruction CS-HD2-P-S_V2.0 Detailed assembly instructions for the Cyclysio Headboard model CS-HD2-P-S_V2.0. Includes a comprehensive parts list, hardware list, step-by-step guides for different installation options (A/B and C/D), and instructions for attaching a bed frame adapter. Features LED lighting and a charging station. |
 |
17 Stories Computer Desk Assembly Instructions Comprehensive assembly guide for the 17 Stories Computer Desk (Model P78 X-013), featuring a hutch, storage, and LED lighting. Includes a detailed parts list, step-by-step instructions, and important safety and installation notes. |
 |
Furologee L-Shaped Desk with File Drawer and 2 Monitor Stands User Manual User manual for the Furologee L-Shaped Desk, providing assembly instructions, parts list, and troubleshooting tips for the computer desk with a file drawer and two monitor stands. |
 |
Anko Travel Mirror Instruction Manual Instruction manual for the Anko Travel Mirror, detailing back seat and front seat headrest positioning, care instructions, and important safety precautions. |
 |
Furologee L-Shaped Desk with File Drawer and 2 Monitor Stands User Manual User manual for the Furologee L-Shaped Desk, providing installation instructions for two methods, parts list, and troubleshooting tips for assembly and product issues. |
Ask a question about this manual
Ask about setup, troubleshooting, compatibility, parts, safety, or missing instructions. Manuals+ will review the question and use this page’s manual context to help answer it.