1. Introduction
This manual provides essential instructions for operating your KOMERY G7A 4K Digital Camera. Designed for ease of use, this compact camera offers 4K video recording and 64-megapixel still photography, making it suitable for beginners and enthusiasts alike. Key features include autofocus, 18X digital zoom, a 2.8-inch IPS HD screen, and various creative modes.

Figure 1: Front view of the KOMERY G7A 4K Digital Camera.
2. What's in the Box
Verify that all items are present in your product packaging:
- 1x KOMERY G7A Digital Camera
- 2x Rechargeable Batteries (750mAh)
- 1x 32GB SD Card (pre-installed or separate)
- 1x USB-C Cable
- 1x Storage Bag
- 1x User Manual (this document)

Figure 2: Included accessories with the KOMERY G7A Digital Camera.
Video 1: Unboxing and initial overview of a similar digital camera model. This video demonstrates the typical contents and initial handling.
3. Setup
3.1 Battery Installation and Charging
- Open the battery compartment cover located on the bottom of the camera.
- Insert the provided 750mAh rechargeable battery, ensuring correct polarity.
- Close the battery compartment cover securely.
- Connect the camera to a USB power source using the supplied USB-C cable for charging. The charging indicator light will illuminate.

Figure 3: Correct battery insertion into the camera.
3.2 SD Card Insertion
- Locate the SD card slot, usually near the battery compartment or on the side.
- Insert the 32GB SD card with the metal contacts facing the correct direction until it clicks into place.
- To remove, gently push the card until it springs out.
3.3 Initial Power On
Press and hold the power button (usually on the top) for a few seconds until the screen illuminates and displays "Welcome".
4. Operating Instructions
4.1 Basic Photography
- Power On: Press and hold the power button.
- Focus: Half-press the shutter button to activate autofocus. The focus frame will turn green when focused.
- Capture Photo: Fully press the shutter button to take a picture.
- Zoom: Use the 'W' (Wide) and 'T' (Telephoto) buttons to zoom in and out. The camera supports 18X digital zoom.
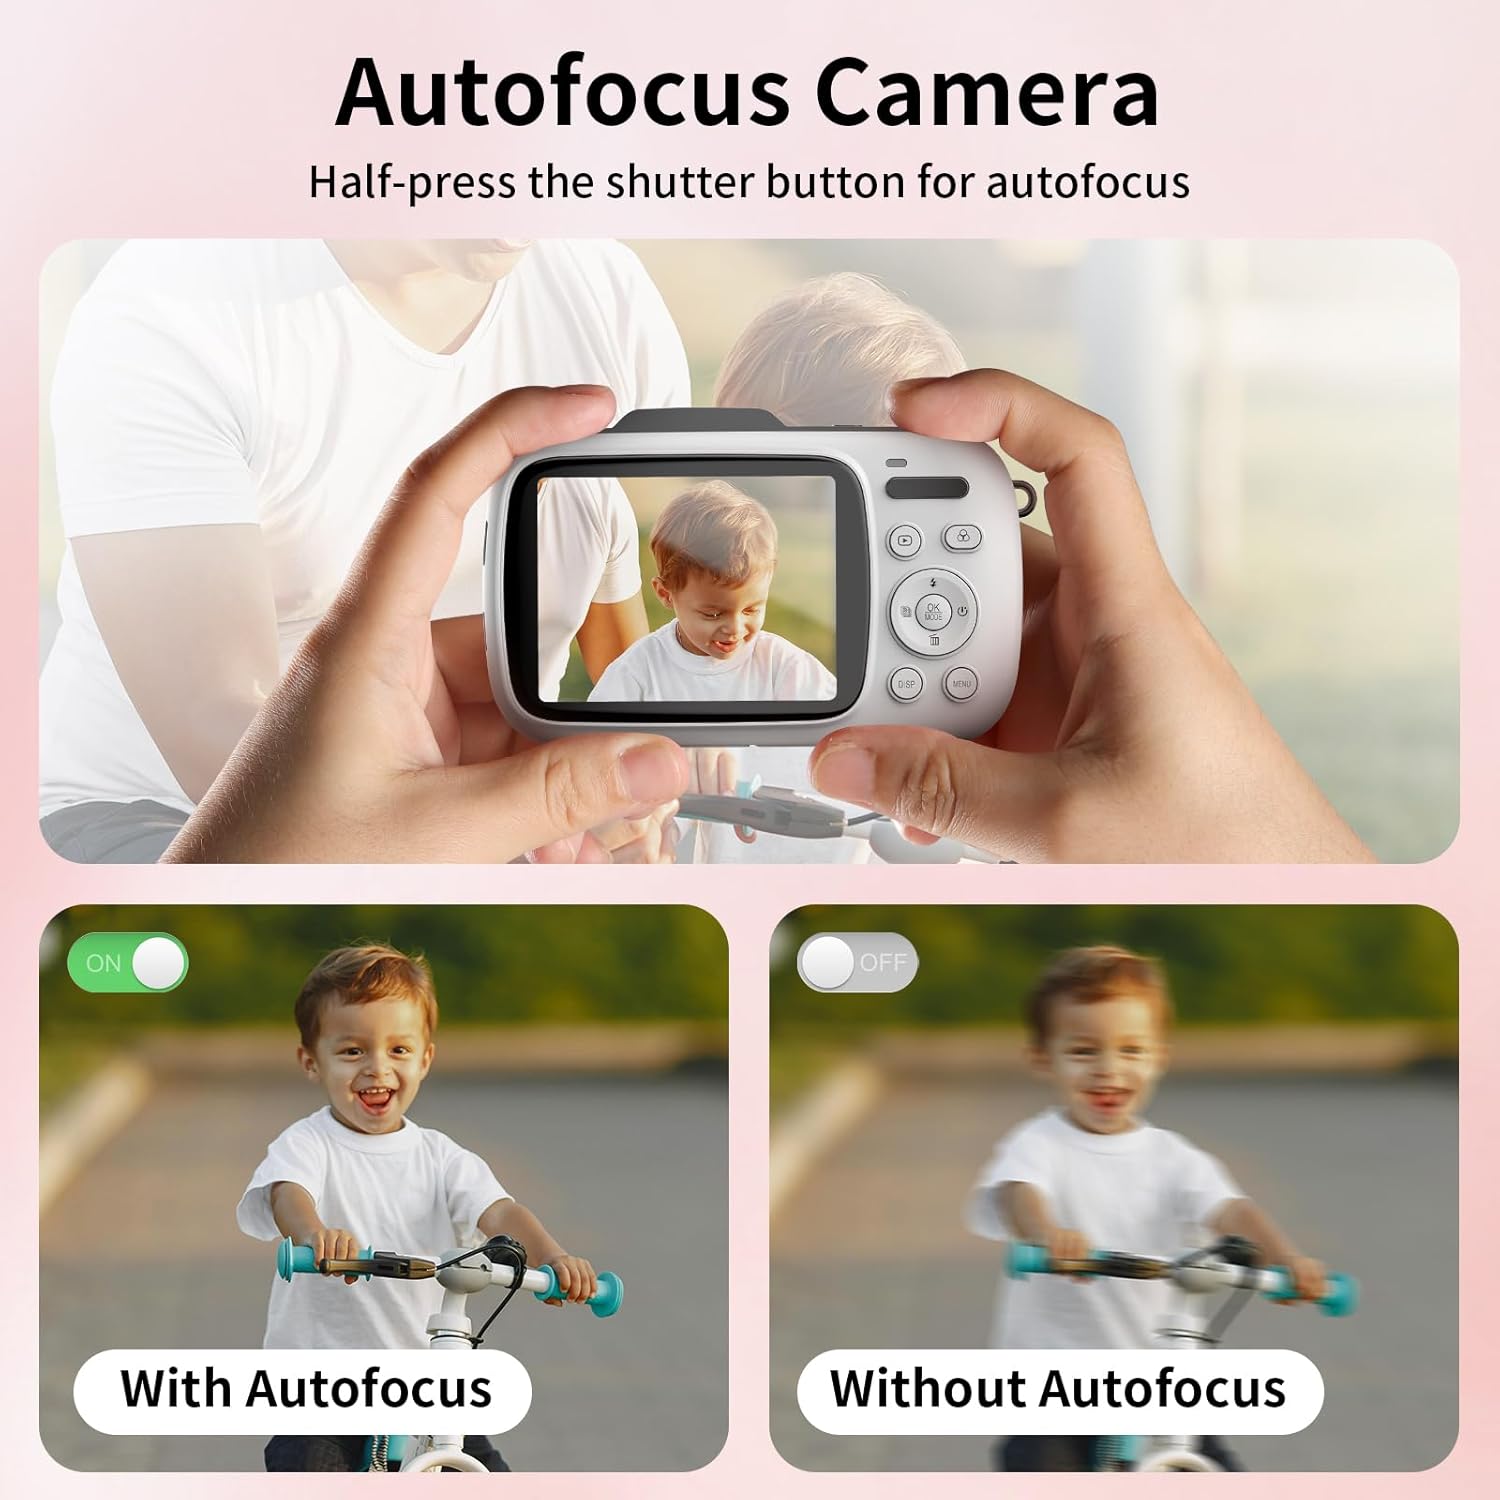
Figure 4: Demonstrating the autofocus feature for clear images.
4.2 Video Recording
- Switch to Video Mode: Press the 'M' (Mode) button until the video icon is selected on the screen.
- Start Recording: Press the shutter button to begin recording. A timer will appear on the screen.
- Stop Recording: Press the shutter button again to stop recording.
Video 2: Demonstration of camera functions including photo and video modes, zoom, and menu navigation.
4.3 Menu Navigation and Settings
- Access Menu: Press the 'MENU' button to enter the settings menu.
- Navigate: Use the directional buttons (Up, Down, Left, Right) to scroll through options.
- Select: Press the 'OK' button to select an option.
- Exit Menu: Press the 'MENU' button again to exit.
Adjust settings such as photo resolution (up to 64MP), timed shooting (3/5/10/20S), continuous shooting, loop recording, and various creative filters (20 options available).

Figure 5: Time-lapse camera feature with self-timer options.

Figure 6: Various filter effects and flash functionality.
4.4 Using the Flash and Selfie Mirror
- Flash: The camera features both a pop-up flash and a fill light for low-light conditions. Activate or deactivate through the menu settings.
- Selfie Mirror: A small mirror is located on the front of the camera next to the lens, allowing for easy self-portraits.
4.5 Webcam Functionality
Connect the camera to a computer using the USB-C cable. Select "Webcam Mode" from the options that appear on the camera screen. This allows the camera to function as a webcam for video calls, live streaming, or online teaching.
5. Maintenance
- Cleaning: Use a soft, dry cloth to clean the camera body. For the lens, use a specialized lens cleaning cloth and solution. Avoid abrasive materials.
- Battery Care: Store batteries in a cool, dry place. Do not expose to extreme temperatures. Charge fully before extended storage.
- Storage: When not in use, store the camera in its provided storage bag to protect it from dust and scratches.
6. Troubleshooting
| Problem | Solution |
|---|---|
| Camera does not power on. | Ensure the battery is correctly inserted and fully charged. Try using the spare battery. |
| Pictures are blurry. | Ensure autofocus is engaged (half-press shutter). Check for sufficient lighting. Clean the lens if smudged. |
| SD card error. | Reinsert the SD card. Format the SD card via the camera's menu (this will erase all data). Ensure the card is not locked. |
| Cannot connect to computer. | Ensure the USB-C cable is securely connected. Select the correct USB mode (e.g., "Mass Storage" or "Webcam") on the camera. |
7. Specifications
| Feature | Detail |
|---|---|
| Model Name | G7A 4K Digital Cameras |
| Photo Sensor Resolution | 64 MP |
| Video Resolution | 4K (2160p) |
| Digital Zoom | 18x |
| Screen Size | 2.8 inches (LCD) |
| Autofocus | Yes (Hybrid) |
| Image Stabilization | Digital |
| Battery Type | Lithium Polymer (750mAh) |
| Memory Storage Capacity | 32 GB (SD Card included) |
| Connectivity Technology | USB |
| Item Weight | 4.96 ounces |
8. Warranty and Support
Your KOMERY G7A Digital Camera is covered by a 1-Year Manufacturer's Warranty. For warranty claims, technical support, or any inquiries, please refer to the contact information provided in your product packaging or visit the official KOMERY website.


