Introduction
The AIDNTBEO TM922 is a versatile 2-channel digital timer designed for DIN rail mounting. It features a large LCD display for easy readability and programming, offering precise control over two separate devices or systems simultaneously. This timer is ideal for various applications requiring automated scheduling and reliable timing.
Safety Information
Please read and understand all safety instructions before installation and operation. Failure to follow these instructions may result in electric shock, fire, or serious injury.
- Always disconnect power before installing or servicing the device.
- Installation should be performed by a qualified electrician in accordance with all local and national electrical codes.
- Do not expose the device to moisture or extreme temperatures.
- Ensure proper grounding.
- Do not exceed the specified voltage and current ratings.
Product Overview
The TM922 timer is designed for easy integration into control panels. Below are key components and views of the device.
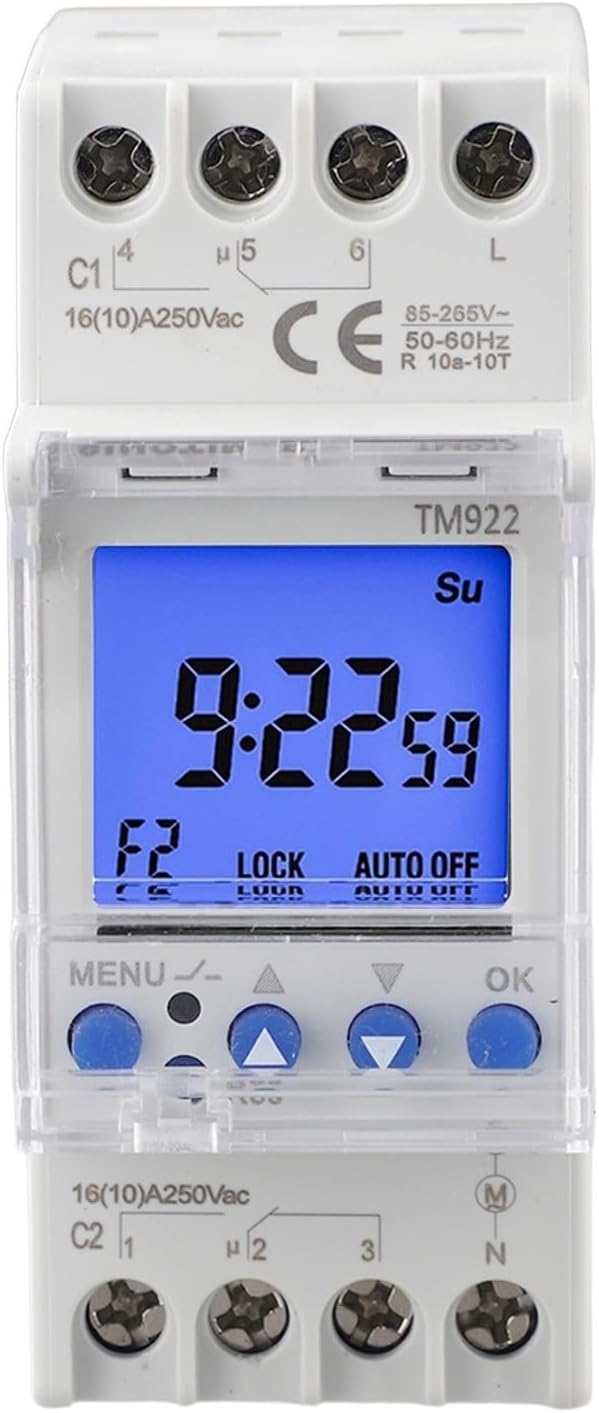
Figure 1: Front view of the TM922 timer, showing the large LCD display, "MENU", "OK", and navigation buttons, along with input/output terminals C1 and C2.
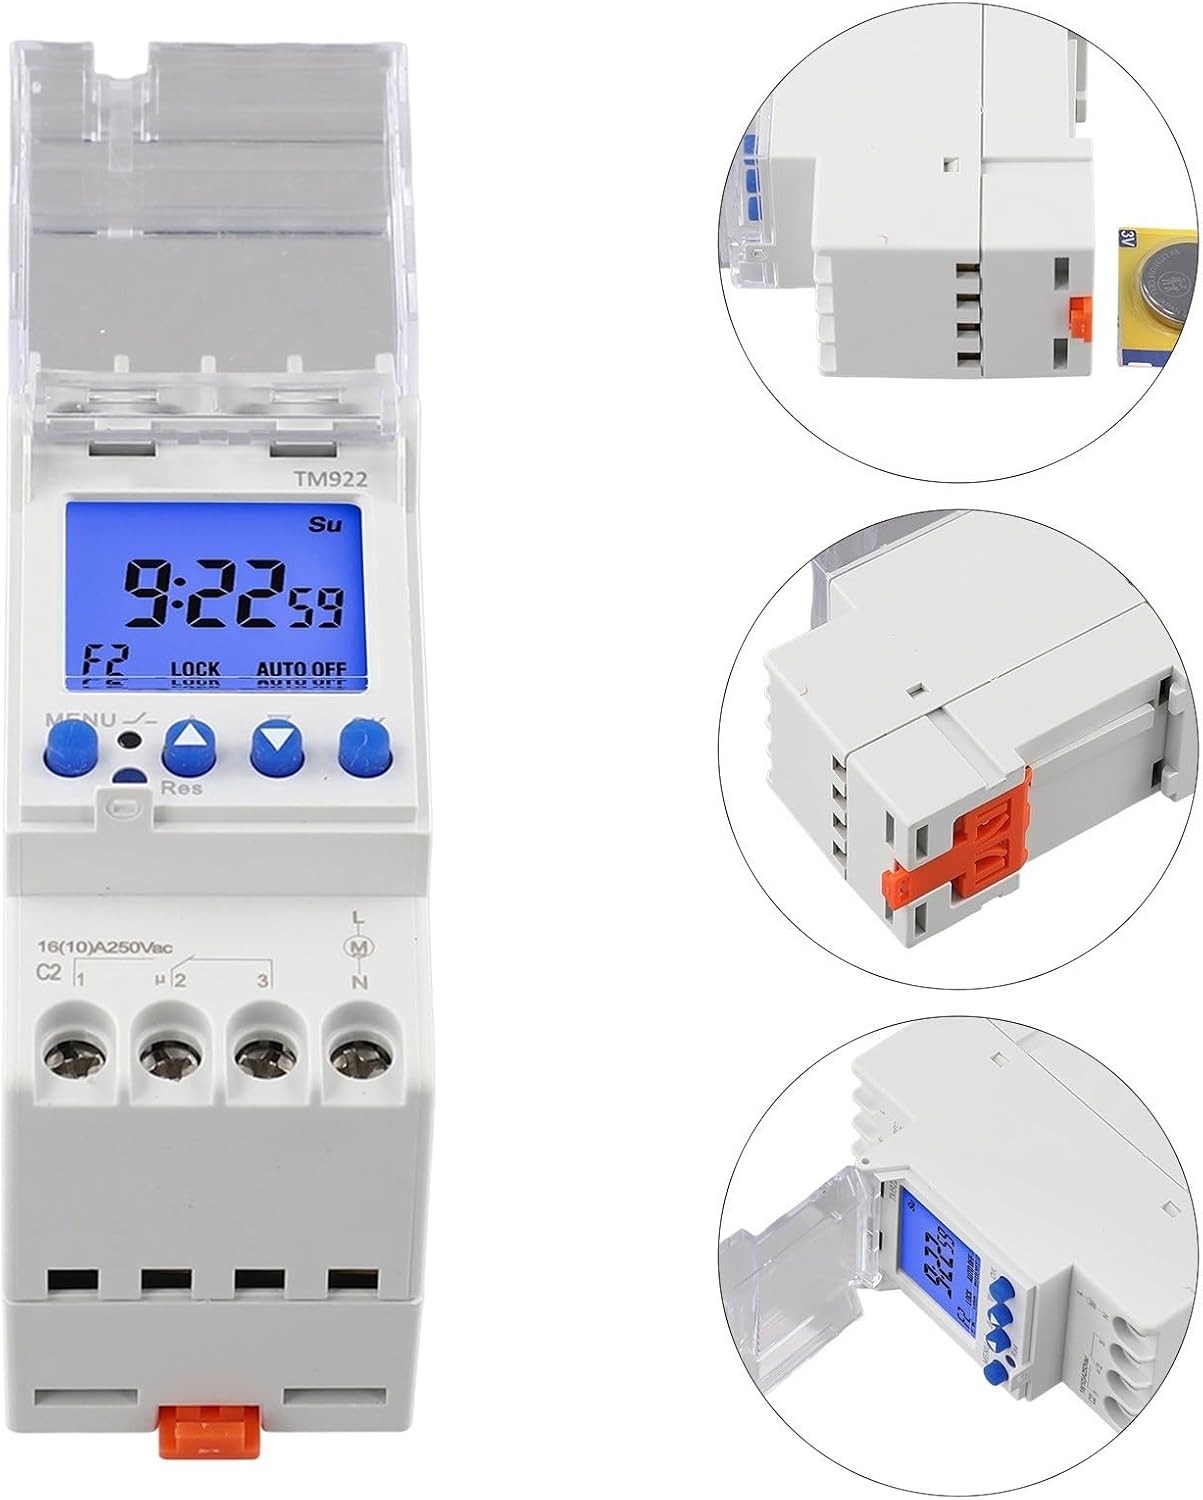
Figure 2: Exploded view illustrating the internal structure and the orange DIN rail mounting clip at the bottom.
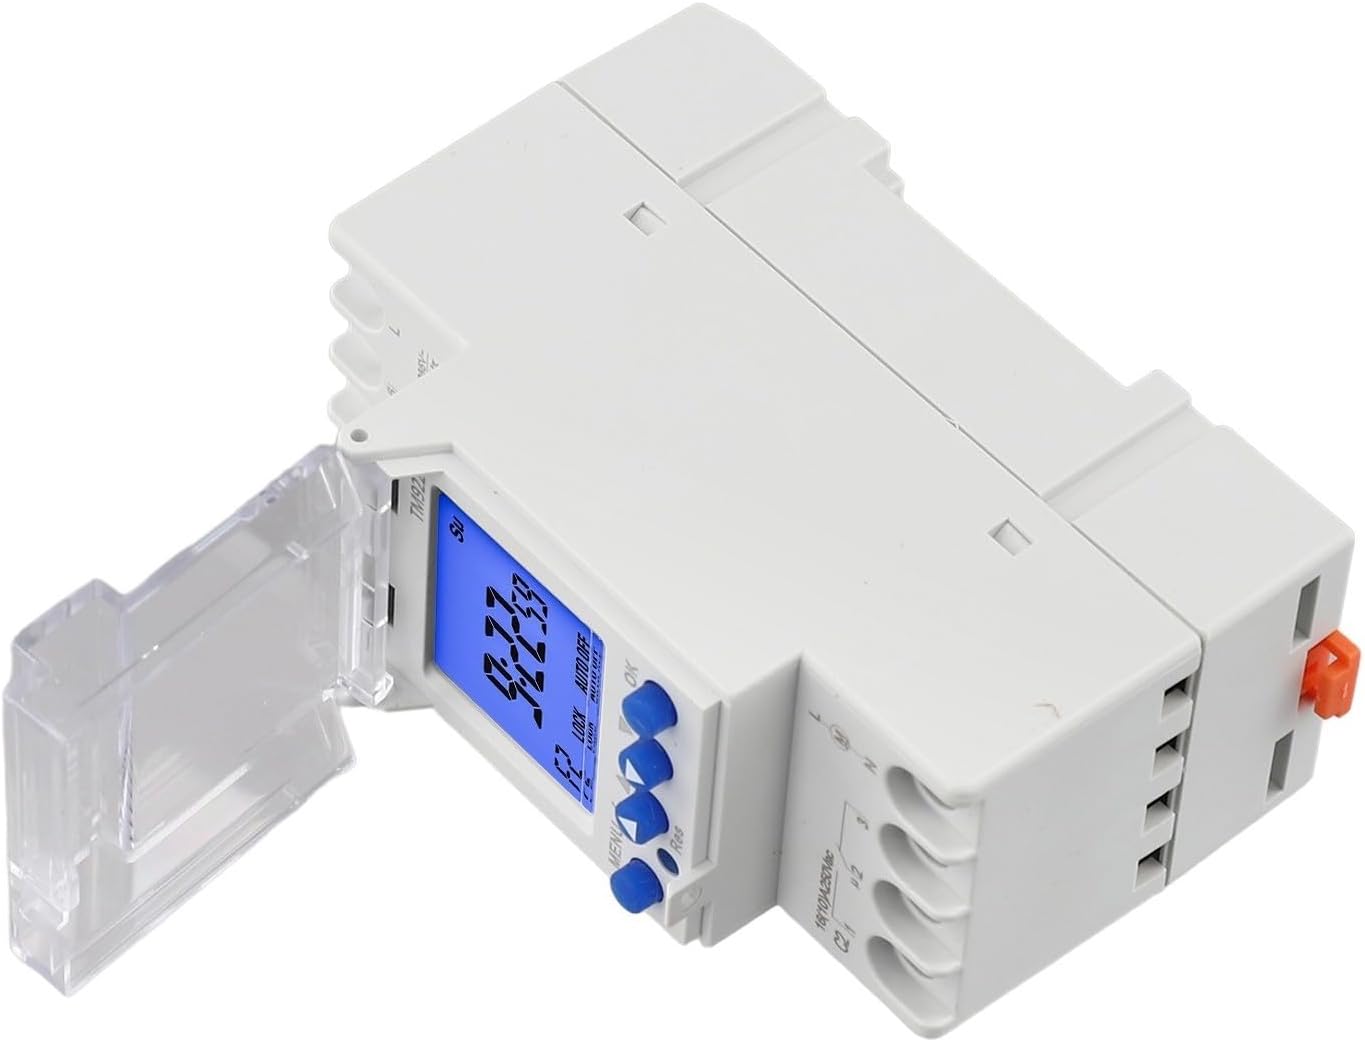
Figure 3: Side view of the TM922 timer, highlighting its compact form factor suitable for DIN rail installations.
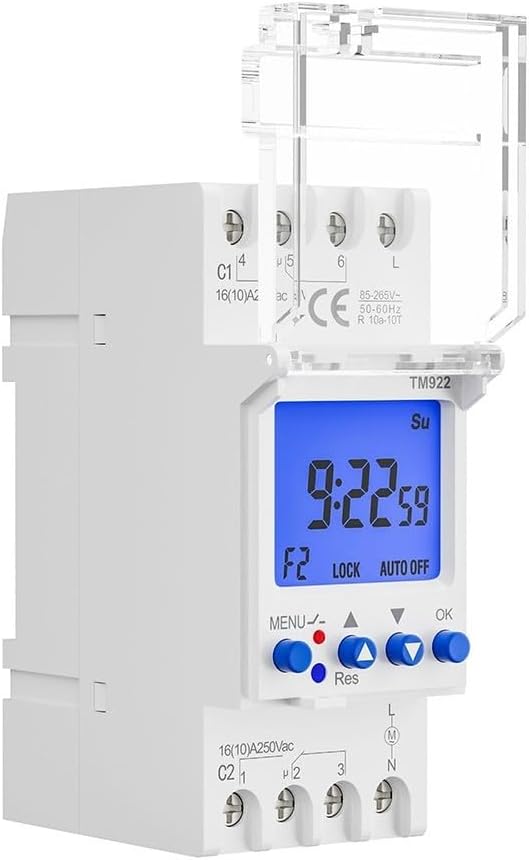
Figure 4: Rear view of the TM922 timer, displaying the integrated DIN rail mounting clip for secure installation.
Specifications
| Feature | Detail |
|---|---|
| Product Name | 2 channel large LCD display programmable 24 hour time clock with two relay |
| Model Number | TM922 |
| Power Supply | 85~265VAC 50/60Hz |
| Material | ABS |
| Color | White |
| Product Dimensions | 8.5 x 3.5 x 6.5 CM (3.35 x 1.38 x 2.56 inches) |
| Item Weight | 6 ounces |
| Relay Outputs | Two independent relay outputs |
| Display | Large LCD Display |
| Mounting Type | DIN Rail Mounted |
Setup and Installation
The TM922 timer is designed for easy installation on a standard DIN rail. Follow these steps for proper setup:
- Mounting:
- Ensure power is disconnected from the circuit where the timer will be installed.
- Locate a suitable DIN rail within your control panel or equipment rack.
- Align the timer's integrated DIN rail clip with the rail and press firmly until it clicks into place.
- Verify that the timer is securely fastened to the rail.
- Wiring:
- Refer to the wiring diagram provided on the device or in the packaging (if available).
- Connect the power supply (85-265VAC, 50/60Hz) to the designated input terminals (L and N).
- Connect your two controlled devices to the respective relay output terminals (C1 and C2). Each relay typically has common, normally open (NO), and normally closed (NC) contacts. Ensure correct connections based on your application's requirements.
- Use appropriate wire gauges for all connections to prevent overheating and ensure safe operation.
- Double-check all connections for tightness and correctness before restoring power.
- Initial Power-Up:
- Once wiring is complete and verified, restore power to the circuit.
- The LCD display should illuminate, indicating the timer is powered on.
- The timer may require initial time and date setting upon first power-up or after a power outage.
Operating Instructions
The TM922 timer allows for flexible programming of ON/OFF schedules for its two independent relay channels. While specific button functions may vary slightly, the general programming flow involves setting the current time, then defining program schedules.
Setting Current Time and Day
- Press the MENU button to enter the main menu or time setting mode.
- Use the Up (▲) and Down (▼) buttons to adjust the hour, minute, and day of the week.
- Press OK or MENU again to confirm each setting and move to the next.
- Once all time and day settings are complete, the timer will return to the main display.
Programming ON/OFF Schedules
The TM922 supports multiple ON/OFF programs. Each program can be set for specific days of the week or for daily repetition.
- Press the MENU button repeatedly until you reach the "Program" or "P" setting mode.
- The display will show "1 ON" (Program 1 ON time). Use the Up (▲) and Down (▼) buttons to set the desired ON time (hour and minute).
- Press OK to confirm.
- Next, the display will show "1 OFF" (Program 1 OFF time). Set the desired OFF time using the Up (▲) and Down (▼) buttons.
- Press OK to confirm.
- You will then be prompted to select the days of the week for this program. Use the Up (▲) and Down (▼) buttons to cycle through options like "Mon-Sun", "Mon-Fri", "Sat-Sun", or individual days. Press OK to select.
- Repeat steps 2-6 for additional programs (e.g., "2 ON", "2 OFF", etc.) as needed for both channels.
- To exit programming mode and save settings, press the MENU button until the current time is displayed.
Manual Override
The timer typically includes a manual override function to temporarily switch the output ON or OFF without affecting the programmed schedules. Look for a button labeled "MANUAL", "ON/OFF", or similar. Pressing this button usually cycles through "ON", "OFF", and "AUTO" modes.
- AUTO: The timer operates according to the programmed schedules.
- ON: The output is continuously ON, overriding schedules.
- OFF: The output is continuously OFF, overriding schedules.
Maintenance
The TM922 timer requires minimal maintenance to ensure long-term reliable operation.
- Cleaning: Periodically wipe the exterior of the timer with a soft, dry cloth. Do not use abrasive cleaners or solvents.
- Battery Backup: The timer likely contains an internal battery for retaining settings during power outages. If the display becomes dim or settings are lost frequently after power interruptions, the internal battery may need replacement. This typically requires professional service.
- Inspection: Regularly inspect wiring connections for any signs of loosening or damage.
Troubleshooting
If you encounter issues with your TM922 timer, refer to the following common troubleshooting steps:
- Timer Display is Blank:
- Check if the power supply is connected correctly and receiving voltage (85-265VAC).
- Ensure the circuit breaker or fuse supplying power to the timer is not tripped or blown.
- The internal battery might be completely drained. Allow some time for it to charge after power is restored.
- Timer Not Switching ON/OFF at Programmed Times:
- Verify that the current time and day are set correctly on the timer.
- Check if the timer is in "AUTO" mode and not in "ON" or "OFF" manual override mode.
- Review your programmed schedules carefully for any errors in ON/OFF times or selected days.
- Ensure the connected load is functioning correctly and its wiring to the timer's output terminals is secure.
- Settings are Lost After Power Outage:
- This indicates that the internal backup battery may be weak or depleted. While the timer will function when powered, it will lose settings during power interruptions. Consider professional service for battery replacement if this is a persistent issue.
Warranty and Support
For warranty information or technical support, please contact AIDNTBEO customer service through the retailer where the product was purchased. Keep your purchase receipt as proof of purchase.
For further assistance, you may visit the manufacturer's website or contact their support channels directly. Please have your model number (TM922) and serial number (if applicable) ready when contacting support.