1. Introduction
This manual provides instructions for the setup, operation, and maintenance of your TXGJWRA Wireless Weather Station. This device offers comprehensive weather monitoring, including indoor and outdoor temperature and humidity, a 12-24 hour weather forecast, and a DCF radio-controlled clock with alarm and snooze functions. Please read this manual thoroughly before using the product to ensure correct operation and to maximize its lifespan.

Image 1.1: Main unit displaying time, indoor/outdoor temperature and humidity, and weather forecast icons.
2. Product Features
- DCF Radio Controlled Time: Automatic time synchronization for accuracy.
- Multi-Channel Support: Supports up to 3 RF channels for outdoor sensors (one sensor included).
- Time Functions: Calendar, alarm, and snooze function. Time display in 12/24H format.
- Temperature Tendency: Displays temperature trends with arrows.
- Multi-Language Weekdays: Weekdays available in 7 languages: German, English, French, Italian, Spanish, Dutch, Danish.
- Weather Forecast: Provides a forecast for the next 12-24 hours.
- Indoor/Outdoor Monitoring: Measures indoor and outdoor humidity and temperature (Celsius/Fahrenheit).
- Max/Min Records: Records maximum and minimum indoor/outdoor temperature and humidity.
- Comfort Level Indicator: Displays comfort levels (dry/comfortable/wet).
- Illuminated Display: White backlight for 20 seconds, activated by touch.
- Touch Buttons: Four touch-sensitive buttons for easy settings adjustment.

Image 2.1: Overview of the multifunction weather station's capabilities.
3. Package Contents
Verify that all items are present in the package:
- 1 x Weather Station Main Unit
- 1 x Remote Sensor
- 1 x User Manual (this document)
4. Setup
4.1 Battery Installation
- Main Unit: Open the battery compartment on the back of the main unit. Insert 3 x AAA 1.5V alkaline batteries, ensuring correct polarity (+/-). Close the compartment.
- Remote Sensor: Open the battery compartment on the back of the remote sensor. Insert 2 x AA 1.5V alkaline batteries, ensuring correct polarity (+/-). Close the compartment.
Note:
- Alkaline batteries are recommended for optimal performance. Avoid using high-performance or rechargeable batteries.
- Ensure batteries are inserted correctly to prevent damage to the device.
4.2 Remote Sensor Placement
Proper placement of the remote sensor is crucial for accurate readings and reliable wireless transmission.
- Mount the sensor vertically.
- Position the sensor at a height of 2 to 2.5 meters (approximately 6.5 to 8.2 feet) above the ground.
- Place the sensor away from direct sunlight to prevent inaccurate temperature readings.
- Avoid placing the sensor near heat sources (e.g., exhaust vents, heating units) or ventilation openings.
- Ensure the sensor is not placed near wireless devices that could interfere with wireless transmission (e.g., routers, TVs, microwaves, computers). The barrier-free transmission range is up to 80 meters.
4.3 Initial Setup and DCF Signal Reception
After battery installation, the main unit will power on and attempt to receive the DCF radio signal for automatic time synchronization.
- For the first use, place the main unit near a window to ensure better reception of the DCF signal.
- The time and calendar will update automatically once the signal is successfully received. This process may take several minutes.
- The main unit and remote sensor will automatically attempt to establish a connection. Ensure they are within range of each other.

Image 4.1: DCF signal reception and sensor communication.
5. Operating Instructions
5.1 Display Overview and Touch Buttons
The clear LCD display shows current time, indoor/outdoor temperature and humidity, weather forecast, and comfort level. The device features four touch-sensitive buttons for easy navigation and settings adjustment.

Image 5.1: Touch buttons for channel selection, RCC settings, memory, and alarm.
5.2 Time and Date Settings
The weather station automatically updates time and calendar via the DCF signal. If manual adjustment is required or the signal is not available:
- Press and hold the "RCC SET" touch button to enter time setting mode.
- Use the "CH" and "MEM" touch buttons to adjust values (e.g., hour, minute, year, month, day).
- Press "RCC SET" again to confirm each setting and move to the next.
- Select 12/24H format as desired.
- Choose your preferred weekday language from the 7 available options.
5.3 Alarm and Snooze Function
The device can function as an alarm clock with a snooze feature.
- To set the alarm, press the Alarm icon touch button to cycle through alarm settings.
- Use the "CH" and "MEM" touch buttons to adjust the alarm time.
- Press the Alarm icon again to confirm.
- When the alarm sounds, press any button (except the alarm icon) to activate the 5-minute snooze function.
- To stop the alarm, press the Alarm icon button.

Image 5.2: Alarm and 5-minute snooze function.
5.4 Backlight Activation
The white backlight improves visibility in low-light conditions.
- Press the top button (usually the snooze/light button) to activate the white backlight.
- The backlight will remain on for approximately 20 seconds before automatically turning off.
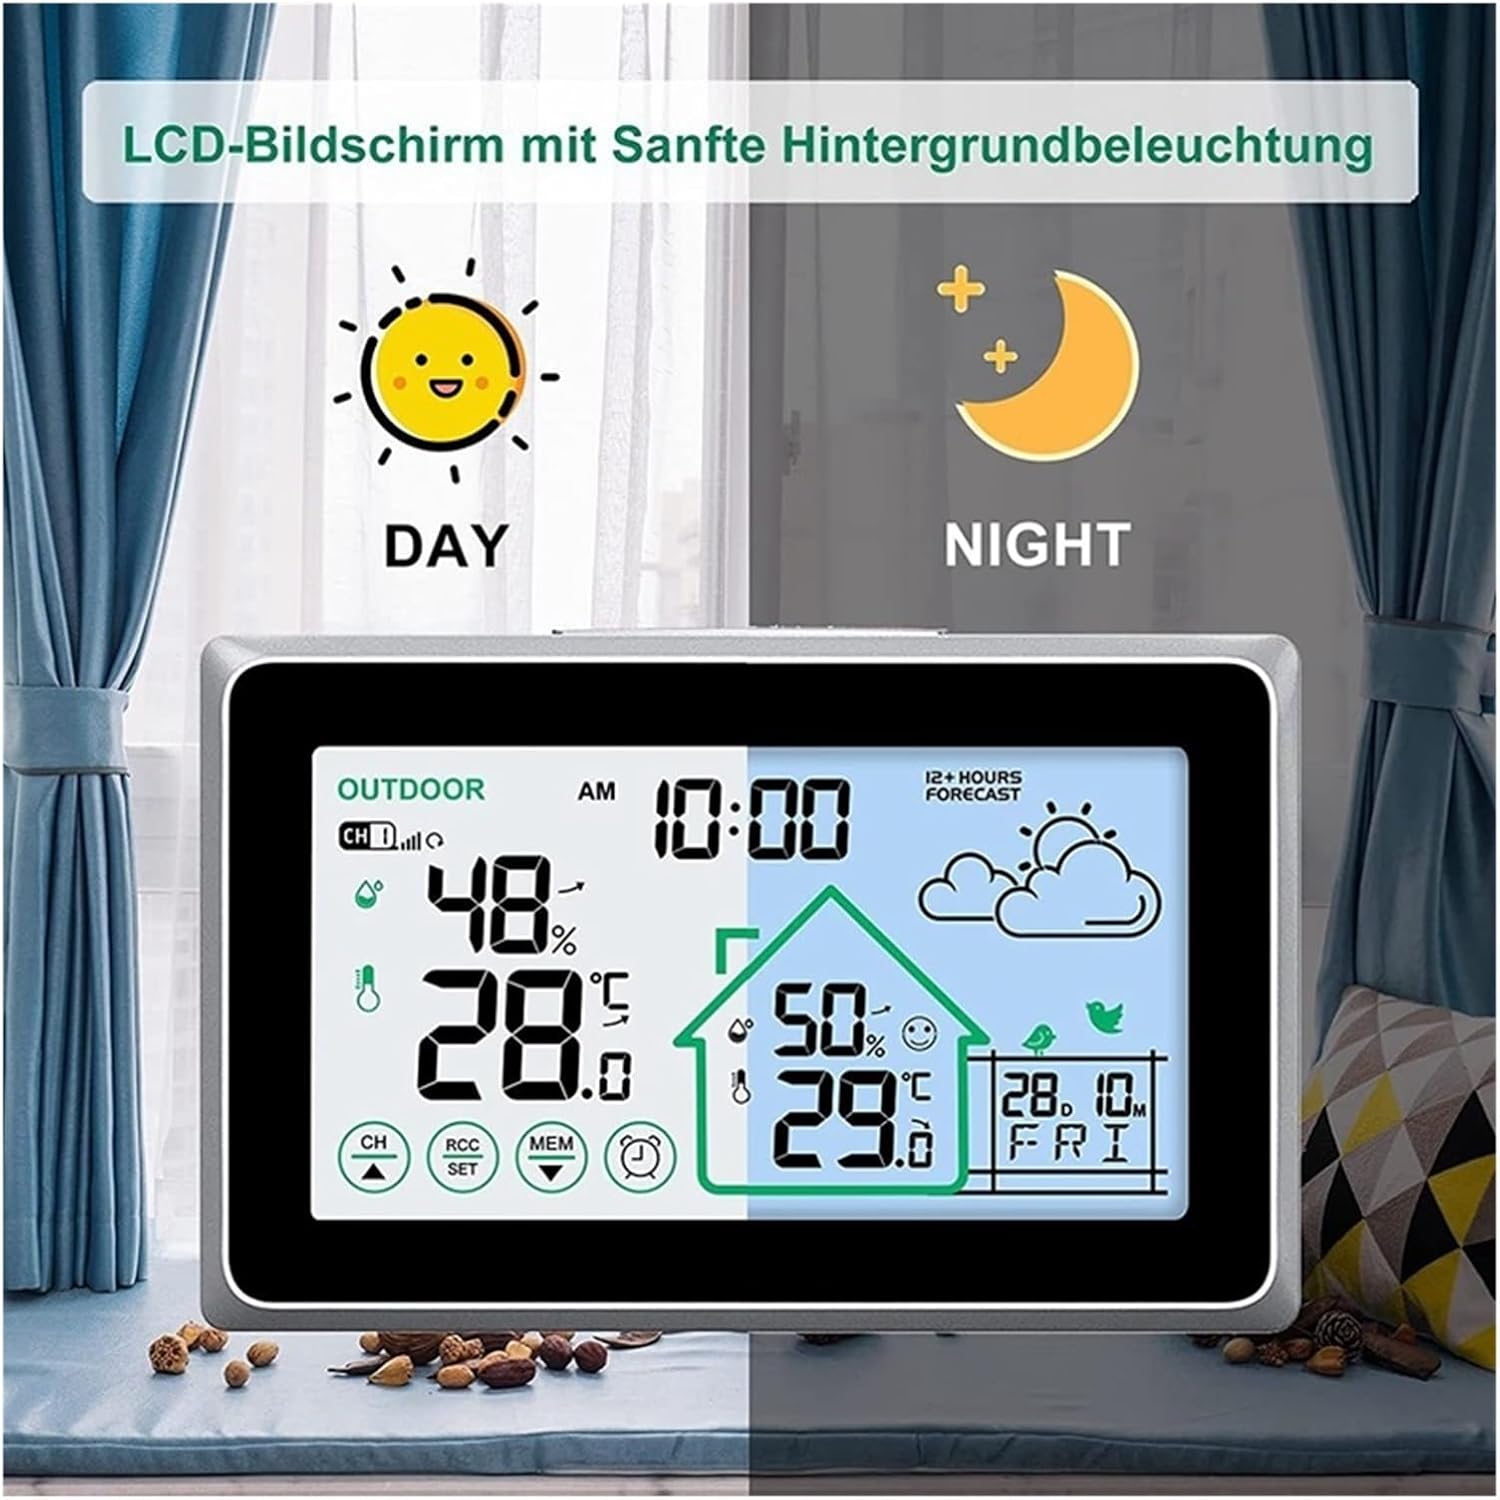
Image 5.3: LCD screen with soft backlight for day and night use.
5.5 Temperature and Humidity Display
- The display shows current indoor and outdoor temperature and humidity.
- Press the "CH" touch button to cycle through different outdoor sensor channels if multiple sensors are connected.
- Press the "MEM" touch button to view the maximum and minimum recorded temperature and humidity values. Press again to clear the records.
- Temperature tendency arrows indicate whether the temperature is rising, falling, or stable.
- The comfort level indicator (dry/comfortable/wet) provides a quick overview of indoor air conditions.
5.6 Multi-Sensor Usage
The weather station supports up to three remote sensors for monitoring temperature and humidity in multiple locations.
- Additional sensors (not included) can be purchased separately.
- Each sensor should be set to a different channel (1, 2, or 3) using the switch inside its battery compartment.
- The main unit will automatically detect and display data from all active sensors. Use the "CH" button to switch between sensor readings.
6. Maintenance
- Clean the device with a soft, damp cloth. Do not use abrasive cleaners or solvents.
- Avoid exposing the main unit to direct sunlight, extreme temperatures, or moisture.
- Replace batteries in both the main unit and remote sensor when the low battery indicator appears on the display to ensure continuous operation and accurate readings.
- If the device will not be used for an extended period, remove the batteries to prevent leakage.
7. Troubleshooting
- No Display / Faint Display: Check battery installation and replace with fresh alkaline batteries if necessary.
- Incorrect Time: Ensure the main unit is placed near a window for better DCF signal reception. Allow time for synchronization. If manual time setting was used, verify the settings.
- No Outdoor Temperature/Humidity Reading:
- Check batteries in the remote sensor.
- Ensure the remote sensor is within the 80m transmission range and free from obstructions.
- Verify that the remote sensor is not near interfering wireless devices (routers, TVs, etc.).
- Re-establish connection: Remove batteries from both units, wait a few minutes, then reinsert batteries into the remote sensor first, then the main unit.
- Inaccurate Readings: Ensure the remote sensor is placed away from direct sunlight, heat sources, or ventilation openings.
8. Specifications
| Time Control | DCF Radio Controlled |
| Outdoor Sensor Channels | Up to 3 RF channels (1 sensor included) |
| Time Display | 12/24H format |
| Weekday Languages | GER, ENG, FRE, ITA, SPA, DUT, DAN (7 languages) |
| Weather Forecast | Next 12-24 hours |
| Indoor Temperature Range | -10°C to 50°C (14°F to 122°F) |
| Outdoor Temperature Range | -40°C to 60°C (-40°F to 140°F) |
| Temperature Accuracy | ±1°C |
| Humidity Range | 1% to 99% |
| Backlight Duration | 20 seconds (white) |
| Product Dimensions | 13.5 x 2.5 x 8.5 cm |
| Item Weight | 270 g |
| Main Unit Power | 3 x AAA 1.5V batteries (not included) |
| Remote Sensor Power | 2 x AA 1.5V batteries (not included) |
| Wireless Transmission Range | Up to 80m (barrier-free) |
9. Warranty and Support
For warranty information or technical support, please refer to the retailer where the product was purchased or visit the official TXGJWRA website. Keep your purchase receipt as proof of purchase.