WeBeqer A7
WeBeqer Dash Cam 1080P (Model A7) User Manual
Detailed instructions for installation, operation, and maintenance.
1. Introduction
Thank you for choosing the WeBeqer Dash Cam 1080P, Model A7. This device is designed to record your driving journey, providing clear video evidence in case of incidents and enhancing your overall road safety. Please read this manual thoroughly before using the product to ensure proper operation and to maximize its features.
2. What's in the Box
Please verify that all items are present in your package:
- WeBeqer Dash Cam (Model A7)
- Car Charger
- User Manual (this document)
- Quick Guide
- Crowbar (for cable routing)
- Cable Clips
- 64GB SD Card
3. Product Overview
The WeBeqer Dash Cam A7 features a compact design with a 3-inch IPS screen and a 176° super wide-angle lens to capture a broad view of the road.

Figure 3.1: WeBeqer Dash Cam 1080P, showing the camera unit, suction mount, and included 64GB SD card.
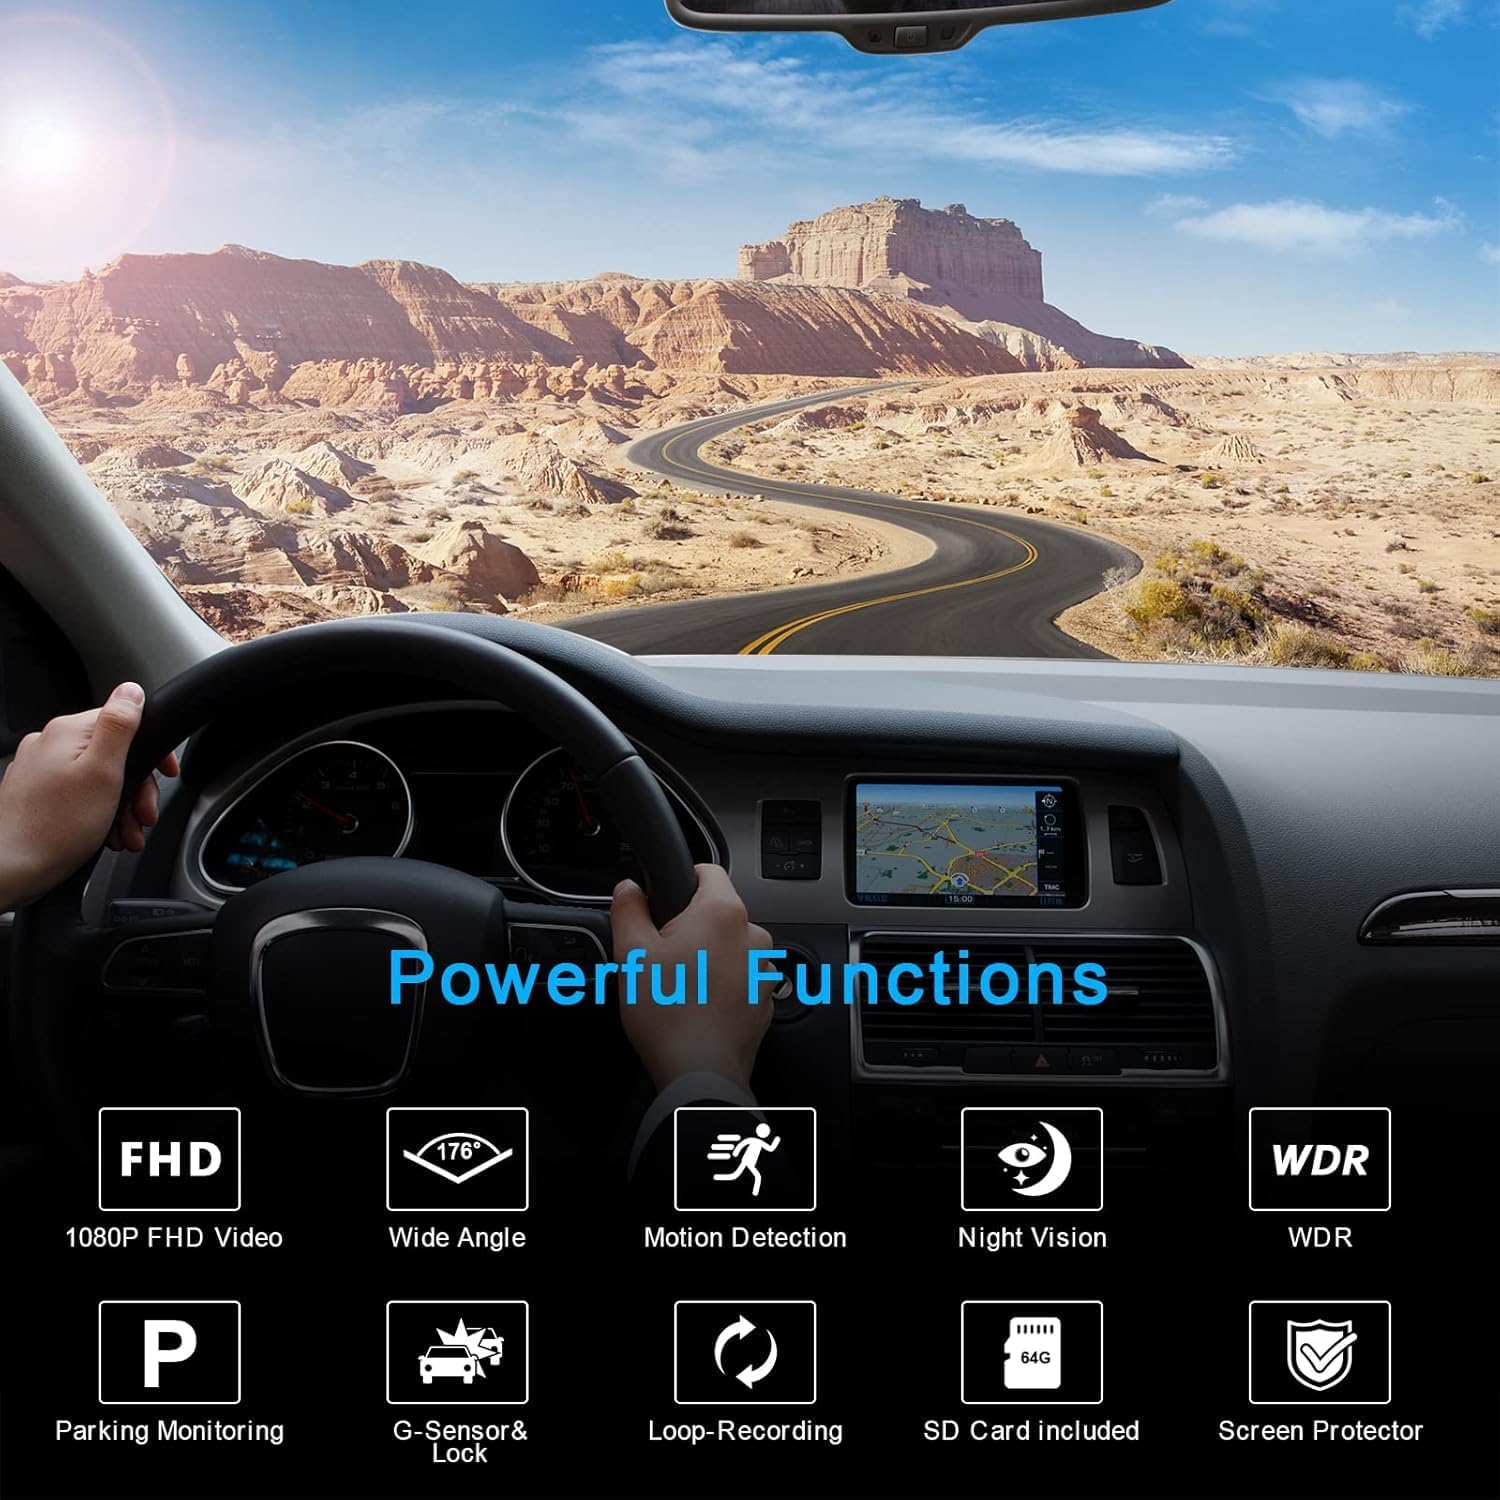
Figure 3.2: Dash Cam installed in a vehicle, illustrating its various functions such as FHD video, wide angle, motion detection, night vision, WDR, parking monitoring, G-sensor, loop recording, and SD card inclusion.
3.1. Components
- Camera Lens: Captures video footage.
- 3-inch IPS Screen: Displays live view, menu, and playback.
- Mounting Slot: For attaching the suction cup mount.
- Power Port: For connecting the car charger.
- SD Card Slot: For inserting the memory card.
- Control Buttons: For menu navigation and function selection.
4. Setup and Installation
4.1. Inserting the SD Card
- Ensure the dash cam is powered off.
- Locate the SD card slot on the side of the dash cam.
- Insert the provided 64GB SD card with the gold contacts facing the back of the camera until it clicks into place.
4.2. Mounting the Dash Cam
- Clean the windshield area where you intend to mount the dash cam.
- Attach the suction cup mount to the dash cam's mounting slot.
- Press the suction cup firmly against the windshield and flip the lever to secure it. Adjust the angle for optimal road view. The mount allows 360° rotation.
4.3. Connecting to Power
- Connect the car charger to the dash cam's power port.
- Plug the other end of the car charger into your vehicle's cigarette lighter socket.
- Use the provided crowbar and cable clips to neatly route the power cable along the windshield and dashboard, ensuring it does not obstruct your view or interfere with driving controls.
5. Operating Instructions
5.1. Power On/Off
- Automatic: The dash cam will automatically power on and begin recording when your vehicle's ignition is turned on (and power is supplied to the cigarette lighter socket).
- Manual: Press and hold the Power button to manually turn the dash cam on or off.
5.2. Recording
- Once powered on, the dash cam will automatically start recording in a continuous loop. A red indicator light or icon on the screen typically confirms recording is active.
- To stop recording, briefly press the OK/Record button. Press it again to resume.
5.3. Menu Navigation
- Press the Menu button to access settings.
- Use the Up/Down arrow buttons to navigate through menu options.
- Press the OK button to select an option or confirm a setting.
- Press the Menu button again to exit the menu.
5.4. Video Playback
- Stop recording if currently active.
- Enter Playback mode via the menu or a dedicated button (refer to Quick Guide for specific button layout).
- Use the Up/Down buttons to browse recorded videos.
- Press OK to play a selected video.
6. Key Features
6.1. 1080P Full HD Video & 176° Super Wide Angle
The dash cam records video at 1080P resolution, ensuring clear and detailed footage. The 176° super wide-angle lens expands your field of view, capturing more of the road and reducing blind spots.
6.2. Super Night Vision & WDR
Equipped with a 6-layer lens, an f/1.8 aperture, and Wide Dynamic Range (WDR) technology, the dash cam balances brightness in varying light conditions. This enhances image clarity during nighttime driving, making recordings clearer and improving safety.
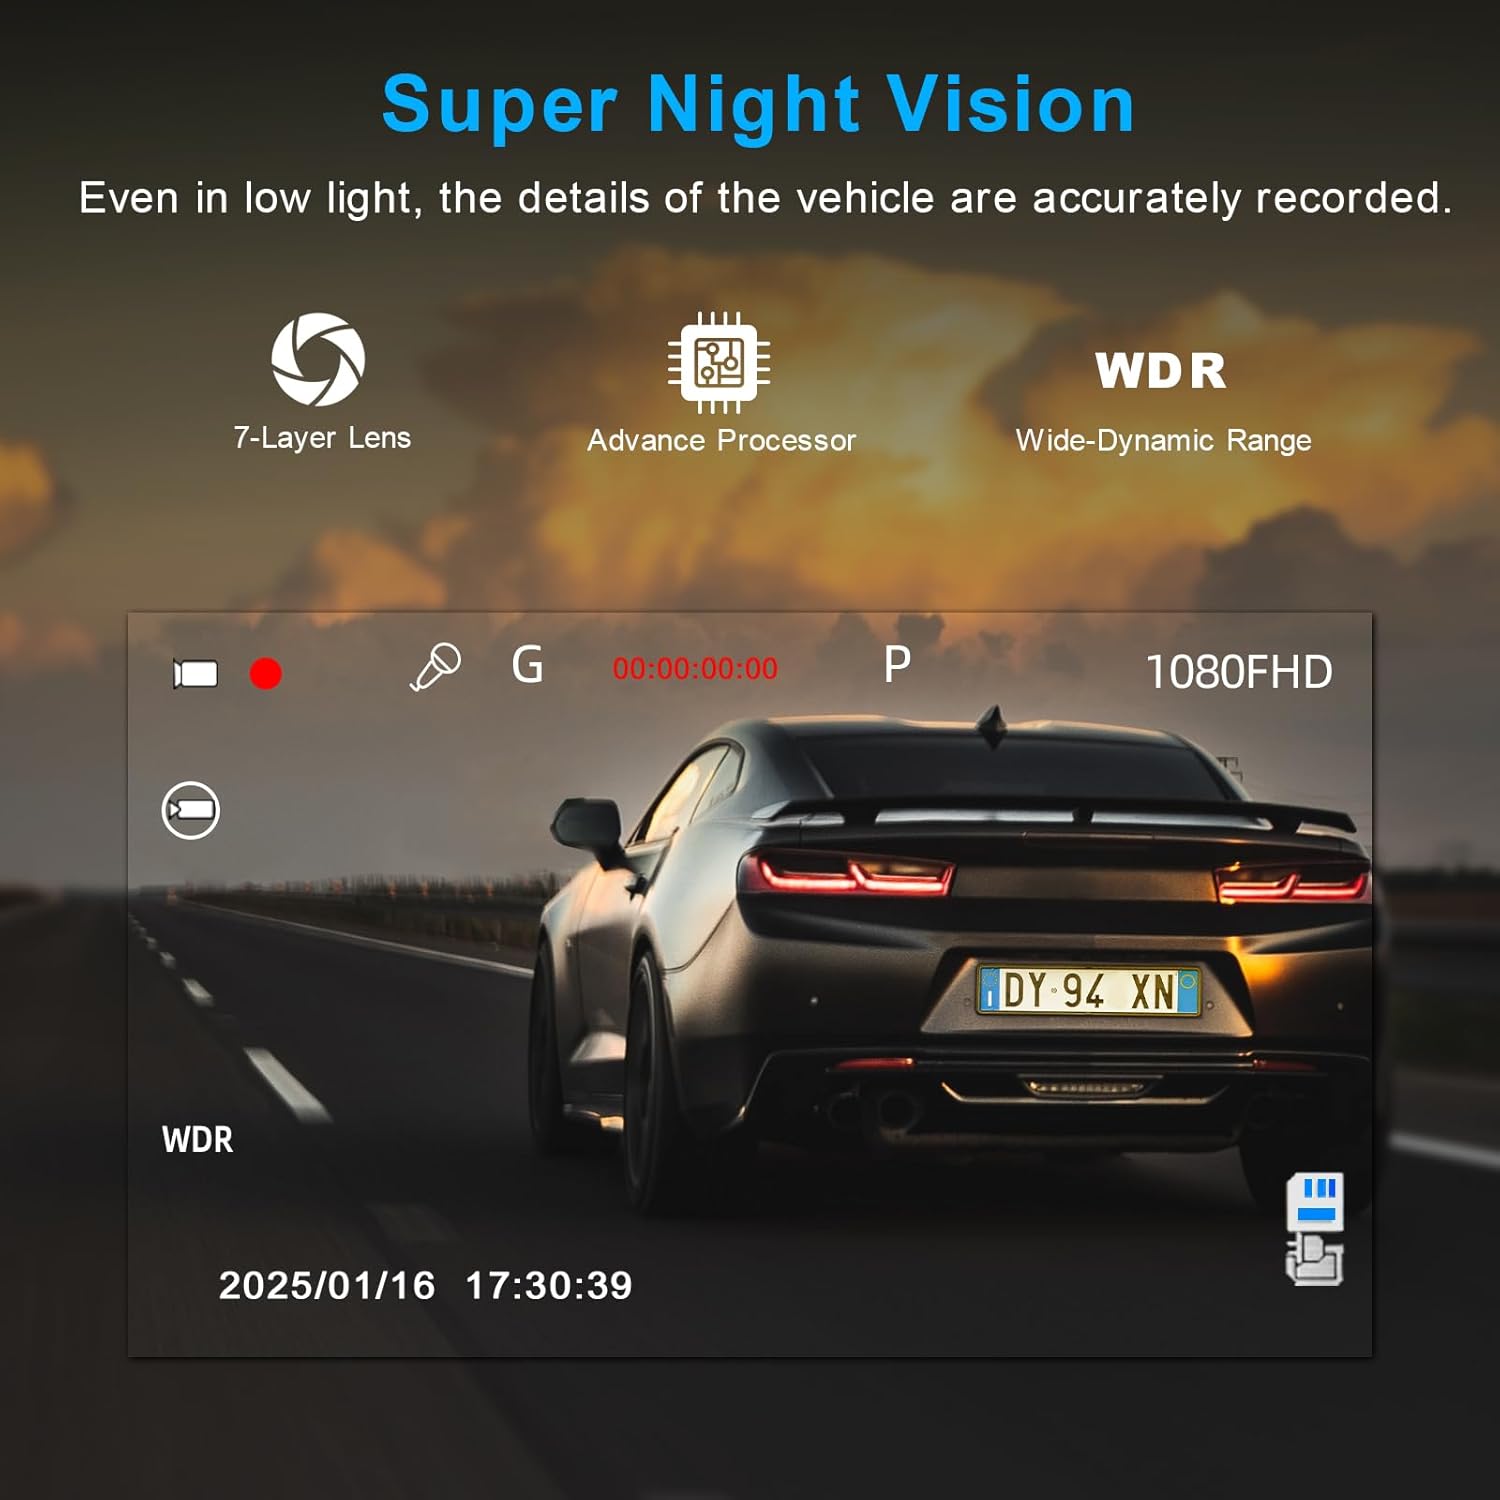
Figure 6.1: Visual representation of Super Night Vision and WDR technology, demonstrating improved detail capture in low-light conditions.
6.3. G-Sensor & Automatic Locking
The built-in gravity sensor (G-Sensor) detects sudden movements, collisions, or emergency braking. When such an event occurs, the dash cam automatically initiates emergency recording and locks the video file to prevent it from being overwritten by loop recording.

Figure 6.2: Illustration of the G-Sensor function, showing a collision event triggering automatic video locking.
6.4. 24-Hour Parking Monitoring
When connected via a hardware kit (step-down cable, not included in the package and must be purchased separately), the dash cam can monitor your vehicle for 24 hours. If an impact is detected while parked, the camera will automatically record.

Figure 6.3: Depiction of the 24-hour parking monitor feature, indicating the need for a separate hardware kit for continuous operation.
6.5. Loop Recording
The dash cam utilizes loop recording to continuously record video. When the 64GB memory card is full, the oldest unlocked video files are automatically overwritten to make space for new recordings. You can typically set loop recording segments to 1, 3, or 5 minutes.
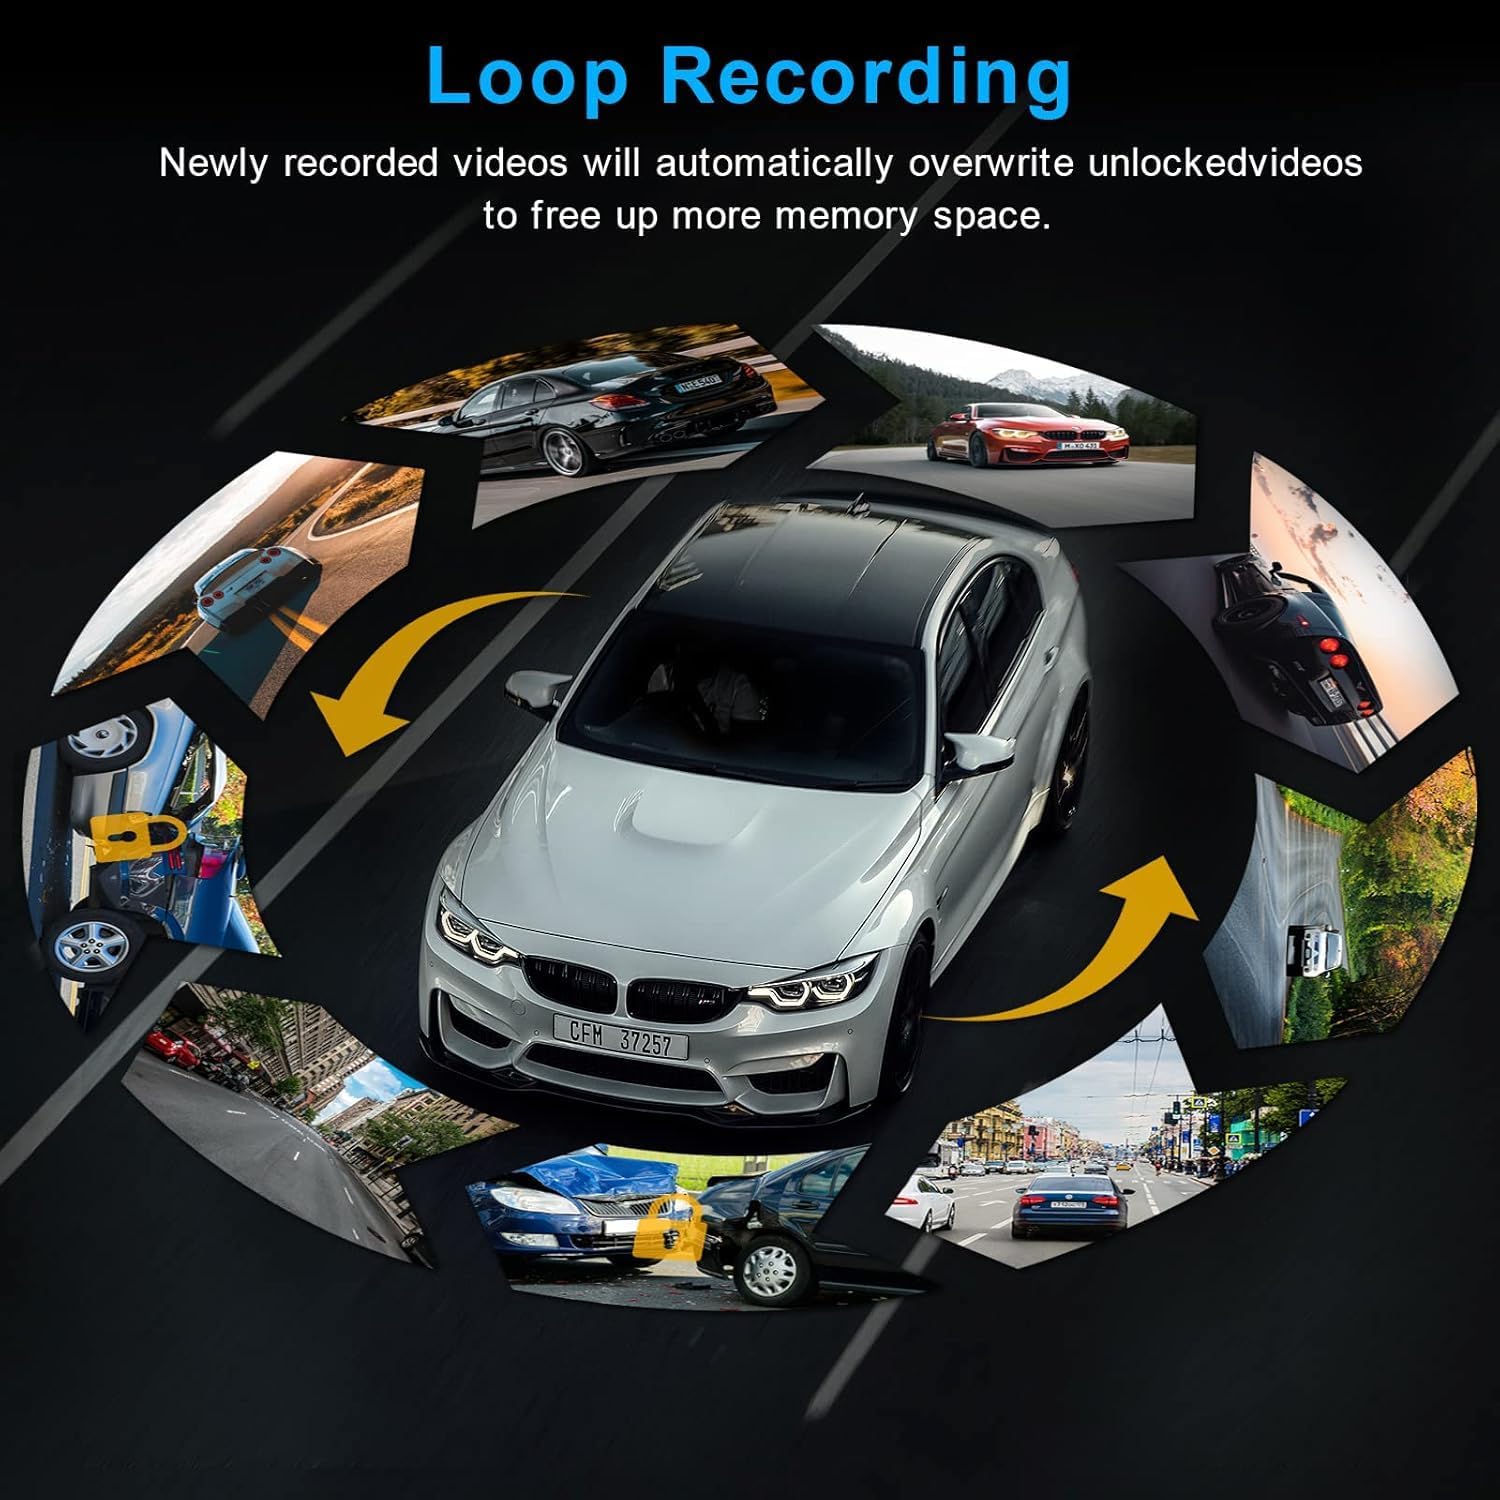
Figure 6.4: Diagram illustrating the loop recording function, showing how older, unlocked video segments are replaced by new recordings.
7. Maintenance
- Cleaning: Use a soft, dry cloth to clean the camera lens and screen. Avoid abrasive cleaners.
- SD Card: Periodically format the SD card (e.g., once a month) within the dash cam's settings to ensure optimal performance and prevent data corruption. Back up any important files before formatting.
- Temperature: Avoid exposing the dash cam to extreme temperatures for extended periods, as this can affect battery life and component integrity.
8. Troubleshooting
8.1. Dash Cam Not Powering On
- Ensure the car charger is securely plugged into both the dash cam and the vehicle's cigarette lighter socket.
- Check if the vehicle's cigarette lighter socket is receiving power (e.g., by testing with another device).
- Try a different car charger if available.
8.2. Recording Issues (e.g., Stops Recording, Corrupted Files)
- Format the SD card using the dash cam's menu.
- Ensure the SD card is properly inserted.
- If issues persist, try a different high-speed (Class 10 or higher) SD card.
8.3. Screen Freezes or Malfunctions
- Press and hold the Power button for 10-15 seconds to force a restart.
- If a reset button is available (refer to Quick Guide), use a thin object to press it.
8.4. Poor Video Quality
- Ensure the camera lens is clean and free from smudges or dirt.
- Check video resolution settings in the menu to ensure it is set to 1080P.
- Ensure the protective film has been removed from the lens.
9. Specifications
| Feature | Detail |
|---|---|
| Model Number | A7 |
| Video Capture Resolution | 1080p |
| Screen Size | 3-inch IPS |
| Wide Angle | 176° |
| Special Features | Built-In Display, G-Sensor, Loop Recording, Night Vision, Parking Monitor, WDR |
| Included Memory Card | 64GB SD Card |
| Mounting Type | Windshield Mount |
| Control Method | App (Wireless) |
| Product Dimensions | 1.18"D x 3.15"W x 1.57"H |
| Item Weight | 12.3 ounces |
| Battery | 1 Lithium Metal battery (included) |
10. Warranty and Support
For warranty information and technical support, please refer to the contact details provided on the product packaging or visit the official WeBeqer website. Keep your purchase receipt as proof of purchase for warranty claims.
Related Documents - A7
 |
WEBEQER Q20 4K Dash Camera User Manual Comprehensive user manual for the WEBEQER Q20 4K Dash Camera, covering product features, installation, operation, and troubleshooting. Learn how to use your dash cam effectively. |
 |
WEBEQER Q20 4K Dash Camera User Manual Comprehensive user manual for the WEBEQER Q20 4K Dash Camera, detailing features, installation, operation, and troubleshooting. Includes guide videos and support contact. |
 |
WeBeqer Q21 Hochgeschwindigkeits-Fahrrekorder Bedienungsanleitung Diese Bedienungsanleitung bietet detaillierte Anweisungen und Spezifikationen für den WeBeqer Q21 Hochgeschwindigkeits-Fahrrekorder, einschließlich Einrichtung, Betriebsmodi und Fehlerbehebung in mehreren Sprachen. |
 |
WEBEQER Q18 2.5K Dash Camera Benutzerhandbuch Umfassendes Benutzerhandbuch für die WEBEQER Q18 2.5K Dash Camera. Finden Sie detaillierte Anleitungen zur Installation, Einrichtung, Bedienung, Einstellungen und Fehlerbehebung für Ihre Dashcam. |
 |
TIESFONG ON DASH A7-WB User Manual - Your Guide to Advanced Vehicle Recording Comprehensive user manual for the TIESFONG ON DASH A7-WB Multi-Channel Dash Cam. Learn about installation, features, operation, and specifications for optimal vehicle monitoring. |