1. Introduction
This manual provides comprehensive instructions for the installation, operation, and maintenance of the Creality Ender 3 V3 SE Linear Rail Kit. This upgrade kit is designed to enhance the precision, speed, and stability of your Creality Ender 3 V3 SE 3D printer by replacing the standard motion system with a high-quality linear guideway.
Please read this manual thoroughly before proceeding with installation to ensure correct assembly and optimal performance.
2. Package Contents
Verify that all components listed below are present in your package:
- Linear Rail Kit (1 set)
- Lubricant Grease (1 tube)
- Mounting Hardware (screws, nuts, washers)
- Hex Wrenches (various sizes)
- Open-end Wrench
- Mounting Brackets

Image 2.1: Overview of the Creality Ender 3 V3 SE Linear Rail Kit and its included components.
3. Features and Benefits
The Creality Ender 3 V3 SE Linear Rail Kit offers several advantages for your 3D printing experience:
- Enhanced Printing Precision: Crafted from high-quality high carbon chromium steel, the linear rail provides optimal stiffness and stability, minimizing printing vibrations and significantly improving printing accuracy.
- Increased Printing Speed: The ultra-smooth and low-friction linear motion system reduces energy consumption and mechanical wear, enabling the 3D printer to operate at higher speeds.
- Long Service Life: Made of high-carbon chromium steel, the components offer strong wear resistance, smooth movement, low noise, uniform force, and increased durability.
- Effortless Integration and Installation: Designed with a modular approach for easy modification and upgrade. No firmware modifications or rewiring are required.
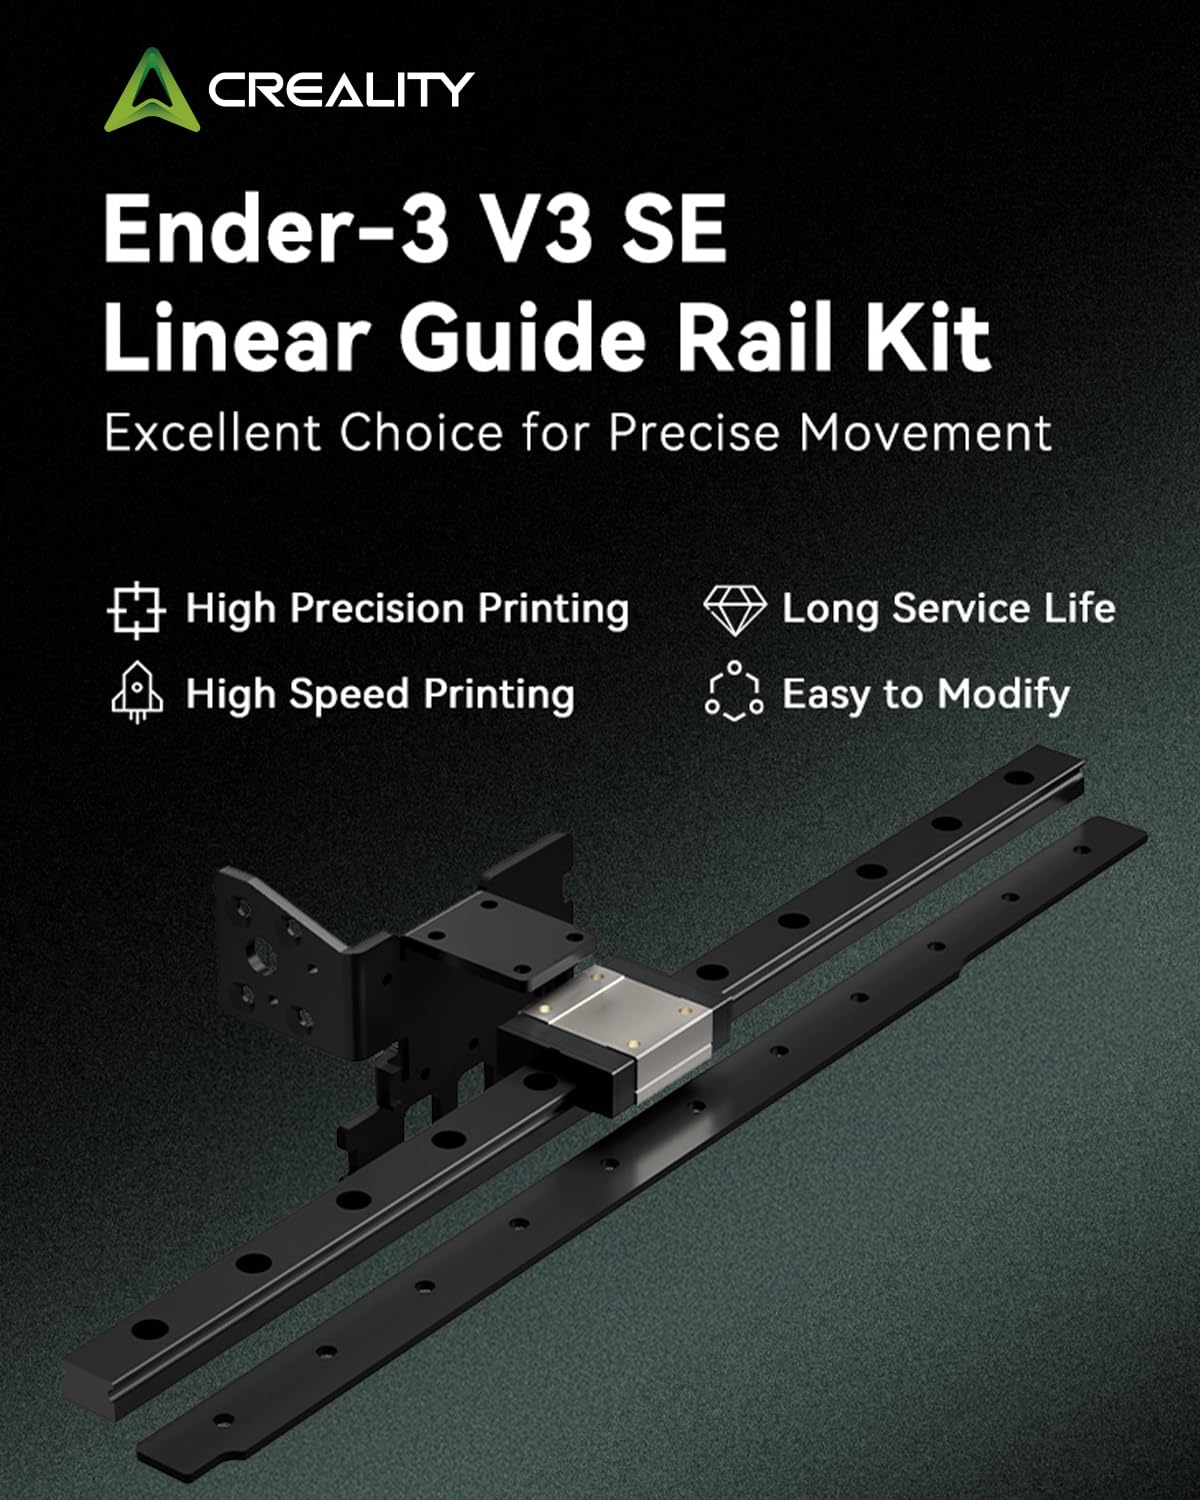
Image 3.1: Visual representation of the Ender-3 V3 SE Linear Guide Rail Kit's key features.

Image 3.2: Illustration of high precision printing achieved with the linear guide rail, showing a detailed 3D printed boat model.

Image 3.3: Depiction of high-speed printing capability, showing the print head in rapid motion over a 3D printed object.

Image 3.4: Close-up view highlighting the high-carbon chromium steel material used for durability and extended service life.

Image 3.5: Example of the modular design, illustrating how the linear rail integrates into the 3D printer for easy modification.
4. Setup and Installation
This section outlines the general steps for installing the linear rail kit. Specific details may vary; refer to the included diagram or Creality's official installation video for precise guidance.
- Preparation: Power off and unplug your 3D printer. Carefully remove the existing X-axis assembly (V-wheels, carriage, etc.) from the printer frame.
- Clean Components: Before installation, clean the linear rail and carriage thoroughly to remove any manufacturing residues or protective coatings. Use a lint-free cloth and a suitable degreaser.
- Lubricate: Apply a small amount of the provided lubricant grease to the linear rail and carriage. Ensure even distribution for smooth operation.
- Mount the Linear Rail: Securely attach the linear rail to the X-axis extrusion of your Ender 3 V3 SE using the provided screws and mounting hardware. Ensure it is straight and parallel to the extrusion.
- Install the Carriage: Slide the linear rail carriage onto the mounted linear rail.
- Attach Extruder Assembly: Mount your extruder assembly (hotend, fan shroud, etc.) to the linear rail carriage using the appropriate brackets and screws.
- Adjust End Stops and Z-Offset: After installation, it is crucial to adjust your X-axis end stop position and recalibrate your Z-offset to accommodate the new assembly.
- Test Movement: Manually move the X-axis carriage along the rail to ensure smooth, unobstructed motion.
Note: For detailed visual instructions, please refer to the official Creality installation video for the Ender 3 V3 SE Linear Rail Kit.
5. Operating Considerations
Once installed, the linear rail kit operates as an integral part of your 3D printer's motion system. Its primary function is to provide precise and stable movement for the X-axis.
- Enhanced Stability: The linear rail significantly reduces play and vibration in the X-axis, leading to improved print quality, especially at higher speeds.
- Increased Speed Potential: The low-friction design allows for faster print head movements without compromising accuracy, potentially reducing print times.
- Reduced Wear: Compared to traditional V-wheel systems, linear rails typically experience less wear over time, contributing to a longer lifespan for the motion system.
Ensure your printer's firmware settings (if applicable) are optimized for the increased precision and speed capabilities of the linear rail. Regular calibration of your printer is recommended to maintain optimal performance.
6. Maintenance
Proper maintenance ensures the longevity and optimal performance of your linear rail kit.
- Regular Cleaning: Periodically inspect the linear rail for dust, filament debris, or other contaminants. Clean the rail surface and the carriage using a lint-free cloth.
- Lubrication: Reapply lubricant grease to the linear rail and carriage every few months, or as needed, depending on usage. Ensure the grease is evenly distributed by moving the carriage back and forth along the rail. Use a high-quality lithium grease (NLGI 2 or lower) or the provided lubricant.
- Inspection: Check all mounting screws for tightness. Ensure the linear rail is securely fastened and there is no excessive play in the carriage.
7. Troubleshooting
If you encounter issues after installing the linear rail kit, consider the following:
- Rough Movement or Noise:
- Ensure the rail and carriage are clean and properly lubricated.
- Check for any debris obstructing the rail.
- Verify that the rail is mounted straight and not warped.
- Print Quality Issues (e.g., layer shifts, inconsistent lines):
- Recalibrate your Z-offset and ensure your X-axis end stop is correctly positioned.
- Check for loose mounting screws on the rail or the extruder assembly.
- Ensure the linear rail carriage is not binding.
- Extruder Not Moving Correctly:
- Verify all electrical connections to the X-axis stepper motor and end stop.
- Confirm that the belt tension is appropriate.
If problems persist, contact Creality customer support for further assistance.
8. Specifications
| Feature | Detail |
|---|---|
| Linear Rail Model | MGN12 |
| Slide Rail Length | 280mm |
| Compatible Models | Ender-3 V3 SE |
| Material | High-carbon chromium steel |
| Package Dimensions | 11.97 x 2.91 x 2.64 inches |
| Package Weight | 1.19 Pounds |

Image 8.1: Visual representation of the product specifications.
9. Warranty and Support
Creality provides comprehensive after-sales support for this product.
- Warranty: The product comes with a 1-year limited warranty.
- Technical Assistance: Lifetime technical assistance is available.
- Customer Service: For any inquiries or assistance, please contact Creality customer service directly.


