1. Introduction
This manual provides detailed instructions for the installation, operation, and maintenance of your Hikity 8 Core 4GB+64GB Android 15 Car Radio. Please read this manual thoroughly before using the product to ensure proper functionality and safety. This car radio is designed to enhance your driving experience with advanced features such as wireless CarPlay, Android Auto, GPS navigation, Bluetooth 5.0, and a high-resolution IPS touchscreen.
2. Safety Information
- Always ensure the vehicle is turned off and the battery is disconnected before performing any installation or wiring.
- Professional installation is highly recommended to prevent damage to the unit or your vehicle's electrical system.
- Do not operate the device in a way that distracts you from driving. Always prioritize road safety.
- Avoid exposing the unit to extreme temperatures, direct sunlight for prolonged periods, or excessive moisture.
- Use only approved accessories and wiring harnesses provided with the product.
3. Package Contents
Verify that all items listed below are included in your package:
- Android Car Radio Unit
- Canbus Decoder
- Rear View Camera
- External Microphone
- Power Cable
- GPS Antenna
- Rear Camera Input Cable
- RCA Cables
- USB Cables
- User Manual (this document)

Image: Package contents including the main unit, wiring harnesses, antennas, and accessories.
4. Compatibility
This car radio is designed for specific vehicle models. Please confirm your car's system configuration, year, and central control layout to ensure compatibility before installation. Incompatibility may lead to installation issues or damage.
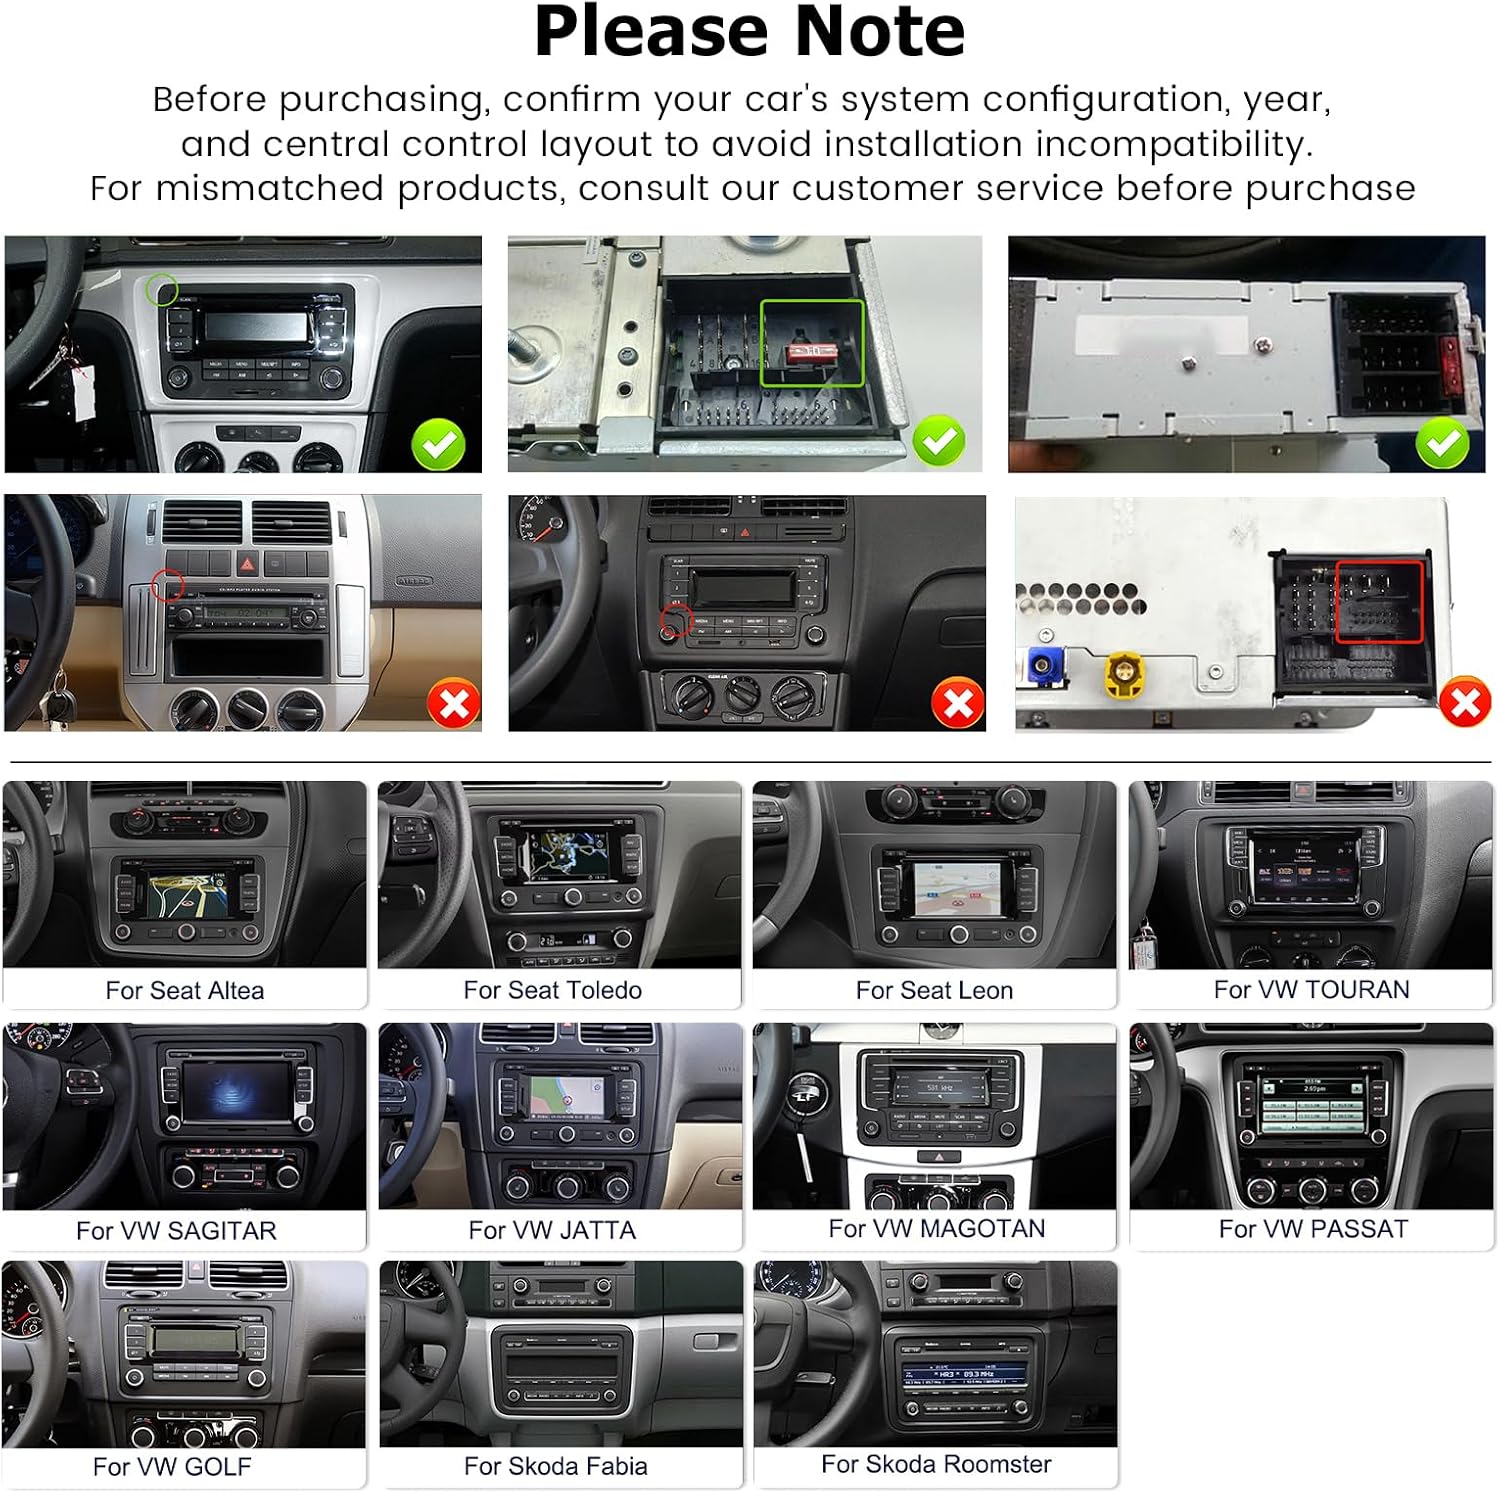
Image: Compatibility check for car dashboard layouts.
Compatible Vehicle Models:
| Brand | Models |
|---|---|
| For Seat | Altea (from 05/2004), Toledo (from 12/2004), Leon (from 09/2005), Altea XL (from 04/2007), Alhambra (from 2010) |
| For VW | SAGITAR/JETTA, MAGOTAN/MAGOTAN V6, PASSAT B6/B7/NMS/CC/TSI/Variant, TOURAN, GOLF V/VI/Variant, TIGUAN/TIGUAN GP, SHARAN, CADDY, POLO, EOS, SCIROCCO, TRANSPORTER (part of VW/T5), R36 VARIANT, BEETLE, MULTZVAN, GOLF CROSS, GOLF BLUE MOTION, SPORTLINE, BORA, AMAROK |
| For Skoda | Fabia Limousine (02/2007-2012), Fabia Combi (04/2007-2012), Praktic (04/2007-2012), Roomster (04/2006-2012), Yeti (from 2009-2012), Superb/3 T (from 2008-2012) |
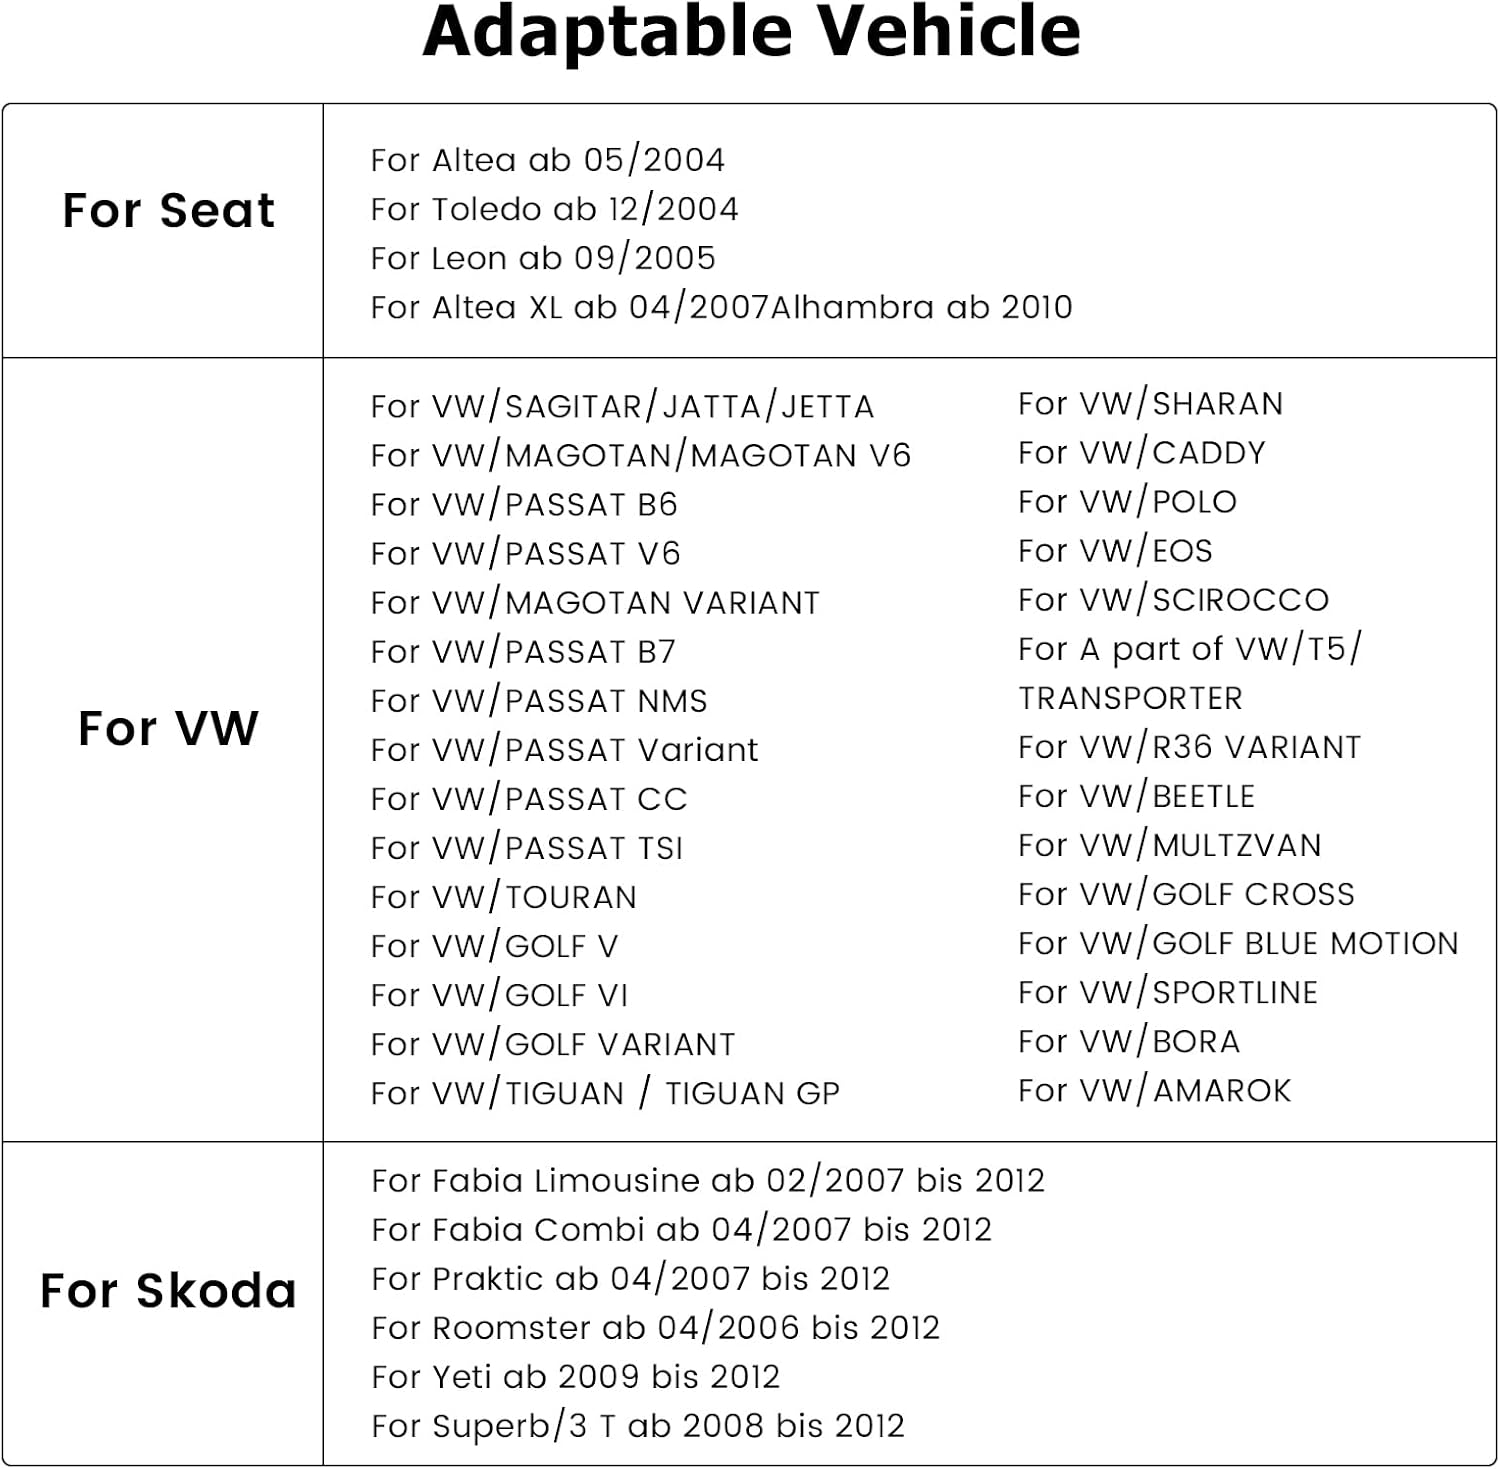
Image: Detailed list of compatible vehicle models.
5. Setup and Installation
5.1. Pre-Installation Check
- Ensure your vehicle is compatible (refer to Section 4).
- Gather all necessary tools (e.g., screwdrivers, wire strippers, electrical tape).
- Disconnect the vehicle's battery to prevent electrical shorts.
5.2. Wiring Connections
Connect the provided wiring harnesses to the car radio and your vehicle's existing wiring. Pay close attention to the power, speaker, and accessory wires. The Canbus decoder should be connected as per your vehicle's specific requirements to ensure proper communication with the car's systems.
Rear Camera Connection:
To connect the AHD rear camera, follow these steps:
- Connect the red wire (1) of the camera's power cable to the backup light's positive (+) terminal.
- Connect the black wire (2) of the camera's power cable to a ground (GND) point.
- Plug the yellow RCA video cable from the camera into the "CAM IN" port on the car radio's RCA harness.
- Ensure the reverse trigger wire (usually labeled "BACK" or "REVERSE") from the car radio's harness is connected to the vehicle's reverse light signal.
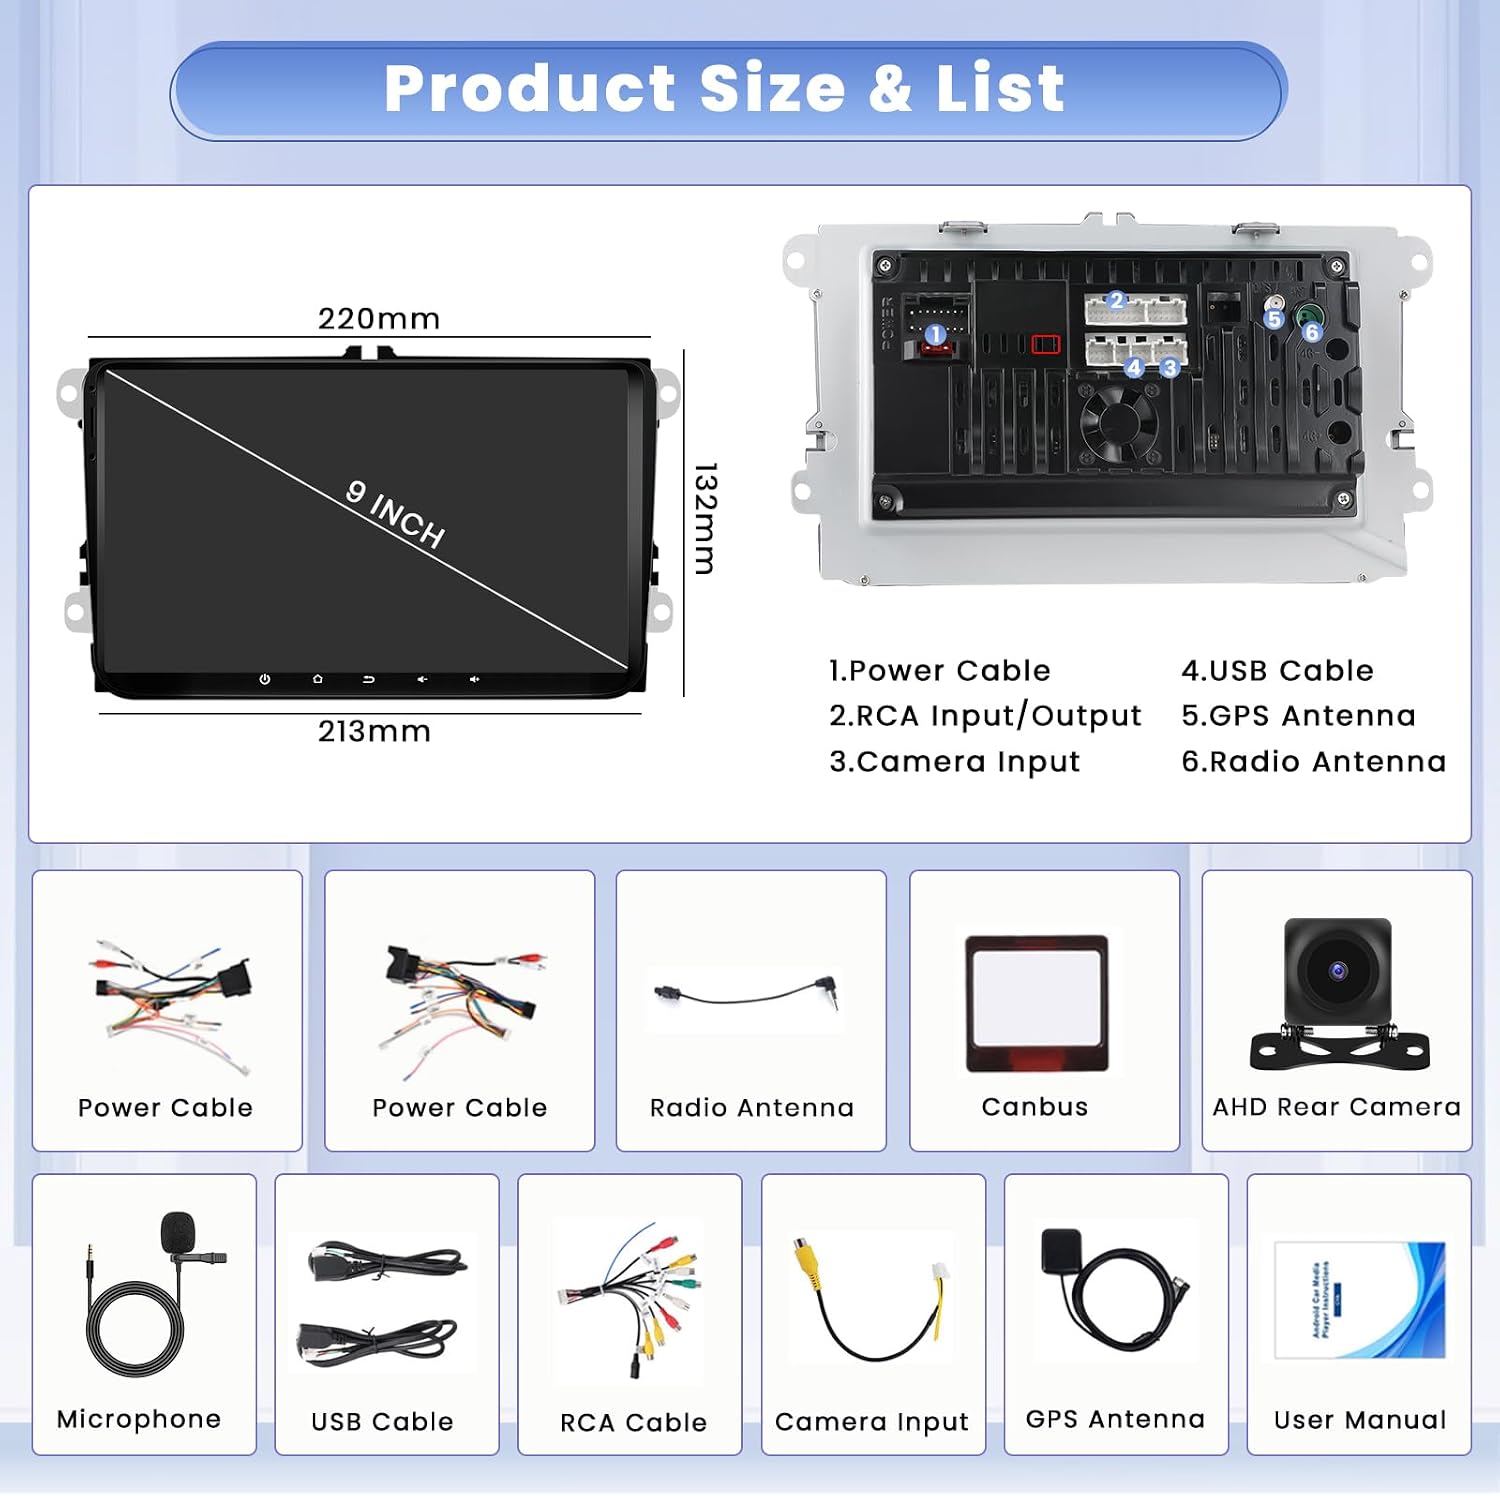
Image: Wiring diagram for the backup camera.
5.3. Initial Power-On
- After all connections are secure, reconnect the vehicle's battery.
- Turn on your vehicle's ignition. The car radio should power on automatically.
- Follow any on-screen prompts for initial setup, such as language selection and time zone.
6. Operating Instructions
6.1. Android System Overview
The unit runs on the latest Android 15 system, powered by an 8-core CPU, 4GB RAM, and 64GB ROM, ensuring smooth operation and ample storage for applications.
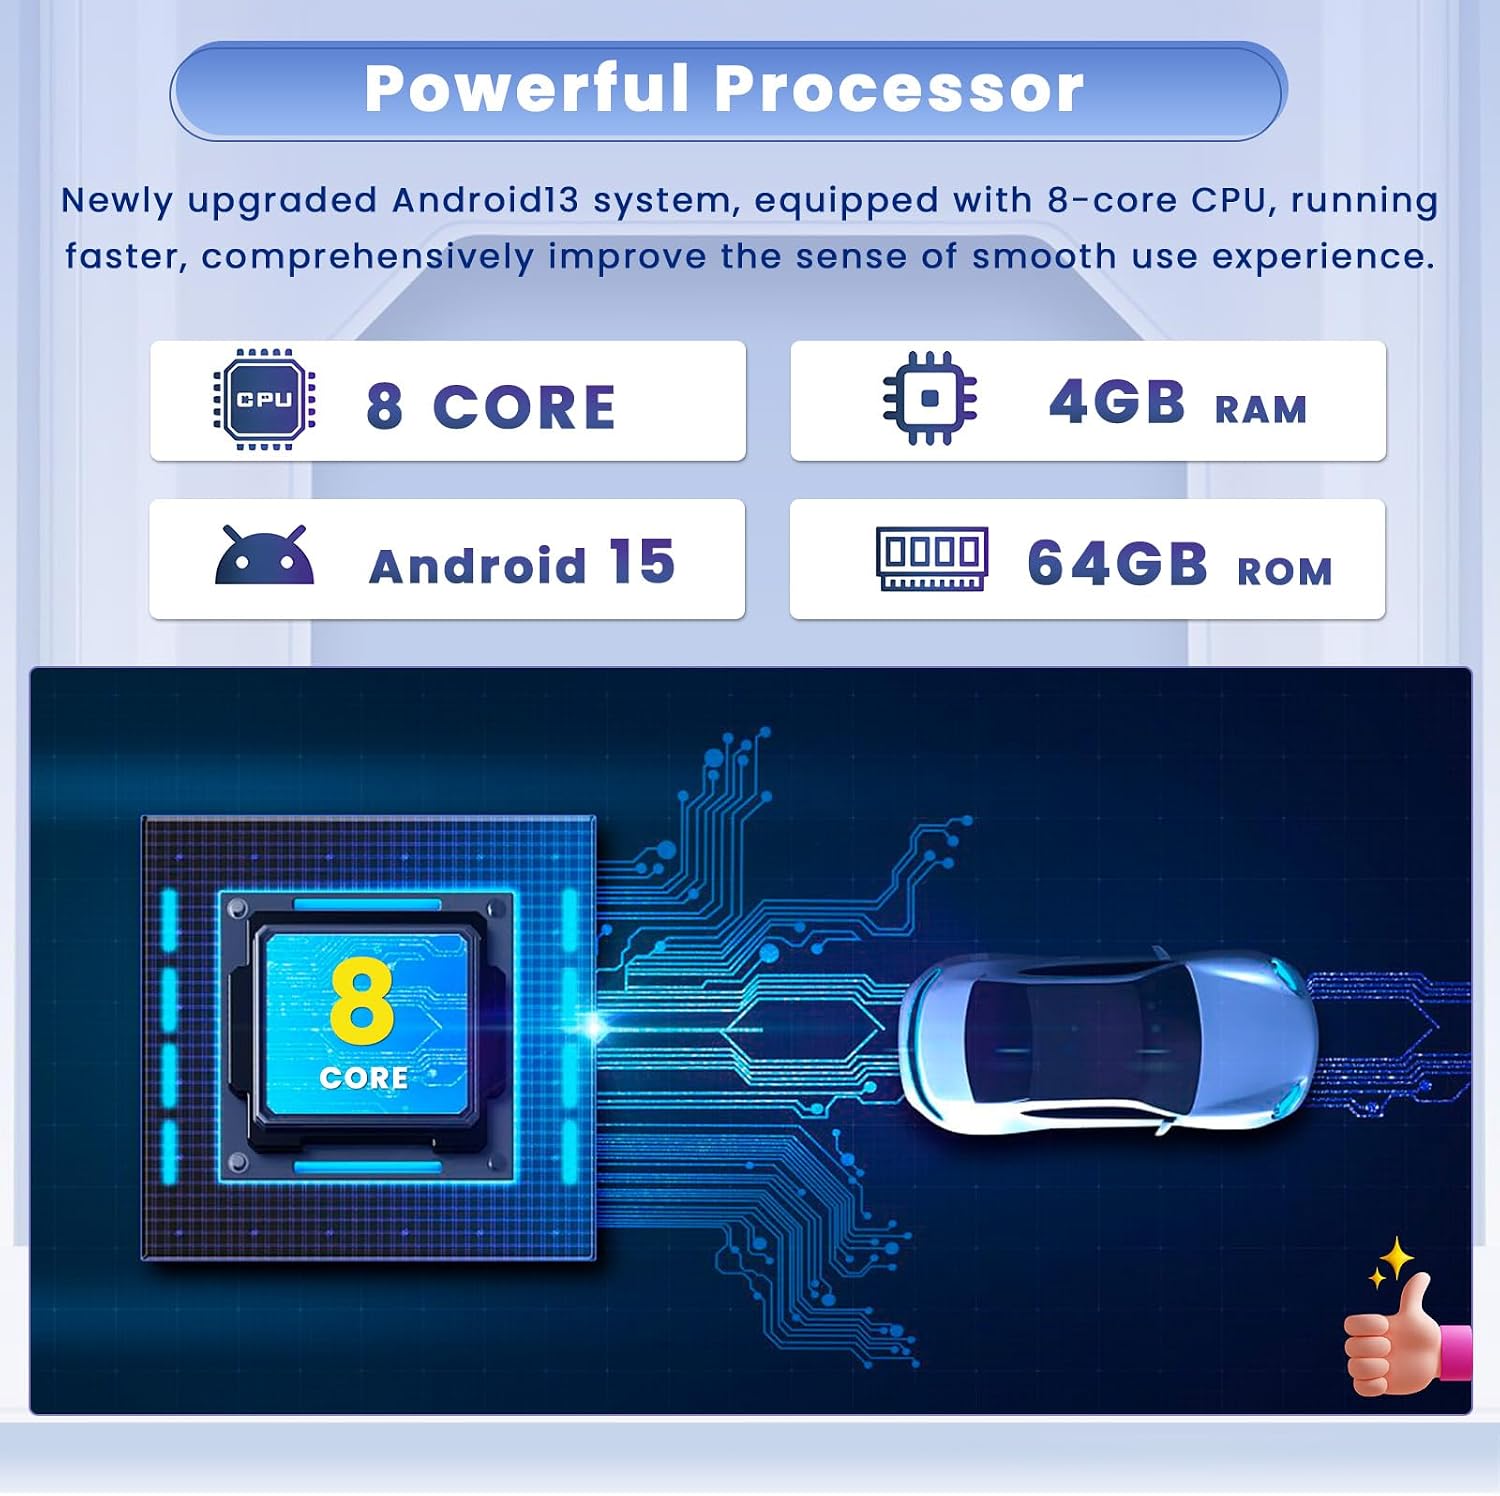
Image: Powerful processor and system specifications.
6.2. Display and User Interface
The 9-inch IPS capacitive touchscreen features a 1280x720 resolution, providing vivid images and a wide 178° viewing angle. The user-friendly interface allows for customization, including 59 UI themes and the ability to rearrange homepage applications.
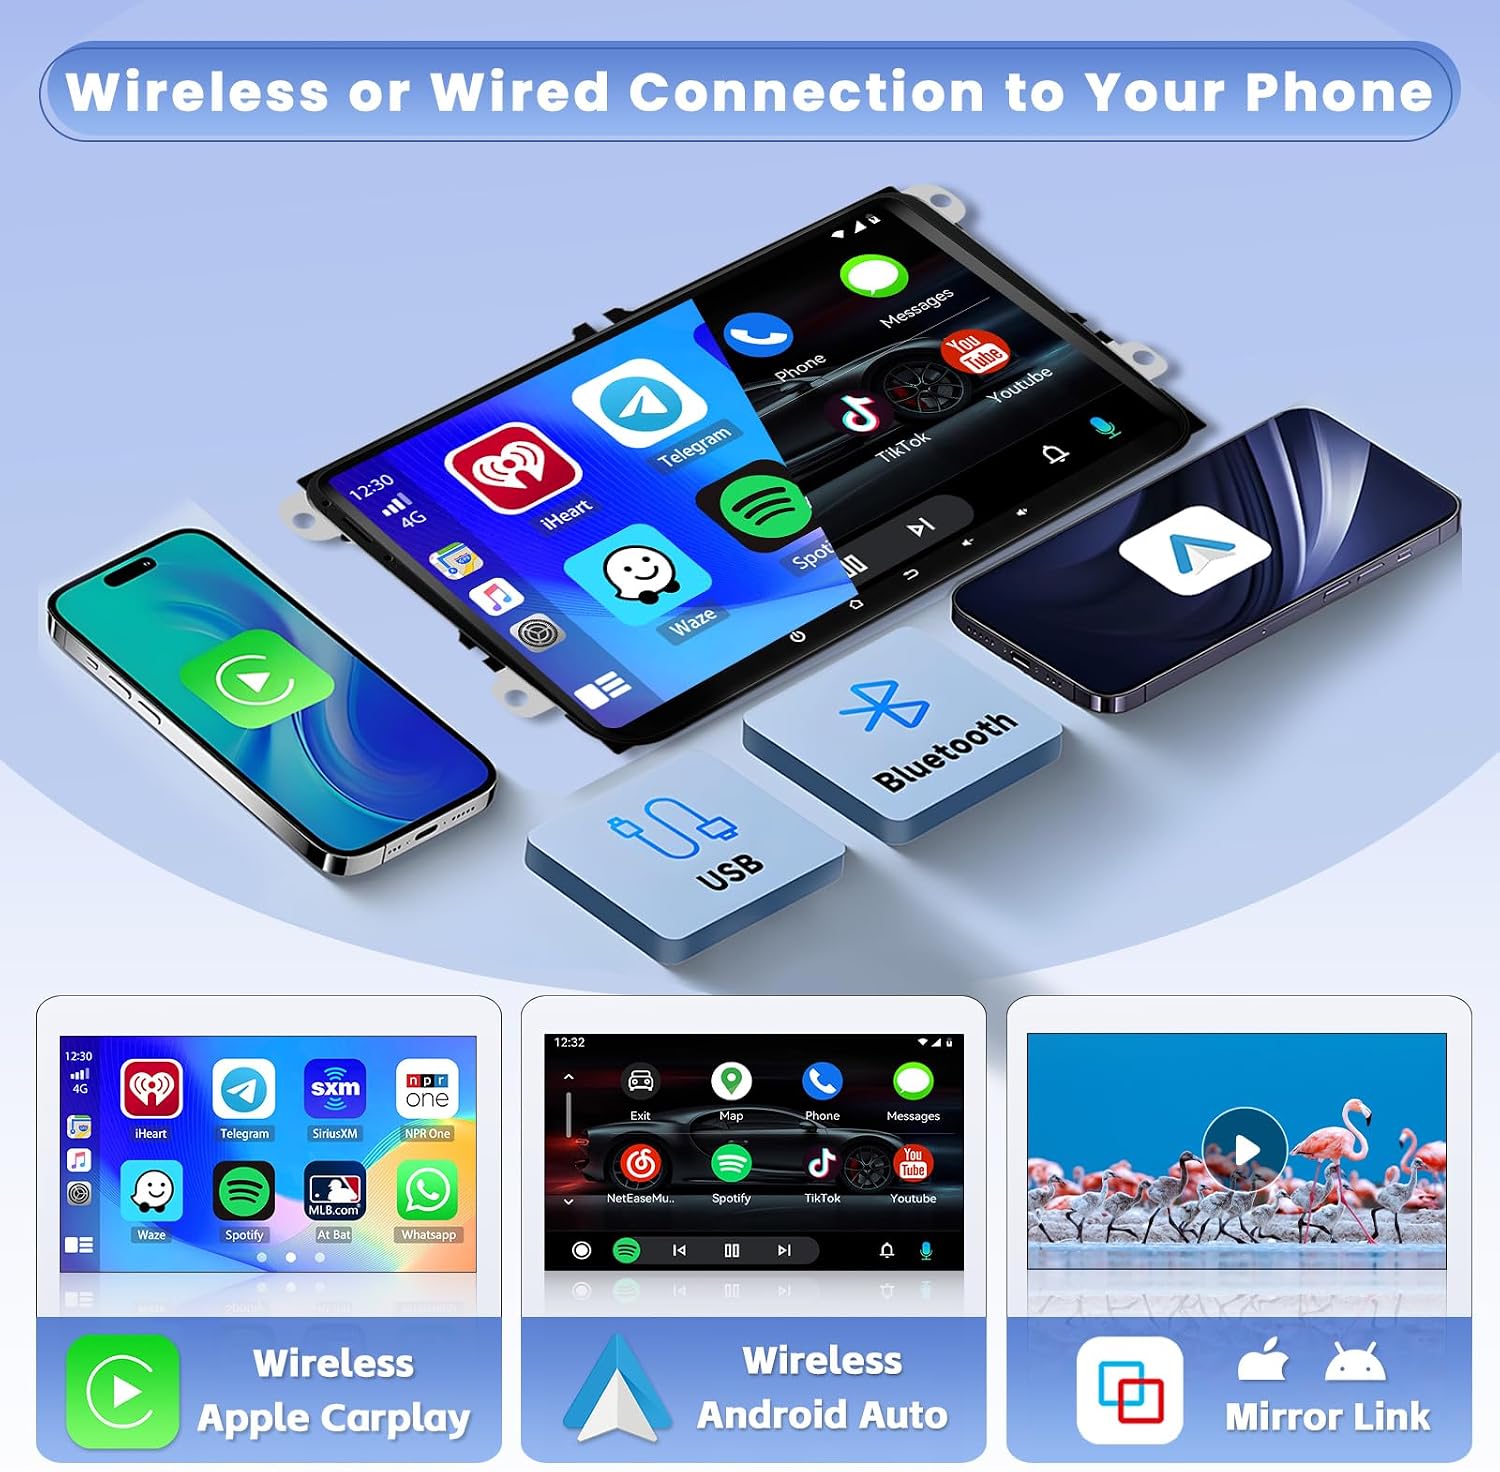
Image: Display resolution and IPS touchscreen features.

Image: User-friendly interface with customizable apps.
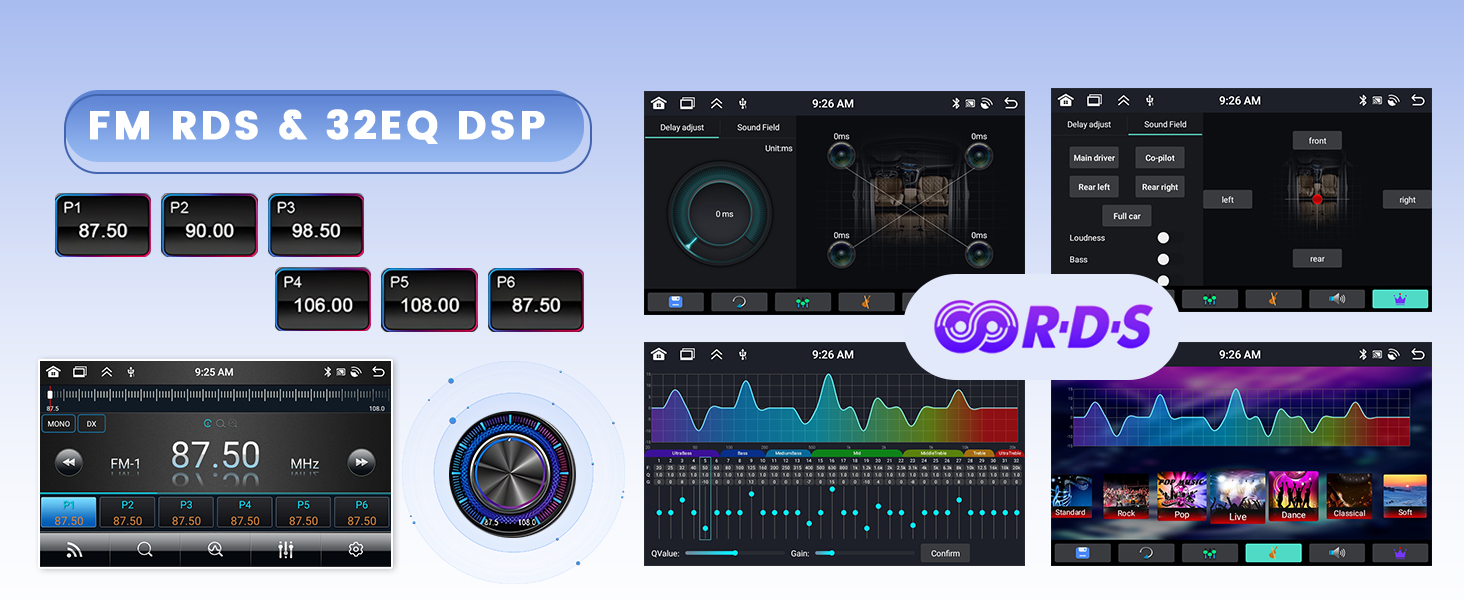
Image: Examples of 59 UI themes.
6.3. Wireless/Wired CarPlay & Android Auto
Connect your smartphone seamlessly via Bluetooth or USB cable to access CarPlay or Android Auto. This allows for hands-free control of navigation, music, calls, and messaging through voice commands (Siri or Google Assistant).
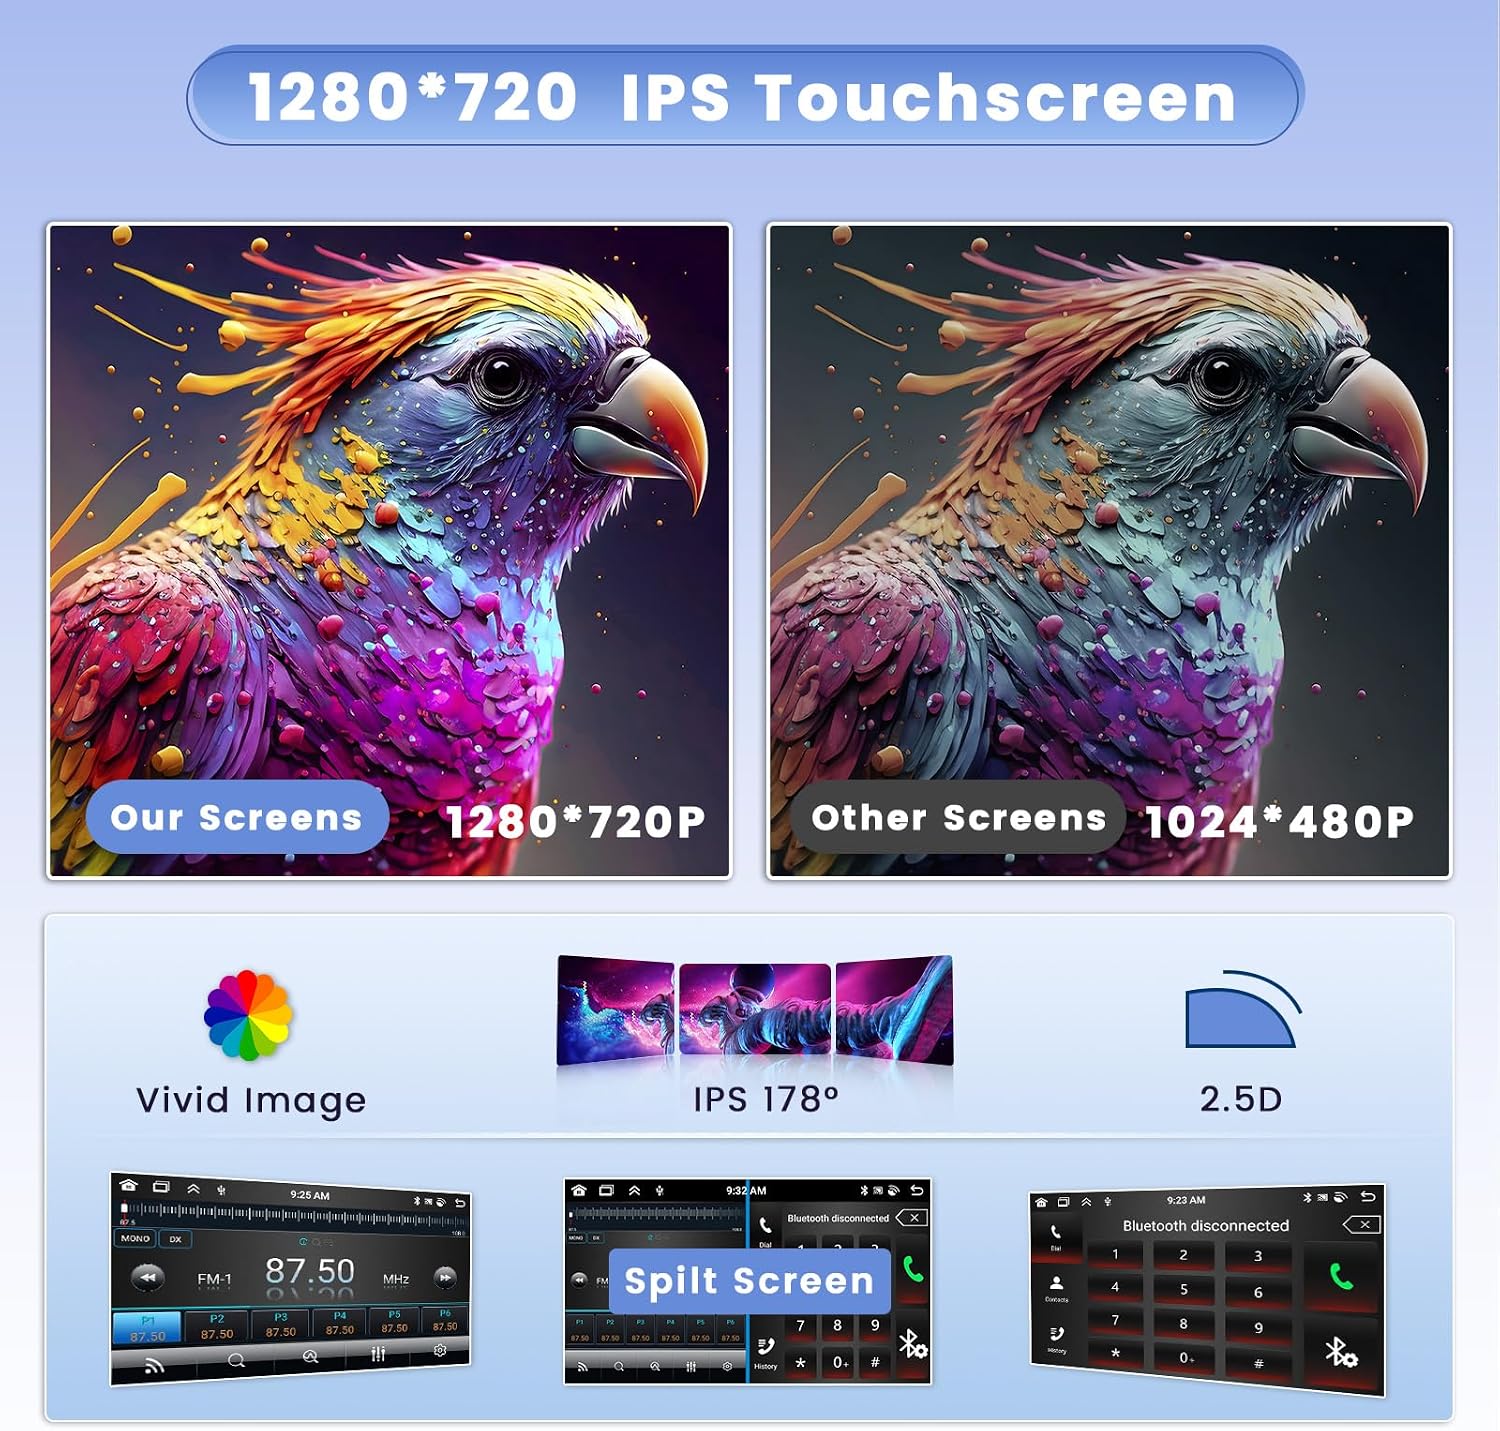
Image: Wireless and wired CarPlay/Android Auto connectivity.
6.4. GPS Navigation & WiFi
Utilize online and offline maps for navigation. Connect to the internet via WiFi or a mobile hotspot to browse, stream videos, and download applications. The split-screen function allows simultaneous use of navigation and other apps.

Image: GPS navigation and WiFi features.
6.5. Bluetooth 5.0 & Voice Control
Bluetooth 5.0 provides faster transmission speeds for hands-free calling, phonebook download, and music streaming. Voice control features allow for safe operation while driving.
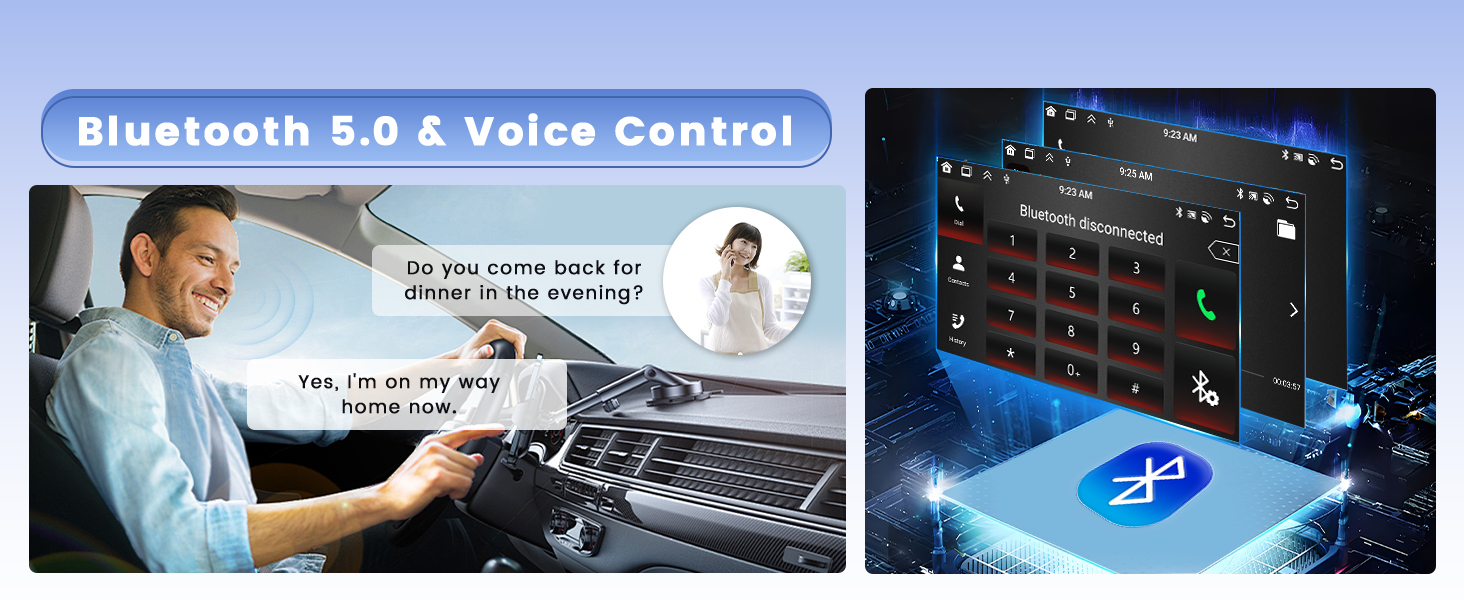
Image: Bluetooth 5.0 and voice control features.
6.6. DSP & FM/RDS Radio
The pre-installed DSP tuning software offers 32 equalization (EQ) settings, allowing you to fine-tune audio frequencies for optimal sound quality. The FM/RDS radio provides access to 30 preset stations and displays station information.

Image: DSP sound settings and FM/RDS radio interface.
6.7. Steering Wheel Control
The unit supports original steering wheel controls. To configure, navigate to: Settings > Factory Settings (Password 1234) > Protocol settings > Select Protocol Box Brand. Ensure the protocol box brand matches your installed Canbus decoder. Then, you can learn and assign functions to your steering wheel buttons.

Image: Steering wheel control setup guide.
6.8. AHD Rear Camera
The included AHD rear camera provides clear rear visibility. To enable or adjust guidelines, go to: Car Info > About > Custom Set > Turn on "show dynamic trackline" and "show static trackline".

Image: AHD backup camera functionality and guideline settings.
7. Maintenance
- Cleaning the Screen: Use a soft, lint-free cloth to gently wipe the touchscreen. Do not use abrasive cleaners or solvents.
- Software Updates: Periodically check for software updates to ensure optimal performance and access to new features. Updates can usually be found in the system settings or on the manufacturer's website.
- General Care: Avoid placing heavy objects on the unit. Keep the unit free from dust and debris.
8. Troubleshooting
If you encounter issues, refer to the following common problems and solutions:
| Problem | Possible Solution |
|---|---|
| No Power | Check power cable connections and vehicle fuses. Ensure the battery is properly connected. |
| No Sound | Verify speaker wire connections. Check volume settings and ensure mute is not activated. Confirm amplifier is powered if external. |
| GPS Not Working | Ensure GPS antenna is properly connected and has a clear view of the sky. Check GPS settings in the system. |
| Bluetooth Connection Issues | Ensure Bluetooth is enabled on both the car radio and your phone. Delete previous pairings and try reconnecting. |
| Rear Camera Not Displaying | Check camera power and video cable connections. Ensure the reverse trigger wire is correctly connected. |
If the problem persists, please contact customer support for assistance.
9. Specifications
Detailed technical specifications for the Hikity 8 Core 4GB+64GB Android 15 Car Radio:
| Feature | Specification |
|---|---|
| Brand | Hikity |
| Model Number | e50dbe4c-53c3-4b7a-9654-d82bf164fed0 (4+64G(DSP)) |
| Operating System | Android 15 |
| CPU | 8 Core Processor |
| RAM | 4GB |
| ROM | 64GB |
| Display | 9-inch IPS Capacitive Touchscreen |
| Resolution | 1280x720 |
| Connectivity Technology | Bluetooth, USB, Wi-Fi |
| Wireless Technology | Bluetooth 5.0, Wi-Fi |
| Special Features | Android Auto, Built-in Bluetooth, GPS Navigation, FM Tuner, DSP (32EQ) |
| Compatible Devices | Smartphone |
| Audio Output Mode | Stereo |
| Surround Sound Channel Configuration | 4.0 |
| Wattage | 45 Watts (per channel, 4 channels) |
| Connector Type | USB, CVBS, HDMI |
| Video Encoding | MKV, RMVB, AVI, MP4, MDV |
| Control Method | Touchscreen |
| Item Dimensions (D x W x H) | 24D x 5.7W x 13.2H centimeters |
| Country of Origin | China |
10. Warranty and Support
10.1. Warranty Information
This product comes with a 12-month warranty from the date of purchase. The manufacturer provides online assistance for lifetime inquiries and aims to respond within 24 hours for any warranty-related questions or issues.
10.2. Customer Support
For technical support, troubleshooting, or warranty claims, please contact Hikity Electronic directly. You can reach them via:
- Email: hickitysals@163.com
- Refer to the seller information on your purchase platform (e.g., Amazon) for direct messaging options.
When contacting support, please provide your product model number (4+64G(DSP)) and a detailed description of the issue.