
ARSSLY GT2
ARSSLY Huawei Watch GT2 Screen Replacement Instruction Manual
Model: Huawei Watch GT2 (LTN-B19, DAN-B19)
Introduction
This manual provides essential instructions for the installation and care of your ARSSLY LCD Display Touch Screen Replacement for the Huawei Watch GT2. This replacement screen is compatible with Huawei Watch GT2 models LTN-B19 and DAN-B19. Please review this manual thoroughly before beginning the replacement process.
Safety Information
- Always power off your device completely before starting any repair.
- Use appropriate tools and handle components with care to avoid damage.
- Avoid applying excessive force to the screen or internal components.
- Keep small parts away from children.
- If you are unsure about any step, seek professional assistance.
Package Contents
Verify that all items are present in your package:
- 1x ARSSLY LCD Display Touch Screen Replacement for Huawei Watch GT2 (without frame)
- 1x Repair Tool Kit (may include screwdrivers, prying tools, suction cup, etc.)

Image: The ARSSLY Huawei Watch GT2 screen replacement module shown alongside the various repair tools included in the kit, such as screwdrivers, prying tools, and adhesive strips.
Setup and Installation
The screen replacement process requires careful attention. We strongly recommend watching video tutorials before attempting installation.
Important Considerations:
- Model Verification: Ensure your device is a Huawei Watch GT2 (LTN-B19 or DAN-B19) 46mm model. This screen is not compatible with other models.
- Video Guidance: Search for "Huawei Watch GT2 screen replacement" on video platforms like YouTube for detailed visual instructions.
- Professional Tools: While a basic repair kit is included, some advanced repairs may benefit from professional-grade tools.
General Installation Steps (Consult Video Tutorials for Details):
- Power Off Device: Completely power down your Huawei Watch GT2.
- Heat Application (Optional): Gently heat the edges of the original screen to soften the adhesive. Use a heat gun or hairdryer on a low setting.
- Pry Open: Carefully use the included prying tools to separate the old screen from the watch body. Work slowly and methodically around the edges.
- Disconnect Cables: Once the screen is partially lifted, locate and carefully disconnect the flex cables connecting the old screen to the watch's main board. These are typically delicate ribbon cables.
- Remove Old Screen: Once all cables are disconnected, remove the damaged screen.
- Clean Frame: Thoroughly clean any remaining adhesive or debris from the watch frame.
- Connect New Screen: Carefully connect the flex cables of the new ARSSLY screen to the corresponding connectors on the watch's main board. Ensure they are seated correctly and securely.
- Test Functionality: Before fully sealing the new screen, temporarily power on the watch to test the display and touch functionality. Check for dead pixels, touch response, and display clarity.
- Apply Adhesive: Apply new adhesive (not included, but often part of a more comprehensive repair kit) around the watch frame.
- Secure New Screen: Carefully align and press the new screen into place on the watch frame. Apply gentle, even pressure.
- Final Assembly: Allow the adhesive to cure for several hours, ideally under gentle clamping pressure (e.g., rubber bands around the watch).
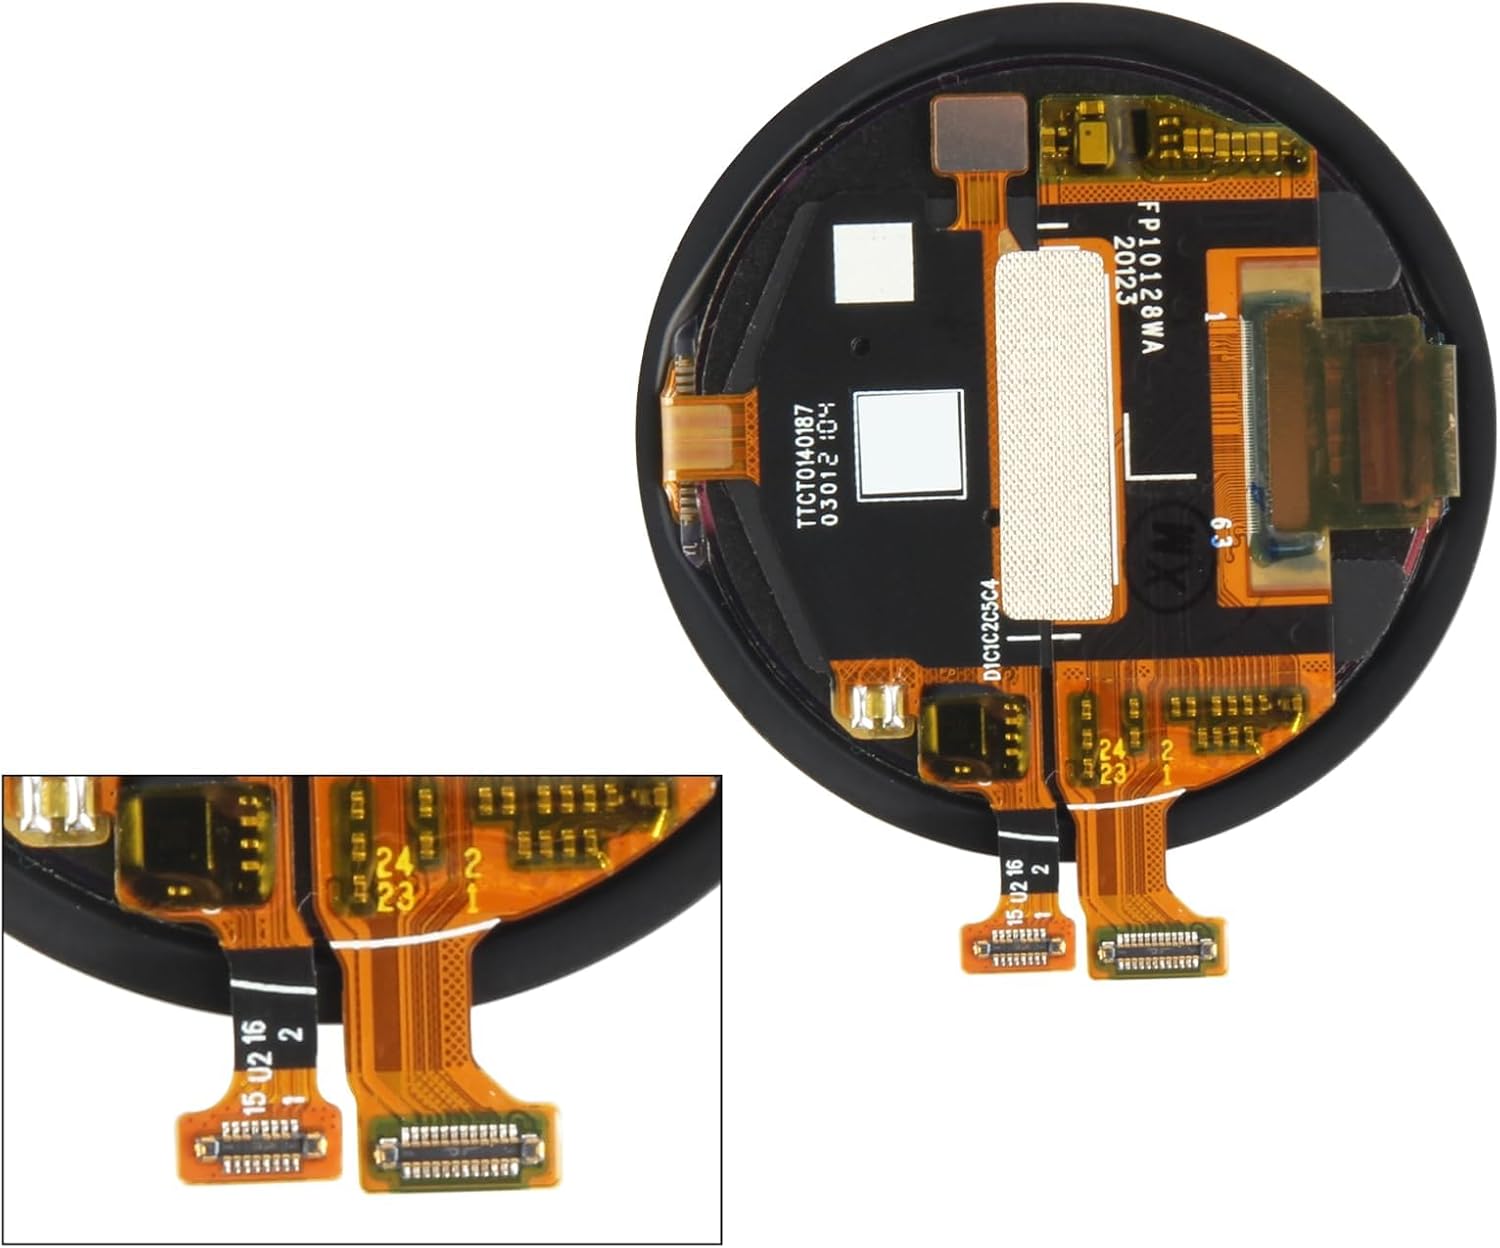
Image: A detailed view of the reverse side of the replacement screen, highlighting the delicate flex cable connectors that must be carefully attached to the watch's main board during installation.

Image: A composite image showing both the front display surface and the intricate back circuitry of the ARSSLY Huawei Watch GT2 replacement screen.
Operating (Post-Installation)
After successful installation, power on your Huawei Watch GT2 and perform the following checks:
- Display Check: Verify that the screen displays images clearly, without flickering, dead pixels, or discoloration.
- Touch Functionality: Test the touch response across the entire screen. Swipe, tap, and interact with all on-screen elements to ensure full functionality.
- Brightness Adjustment: Confirm that screen brightness can be adjusted through the watch settings.

Image: The replacement screen emphasizing its scratch-proof surface, high-definition display, and resistance to fingerprints, ensuring optimal post-installation performance.
Maintenance
To ensure the longevity and optimal performance of your new screen:
- Cleaning: Use a soft, lint-free cloth to gently wipe the screen. For stubborn smudges, slightly dampen the cloth with water or a screen-specific cleaner. Avoid harsh chemicals.
- Protection: Consider applying a screen protector for added scratch resistance.
- Avoid Impact: Protect your watch from drops and impacts that could damage the screen.
- Temperature Extremes: Avoid exposing the watch to extreme temperatures, which can affect screen performance and adhesive integrity.
Troubleshooting
If you encounter issues after installation, consider the following:
- Screen Not Turning On:
- Ensure all flex cables are securely connected.
- Check the watch battery level.
- Perform a hard reset of the watch (refer to your watch's original manual for instructions).
- Touch Not Responding:
- Verify flex cable connections, especially the digitizer cable.
- Ensure no debris is trapped between the screen and the frame.
- Restart the watch.
- Display Issues (Lines, Discoloration):
- Recheck flex cable connections for proper seating.
- Ensure no pressure is being applied unevenly to the screen.
- If issues persist, the screen itself may be faulty. Contact customer support.
Specifications
| Compatible Models | Huawei Watch GT2 (LTN-B19, DAN-B19) 46mm |
| Type | LCD Display Touch Screen Digitizer Full Assembly (without frame) |
| Color | Black |
| Item Weight | 1.6 ounces |
| Manufacturer | ARSSLY |
Warranty and Support
ARSSLY provides the following support for your product:
- Warranty: Free replacement within three months in case of non-human damage.
- Customer Service: If you experience any problems with the product, please contact our customer service immediately. We aim to respond within 24 hours.
Ask a question about this manual
Ask about setup, troubleshooting, compatibility, parts, safety, or missing instructions. Manuals+ will review the question and use this page’s manual context to help answer it.