1. Introduction
This manual provides detailed instructions for the proper setup, operation, and maintenance of your LINKMICRO LM115 LCD Digital Coin Microscope. This device features a 5-inch IPS screen, 12MP camera, 8 adjustable LED lights, and a sturdy metal stand, making it suitable for observing coins, soldering, and various other small objects. It supports both handheld and stand-mounted use, offering versatility for different observation needs.
2. What's in the Box
Please verify that all components are present upon unboxing:
- Microscope
- Metal Bracket
- USB-C Data Cable
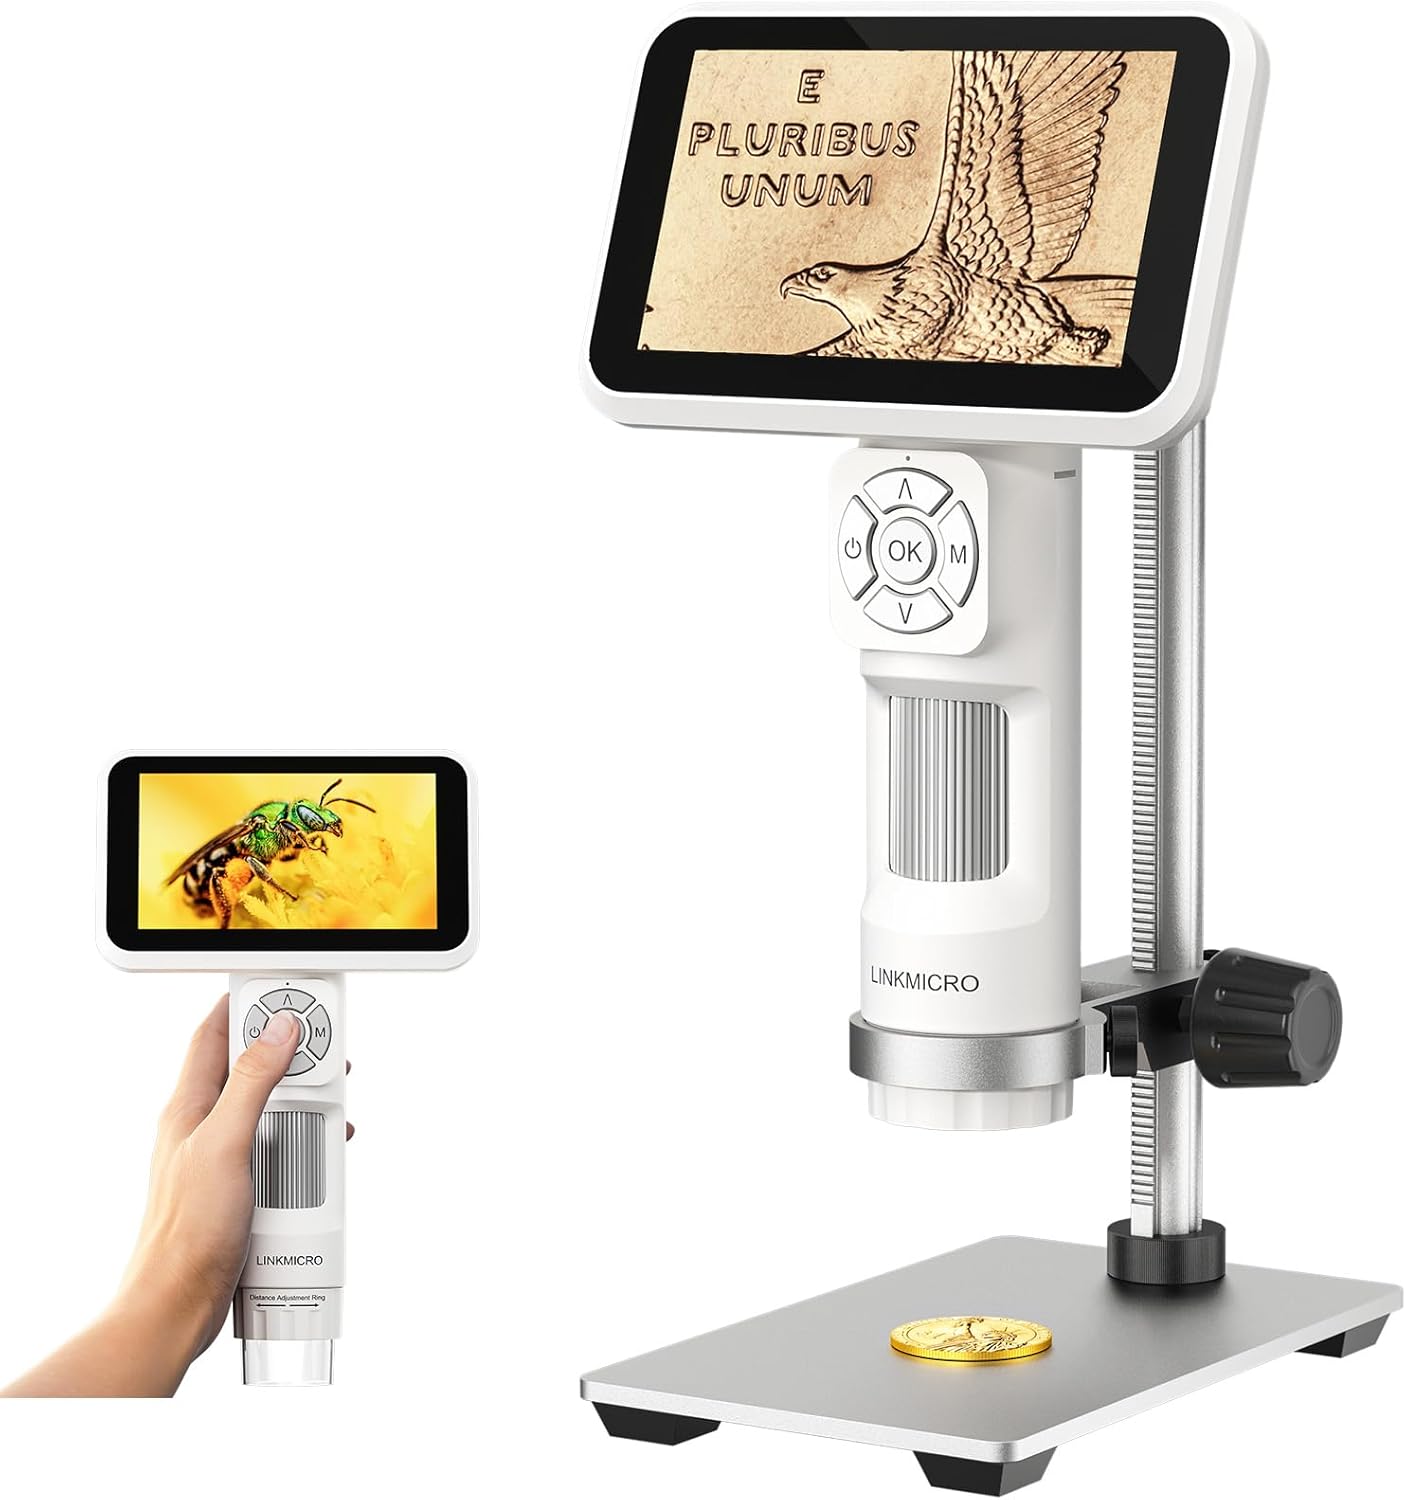
Image: LINKMICRO LM115 Digital Coin Microscope in both handheld and stand configurations.
3. Setup
3.1 Assembling the Metal Stand
- Unpack the metal base, vertical rod, and microscope holder.
- Insert the vertical rod into the designated hole on the metal base and secure it with the provided screw.
- Attach the microscope holder to the vertical rod, ensuring it can slide smoothly for height adjustment.
- Place the LM115 microscope unit into the holder and tighten the side screws to secure it.

Image: Assembly of the metal stand for the LM115 microscope.
3.2 Initial Power On
Press and hold the power button on the microscope unit to turn it on. The 5-inch IPS screen will display the startup sequence.
3.3 Charging the Device
Connect the microscope to a power source using the provided USB-C data cable. The built-in 900 mAh battery provides approximately 2.5 hours of continuous usage. A charging indicator will typically be visible on the device.
Video: Demonstrates the easy assembly process of the LINKMICRO LM115 Digital Coin Microscope.
4. Operating the Microscope
4.1 Handheld Mode
For portable observation, detach the microscope unit from the metal stand. The compact design allows for outdoor exploration and on-the-go use. The built-in Distance Adjustment Ring helps maintain stability and clarity.

Image: LM115 in handheld mode, demonstrating its portability and anti-shake features.
4.2 Stand Mode
When detailed, hands-free observation is required, use the microscope with its 7.3-inch metal stand. Adjust the height of the microscope on the stand using the adjustment knobs to achieve the desired working distance and field of view.

Image: LM115 on its metal stand, ideal for coin collectors.
4.3 Focusing and Zoom
- Distance Adjustment Ring: Rotate the ring on the microscope body to adjust the object distance for stable and clear images. This is crucial for anti-shake performance and a larger field of view.
- Digital Zoom: Use the 'Up' and 'Down' arrow buttons on the control panel to digitally zoom in or out on the image displayed on the screen. The maximum magnification is 60x.
4.4 Adjusting LED Lights
The LM115 features 8 built-in adjustable LED lights. Use the light control button (often indicated by a light bulb icon) to cycle through different brightness levels or turn the lights on/off. Proper illumination reduces shadows and glare, enhancing image clarity.

Image: Illustration of the 8 adjustable LED lights and their effect on image clarity.
Video: Demonstrates the LM115 in stand mode, focusing on coins and highlighting its features for error coin detection.
5. Media Integration
5.1 Recording Images and Videos
The LM115 supports capturing high-quality 12MP images and 1080FHD videos. Insert a microSD card (not included) into the designated slot on the microscope unit to save your observations. Use the 'OK' button to capture images or start/stop video recording.
5.2 PC Connectivity
Connect the microscope to your computer via the USB-C data cable for real-time viewing, sharing, and recording on a larger screen. This feature is ideal for detailed analysis or presenting observations.

Image: LM115 connected to a computer for real-time viewing and recording.
Video: Shows the LM115 in action, recording details of a coin, demonstrating its utility for coin collectors.
6. Maintenance
- Keep the lens and screen clean using a soft, lint-free cloth. Avoid abrasive materials or harsh chemicals.
- Store the microscope in a dry, dust-free environment when not in use.
- Ensure the battery is charged regularly to maintain optimal performance.
7. Troubleshooting
If you encounter any issues with your LM115 microscope, please refer to the following general advice:
- No Power: Ensure the device is fully charged or connected to a power source. Check the USB-C cable connection.
- Unclear Image: Adjust the distance adjustment ring and use the digital zoom buttons to refine focus. Ensure the lens is clean.
- Cannot Save Files: Verify that a compatible microSD card is inserted correctly and has sufficient free space.
For further assistance, please contact LINKMICRO customer support.
8. Specifications
| Feature | Detail |
|---|---|
| Model Name | LM115 |
| Brand | LINKMICRO |
| Screen Size | 5-inch IPS |
| Camera Resolution | 12MP |
| Video Resolution | 1080P FHD |
| Magnification Maximum | 60x |
| Light Source Type | 8 Adjustable LED Lights |
| Stand Material | 7.3-inch Metal Stand |
| Battery Capacity | 900 mAh Lithium Ion (included) |
| Usage Time | Approx. 2.5 hours |
| Connectivity | USB Output (for PC view) |
| Compatible Devices | Laptop, Personal Computer |
| Item Weight | 1.1 pounds (0.5 Kilograms) |
| Package Dimensions | 10.28 x 7.13 x 4.29 inches |
9. Warranty and Support
For information regarding product warranty, returns, or technical support, please refer to the official LINKMICRO website or contact their customer service directly. Keep your purchase receipt for warranty claims.