Introduction
The RAINPOINT 3 Zone Sprinkler Timer (Model B347) is designed to provide efficient and customizable watering solutions for your garden, lawn, or yard. Featuring a durable brass inlet and a robust, waterproof construction, this timer ensures reliable performance in various outdoor conditions. Its user-friendly interface allows for precise control over individual watering zones, helping you conserve water and maintain healthy plants.
Product Features
Enhanced Timer Performance
The water hose timer features a durable brass inlet and a reinforced inlet neck for added strength. The upgraded coil valve ensures less bucking and a more robust, smooth water flow.

Image: Close-up view of the reinforced brass inlet and internal coil valve mechanism.
Customized Zone Scheduling
The 3 zone sprinkler timer allows for individual watering plans, with adjustable durations from 1 minute to 4 hours and frequencies from 1 hour to 7 days.
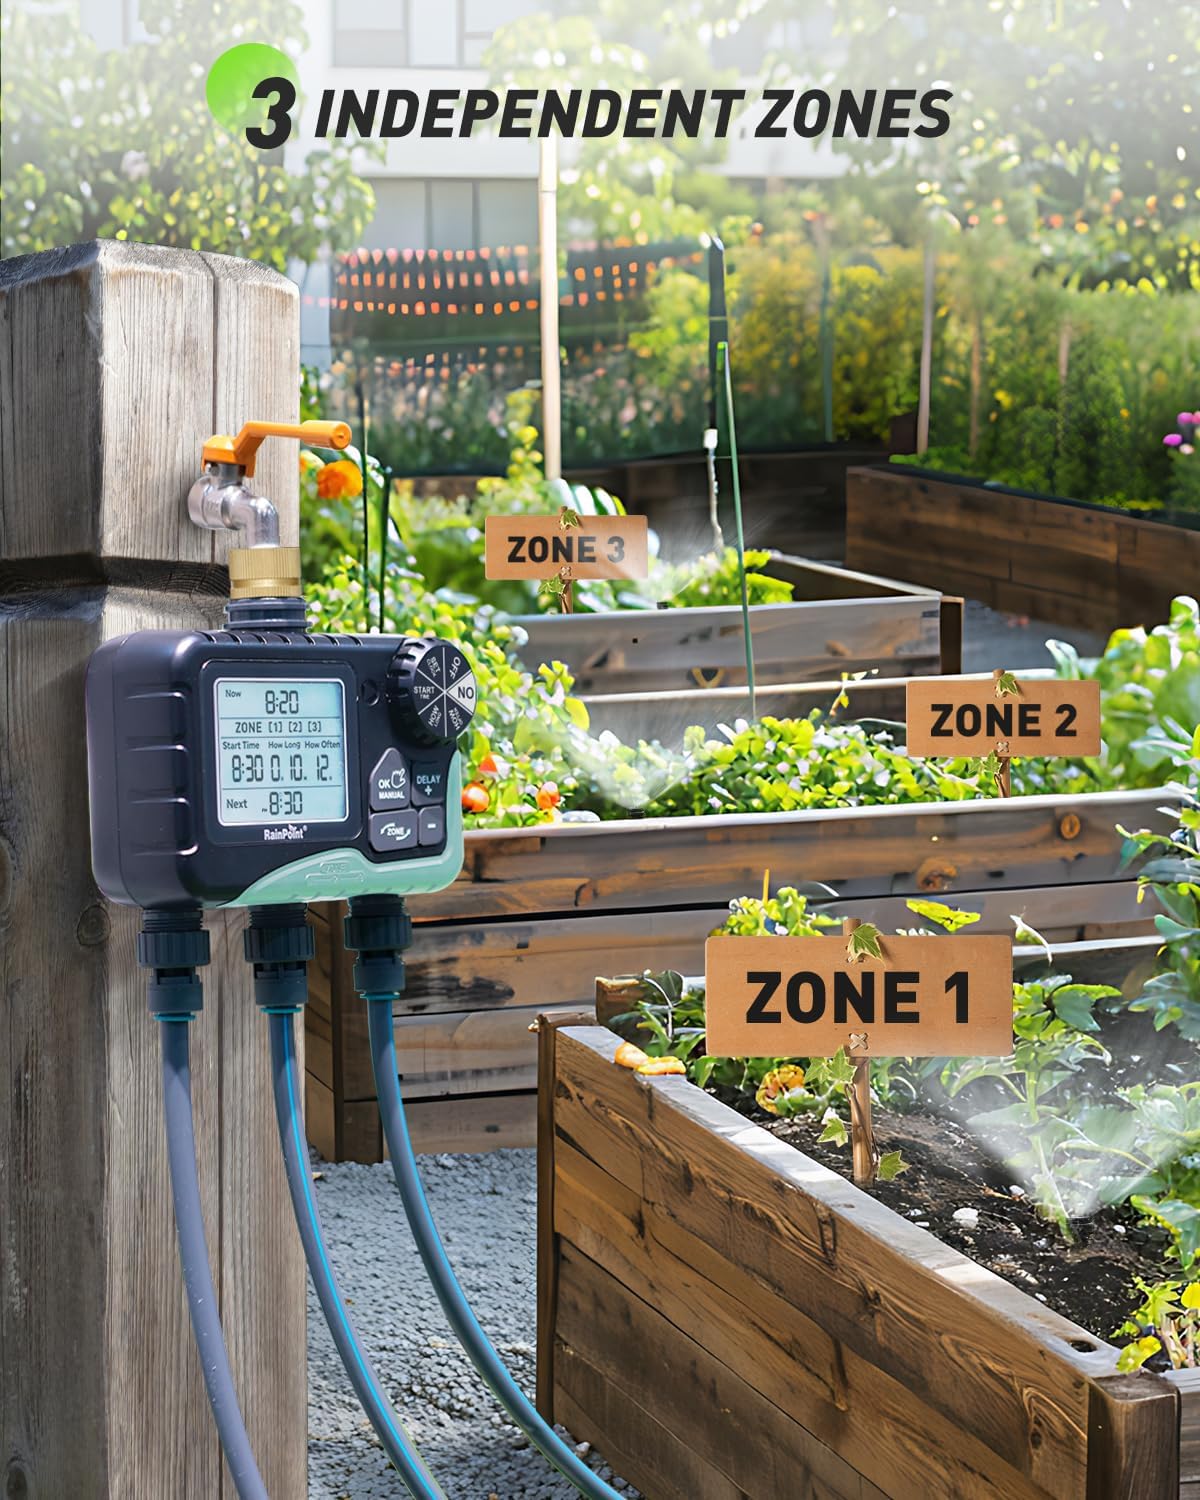
Image: The timer connected to three distinct watering zones in a garden setting.
Weather-Resilient Build
With a sturdy ABS shell and IP65 waterproof rating, this watering timer is built to last, even in harsh outdoor conditions.

Image: The timer shown operating outdoors during rainfall, highlighting its waterproof design.
Flexible Watering Control
Easily adjust irrigation timer manual watering from 1 minute to 8 hours and set weather-responsive delays of 24H, 48H, or 72H to conserve water efficiently.

Image: The timer's LCD screen showing options for setting clock, start time, duration, and frequency.
User-Friendly Interface
The ergonomic design and large, clear LCD display make hose timers for watering easy to read and operate, with low battery warnings to avoid unnecessary water loss.

Image: The timer's display showing a low battery warning and auto shut-off valve feature.
Setup Guide
1. Battery Installation
Remove the battery compartment cover at the back of the timer. Insert 4 new AA (1.5V) alkaline batteries (not included). Ensure the battery compartment cover is securely reattached to maintain waterproofing.
Video: Unboxing of the RAINPOINT 3-Zone Water Timer, showing battery installation and overall product components.
2. Attaching to Faucet
Close your garden faucet. Apply Teflon tape to the faucet threads for a secure, leak-free connection. Attach the timer to the faucet, ensuring the display is vertical to prevent water ingress. If connections are loose or leaking, add more Teflon tape or use a rubber washer if faucet threads don't reach the timer inlet.
3. Connecting Hoses
Connect your garden hoses to the timer outlets. Turn the faucet on after setting the timer to test water flow.
Operating Instructions
1. Activate the Timer
Turn off the faucet and set the dial to "ON". Long-press the "OK/MANUAL" button and insert batteries to enter self-check. Release the button; valves will cycle open and closed (5 seconds each). Verify flow; if correct, the timer is ready for use. If not, retry or contact support. Remove batteries after testing, then reinsert for normal use.
Video: Demonstrates how to activate the 3-zone water timer before its first use, including valve self-check.
2. Setting the Clock
Set the dial to "SET CLOCK". Use the "+" or "-" buttons to choose 24H/12H format, and press "OK" to confirm. Adjust the hour with "+" or "-" to match local time, noting AM/PM in 12H format. Press "OK" to toggle between hours and minutes. Rotate the dial clockwise to save and move on.
3. Programming Watering Schedules
Set the dial to "START TIME". The hour flashes; adjust start time with "+" and "-" buttons. Press "OK" to toggle between hours and minutes. Rotate the dial clockwise to save and continue. Set the dial to "HOW LONG". The hour flashes; adjust watering duration from 1 minute to 4 hours with "+" and "-". Press "OK" to toggle between hours and minutes. Rotate the dial to save and move on. Set the dial to "HOW OFTEN". Use "+" and "-" to select frequency: 1 to 12 hours or 1 to 7 days. Rotate the dial to save and continue.
4. Manual Watering
Set the dial to "ON". Hold "MANUAL" for 3-5 seconds to enter manual mode. Use "ZONE" to switch zones, "+" to select, and "-" to deselect. Press "OK" to set time. Adjust duration with "+" or "-" (1 min to 8 hours), holding them for quick changes. The default watering duration is 10 minutes. Confirm and start watering by pressing "OK" when numbers flash; screen shows remaining time. To stop, hold "MANUAL" for 3-5 seconds or turn dial to "OFF" and back to "ON" to resume program.

Image: A user manually watering plants with the timer, showing the sequential zone activation.
5. Rain Delay Function
At "ON", hold "DELAY / +" for 3 seconds to access rain delay. Adjust the flashing "24H" to 0H, 24H, 48H, or 72H with "+" and "-"; 0H cancels delay. Press "OK/Manual" to activate the rain delay program. Rain delay affects all three zones; setting it for one zone delays all zone plans. Rain delay cannot be paused; to stop, hold "DELAY/-" or turn dial to "OFF" and back to "ON".
Maintenance
Properly install and maintain the filter to prevent debris from entering the timer. Remove batteries if the timer is not used for a long period. Remove the timer during freezing temperatures to avoid damage.


