QcuGvy dianlu-01
QcuGvy Portable Infrared Burner User Manual
Model: dianlu-01
Introduction
Thank you for purchasing the QcuGvy Portable Infrared Burner. This 3500W electric hot plate is designed for efficient and versatile cooking, featuring a touch control panel, a 3-hour timer, and adjustable heating power. Its high-quality glass plate ensures durability and ease of cleaning. This manual provides essential information for safe operation, maintenance, and troubleshooting to ensure optimal performance of your new appliance.

Figure 1: QcuGvy Portable Infrared Burner
This image shows the QcuGvy Portable Infrared Burner from an angled front view, highlighting its sleek black glass surface, digital display, touch controls, and silver base with side handles. The red heating element is visible through the glass.
Important Safety Information
Please read all instructions carefully before using the appliance. Failure to follow these instructions may result in electric shock, fire, or serious injury.
- Do not touch hot surfaces. Use handles or knobs.
- To protect against electrical shock, do not immerse cord, plugs, or the appliance in water or other liquid.
- Close supervision is necessary when any appliance is used by or near children.
- Unplug from outlet when not in use and before cleaning. Allow to cool before putting on or taking off parts, and before cleaning the appliance.
- Do not operate any appliance with a damaged cord or plug or after the appliance malfunctions or has been damaged in any manner.
- The use of accessory attachments not recommended by the appliance manufacturer may cause injuries.
- Do not use outdoors.
- Do not let cord hang over edge of table or counter, or touch hot surfaces.
- Do not place on or near a hot gas or electric burner, or in a heated oven.
- Extreme caution must be used when moving an appliance containing hot oil or other hot liquids.
- Always attach plug to appliance first, then plug cord into the wall outlet. To disconnect, turn any control to "off", then remove plug from wall outlet.
- Do not use appliance for other than intended use.
- This appliance is an electric ceramic stove, not an induction cooker, and does not produce electromagnetic radiation.
- The appliance features overheating protection for enhanced safety.
- An advanced cooling system with a built-in fan ensures rapid cooling after use. The fan may continue to run briefly after the unit is turned off.
Product Overview
Familiarize yourself with the components and controls of your QcuGvy Portable Infrared Burner.

Figure 2: Key Features and Controls
This image displays a collage of four close-up views of the cooktop: the crystal glass surface, the multifunction touch control panel, the knob control for power/timer, and the inner and outer heating circles.

Figure 3: Advanced Cooling System
This image shows the underside of the cooktop, highlighting the large base and the built-in cooling fan, which helps dissipate heat quickly after use.
- Heating Surface: High-quality black crystal glass plate.
- Control Panel: Touch-sensitive controls for various functions (Fried, BBQ, Soup, Function, Timer, ON/OFF).
- Knob Control: Used for adjusting power levels and setting the timer.
- Handles: Anti-scalding portable handles for safe movement.
- Cooling System: Integrated fan and side cooling slots for efficient heat dissipation.
Setup
- Unpack the infrared burner and remove all packaging materials.
- Place the burner on a stable, flat, heat-resistant surface, ensuring adequate ventilation around the unit.
- Ensure the power cord is not obstructed and is away from hot surfaces.
- Plug the power cord into a standard electrical outlet.
- The appliance is now ready for use.
Operating Instructions
The QcuGvy Portable Infrared Burner offers intuitive controls for various cooking needs.
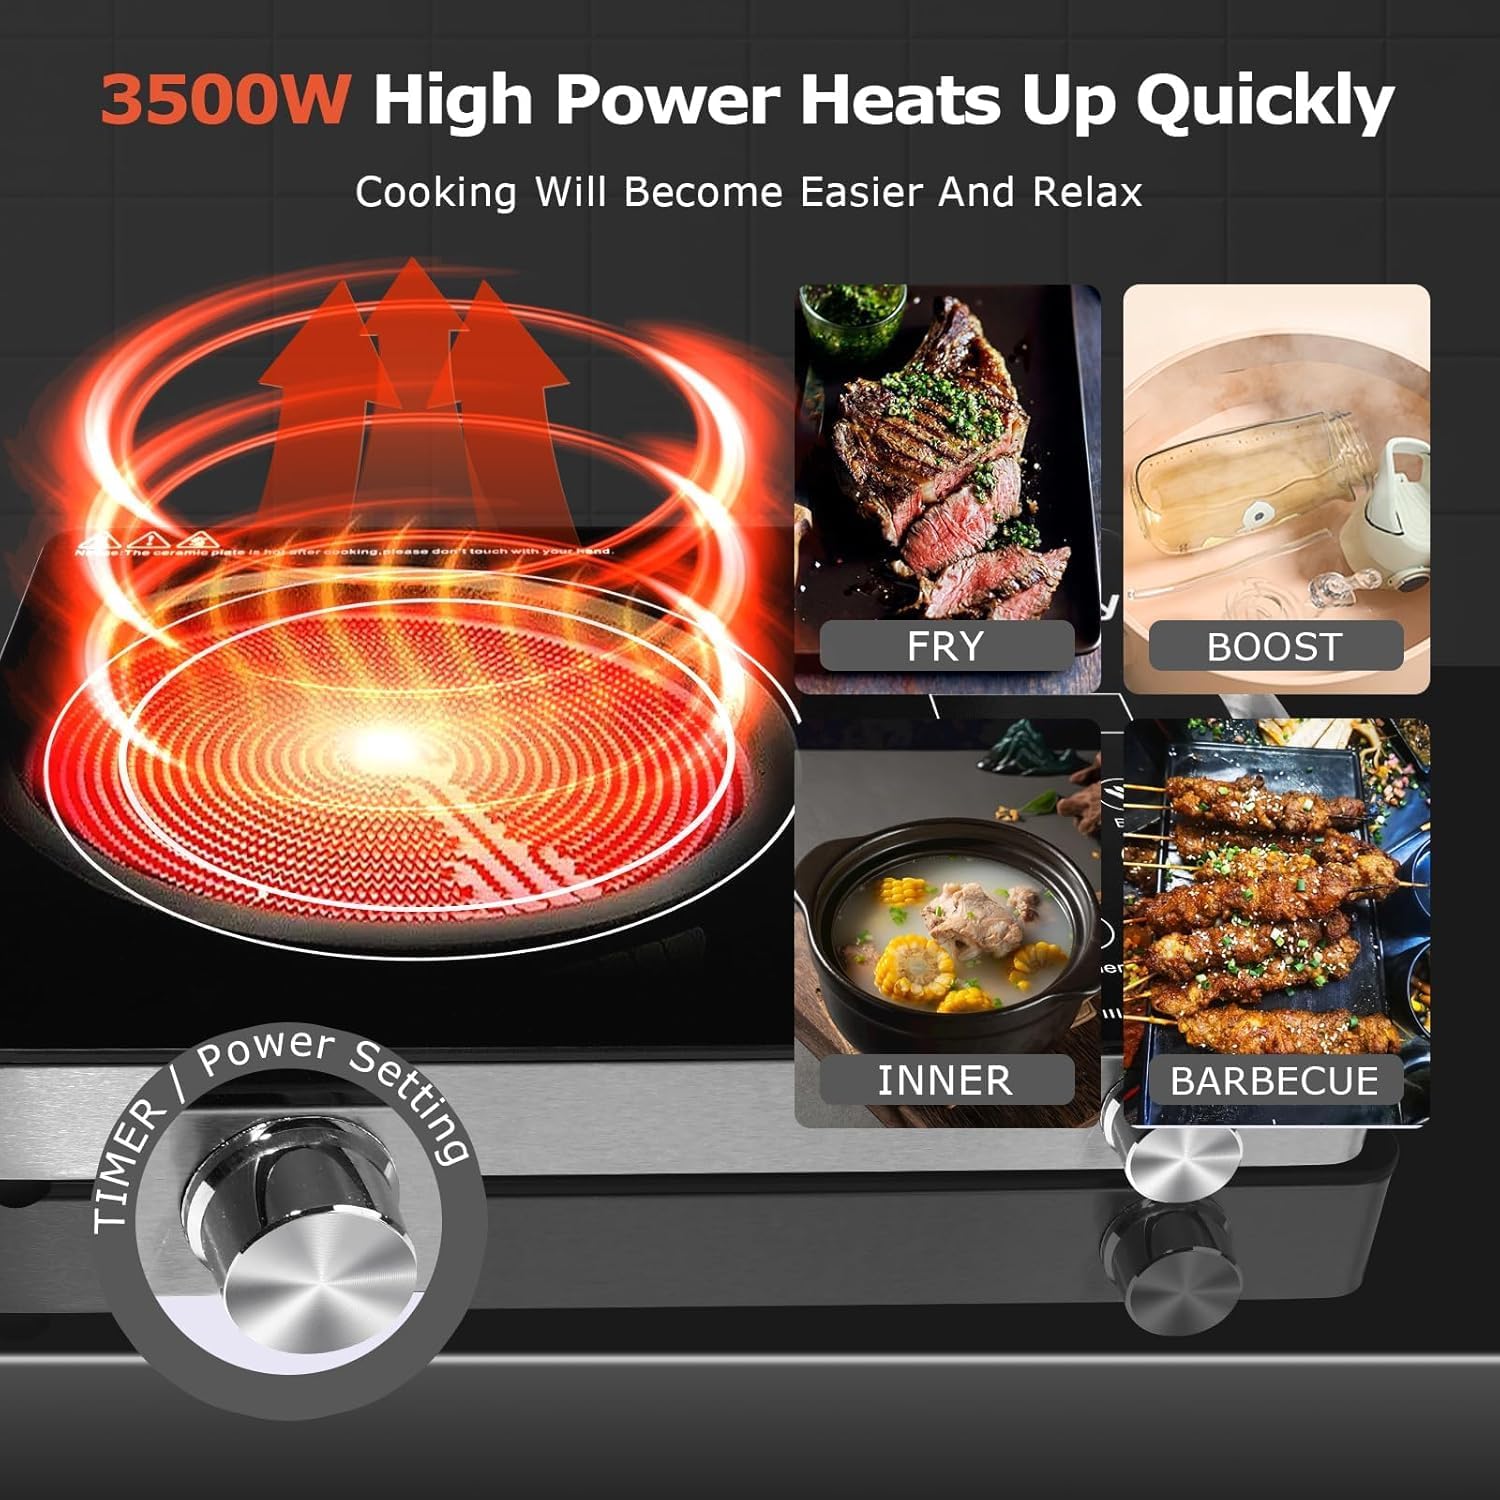
Figure 4: High Power Heating and Cooking Modes
This image illustrates the rapid heating capability of the 3500W burner and shows examples of different cooking applications: Fry, Boost, Inner (for soup), and Barbecue.
- Power On/Off: Press the "ON/OFF" button on the touch control panel to turn the unit on or off.
- Adjusting Heating Power:
- Use the knob control to adjust the heating power from 200W to 3500W. Rotate clockwise to increase power, counter-clockwise to decrease.
- The digital display will show the current power setting.
- Using Pre-set Functions:
- Press the "Function" button to cycle through pre-set cooking modes such as "Fried", "BBQ", and "Soup". Each mode has optimized heating profiles.
- The corresponding indicator light will illuminate.
- Setting the Timer:
- Press the "Timer" button.
- Use the knob control to set the desired cooking time, up to 3 hours. The display will show the remaining time.
- The burner will automatically turn off once the timer expires.
- Cookware Compatibility: This infrared burner is compatible with all types of cookware, including iron, stainless steel, glass, and ceramic.
- Initial Use: During the first few uses, a slight odor may be present. This is normal and will dissipate with continued use. Ensure good ventilation during initial operation.
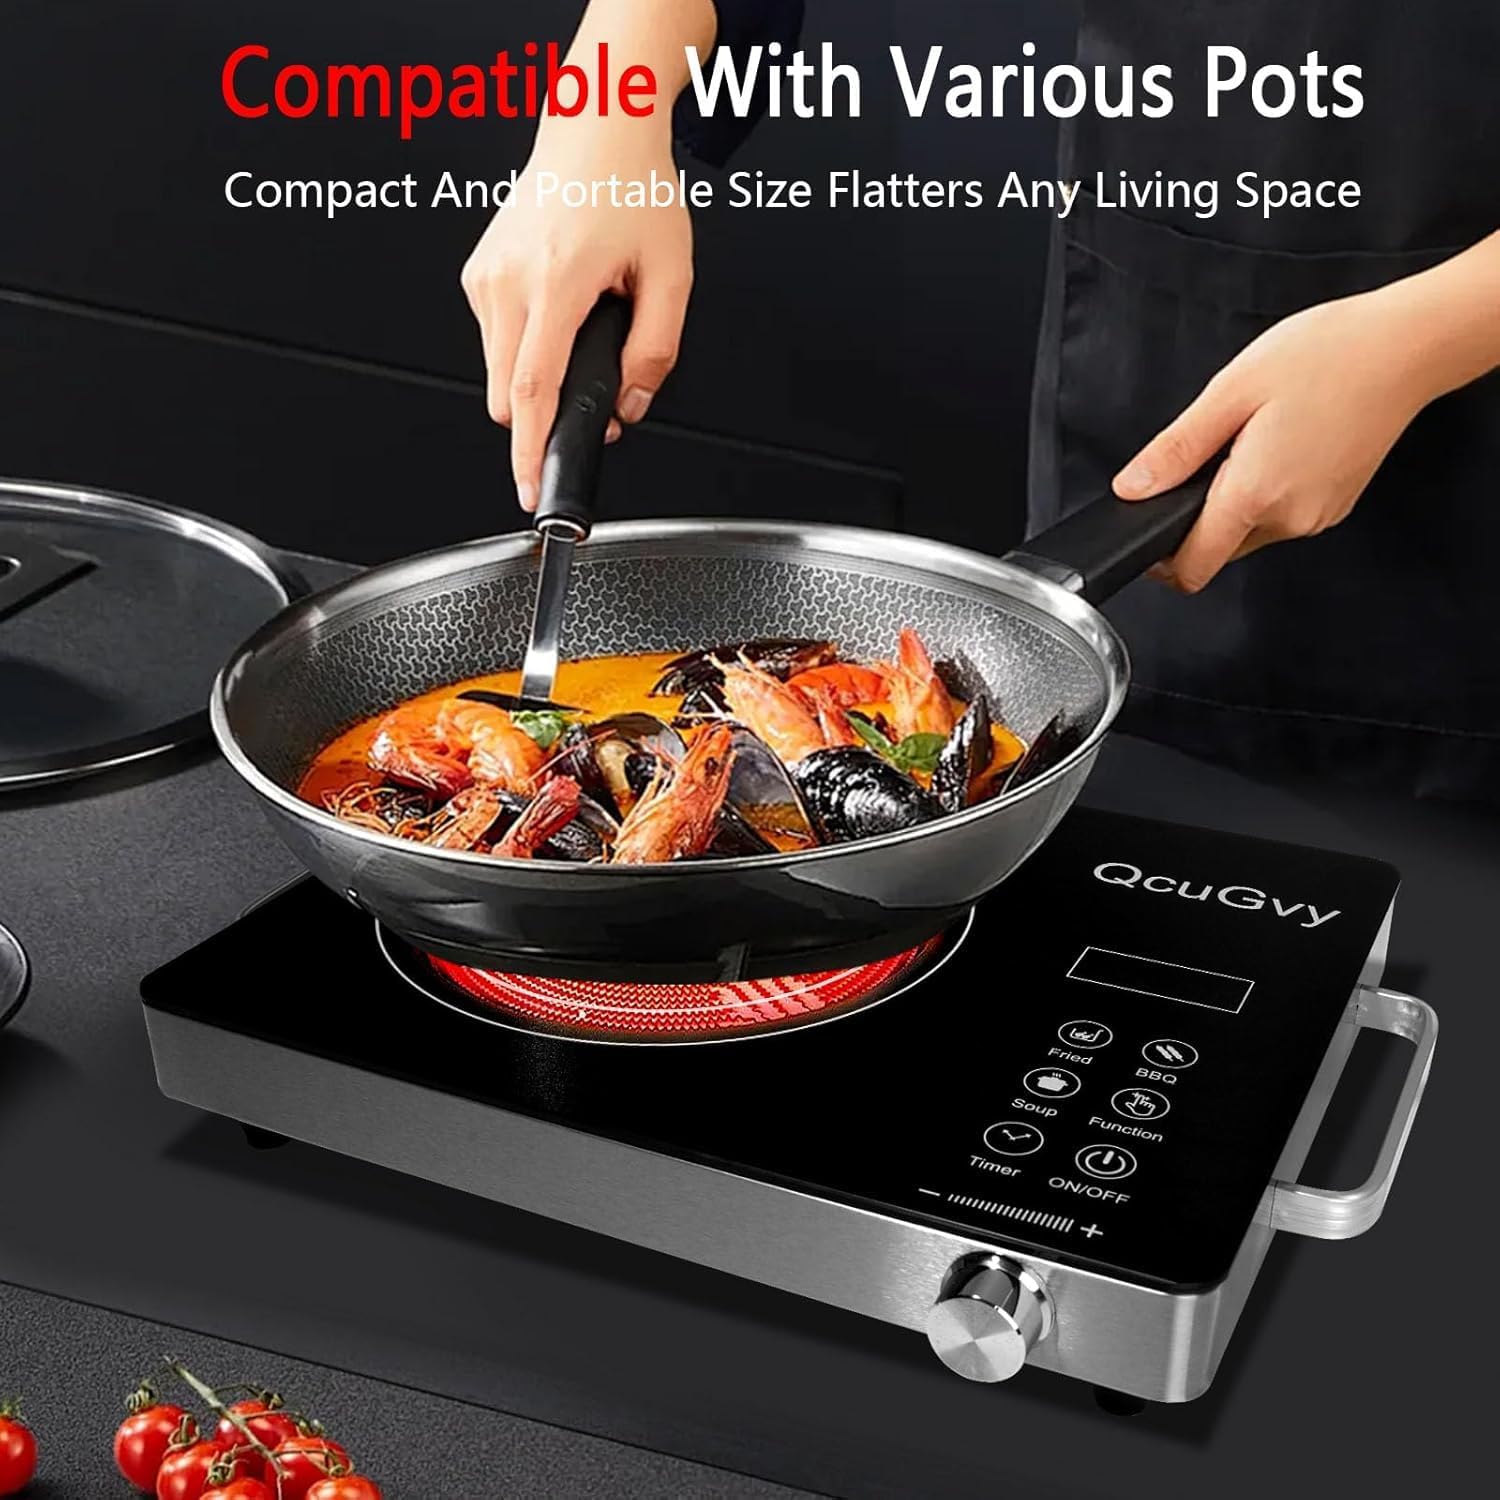
Figure 5: Versatile Cookware Compatibility
This image shows the infrared burner in use with a large wok, demonstrating its compatibility with various pot and pan materials and sizes.
Maintenance and Cleaning
Proper care and cleaning will extend the life of your infrared burner.

Figure 6: Cleaning the Glass Surface
This image shows a hand wiping the black crystal glass surface of the burner with a damp cloth, illustrating the ease of cleaning.
- Always unplug the appliance from the power outlet and allow it to cool completely before cleaning.
- The high-quality glass surface is easy to clean. Wipe with a damp cloth and a mild detergent.
- Do not use abrasive cleaners, scouring pads, or harsh chemicals, as these may damage the surface.
- For stubborn stains, a non-abrasive ceramic cooktop cleaner can be used.
- Do not immerse the appliance in water or any other liquid.
- Ensure the cooling fan area is free from dust and debris for optimal performance.
Troubleshooting
If you encounter any issues with your infrared burner, refer to the following common problems and solutions:
| Problem | Possible Cause | Solution |
|---|---|---|
| Appliance does not turn on. | Not plugged in; power outlet malfunction; power button not pressed. | Ensure the power cord is securely plugged into a working outlet. Press the ON/OFF button. |
| Burner not heating. | Power level too low; timer expired; overheating protection activated. | Increase the power level using the knob. Check if the timer has run out. If overheated, unplug and allow to cool completely before restarting. |
| Unusual odor during first use. | Normal burn-in of new components. | This is normal. Ensure good ventilation in the area. The odor will dissipate after a few uses. |
| Cooling fan continues to run after turning off. | Normal operation of the advanced cooling system. | This is intended to cool the unit down safely. The fan will stop automatically once the internal temperature reaches a safe level. |
If the problem persists after attempting these solutions, please contact customer support.
Specifications

Figure 7: Product Dimensions
This image provides a top-down and side view of the burner with measurements, indicating a width of 14.1 inches, a depth of 11 inches, and a height of 2.5 inches.
| Feature | Detail |
|---|---|
| Brand | QcuGvy |
| Model Number | dianlu-01 |
| Color | Single Burner (Black) |
| Material | Stainless Steel (base), Glass (surface) |
| Wattage | 3500W |
| Controls Type | Touch and Knob |
| Heating Elements | 1 |
| Burner Type | Coil (Infrared) |
| Product Dimensions (D x W x H) | 16.4"D x 12.9"W x 3.5"H |
| Item Weight | 6.34 pounds |
| Power Source | Electric |
| Special Feature | Temperature Control, 3-Hour Timer, Overheating Protection, Advanced Cooling System |
| UPC | 710913397158 |
| Manufacture Year | 2024 |
Warranty and Support
For warranty information or technical support, please contact the manufacturer, QcuGvy, or your retailer. Keep your purchase receipt as proof of purchase for any warranty claims.
For further assistance, you may visit the QcuGvy Store on Amazon.
Ask a question about this manual
Ask about setup, troubleshooting, compatibility, parts, safety, or missing instructions. Manuals+ will review the question and use this page’s manual context to help answer it.