1. Introduction
This manual provides comprehensive instructions for the installation, operation, and maintenance of your GIGABYTE B860 DS3H WIFI6E Motherboard. This motherboard is designed to support Intel Core Ultra Processors (Series 2) and offers advanced features for optimal system performance, including robust power delivery, high-speed storage interfaces, and versatile connectivity options.
2. Product Overview

Figure 2.1: GIGABYTE B860 DS3H WIFI6E Motherboard and Packaging. This image displays the motherboard alongside its retail box, highlighting the product's branding and model name.
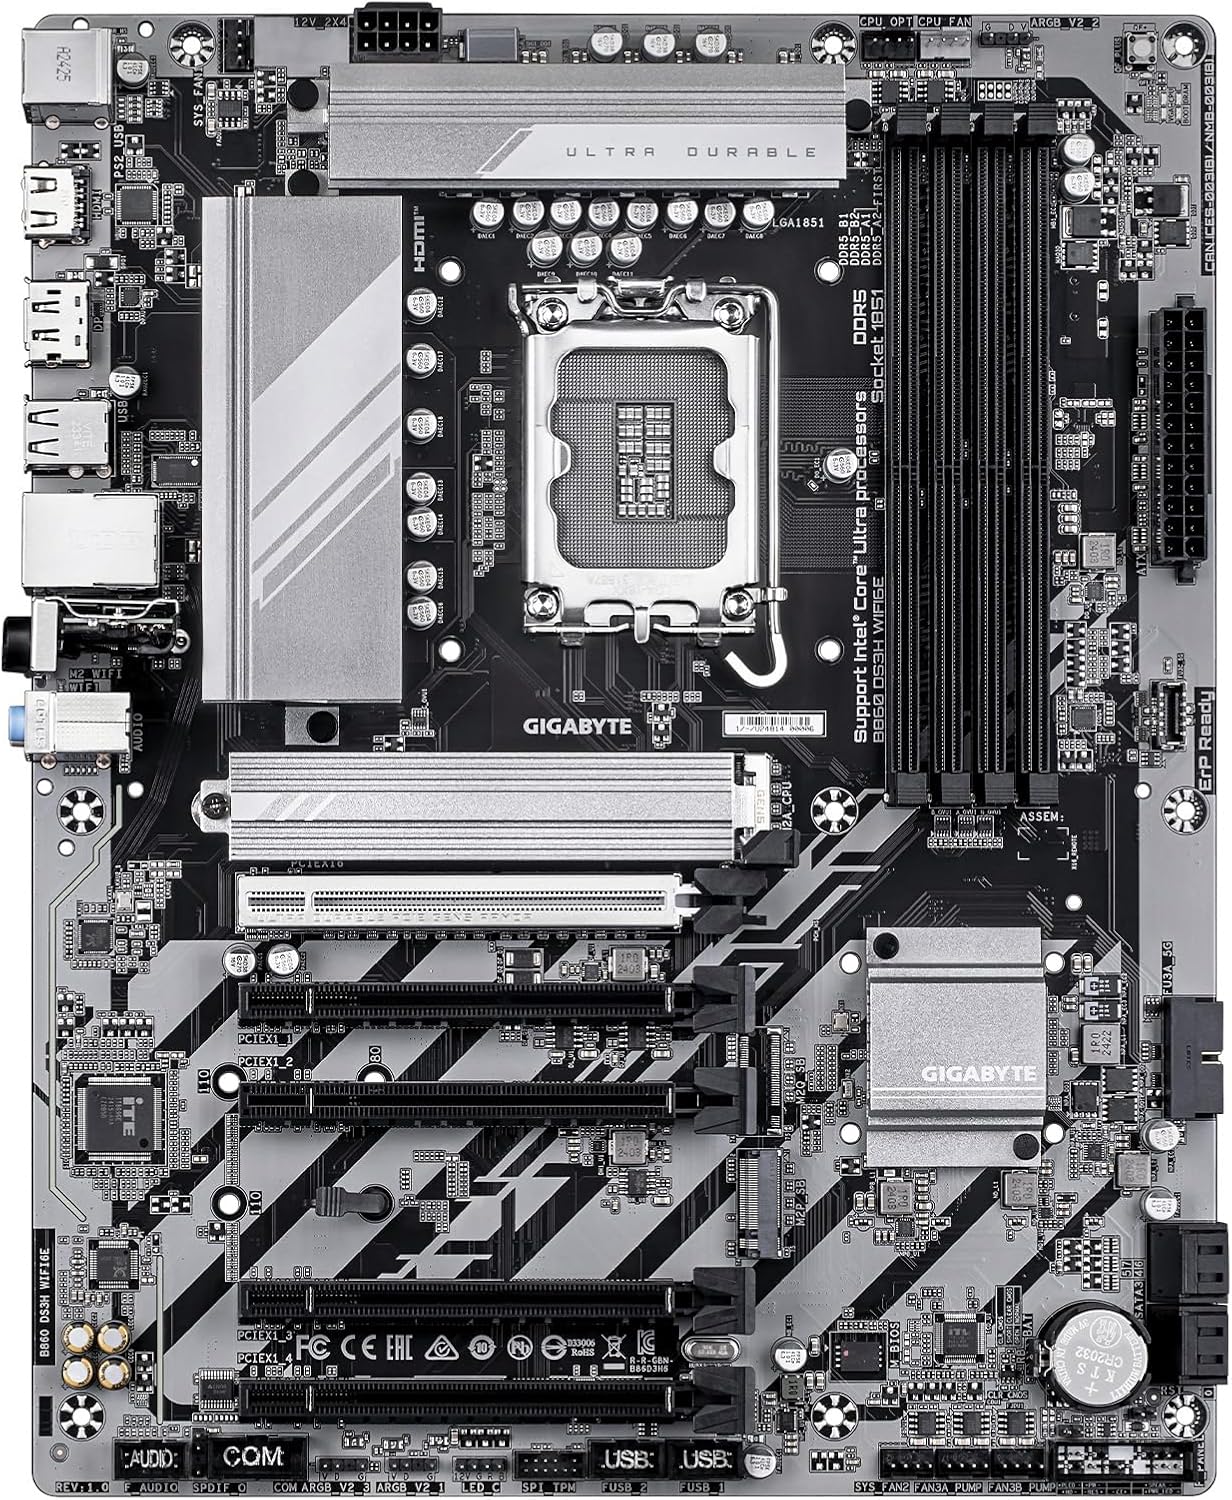
Figure 2.2: Top-down view of the B860 DS3H WIFI6E Motherboard. This perspective shows the layout of components including the CPU socket, DIMM slots, PCIe slots, and M.2 slots.

Figure 2.3: Rear I/O Panel of the B860 DS3H WIFI6E Motherboard. This image details the various ports available for external device connections, including USB, Ethernet, and audio jacks.
3. Setup and Installation
3.1 Pre-Installation Checklist
- Ensure your power supply unit (PSU) is compatible and provides sufficient wattage.
- Verify your CPU is compatible with the LGA 1851 socket.
- Prepare your computer case for motherboard installation.
- Gather necessary tools: Phillips head screwdriver, anti-static wrist strap.
3.2 Motherboard Installation
- Install the I/O shield into your computer case.
- Carefully align the motherboard with the standoffs in your case.
- Secure the motherboard with screws, ensuring it is firmly seated.
3.3 CPU Installation
- Open the CPU socket lever and remove the protective cover.
- Align the CPU's golden triangle with the triangle mark on the socket.
- Gently place the CPU into the socket without forcing it.
- Close the socket lever to secure the CPU.
- Install the CPU cooler according to its manufacturer's instructions, ensuring proper thermal paste application.
3.4 RAM (DDR5) Installation
- Open the clips on both ends of the DIMM slots.
- Align the notch on the DDR5 memory module with the key in the DIMM slot.
- Press down firmly on both ends of the memory module until the clips snap into place.
3.5 Storage Device Installation (M.2 & SATA)
- M.2 SSD: Locate the M.2 slots. Remove the M.2 Thermal Guard if present. Insert the M.2 SSD into the slot at an angle, then push it down and secure it with the M.2 EZ-Latch mechanism or screw. Reattach the Thermal Guard.
- SATA Drives: Connect SATA data cables from your storage drives to the SATA ports on the motherboard. Connect power cables from your PSU to the drives.
3.6 PCIe Card Installation
- Remove the corresponding expansion slot cover from your case.
- Align your PCIe card (e.g., graphics card) with the PCIe 5.0 slot.
- Press down firmly until the card is seated and the PCIe EZ-Latch secures it.
- Secure the card to the case with a screw.
3.7 Power Connections
- Connect the 24-pin ATX main power connector from your PSU to the motherboard.
- Connect the 8-pin (or 4+4-pin) CPU power connector from your PSU to the motherboard.
3.8 Front Panel Connections
- Connect the power button, reset button, HDD LED, and power LED cables from your case to the corresponding pins on the motherboard's front panel header. Refer to the motherboard diagram for correct pin assignments.
- Connect the USB 2.0, USB 3.0, and USB-C front panel headers.
- Connect the front panel audio header.
4. Operating Instructions
4.1 First Boot and BIOS/UEFI Setup
- After all components are installed and connected, power on your system.
- Press the designated key (usually DEL or F2) during startup to enter the BIOS/UEFI setup utility.
- Configure boot order, enable XMP/EXPO for memory, and adjust other settings as needed. Save and exit.
4.2 Driver Installation
After installing your operating system, install the necessary drivers for your motherboard components. These include chipset drivers, audio drivers, LAN drivers, and WIFI6E drivers. Drivers can typically be found on the GIGABYTE official website for your specific motherboard model.
4.3 Operating System Installation
Insert your operating system installation media (USB drive or DVD) and follow the on-screen prompts to install your preferred OS (e.g., Windows 11).
5. Maintenance
5.1 Cleaning
- Regularly clean dust from your computer case and motherboard components using compressed air.
- Ensure the system is powered off and unplugged before cleaning.
5.2 BIOS/UEFI Updates
Periodically check the GIGABYTE website for BIOS/UEFI updates. Updates can improve stability, add support for new hardware, or fix bugs. Follow the provided instructions carefully when updating the BIOS/UEFI.
5.3 Driver Updates
Keep your drivers updated to ensure optimal performance and compatibility. Download the latest drivers from the GIGABYTE support page.
6. Troubleshooting
6.1 No Power / No POST (Power-On Self-Test)
- Check all power connections (24-pin ATX, 8-pin CPU) are securely seated.
- Ensure the PSU is switched on and connected to a working power outlet.
- Reseat RAM modules. Try booting with only one RAM stick.
- Clear CMOS by removing the CMOS battery for 5-10 minutes or using the clear CMOS jumper.
- Ensure the CPU is correctly installed and the CPU cooler is properly mounted.
6.2 Peripheral Detection Issues
- Ensure USB devices are connected to functional ports.
- Verify SATA cables are securely connected to both the motherboard and storage drives.
- Check device manager in your operating system for driver conflicts or missing drivers.
6.3 Network Connectivity Problems
- Ensure Ethernet cable is properly connected and router/modem is working.
- Verify WIFI6E antennas are securely attached to the motherboard.
- Install or update LAN and WIFI drivers from the GIGABYTE website.
- Check network adapter settings in your operating system.
7. Specifications
| Feature | Detail |
|---|---|
| CPU Socket | Intel LGA 1851 |
| Compatible Processors | Intel Core Ultra Processors (Series 2) |
| Chipset | Intel B860 |
| RAM Type | DDR5 |
| Memory Slots | 4 x DIMMs |
| Memory Speed | Up to 5600 MHz |
| Power Design | 8+1+2+2, 50A PPAK VRM |
| PCIe Slots | PCIe 5.0 support |
| M.2 Slots | 2x M.2 Slots with M.2 Thermal Guard |
| USB Connectivity | USB-C and other USB ports |
| Networking | WIFI6E, 2.5GbE LAN |
| Form Factor | ATX |
| Dimensions (LxWxH) | 12 x 9.6 x 1 inches |
| Item Weight | 3.01 pounds |
8. Warranty and Support
For detailed warranty information and technical support, please refer to the official GIGABYTE website or contact GIGABYTE customer service. Keep your proof of purchase for warranty claims.
Official GIGABYTE Support: www.gigabyte.com/support


