Introduction
This manual provides detailed instructions for the installation, operation, and maintenance of your OUTON 52-inch Smart Ceiling Fan with RGB Light. Please read this manual thoroughly before installation and use to ensure safe and efficient operation.
Safety Information
WARNING: To reduce the risk of fire, electric shock, or personal injury, always follow these basic precautions:
- Read all instructions before installing the fan.
- Ensure the power supply is disconnected at the circuit breaker before installation or servicing.
- All wiring must be in accordance with national and local electrical codes. If you are unfamiliar with wiring, consult a qualified electrician.
- The fan must be mounted to a structurally sound ceiling joist or outlet box capable of supporting the fan's weight.
- Do not operate the fan with damaged blades or housing.
- Avoid placing objects in the path of the fan blades.
- Do not use the fan with a dimmer switch not specifically designed for ceiling fans.
- Always ensure the fan is securely mounted before operation.
Package Contents
Verify that all components listed below are included in your package. If any parts are missing or damaged, contact customer support.

Image: All components of the OUTON 52-inch ceiling fan laid out, including motor housing, blades, light kit, remote, and mounting hardware.
- Motor Housing Assembly
- Fan Blades (5x, reversible walnut/black)
- Blade Brackets (5x)
- Light Kit Assembly (LED with RGB)
- Remote Control with Wall Holder
- Downrods (5-inch and 8-inch options)
- Canopy and Mounting Bracket
- Hardware Pack (screws, wire nuts, washers)
- User Manual
Installation Guide
Before beginning installation, ensure the power is turned off at the circuit breaker. It is recommended to have two people for installation. A screwdriver is required but not included.
Step 1: Attach Fan Blades
Attach each fan blade to its corresponding blade bracket using the provided screws. Ensure they are securely fastened. The blades are double-sided, allowing you to choose between walnut and black finishes.

Image: Attaching a fan blade to its bracket. Note: A screwdriver is required for this step.
Step 2: Secure Blade Assemblies to Motor
Once all blades are attached to their brackets, secure these assemblies to the motor housing using the designated screws. Tighten all screws firmly.

Image: Securing the fan blade assembly to the motor housing.
Step 3: Install Light Kit
Connect the light kit wiring to the corresponding wires from the motor. Secure the light kit assembly to the bottom of the motor housing with screws. Ensure all connections are snug.

Image: Connecting the light kit wiring and securing the light kit to the fan motor.
Step 4: Assemble Downrod and Canopy
Thread the fan wires through the chosen downrod (5-inch or 8-inch). Insert the downrod into the motor housing and secure it with the provided pin and screws. Slide the canopy over the downrod.

Image: Assembling the downrod and canopy onto the fan motor.
Step 5: Mount Fan to Ceiling
Secure the mounting bracket to the ceiling joist or outlet box. Carefully lift the fan assembly and hang it from the mounting bracket. Connect the electrical wires from the fan to the house wiring using wire nuts. Ensure proper grounding.
Video: Detailed installation guide for the OUTON ceiling fan. This video demonstrates the process of mounting the fan to the ceiling and connecting electrical wires. Always disconnect power at the circuit breaker before performing any electrical work.
After connecting the wires, slide the canopy up to cover the mounting bracket and secure it with screws.
Operating Instructions
Your OUTON Smart Ceiling Fan can be controlled via the included remote control or a dedicated smartphone application.
Remote Control Functions
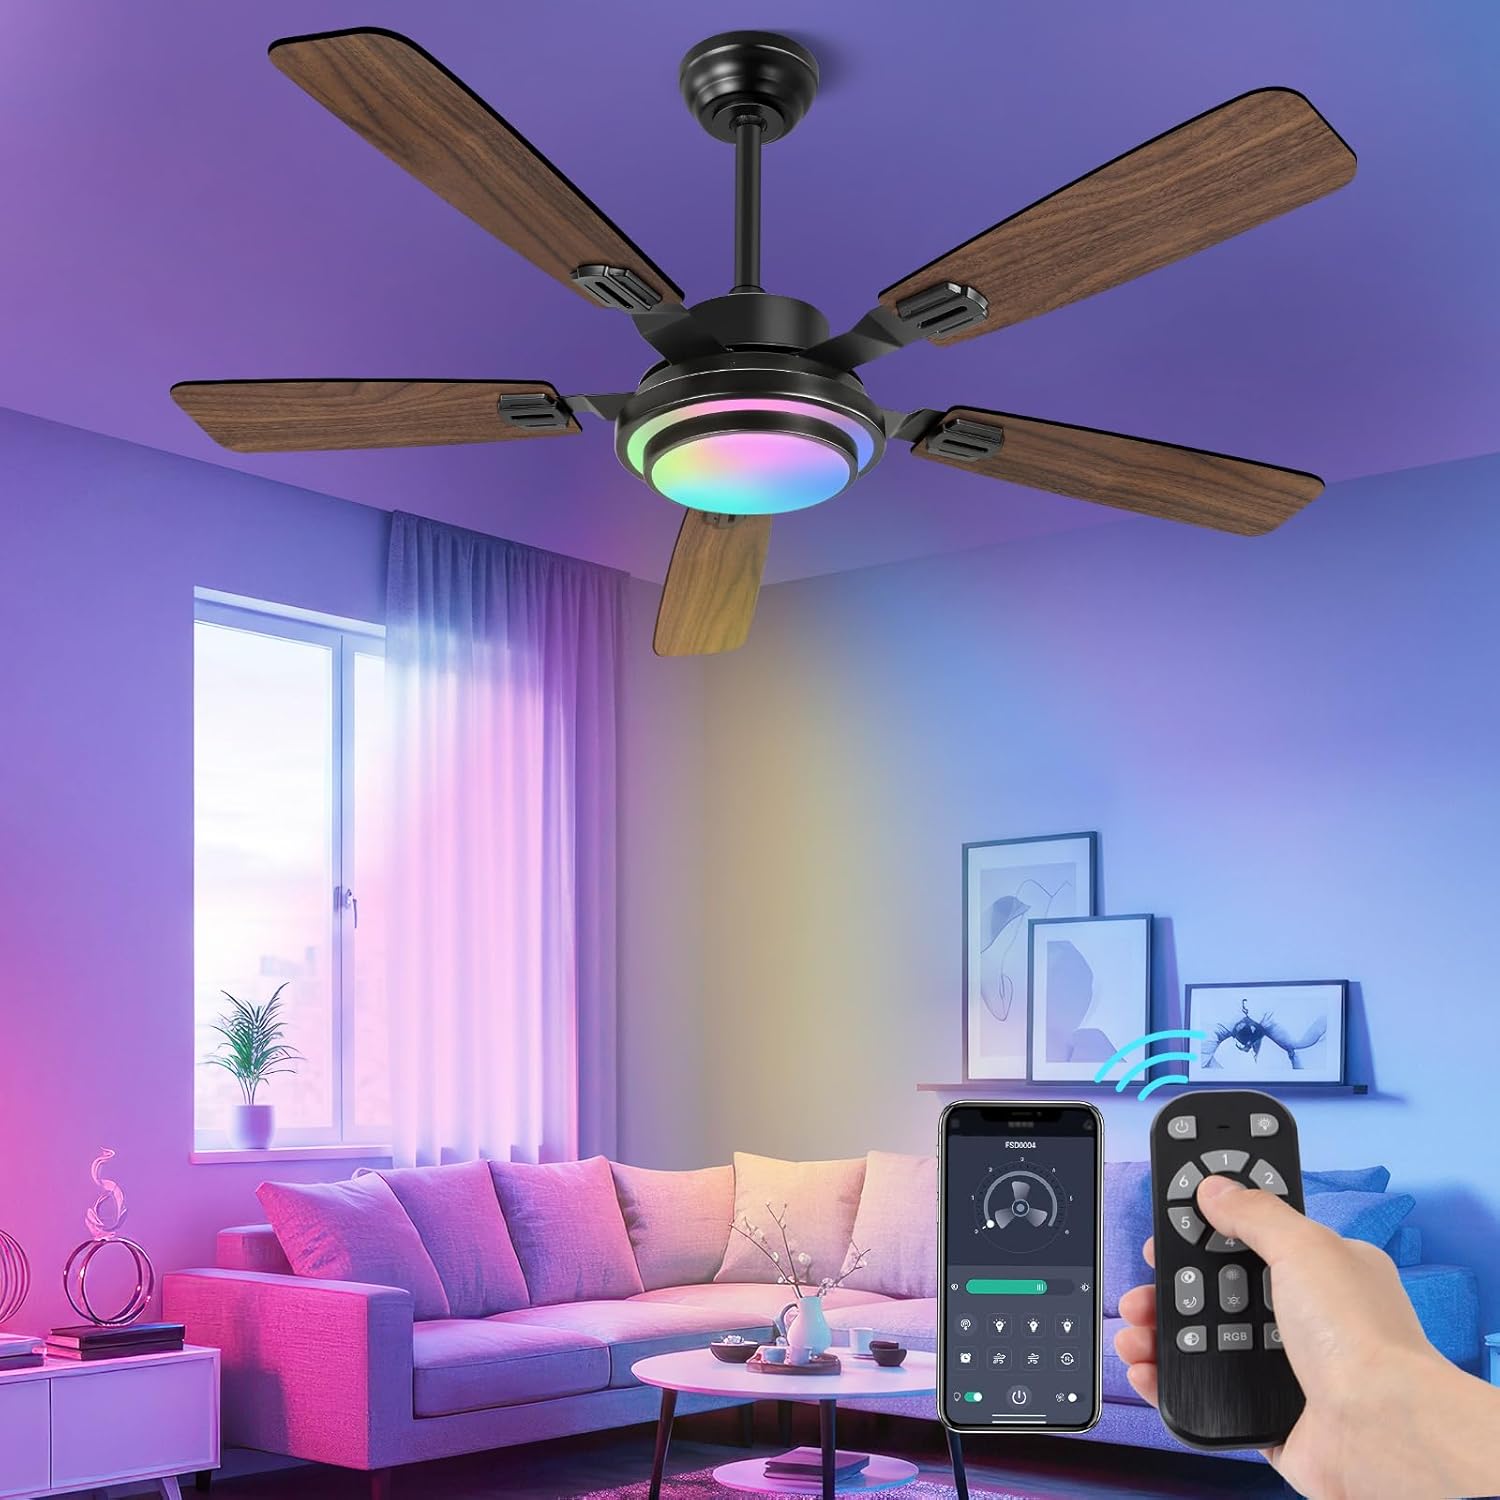
Image: Remote control and smartphone app interface for the OUTON ceiling fan.
- Power On/Off: Turns the fan and light on or off.
- Fan Speed (1-6): Adjusts fan speed from gentle breeze (1) to powerful gust (6).
- Light On/Off: Controls the main light independently.
- Brightness Adjustment (10%-100%): Dims or brightens the main light.
- Color Temperature Adjustment (3000K-6500K): Cycles through warm white, neutral white, and cool white.
- RGB Mode: Activates the vibrant RGB lighting.
- Nightlight Mode: Provides a calming, low-intensity light.
- Reversible Function (F/R): Changes fan direction for summer (downward airflow) or winter (upward circulation).
- Timer (1/2/4/8 hours): Sets automatic shutoff for the fan.
- Memory Function: Retains the last settings for fan speed, brightness, and color temperature when turned off and on.
APP Control Functions
Download the OUTON smart home app from your device's app store. Follow the in-app instructions to pair your fan. The app provides all remote control functionalities, plus additional customization options for RGB lighting and scheduling.
- Full control over fan speeds, light brightness, and color temperature.
- Access to a spectrum of 16 million colors in RGB mode.
- Advanced scheduling and automation features.
- Remote operation from anywhere with an internet connection.

Image: The OUTON 52-inch ceiling fan showcasing its RGB and CCT (Correlated Color Temperature) lighting capabilities in a modern living room.
Maintenance
Regular maintenance ensures optimal performance and longevity of your ceiling fan.
- Cleaning: Periodically wipe the fan blades and motor housing with a soft, damp cloth. Do not use abrasive cleaners or solvents.
- Blade Balance: If the fan wobbles, check that all blade screws are tight. A balancing kit (not included) can be used if wobbling persists.
- Light Source: The LED light source is designed for long life and is not user-replaceable. If the light fails, contact customer support.
- Motor: The DC motor is sealed and requires no lubrication.
Troubleshooting
If you experience issues with your fan, refer to the following common problems and solutions:
| Problem | Possible Cause | Solution |
|---|---|---|
| Fan does not start. | No power to the fan; loose wiring; remote control battery low. | Check circuit breaker. Ensure all wiring connections are secure. Replace remote control batteries. |
| Light does not turn on. | Loose wiring; light kit connection issue. | Check light kit wiring connections. Ensure power is supplied to the light. |
| Fan wobbles. | Loose blade screws; unbalanced blades; improper mounting. | Tighten all blade screws. Use a balancing kit if necessary. Ensure mounting bracket is secure. |
| RGB lighting not working or difficult to use. | Incorrect app usage; main light on. | Ensure the main light is off when attempting to use RGB mode via the app. Some apps require specific steps to activate RGB. Refer to the app's specific instructions. |
| Fan is noisy. | Loose screws; motor issue. | Check and tighten all screws. If noise persists, contact customer support. |
Specifications
- Brand: OUTON
- Model: B0DQL9KZSX
- Color: Walnut-52inch
- Material: Wood (blades)
- Product Dimensions: 51.97"L x 51.97"W x 14.96"H
- Power Source: AC/DC
- Motor Type: Reversible DC Motor
- Fan Speeds: 6 adjustable speeds
- Light Type: LED with 3 Color Temperatures (3000K-6500K) and RGB Mode
- Dimming: Stepless Dimming (10%-100%)
- Control: Remote & APP Control
- Timer: 1/2/4/8 hours
- Mounting Type: Dual Mount (14in or 17in, for flat or sloped ceilings up to 15°)
- Recommended Room Size: 12ft.x12ft. to 19ft.x19ft.
- Item Weight: 13.77 pounds

Image: Diagram illustrating the dimensions and key technical specifications of the OUTON 52-inch ceiling fan.
Warranty and Support
OUTON products are designed for durability and reliability. For specific warranty details, please refer to the warranty card included in your product packaging or visit the official OUTON website. For technical support, troubleshooting assistance, or to inquire about replacement parts, please contact OUTON customer service.
Contact Information:
- Website: OUTON Official Store on Amazon
- Refer to product packaging for direct customer service contact details.