WELYAS 8X6 FT
WELYAS 8x6 FT Outdoor Resin Storage Shed Instruction Manual
Model: 8X6 FT | Brand: WELYAS
Introduction
This manual provides detailed instructions for the assembly, operation, and maintenance of your WELYAS 8x6 FT Outdoor Resin Storage Shed. Please read all instructions carefully before beginning assembly and retain this manual for future reference.
Safety Information
Observe the following safety precautions during assembly and use:
- Ensure the assembly area is a level surface. Avoid uneven ground, gravel, or rocky areas.
- Assemble on a nice day without strong wind to prevent panels from being blown away or causing injury.
- Three people are suggested for easier and safer assembly.
- Wear appropriate safety gear, including gloves, during assembly.
- Use recommended tools: ladder, power drill, gloves, knife, and tape.
- Keep children and pets away from the assembly area.
Setup and Assembly
Your WELYAS 8x6 FT Outdoor Resin Storage Shed is delivered in 3 boxes. While shipped on the same date, delivery may occur on different dates due to carrier logistics. All necessary hardware and tools for installation are included in the package. For easier installation, electric screwdrivers and cooperation of two people are recommended.
Assembly Video Guide
Video Description: This comprehensive video guide provides detailed instructions for assembling your WELYAS 8x6 FT Outdoor Resin Storage Shed, including floor, walls, roof, and doors. Follow along for a smooth installation.
Key Assembly Steps
- Floor Assembly: Connect the pre-installed floor panels (A86-C01, A86-C02, A86-C03) using the provided E02 screws. Ensure the smooth side of the panels faces inwards.
- Side Wall Assembly: Repeat the process for two side walls using B68-C05 and A86-C02 panels, securing with E02 screws.
- Back Wall Assembly: Assemble the back wall using B68-C06 and B68-C07 panels, securing with E02 screws.
- Front Wall Assembly: Assemble the front wall using B68-C02, B68-C03, and B68-C04 panels, securing with E02 screws.
- Roof Assembly (Part 1): Connect the first set of roof panels (A86-V4-A04, A86-V4-C04, A86-V4-C03) and secure with E02 screws. Repeat four times.
- Roof Assembly (Part 2): Connect the second set of roof panels using A86-C12 and E02 screws. Repeat two times.
- Door Assembly (F1 & F2): Assemble the door panels (A64-C04, A64-C05, A86-A03, A64-A02, A64-A06) and attach hinges (A64-A15) and latches (A86-D01) using E02, E11, E12, and F35-C29 screws/parts. Ensure diagonal distances are confirmed before final tightening.
- Triangle Board Assembly: Attach the triangle boards (A86-C11) with vents (A64-C32, A64-C33) using E02 screws.
- Whole Floor Assembly: Connect the assembled floor sections (B68-V4-C01, B68-C11, A64-C30, B68-C10, F35-C27) and secure with E02 screws.
- Wall Installation: Erect the assembled wall sections (B68-C08, B68-C09) onto the floor base.
- Wall Support Installation: Install the wall supports (B68-C12, B68-V4-A02, B68-V4-A01, B68-A03, A86-V4-A03) and secure with E02 screws.
- Window Installation: Insert the window frames (F35-C31, F35-C33, F35-C32) into the designated openings and secure with E02 screws.
- Roof Trim Installation: Attach the roof trim pieces (B68-C13, A86-C15, A86-C16, A86-C17, A86-C18) to the roof edges.
- Roof Support Installation: Install the roof supports (A86-V4-A05, A86-V4-A06, A86-V4-A08) using E02 screws, E08 bolts, and E09 nuts.
- Roof Panel Installation: Secure the roof panels (A86-V4-A09) using E08 bolts and E09 nuts.
- Corner Cap Installation: Attach the corner caps (F35-C30, A64-C31, A64-C29) using E02 screws.
- Final Roof Bracing: Install any remaining roof bracing (B68-V4-A03) and secure with E02 screws.
- Door Installation: Mount the assembled doors using E12 screws and attach the door catch (F35-D02) with E01 screws.
- Ground Mounting: If additional stability is desired, use the provided ground mounted screws (E03, E04) to secure the shed to the ground.
Assembly Tips

Image Description: This graphic provides visual assembly tips, emphasizing the need for a level surface, good weather, teamwork (3 people), and tools like a power drill.

Image Description: A detailed diagram showing the overall dimensions of the 8x6 FT shed, including width, depth, and height, as well as door and window measurements.
Operating Instructions
Doors
The shed features double lockable doors for secure access. To open, disengage the lock and pull the doors outwards. To close, push the doors inwards until they meet, then engage the lock for security.
Video Description: This video provides a quick overview of the WELYAS 8x6 FT Resin Storage Shed, highlighting its key features such as the floor, windows, and overall design, including door operation.
Windows and Ventilation
The shed includes two spacious windows to allow natural light into the interior. Integrated air vents prevent moisture buildup and odors, ensuring proper ventilation for stored items.

Image Description: A close-up view of the shed's features, including the steel door lock, a spacious window for natural light, and integrated air vents for improved airflow.
Maintenance
The WELYAS Outdoor Resin Storage Shed is designed for low maintenance and durability.
- Cleaning: The resin panels are easy to clean. Use mild soap and water with a soft cloth or sponge. Avoid abrasive cleaners or harsh chemicals that could damage the material.
- Durability: The shed is constructed from waterproof, rust-resistant, and UV-protective resin panels, designed to withstand various weather conditions.
- Long-term Care: The material will not rot, rust, or peel, eliminating the need for repainting or extensive repairs common with wood sheds.
Video Description: This short video demonstrates the waterproof performance of the WELYAS Resin Plastic Shed, showing how water beads and runs off the panels.
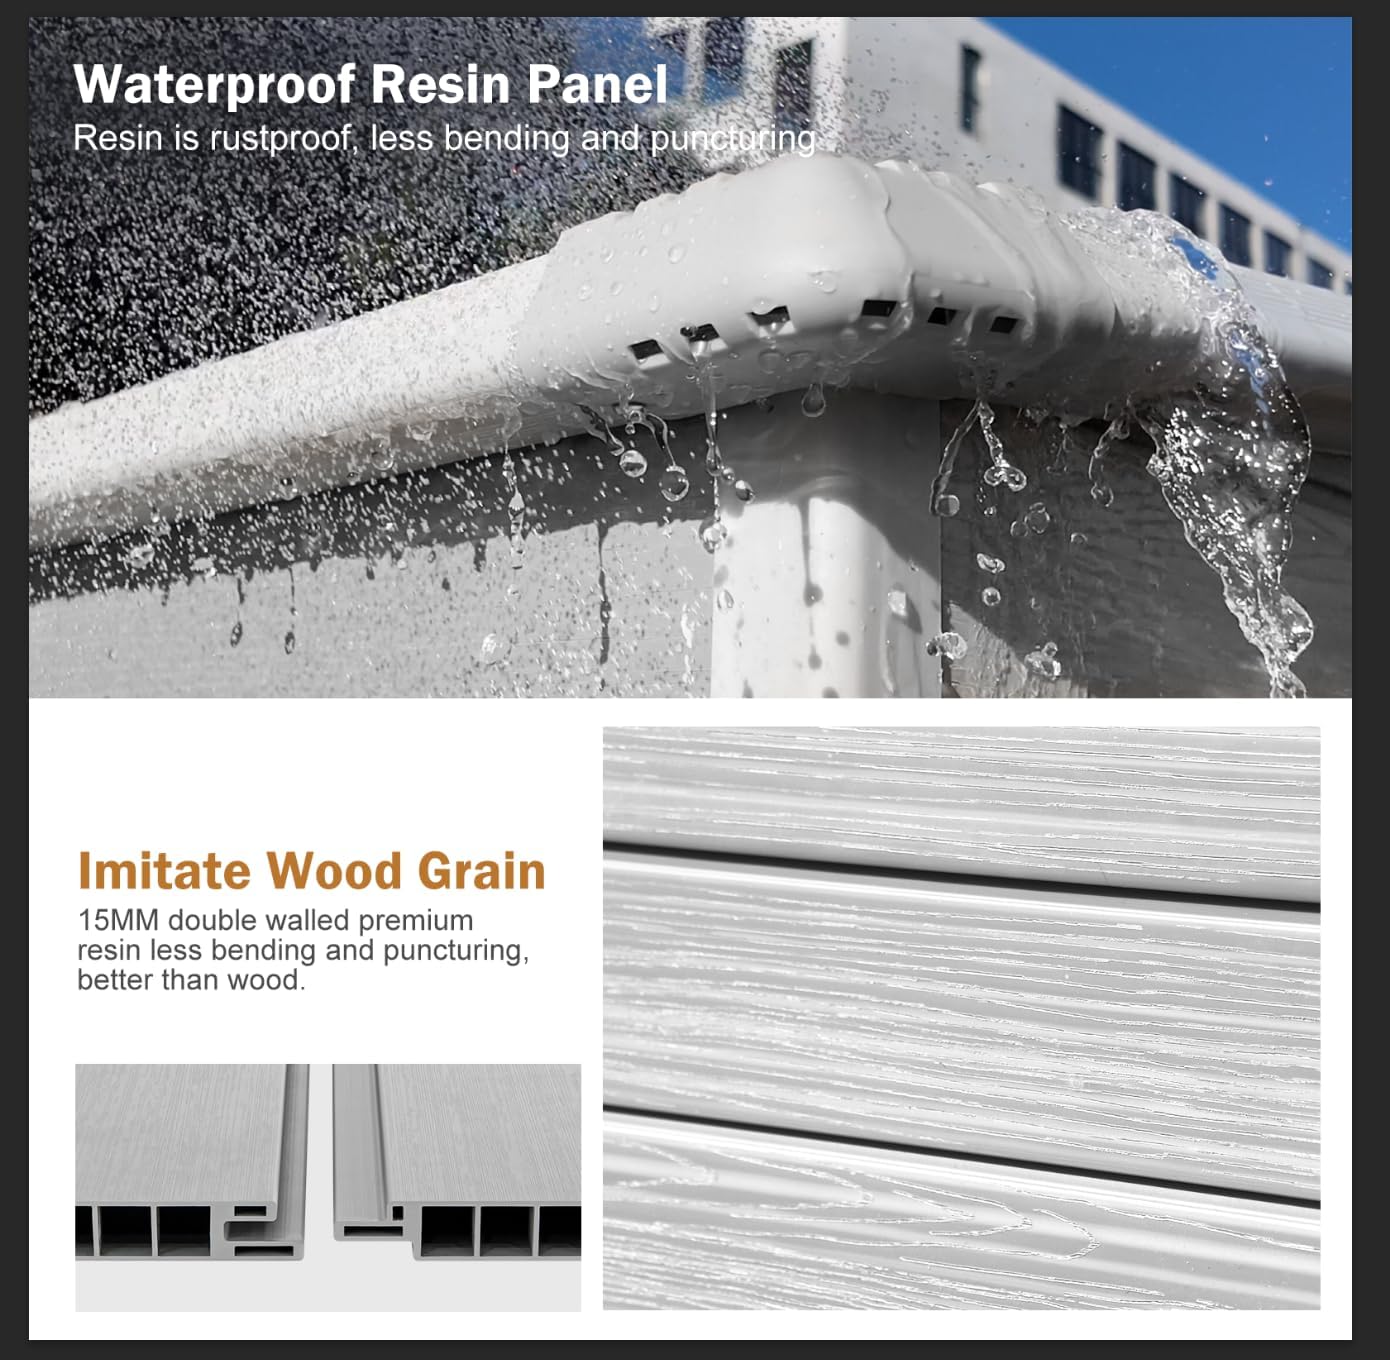
Image Description: A close-up view of the shed's waterproof resin panel, illustrating its water-resistant properties and wood-grain appearance.

Image Description: This image visually confirms the shed's waterproof design and its capacity to withstand snow loads, ensuring protection in various weather conditions.
Troubleshooting
If you encounter any issues during or after assembly, please refer to the following common troubleshooting tips:
- Difficulty during assembly: Ensure all parts are correctly oriented as shown in the instructions and video. Verify that the correct screws are used for each step. Sometimes, a rubber mallet can help align panels.
- Shed instability: Confirm the shed is built on a completely level surface. Utilize the provided ground-mounted screws (E03, E04) to anchor the shed for enhanced stability, especially in windy conditions.
- Door alignment issues: Check that the door frame is square and the hinges are securely fastened. Adjust screws if necessary to ensure smooth opening and closing.
- Water leakage: Verify that all panels are properly interlocked and all screws are tightened. Ensure the roof panels are correctly seated and sealed.
- Missing parts: If any parts are missing or damaged, contact customer support immediately.
Specifications
| Brand | WELYAS |
| Color | Gray |
| Material | Solid Plastic, Waterproof Resin |
| Product Dimensions | 72"D x 96"W x 84"H (8 ft W x 6 FT D x 7 ft H) |
| Item Weight | 215 Pounds |
| Style | Outdoor Storage Shed |
| Base Material | Plastic |
| Top Material Type | Resin and Plastic Mix |
| Water Resistance Level | Waterproof |
| Frame Material | Alloy Steel |
| Door Style | Swing Door |
| Assembly Required | Yes |
| Door Width | 4.2 Feet |
| Door Height | 5.5 Feet |
Warranty Information
For specific warranty details regarding your WELYAS 8x6 FT Outdoor Resin Storage Shed, please refer to the documentation included with your purchase or contact the retailer/manufacturer directly. Warranty terms and conditions may vary.
Customer Support
Should you have any questions, concerns, or require assistance with your WELYAS 8x6 FT Outdoor Resin Storage Shed, please contact us through the platform where you made your purchase. Our support team is available to help.
Related Documents - 8X6 FT
 |
Metal Garden Shed Assembly Instructions Comprehensive assembly instructions for the Metal Garden Shed, detailing parts, tools, and step-by-step guidance for a successful build. Ensure proper installation for durability and safety. |
 |
Metal Garden Shed Assembly Instructions - Homall Outdoor Storage Comprehensive assembly guide for the Homall Metal Garden Shed (6x4 FT). Includes detailed parts list, step-by-step instructions, and tips for safe and correct installation. |
 |
8x6 FT Metal Garden Shed Installation Guide Comprehensive installation manual for the 8x6 FT Metal Garden Shed, detailing assembly steps, part identification, and tips for secure construction. |
 |
VEIKOUS 8 X 6 Metal Garden Shed Assembly Instructions Detailed assembly instructions for the VEIKOUS 8 X 6 Metal Garden Shed, guiding users through the construction process with part identification and step-by-step guidance. |
 |
TOOL ROOM 8x6 Shed Installation Guide Comprehensive installation instructions for the TOOL ROOM 8x6 outdoor storage shed. Includes a detailed parts list, required tools, and step-by-step assembly guidance with textual descriptions of diagrams. |
 |
Yitahome 8x8 ft Intelligent Plastic Storage Shed Installation Guide Comprehensive installation guide for the Yitahome 8x8 ft Intelligent Plastic Storage Shed (models FTPLSS-0001, FTPLSS-0002, FTPLSS-0003). Learn about setup, safety precautions, and assembly steps for your durable outdoor storage solution. |
Ask a question about this manual
Ask about setup, troubleshooting, compatibility, parts, safety, or missing instructions. Manuals+ will review the question and use this page’s manual context to help answer it.