1. Introduction
This manual provides essential information for the safe operation and maintenance of your Generic K6 Max RC Drone. Please read it thoroughly before operating the drone to ensure proper function and to prevent damage or injury. The K6 Max features a built-in screen remote, dual 4K cameras, brushless motors for stable flight, optical-flow hovering, and four-way obstacle avoidance.
Safety Guidelines
- Always operate the drone in open areas, away from people, animals, and obstacles.
- Do not fly near airports, restricted airspace, or in adverse weather conditions (strong winds, rain).
- Ensure the drone battery is fully charged and propellers are securely attached before each flight.
- Maintain a safe distance from the drone during operation.
- Children should only operate the drone under direct adult supervision.
2. Package Contents
Verify that all items listed below are included in your package:
- 1 x Generic K6 Max RC Drone
- 1 x Remote Control with Built-in Screen
- 1 x Camera (integrated)
- 1 x User Manual
- 2 x Drone Batteries
- Spare Propellers
- USB Charging Cable
- Memory Card
- Card Reader
- Handbag

Image: All components of the Generic K6 Max RC Drone package, including the drone, remote, batteries, spare propellers, charging cable, memory card, card reader, and handbag.
3. Drone Overview
Familiarize yourself with the main components of your K6 Max drone.
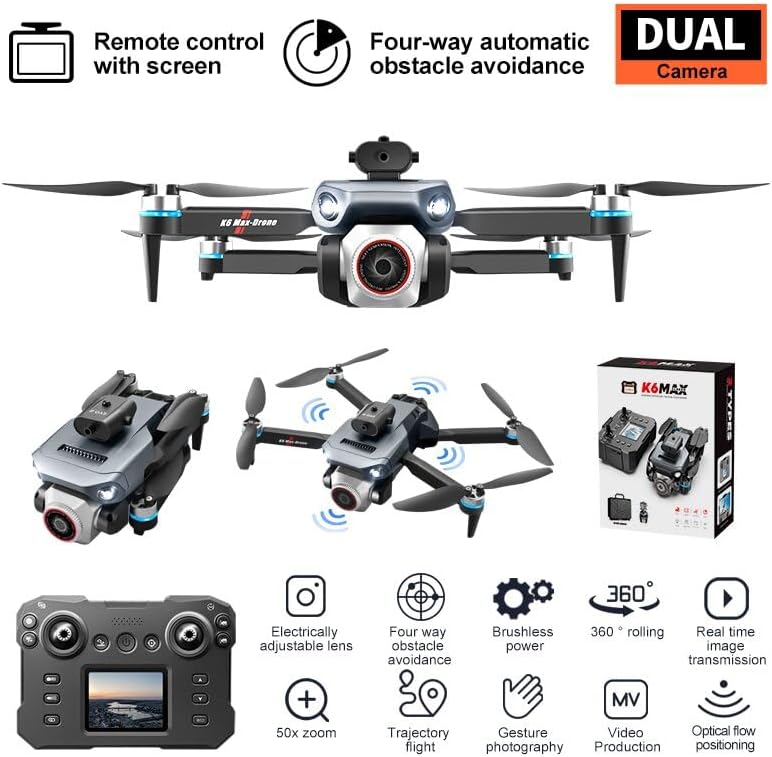
Image: A diagram illustrating the key features of the K6 Max drone, including the electrically adjustable lens, four-way obstacle avoidance, brushless power, 360-degree rolling, real-time image transmission, optical flow positioning, 50x zoom, trajectory flight, gesture photography, and video production capabilities.
Key Components:
- Dual Camera System: Front-facing 4K camera and bottom optical flow camera for stable hovering and image capture.
- Brushless Motors: Provide powerful, smooth, and stable flight performance.
- Obstacle Avoidance Sensors: Located on four sides for enhanced flight safety.
- LED Lights: For visibility and orientation.
- Foldable Arms: For compact storage and portability.
4. Remote Control Overview
The remote control features a built-in screen for real-time video transmission, eliminating the need for a smartphone.
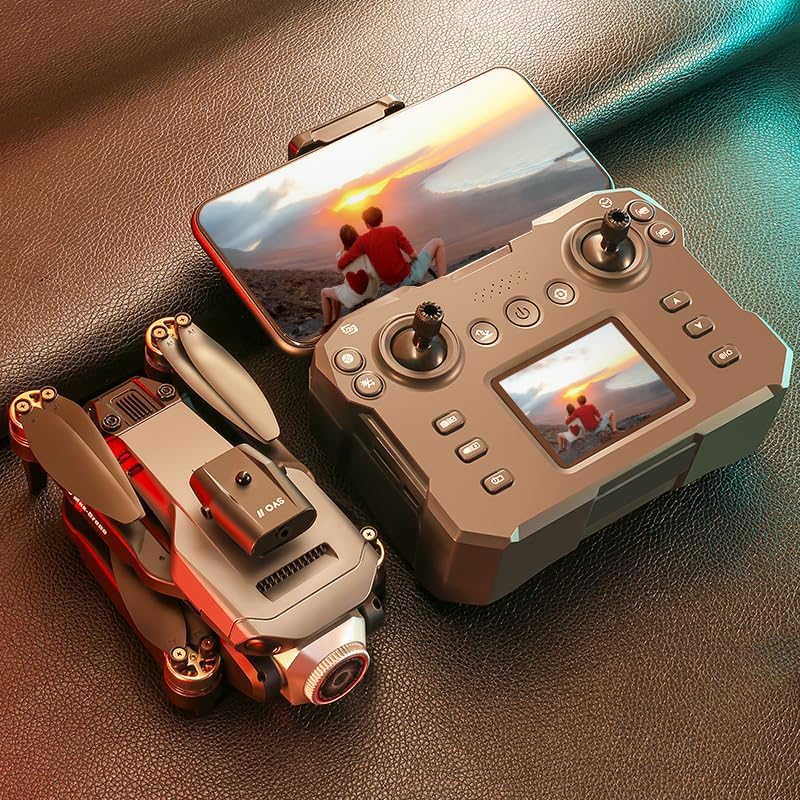
Image: The K6 Max RC Drone positioned next to its remote control, which features a built-in display screen showing a live feed. This setup allows for phone-free operation and real-time viewing.
Remote Control Functions:
- Left Joystick: Controls throttle (up/down) and yaw (rotate left/right).
- Right Joystick: Controls pitch (forward/backward) and roll (sideways left/right).
- Built-in Screen: Displays live video feed from the drone's camera and flight telemetry.
- One-Key Takeoff/Landing Button: Initiates automatic takeoff or landing.
- Photo/Video Button: Captures images or starts/stops video recording.
- Speed Adjustment Button: Toggles between different flight speeds.
- Headless Mode Button: Activates headless flight mode.
- 3D Flip Button: Executes a 3D flip maneuver.
5. Setup
5.1 Battery Installation & Charging
- Drone Battery: Insert the drone battery into the battery compartment on the rear of the drone until it clicks into place. To charge, connect the battery to the USB charging cable and plug it into a 5V/2A USB adapter. The indicator light will show charging status.
- Remote Control: The remote control typically has a built-in rechargeable battery. Connect the remote to a USB power source using its charging cable.
5.2 Propeller Installation
Ensure propellers are installed correctly. Each propeller is marked (A or B) and must match the corresponding motor arm. Gently push and twist the propellers onto the motor shafts until they are secure.
5.3 Memory Card Installation
Locate the memory card slot on the drone (or camera module). Insert the provided memory card with the contacts facing down until it clicks into place. Ensure the card is properly seated for recording.
5.4 Pre-Flight Checklist
- Drone and remote control batteries are fully charged.
- Propellers are correctly installed and secure.
- Memory card is inserted (if recording is desired).
- Drone arms are unfolded and locked into position.
- Choose an open, clear area for flight, free from obstacles and people.
6. Operating Instructions
6.1 Power On/Off
- Power On Drone: Press and hold the power button on the drone until the indicator lights turn on.
- Power On Remote Control: Press and hold the power button on the remote control until the screen illuminates.
- Power Off: Reverse the power-on steps, pressing and holding the power buttons until the devices shut down.
6.2 Pairing
The K6 Max drone is designed for simplified pairing. After powering on both the drone and remote control, they should automatically connect. Observe the indicator lights on the drone and the remote control screen for confirmation of a successful connection.
6.3 Takeoff & Landing
- One-Key Takeoff: Place the drone on a flat, level surface. Press the One-Key Takeoff button on the remote control. The drone will automatically ascend to a stable hovering altitude.
- One-Key Landing: During flight, press the One-Key Landing button. The drone will automatically descend and land gently.
- Manual Takeoff/Landing: Push both joysticks down and outwards to unlock the motors. Slowly push the left joystick (throttle) up to ascend. To land, slowly pull the left joystick down.
6.4 Flight Controls
- Altitude Hold: The drone maintains its current altitude automatically when the left joystick is released.
- Headless Mode: Press the Headless Mode button. In this mode, the drone's orientation is relative to the pilot, regardless of the drone's front direction.
- Speed Adjustment: Use the Speed Adjustment button to cycle through low, medium, and high-speed modes.
- 3D Flipping: Fly the drone to a height of at least 3 meters. Press the 3D Flip button, then move the right joystick in the desired flip direction.
6.5 Camera Operation
The K6 Max features a dual camera system for versatile aerial photography and videography.

Image: Three examples of drone camera usage: vertical shooting (drone camera pointed straight down), landscape shooting (drone camera pointed forward), and top-view shooting (drone camera pointed down at a wide angle).
- Taking Photos: Press the Photo button on the remote control to capture a still image.
- Recording Video: Press the Video button to start recording. Press it again to stop recording. Video files are saved to the inserted memory card.
- Adjusting Camera Angle: Use the dedicated button or dial on the remote control (if available) to adjust the camera's vertical angle during flight.
- Gesture Photography: Perform specific hand gestures in front of the drone's camera to trigger photo or video capture (refer to remote control diagram for specific gestures).
6.6 Special Features
- Optical-Flow Hover: The bottom camera assists in maintaining a stable hover, especially indoors or at low altitudes.
- Four-Way Obstacle Avoidance: Sensors detect obstacles in four directions, helping to prevent collisions.
- Voice Control: Certain voice commands can be used to control basic drone functions (refer to the remote control manual for supported commands).
7. Maintenance
- Cleaning: Use a soft, dry cloth to clean the drone and remote control. Avoid using liquids or solvents.
- Propeller Replacement: If propellers are damaged, replace them with new ones from the spare parts kit. Ensure correct A/B propeller placement.
- Battery Care: Store batteries in a cool, dry place. Do not overcharge or over-discharge. If not used for extended periods, charge them to about 50% capacity.
- Storage: Fold the drone arms and store all components in the provided handbag or a protective case when not in use.
8. Troubleshooting
| Problem | Possible Cause | Solution |
|---|---|---|
| Drone does not power on | Low battery; Battery not properly inserted | Charge drone battery; Reinsert battery securely |
| Remote control does not connect to drone | Remote not powered on; Pairing failed; Interference | Ensure remote is on; Power cycle both devices; Move to an area with less interference |
| Unstable flight / Drifting | Calibration needed; Damaged propeller; Strong wind | Perform gyroscope calibration (refer to remote manual); Replace damaged propellers; Fly in calm conditions |
| Poor camera quality / No recording | Memory card full/faulty; Lens dirty; Insufficient light | Replace/format memory card; Clean lens; Ensure adequate lighting |
| Obstacle avoidance not working | Sensors blocked/dirty; Feature disabled | Clean sensors; Ensure feature is active (check remote display) |
9. Specifications
| Feature | Detail |
|---|---|
| Brand | Generic |
| Model Name | K6 Max |
| Special Features | Beauty Filter, Four Way Obstacle Avoidance, Gesture Photography, Optical Flow Hovering |
| Color | Black |
| Video Capture Resolution | HD (4K capable via dual camera setup) |
| Connectivity Technology | Bluetooth, Wi-Fi |
| Skill Level | Beginner |
| Item Weight | 340 Grams (approx. 12 ounces) |
| Battery Capacity | 2 Amp Hours |
| Video Capture Format | MP4 |
| Control Type | Gesture Control, Radio Control |
| Material | Metal, Plastic |
| Optical Sensor Technology | Optical Flow, CMOS |
| Product Dimensions | 30"L x 30"W x 80"H (Note: These dimensions seem unusually large for a drone and may refer to packaging or a different product. Please verify with product packaging.) |
10. Warranty & Support
Your Generic K6 Max RC Drone is covered by a standard manufacturer's warranty against defects in materials and workmanship. Please refer to the warranty card included in your package for specific terms and conditions, including the warranty period and claim procedures.
For technical support, troubleshooting assistance, or warranty claims, please contact the manufacturer or your point of purchase. Keep your purchase receipt as proof of purchase.