Introduction
The LORPHEIR Pneumatic CV Joint Boot Installation Tool is designed for efficient and easy installation of CV joint boots. Constructed from high-quality 45# steel and rubber, this tool offers corrosion resistance, durability, and a long service life. Its universal design makes it compatible with a wide range of vehicles, including BMW, Citroën, Fiat, Mercedes, Skoda, Volvo, Volkswagen, UTV, and ATV models. This manual provides essential information for the safe and effective use of your tool.

Image: The LORPHEIR Pneumatic CV Joint Boot Installation Tool, showing its main components including the connector, spring control button, and eight steel claws.
Safety Information
Please read and understand all safety instructions before operating the tool. Failure to follow these instructions may result in injury or damage to the tool or vehicle.
- Air Compressor Pressure: Ensure your air compressor pressure reaches 7-8 kg (116 psi) before use.
- Check for Leakage: Verify there is no air leakage from the tool (a hissing sound indicates a leak).
- Boot Type: Use a standard rubber dust boot. Do not use original manufacturer's plastic dust boots, as they cannot be opened or stretched by this tool. A standard rubber dust boot is required for proper operation.
- Personal Protective Equipment: Always wear appropriate safety glasses and gloves when operating pneumatic tools.
- Secure Work Area: Ensure the vehicle is properly supported and the work area is clear of obstructions.

Image: An 'Attention' graphic highlighting critical safety checks: air compressor pressure, leakage verification, and the use of standard rubber dust boots.
Package Contents
Verify that all items listed below are included in your package:
- 1 x CV Joint Boot Installation Tool
- 1 x 1/4" NPT Air Hose Nipple (10mm)
- 4 x Black O-rings
- 1 x Pin
- 1 x Instruction Manual (this document)
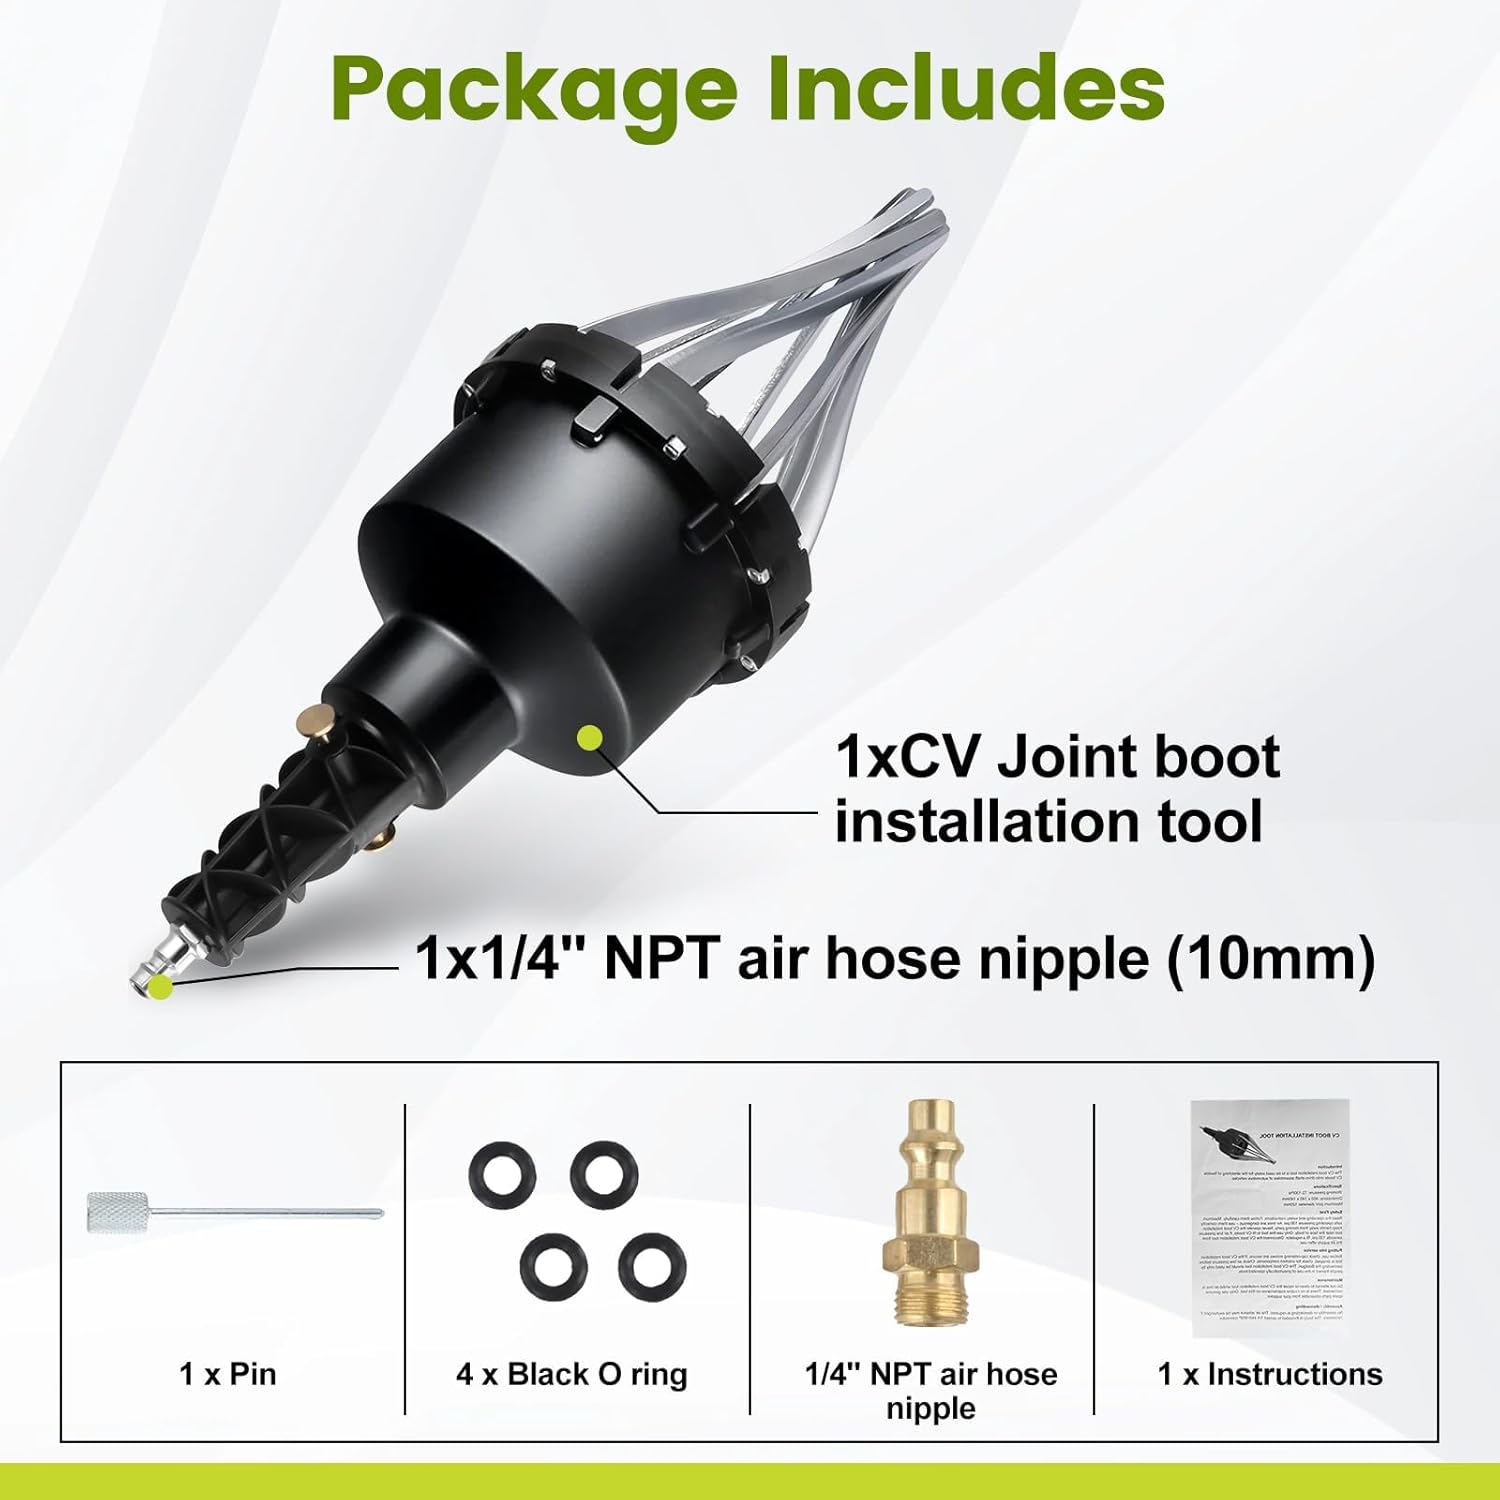
Image: A visual representation of the package contents, including the main tool, air hose nipple, O-rings, pin, and instructions.
Product Features
The LORPHEIR Pneumatic CV Joint Boot Installation Tool offers several key features for reliable performance:
- High Temperature Resistance: Designed to withstand varying operating temperatures.
- Corrosion Resistant: Constructed from durable materials to prevent rust and corrosion.
- Stable and Reliable: Provides consistent performance for professional and DIY use.
- Long Service Life: Engineered for extended durability and repeated use.
- Universal Fit: Compatible with a wide range of vehicle models including BMW, Citroën, Fiat, Mercedes, Skoda, Volvo, Volkswagen, UTV, and ATV.

Image: A close-up view of the tool emphasizing its robust construction and key features such as high temperature and corrosion resistance.
Setup
Before operating the tool, ensure proper setup:
- Connect Air Hose: Attach the provided 1/4" NPT air hose nipple to the tool's connector.
- Connect to Air Compressor: Connect the tool to an air compressor capable of providing 7-8 kg (116 psi) pressure.
- Check for Leaks: Once connected, listen for any hissing sounds indicating air leaks. Address any leaks before proceeding.

Image: The tool with its air connection point, illustrating how to connect the air hose for pneumatic operation. The rubber-coated leak-proof air transmission is compatible with various systems like BOSCH/DELPHI/DENSO/SIEMENS.
Operating Instructions
Follow these steps for effective CV joint boot installation:
- Prepare the Boot: Apply a suitable lubricant to the inside of the new CV joint boot.
- Position the Boot: Place the lubricated boot over the expansion fingers (claws) of the tool.
- Activate Air Valve: Activate the air valve on the tool to expand the claws, stretching the boot.
- Position on Joint: Carefully position the expanded boot over the CV joint on the vehicle axle.
- Release Pressure: Release the air pressure to allow the boot to retract and seat properly on the CV joint.
- Final Check: Ensure the boot is securely seated and properly sealed on both ends of the CV joint.

Image: The tool shown in action, demonstrating how a CV boot is expanded and placed over a CV joint with a simple one-click operation.
Maintenance
Proper maintenance ensures the longevity and performance of your tool:
- Cleaning: After each use, clean the tool, especially the expansion claws, to remove any grease or debris.
- Lubrication: Periodically apply a light oil to moving parts to ensure smooth operation.
- Storage: Store the tool in a clean, dry place away from direct sunlight and extreme temperatures.
- Inspection: Regularly inspect the tool for any signs of wear, damage, or loose components. Replace worn O-rings as needed.
Troubleshooting
If you encounter issues, refer to the following common problems and solutions:
| Problem | Possible Cause | Solution |
|---|---|---|
| Tool does not expand or expands weakly. | Low air pressure; Air leak; Clogged air inlet. | Ensure air compressor provides 116 psi; Check for and seal air leaks; Clean air inlet. |
| Boot tears during expansion. | Boot is not standard rubber; Insufficient lubrication; Boot is old or brittle. | Use a standard rubber CV boot; Apply ample lubricant; Use a new, pliable boot. |
| Tool gets stuck on the CV joint. | Boot not fully released; Tool not properly aligned. | Ensure air pressure is fully released; Realign the tool and try again. |
Specifications
Technical specifications for the LORPHEIR Pneumatic CV Joint Boot Installation Tool:
- Model Number: T9242ABK
- Item Weight: 2 kg (4.4 lbs)
- Product Dimensions (L x W x H): 30 x 15.5 x 15.5 cm (11.8 x 6.1 x 6.1 inches)
- Material: 45# Steel and Rubber
- Air Pressure Requirement: 7-8 kg / 116 psi
- Air Inlet: 1/4" NPT
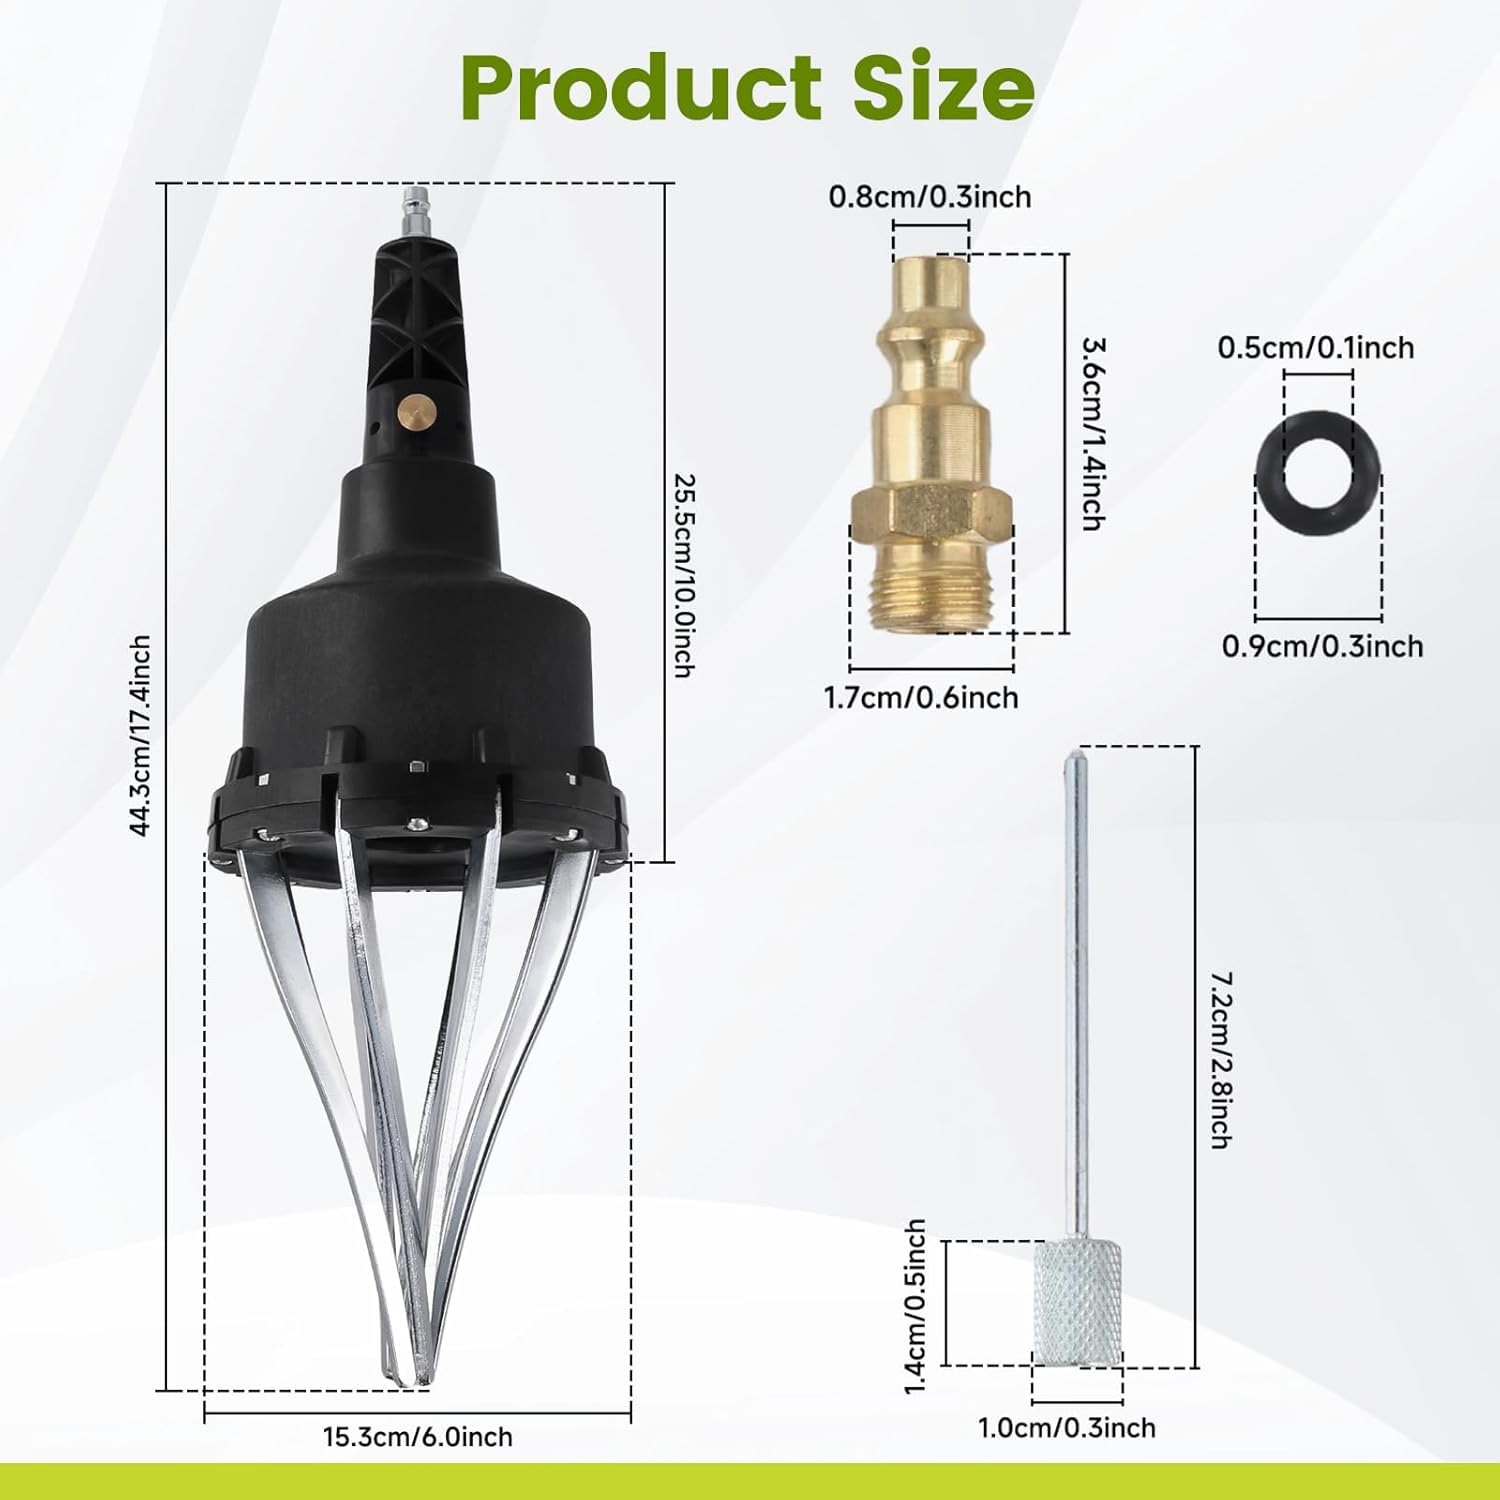
Image: A detailed diagram showing the precise measurements of the CV Joint Boot Installation Tool and its components, including the air hose nipple and pin.
Warranty and Support
LORPHEIR is committed to providing high-quality products and customer satisfaction. If you encounter any problems or have concerns regarding the use of your Pneumatic CV Joint Boot Installation Tool, please do not hesitate to contact us. We guarantee prompt assistance and a quick resolution to any issues. Your satisfaction is our priority.
For support, please refer to the contact information provided with your purchase or visit the official LORPHEIR website.
