1. Introduction
Thank you for choosing the NJDQFA Smart Electric Heated Towel Rack. This appliance is designed to warm and dry towels, bathrobes, and other small garments, enhancing comfort in your bathroom. It features a timer function, a top shelf for additional storage, and can be wall-mounted to save space. Please read this manual thoroughly before installation and use to ensure proper operation and safety.

Image 1.1: The heated towel rack installed in a bathroom, illustrating its versatility for drying various items.
2. Safety Information
- Read all instructions before using this appliance.
- Do not immerse the appliance in water or other liquids.
- Ensure the power supply voltage matches the rating label on the appliance.
- Do not operate the appliance with a damaged cord or plug. If the cord is damaged, it must be replaced by the manufacturer, its service agent, or similarly qualified persons to avoid a hazard.
- This appliance is intended for household use only. Do not use outdoors.
- Unplug the appliance from the outlet when not in use and before cleaning.
- Do not allow the cord to hang over the edge of a table or counter, or touch hot surfaces.
- Close supervision is necessary when any appliance is used by or near children.
- The appliance is designed with IPX4 water resistance, meaning it is protected against splashing water from any direction. However, it should not be submerged.

Image 2.1: Illustration of the IPX4 water resistance rating, indicating protection against splashing water.
3. Package Contents
Verify that all items are present and undamaged upon opening the package. If any parts are missing or damaged, please contact customer support.
- 1x Towel Heater Unit
- 1x Installation Accessories Kit (screws, wall anchors, mounting brackets)
4. Specifications
| Feature | Description |
|---|---|
| Product Name | Smart Electric Towel Rack |
| Brand | NJDQFA |
| Model Number | 66222956-AWHITE42-LEFTLINE |
| Material | Aluminum |
| Color | A White 42 |
| Product Power | 180W |
| Temperature Range | 45 - 70 °C / 113 - 158 °F |
| Heating Method | Carbon Fiber Heating |
| Water Resistance | IPX4 |
| Installation Type | Wall Mounted |

Image 4.1: Product dimensions for installation planning. Height: 58 cm (22.8 inches). Width: 42 or 47 cm (16.5 or 18.5 inches). Depth from wall: 15 cm (5.9 inches).
5. Setup and Installation
This towel rack is designed for wall-mounted installation. Ensure you have the necessary tools (drill, screwdriver, measuring tape, level) and follow these general steps. Refer to Image 4.1 for dimensions and mounting points.
- Choose Location: Select a suitable wall location in your bathroom, away from direct water spray but within reach of a power outlet. Ensure the wall material can support the weight of the unit and any items placed on it.
- Mark Drilling Points: Using the provided mounting template or by carefully measuring the mounting points on the unit, mark the drilling locations on the wall. Use a level to ensure horizontal alignment.
- Drill Holes: Drill holes at the marked locations using an appropriate drill bit for your wall type. Insert wall anchors if necessary.
- Attach Brackets: Secure the mounting brackets to the wall using the provided screws.
- Mount Towel Rack: Carefully align the towel rack with the mounted brackets and secure it in place. Ensure it is firmly attached and stable.
- Connect Power: Plug the towel rack into a grounded electrical outlet.
6. Operating Instructions
The towel rack features an intuitive control panel for setting the timer and managing heating.
- Power On/Off: Press the power button (usually indicated by a circle with a vertical line) to turn the unit on or off.
- Temperature Control: The unit will heat to its operating temperature range of 45-70°C (113-158°F) once powered on. Specific temperature adjustments may be available via dedicated buttons if present on your model.
- Timer Function: Use the timer button (often indicated by a clock icon) to set the desired operating duration. The timer can typically be set from 1 to 24 hours. The display will show the remaining time.

Image 6.1: The control panel showing the timer function, allowing operation for 1 to 24 hours.

Image 6.2: Visual representation of the quick and even heating capability of the towel rack.
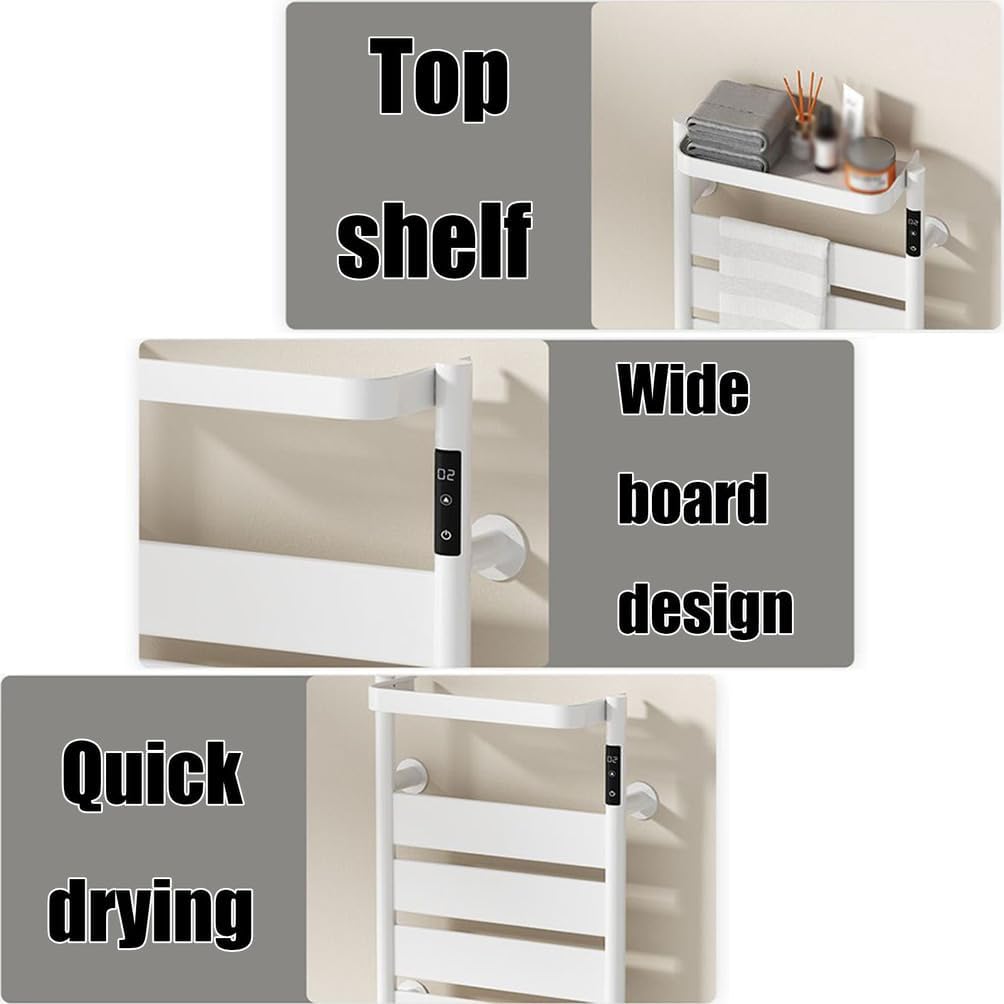
Image 6.3: Features including the convenient top shelf, wide board design for efficient drying, and quick drying capability.
7. Maintenance
Regular cleaning and proper care will ensure the longevity and optimal performance of your heated towel rack.
- Cleaning: Before cleaning, always unplug the unit from the power outlet and allow it to cool completely. Wipe the surface with a soft, damp cloth. Do not use abrasive cleaners, solvents, or harsh chemicals, as these can damage the finish.
- Storage: If storing the unit for an extended period, ensure it is clean and dry. Store it in a cool, dry place, preferably in its original packaging.
- Inspection: Periodically check the power cord for any signs of damage. If damage is found, discontinue use and contact customer support.
8. Troubleshooting
If you encounter any issues with your heated towel rack, refer to the following common problems and solutions:
| Problem | Possible Cause | Solution |
|---|---|---|
| Unit does not turn on | Not plugged in; Power outlet fault; Unit fault | Ensure plug is fully inserted. Test outlet with another appliance. If still not working, contact support. |
| Unit is not heating | Unit not powered on; Timer expired; Internal fault | Press power button. Check timer setting. If problem persists, contact support. |
| Timer not working correctly | Incorrect setting; Control panel fault | Review operating instructions for setting the timer. If unresponsive, contact support. |
If the problem persists after attempting these solutions, please contact NJDQFA customer support for further assistance.
9. Warranty and Support
Specific warranty details are not provided in this manual. For information regarding warranty coverage, returns, or technical support, please refer to the product packaging or contact NJDQFA customer service directly through their official website or the retailer where the product was purchased.