1. Introduction
Thank you for choosing the ELYKEN 2 Pack 5.9" Narrow Console Sofa Table with Power Outlets. This manual provides essential information for the safe assembly, operation, and maintenance of your new console table. Please read these instructions carefully before beginning assembly and retain them for future reference.
2. Product Overview
The ELYKEN Narrow Console Sofa Table is designed to fit into narrow spaces, such as behind a sofa, providing convenient storage and charging capabilities. It features a rustic brown finish with a sturdy metal frame.
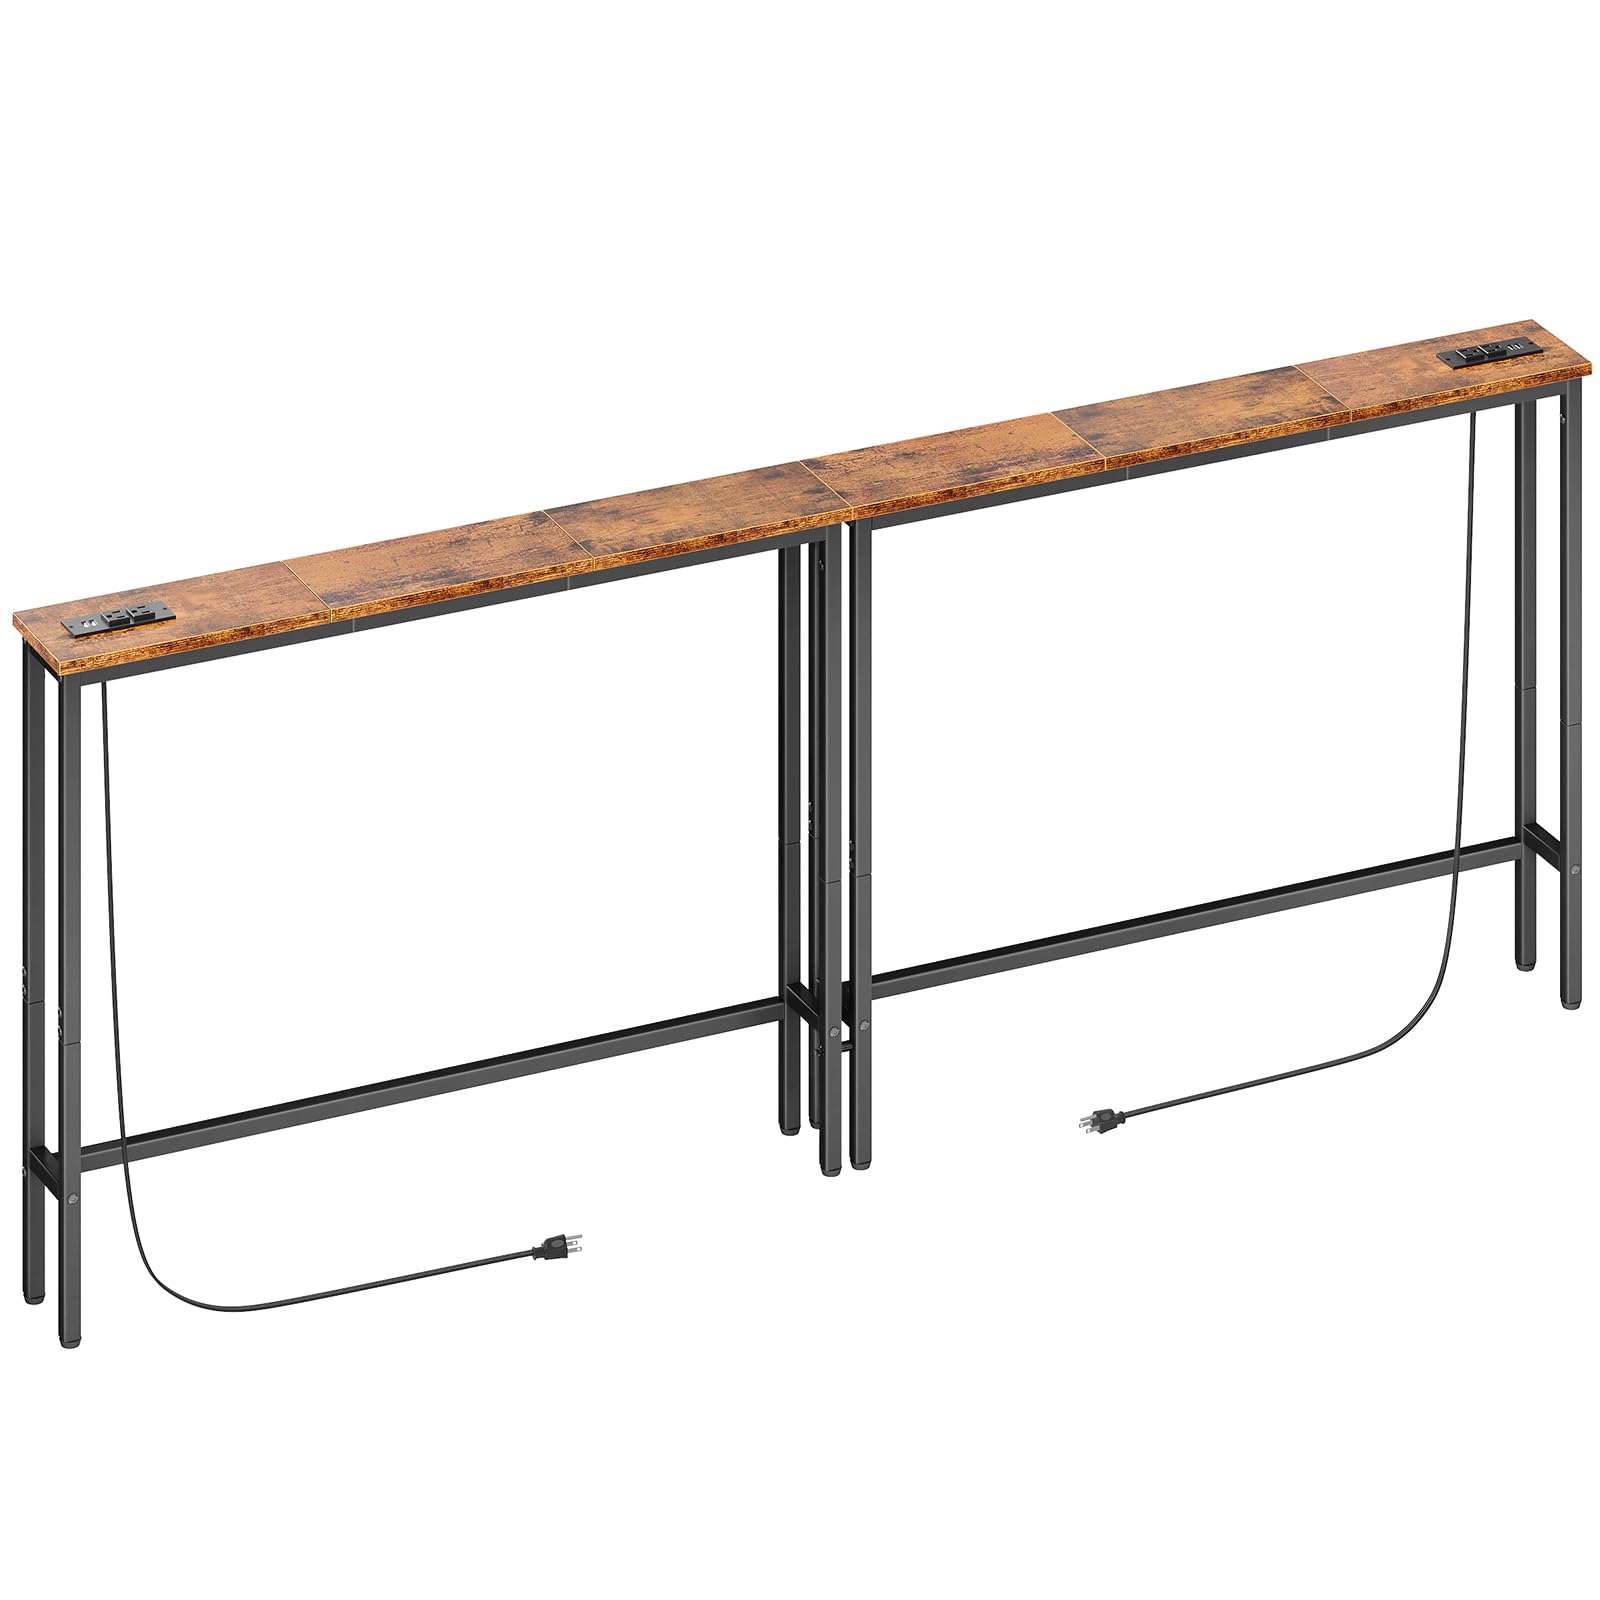
Image 2.1: ELYKEN Narrow Console Sofa Table with Power Outlets.
Key Features:
- Dimensions: 5.9"D x 78.8"W x 29.5"H
- Integrated Power Outlets: Includes 2 standard 120VAC outlets and 2 USB ports.
- Power Cord: 5.9-foot extension cord for flexible placement.
- Construction: Strong metal frame with engineered wood top board.
- Stability: Adjustable feet for uneven floors and an anti-tipping strap for wall attachment.
- Weight Capacity: Maximum recommended weight of 110 pounds.

Image 2.2: Console table positioned behind a sofa, showcasing its narrow design and utility.
3. Package Contents
Before assembly, please verify that all components listed below are present and undamaged. If any parts are missing or damaged, please contact customer support.
- Tabletop sections (Engineered Wood)
- Metal frame components (legs, support bars)
- Power outlet unit with USB ports and extension cord
- Adjustable feet (4 per table section)
- Anti-tipping strap and expansion screw
- Assembly hardware (screws, bolts, washers)
- Installation tool (Allen wrench)
- Assembly Guide

Image 3.1: Detailed dimensions of the console table components.
4. Assembly Instructions
Assembly is designed to be straightforward and typically takes less than 30 minutes. No additional tools are required beyond what is provided.
- Unpack Components: Carefully remove all parts from the packaging and lay them out on a clean, soft surface to prevent scratches.
- Assemble Frame: Attach the metal legs to the support bars using the provided screws and Allen wrench. Ensure all connections are secure but do not overtighten initially.
- Attach Tabletop: Place the engineered wood tabletop sections onto the assembled metal frame. Secure them using the designated screws.
- Connect Table Sections (for 2-pack): If assembling two tables to form a longer unit, align the sections and use the reinforcing screws to connect them at the top and bottom for added stability.
- Install Power Outlet Unit: Insert the power outlet unit into the pre-cut slot on the tabletop. Ensure it is flush and secure.
- Adjust Feet: Screw the adjustable feet into the bottom of each leg. Adjust them as needed to ensure the table is level on uneven surfaces.
- Install Anti-Tip Device: For enhanced stability and safety, especially in households with children or pets, attach the anti-tipping strap to the table and secure it to a wall using the expansion screw.

Image 4.1: Detail of screws used to reinforce the table boards.
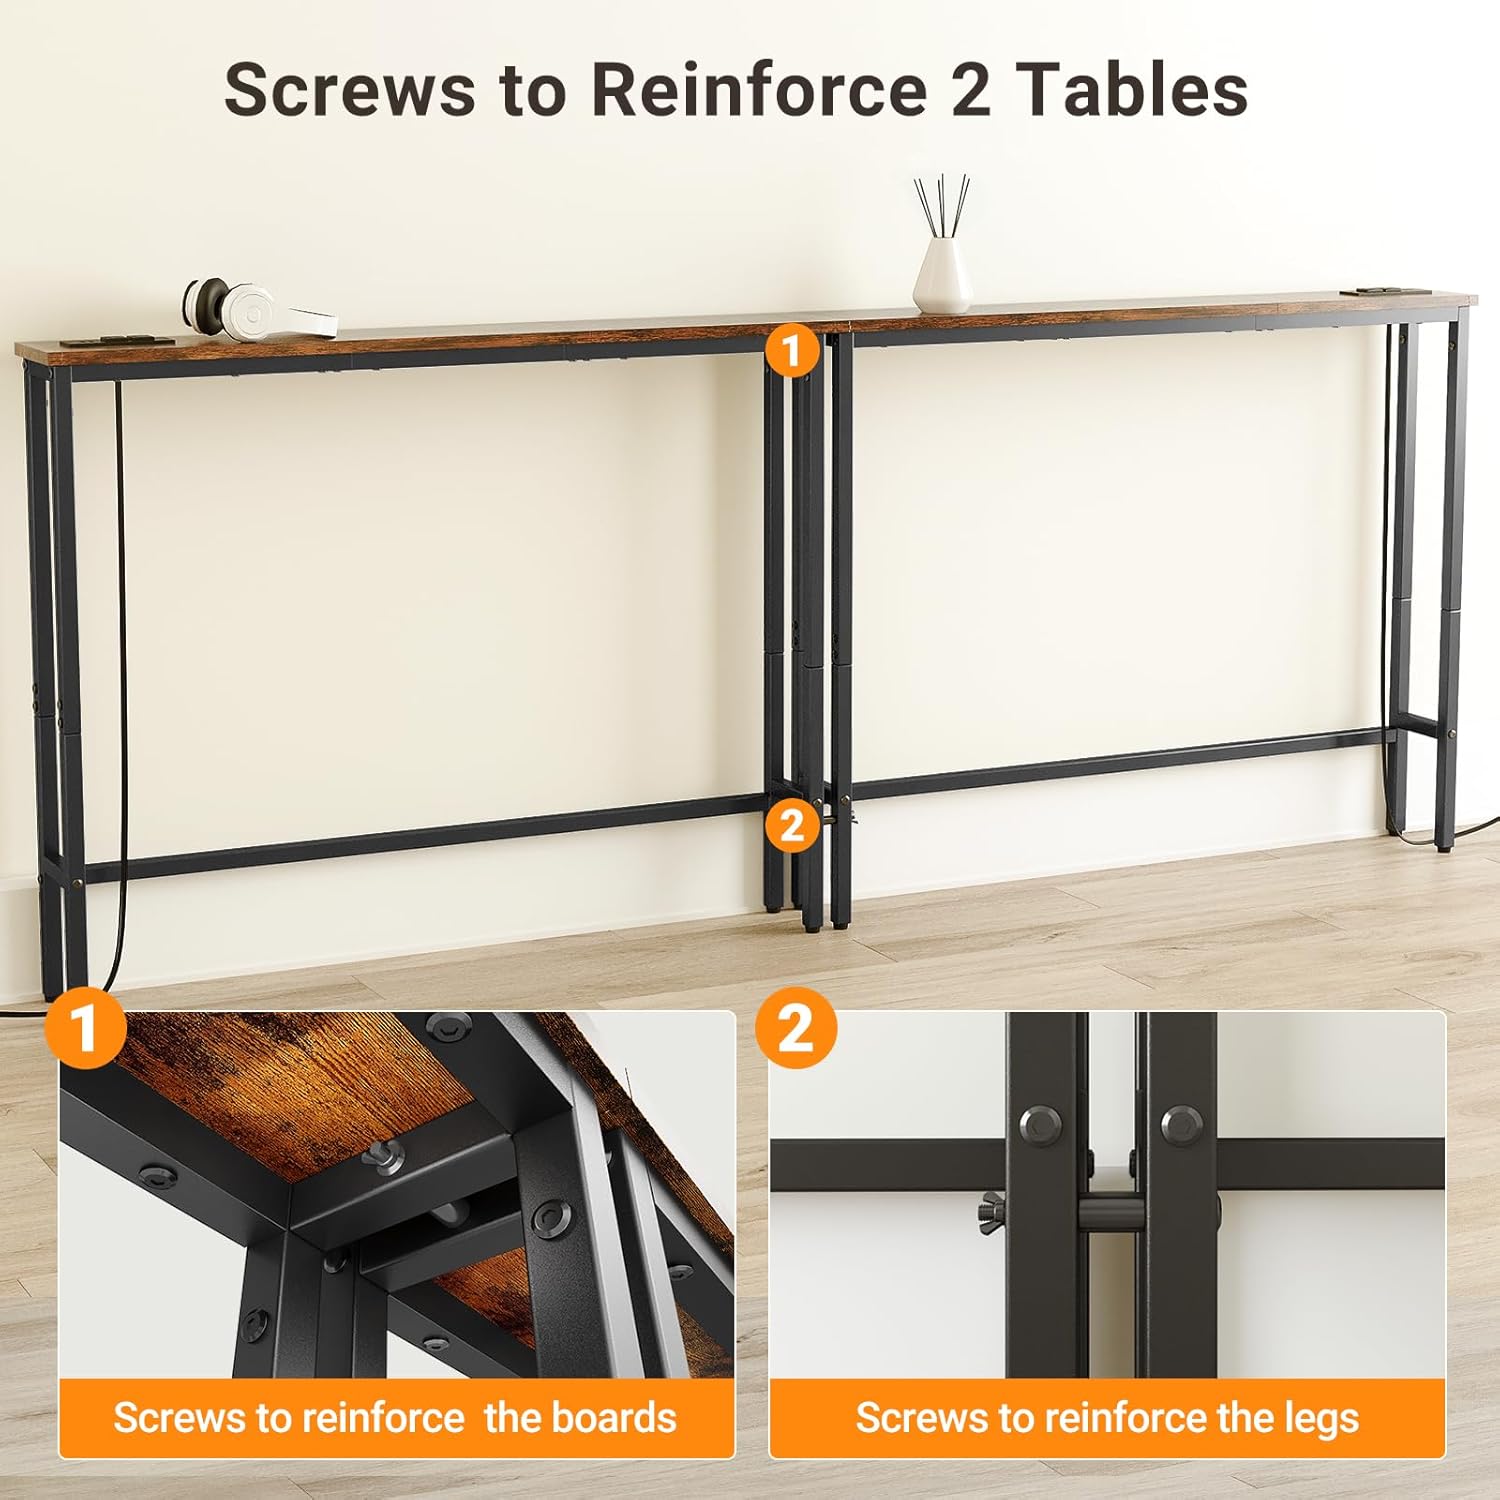
Image 4.2: Illustration of the anti-tip device and adjustable feet for stability.
5. Operating Instructions
Using the Power Outlets and USB Ports:
The integrated power strip provides convenient access to charging for your electronic devices.
- Connect to Power: Plug the table's 5.9-foot power cord into a standard 120VAC wall outlet.
- Charge Devices: Use the two 120VAC outlets for larger electronics or chargers, and the two USB ports (5V/2A) for charging smartphones, tablets, and other USB-powered devices.
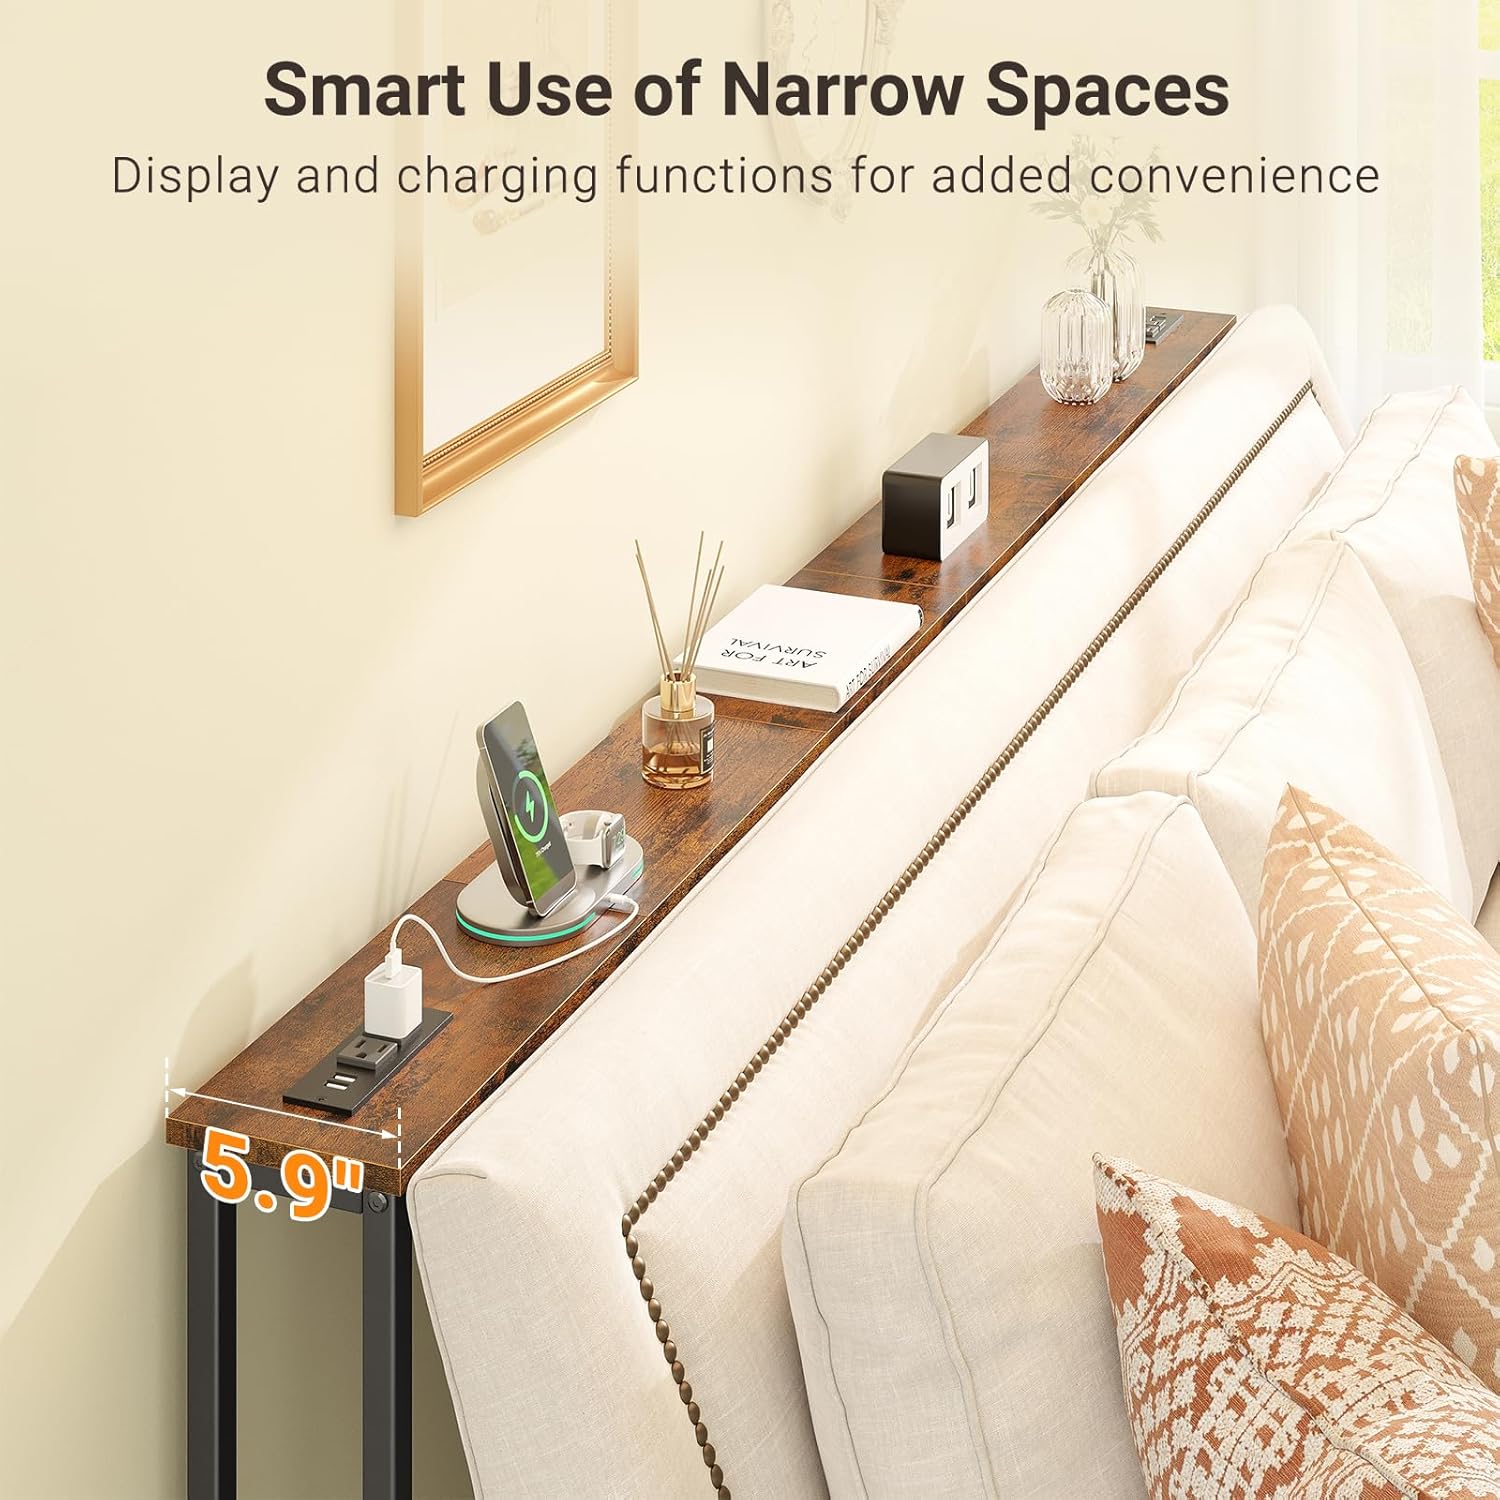
Image 5.1: Close-up view of the 120VAC outlets and USB ports for charging devices.
Utilizing the Narrow Space:
This console table is ideal for maximizing space behind a sofa or in narrow hallways. It provides a surface for:
- Displaying decorative items, photos, or small plants.
- Keeping remote controls, books, or beverages within easy reach.
- Charging personal electronic devices conveniently.

Image 5.2: The charging station can be positioned on the side or in the middle of the table for user convenience.
6. Maintenance
To ensure the longevity and appearance of your console table, follow these maintenance guidelines:
- Cleaning: Wipe the surface with a soft, damp cloth. Avoid harsh chemicals or abrasive cleaners, which can damage the finish.
- Spills: Although the tabletop is stain-resistant, promptly wipe up any spills to prevent potential damage.
- Inspection: Periodically check all screws and connections to ensure they remain tight. Retighten if necessary.
- Power Unit: Keep the power outlets and USB ports free from dust and debris. Do not expose the power unit to liquids.
7. Troubleshooting
Table Stability Issues:
- Wobbling: Adjust the threaded pegs on the bottom of the legs to compensate for uneven flooring. Ensure all assembly screws are tightened.
- Tipping Hazard: Always install the anti-tipping strap and secure it to a wall, especially if the table is not placed firmly against a sofa or wall.
Power Outlets/USB Ports Not Working:
- No Power: Verify that the table's power cord is securely plugged into a functional wall outlet. Check if the wall outlet itself is receiving power (e.g., by plugging in another device).
- Device Not Charging: Ensure your device's charging cable is properly connected to the USB port or AC adapter. Try a different port or cable to rule out a faulty accessory.
- Overload: Avoid plugging in too many high-power devices simultaneously, which could trip a circuit breaker in your home.
8. Specifications
| Attribute | Specification |
|---|---|
| Brand | ELYKEN |
| Model Number | HST04G2 |
| Product Dimensions (D x W x H) | 5.9" x 78.8" x 29.5" |
| Item Weight | 17 Pounds |
| Maximum Weight Recommendation | 110 Pounds |
| Frame Material | Metal |
| Top Material Type | Engineered Wood |
| Color | Rustic Brown |
| Power Outlets | 2 x 120VAC Standard Outlets |
| USB Ports | 2 x 5V/2A USB Ports |
| Power Cord Length | 5.9 feet |
| Required Assembly | Yes |
| Indoor/Outdoor Usage | Indoor Only |
9. Safety Information
- Indoor Use Only: This product is designed for indoor use only. Do not expose it to moisture or outdoor elements.
- Weight Limit: Do not exceed the maximum weight recommendation of 110 pounds on the tabletop. Distribute weight evenly.
- Anti-Tip Device: Always install and properly secure the anti-tipping strap to a wall to prevent accidental tipping, especially if the table is not fully supported by a sofa or other furniture.
- Electrical Safety: Ensure the power cord is not pinched or damaged. Do not overload the electrical outlets. Keep liquids away from the power unit.
- Assembly: Follow all assembly instructions carefully. Ensure all fasteners are tightened before use.
10. Warranty and Support
This ELYKEN console table comes with a 1-year manufacturer warranty from the date of purchase, covering defects in materials and workmanship under normal use. Please retain your proof of purchase for warranty claims.
Customer Support:
For any questions, missing parts, or warranty inquiries, please contact ELYKEN customer support through the retailer's platform or visit the official ELYKEN store page for contact information.
We are committed to providing quality products and support.
