
1. Introduction
This manual provides essential information for the proper installation, operation, and maintenance of your Yeiwenl TPM 2.0 Module. A Trusted Platform Module (TPM) is a secure cryptoprocessor that stores cryptographic keys to protect information. This 14-pin TPM 2.0 module is designed to enhance the security of your personal computer, particularly for compatibility with operating systems like Windows 11, which often require TPM 2.0 for advanced security features.
2. Safety Information
- Always power off your computer and disconnect it from the power source before installing or removing any internal components.
- Discharge any static electricity from your body by touching a grounded metal object (e.g., the computer chassis) before handling the module. Static electricity can damage electronic components.
- Handle the TPM module by its edges to avoid touching the pins or circuit board components.
- Ensure proper ventilation around your computer to prevent overheating.
- Keep the module away from moisture and extreme temperatures.
3. Product Overview
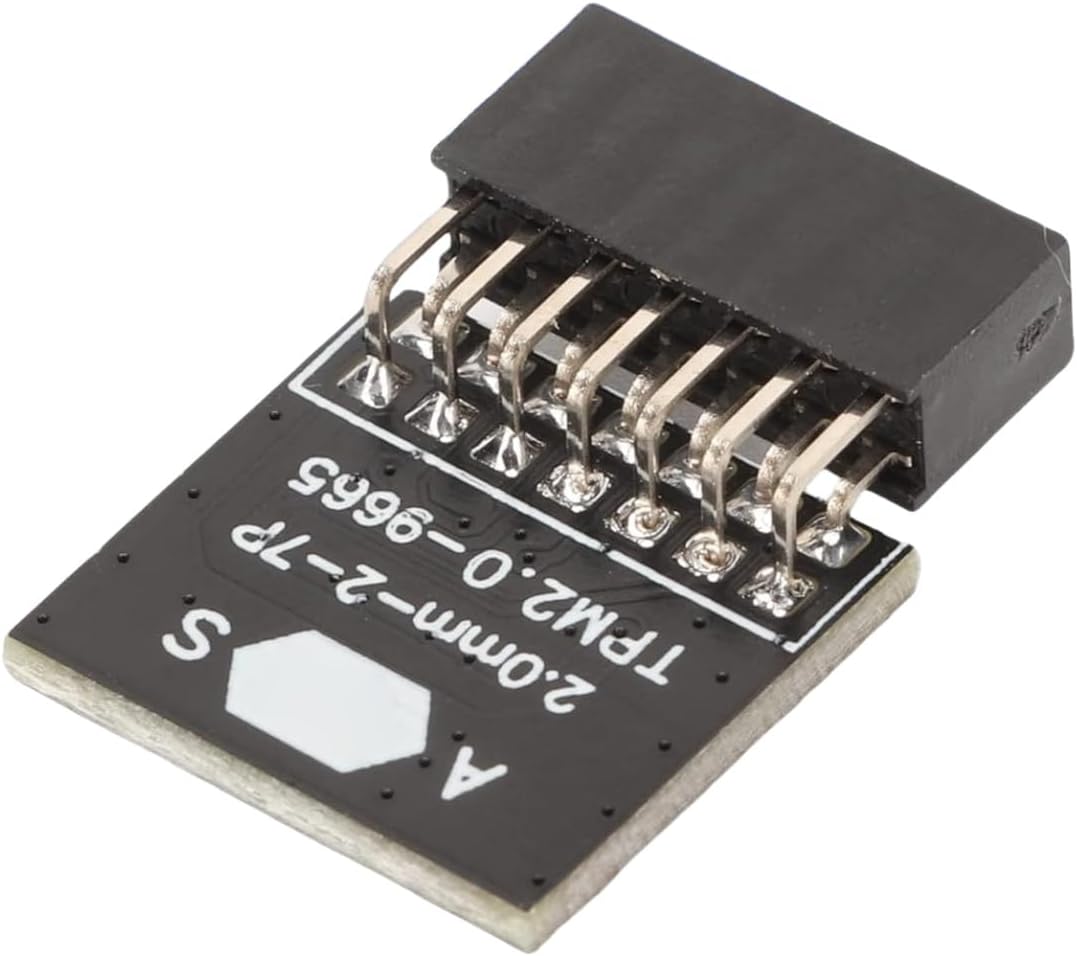
The Yeiwenl TPM 2.0 Module is a compact security device designed for integration with compatible motherboards. It features a 14-pin connector with a 2.0mm pitch, making it suitable for specific ASUS and Gigabyte motherboard models. The module facilitates hardware-based encryption and security functions required by modern operating systems.
Key Features:
- TPM 2.0 standard for enhanced security.
- 14-pin connector (2x7P) with 2.0mm pitch.
- Compatible with select ASUS and Gigabyte motherboards.
- Supports Windows 11 security requirements.
Product Images:


4. Setup and Installation
4.1 Compatibility
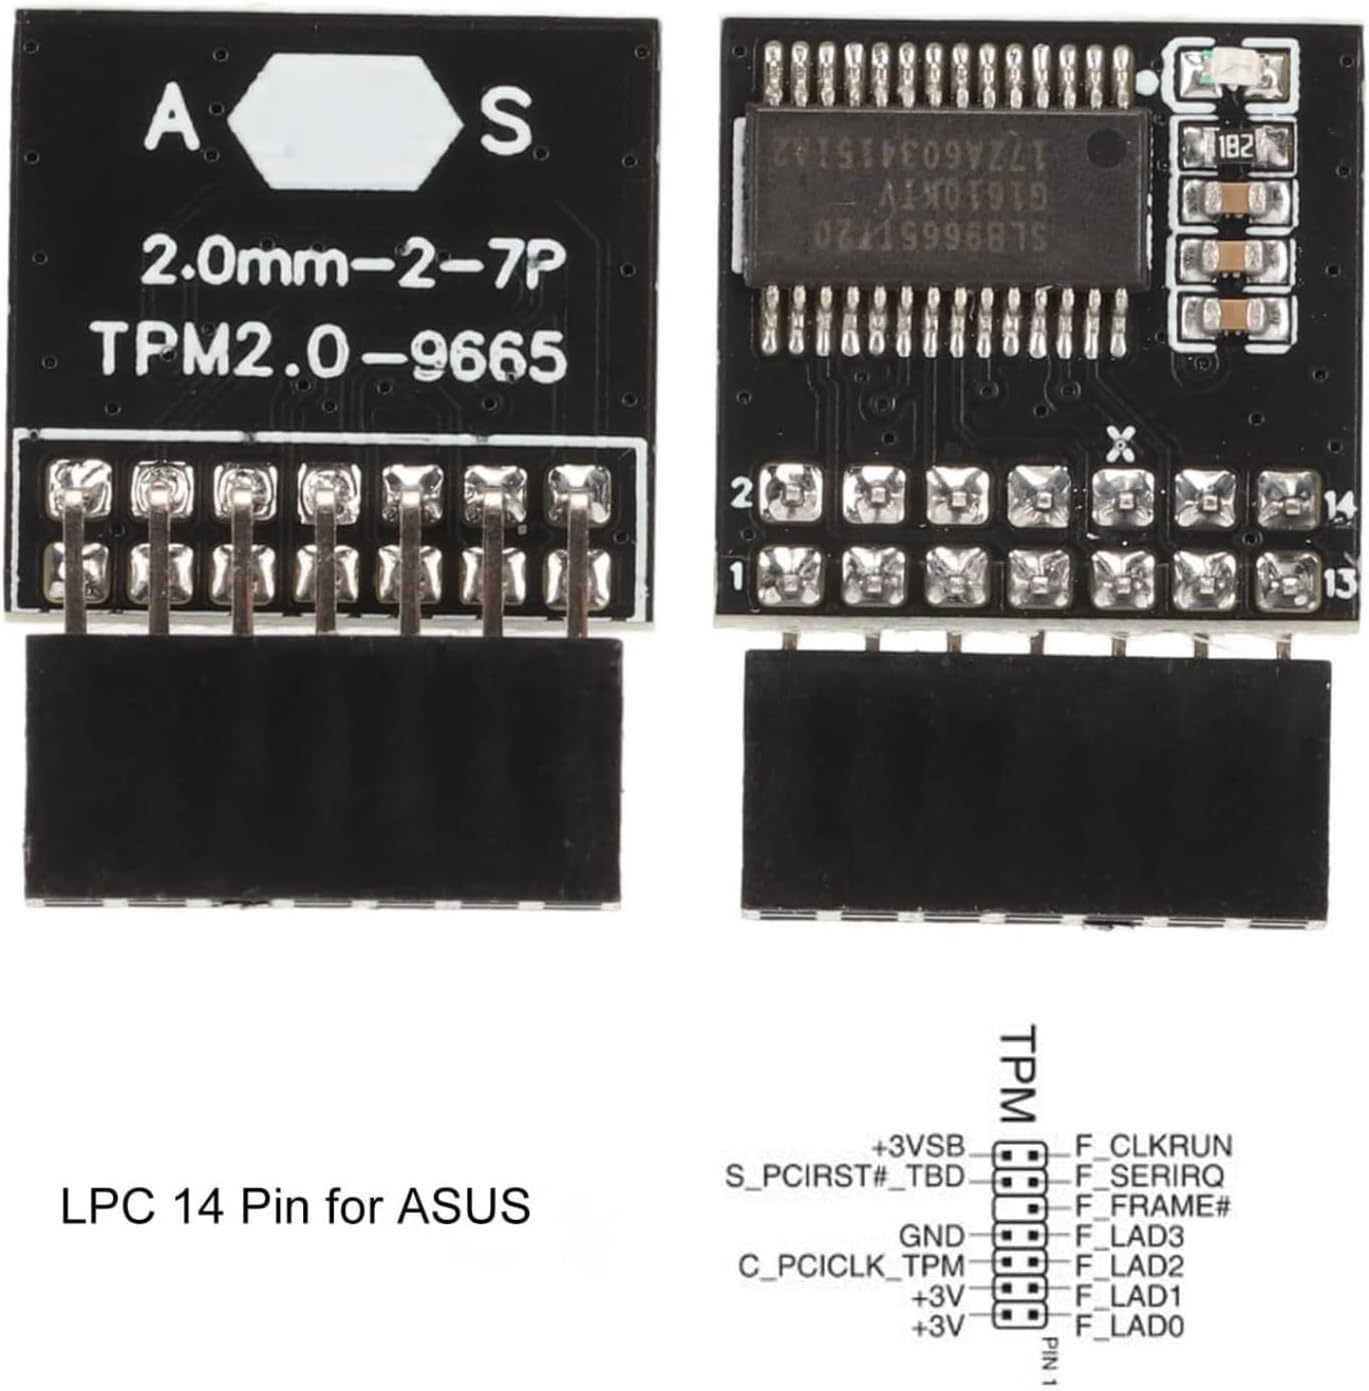
This TPM 2.0 module is designed for specific motherboards. It is generally compatible with ASUS motherboards that feature a 14-pin TPM header. It may also be compatible with certain Gigabyte motherboards. Please note the following compatibility considerations:
- Supported: Motherboards with a 14-pin TPM header, typically those supporting DDR4 memory.
- Not Supported: Laptops, motherboards manufactured prior to the X99 chipset era, and motherboards using DDR3 memory.
Crucial Step: Before installation, consult your motherboard's official manual to confirm the presence and exact pinout of the TPM header. The pinout diagram below is a general reference for LPC 14-pin TPM headers, but your motherboard manual is the definitive source.
4.2 Installation Steps
Follow these steps carefully to install the TPM 2.0 module:
- Prepare Your System: Shut down your computer completely and disconnect the power cable from the wall outlet.
- Open the Computer Case: Remove the side panel of your computer case to access the motherboard.
- Locate the TPM Header: Identify the 14-pin TPM header on your motherboard. Refer to your motherboard manual for its exact location. It is often labeled 'TPM' or similar.
- Align the Module: Carefully align the Yeiwenl TPM 2.0 module with the TPM header on the motherboard. Ensure the notch on the module aligns with the corresponding key on the header to prevent incorrect insertion.
- Insert the Module: Gently but firmly press the TPM module into the header until it is fully seated. Do not force it, as this can damage the pins or the module.
- Close the Computer Case: Once the module is securely installed, replace the computer case side panel.
- Reconnect Power: Reconnect the power cable and power on your computer.
5. Operating Instructions
5.1 Enabling TPM in BIOS/UEFI
After physical installation, you may need to enable the TPM module in your motherboard's BIOS/UEFI settings:
- Access BIOS/UEFI: Restart your computer and repeatedly press the designated key (e.g., Del, F2, F10) during startup to enter the BIOS/UEFI setup utility.
- Locate TPM Settings: Navigate to the 'Security', 'Advanced', or 'Boot' section. Look for options related to 'Trusted Platform Module', 'TPM Device', 'Intel Platform Trust Technology (PTT)', or 'AMD fTPM'.
- Enable TPM: Set the TPM option to 'Enabled' or 'Discrete TPM'. If you see both 'Discrete TPM' and 'Firmware TPM (fTPM/PTT)', select 'Discrete TPM' to utilize the installed hardware module.
- Save and Exit: Save your changes and exit the BIOS/UEFI. Your computer will restart.
5.2 Verifying TPM Status in Windows
To confirm that the TPM module is recognized and active in Windows:
- Open Run Dialog: Press
Windows Key + Rto open the Run dialog box. - Launch TPM Management: Type
tpm.mscand press Enter. - Check Status: The 'Trusted Platform Module (TPM) Management on Local Computer' window will appear. Under the 'Status' section, it should indicate that the TPM is ready for use, and the 'TPM Manufacturer Information' should show 'Specification Version: 2.0'.
Alternatively, you can check in Device Manager:
- Open Device Manager: Right-click the Start button and select 'Device Manager'.
- Expand Security Devices: Look for and expand the 'Security devices' category. You should see 'Trusted Platform Module 2.0'.
6. Maintenance
The Yeiwenl TPM 2.0 Module is a low-maintenance component. To ensure its longevity and proper function:
- Keep the interior of your computer case clean and free of dust to prevent heat buildup and potential component damage.
- Avoid physical impact or bending of the module.
- Ensure adequate airflow within your computer system.
7. Troubleshooting
7.1 TPM Module Not Detected
- Check Installation: Ensure the module is fully and correctly seated in the TPM header.
- Verify Compatibility: Double-check your motherboard manual to confirm it has a compatible 14-pin TPM header and supports TPM 2.0.
- BIOS/UEFI Settings: Confirm that TPM is enabled in your BIOS/UEFI settings as described in Section 5.1.
- Clear CMOS: In some cases, clearing the CMOS (BIOS settings) may help the motherboard detect new hardware. Refer to your motherboard manual for instructions on how to do this.
7.2 Windows 11 Compatibility Issues
- Secure Boot: Ensure Secure Boot is enabled in your BIOS/UEFI settings, as this is also a requirement for Windows 11.
- UEFI Mode: Your system must be running in UEFI mode, not Legacy BIOS mode, for Windows 11 and TPM 2.0 to function correctly.
- Check PC Health Check App: Use Microsoft's PC Health Check application to identify any other potential reasons why your system might not be compatible with Windows 11.
8. Specifications
| Feature | Specification |
|---|---|
| Model Name | YUJIN-022M |
| TPM Version | TPM 2.0 |
| Pin Definition | 14-Pin (2x7P), 2.0mm pitch |
| Material | PCB |
| Compatible Devices | Personal Computers with compatible ASUS/Gigabyte motherboards (DDR4 memory, post-X99 chipset) |
| Platform | Windows 11 (and other compatible OS) |
| Item Weight | 0.634 ounces |
| Package Dimensions | 5.16 x 4.37 x 0.43 inches |
9. Warranty and Support
For warranty information and technical support, please refer to the documentation provided with your purchase or contact Yeiwenl customer service directly. Keep your proof of purchase for warranty claims.