LBAXSXP YongGangMaoYi SHOP
Instruction Manual for Nissan Wingroad AD Wagon Y11 Headlight Assembly
Brand: LBAXSXP
Introduction
This manual provides essential information for the installation, operation, maintenance, and troubleshooting of your new LBAXSXP Headlight Assembly, compatible with Nissan AD and Wingroad Y11 models from 1999-2005. This product is designed to be a direct replacement for OEM parts 26025WE411 and 26010WD026, ensuring a precise fit and reliable performance.

Image: A pair of LBAXSXP headlight assemblies, showcasing the clear lens and internal reflector design. These are the primary components for vehicle illumination.
Setup and Installation
The LBAXSXP Headlight Assembly is designed for easy replacement. Professional installation is recommended, but experienced individuals may perform the installation by following these general guidelines. Always ensure the vehicle's battery is disconnected before beginning any electrical work.
- Preparation: Park the vehicle on a level surface and engage the parking brake. Open the hood.
- Access: Depending on your vehicle model, you may need to remove the front bumper or grille to access the headlight mounting bolts. Refer to your vehicle's service manual for specific instructions.
- Disconnect Wiring: Carefully disconnect the electrical connectors from the existing headlight assembly.
- Remove Old Headlight: Unscrew all mounting bolts securing the old headlight assembly. Gently pull the assembly out of its housing.
- Install New Headlight: Position the new LBAXSXP headlight assembly into the vehicle's housing. Ensure all mounting points align correctly.
- Secure and Connect: Re-install all mounting bolts and tighten them securely. Reconnect the electrical connectors to the new headlight assembly.
- Test Functionality: Reconnect the vehicle's battery. Turn on the headlights (low beam, high beam, turn signals, parking lights) to ensure all functions are working correctly.
- Alignment: After installation, it is crucial to check and adjust the headlight beam alignment to ensure proper road illumination and to avoid blinding oncoming traffic. This may require professional assistance or specific tools.
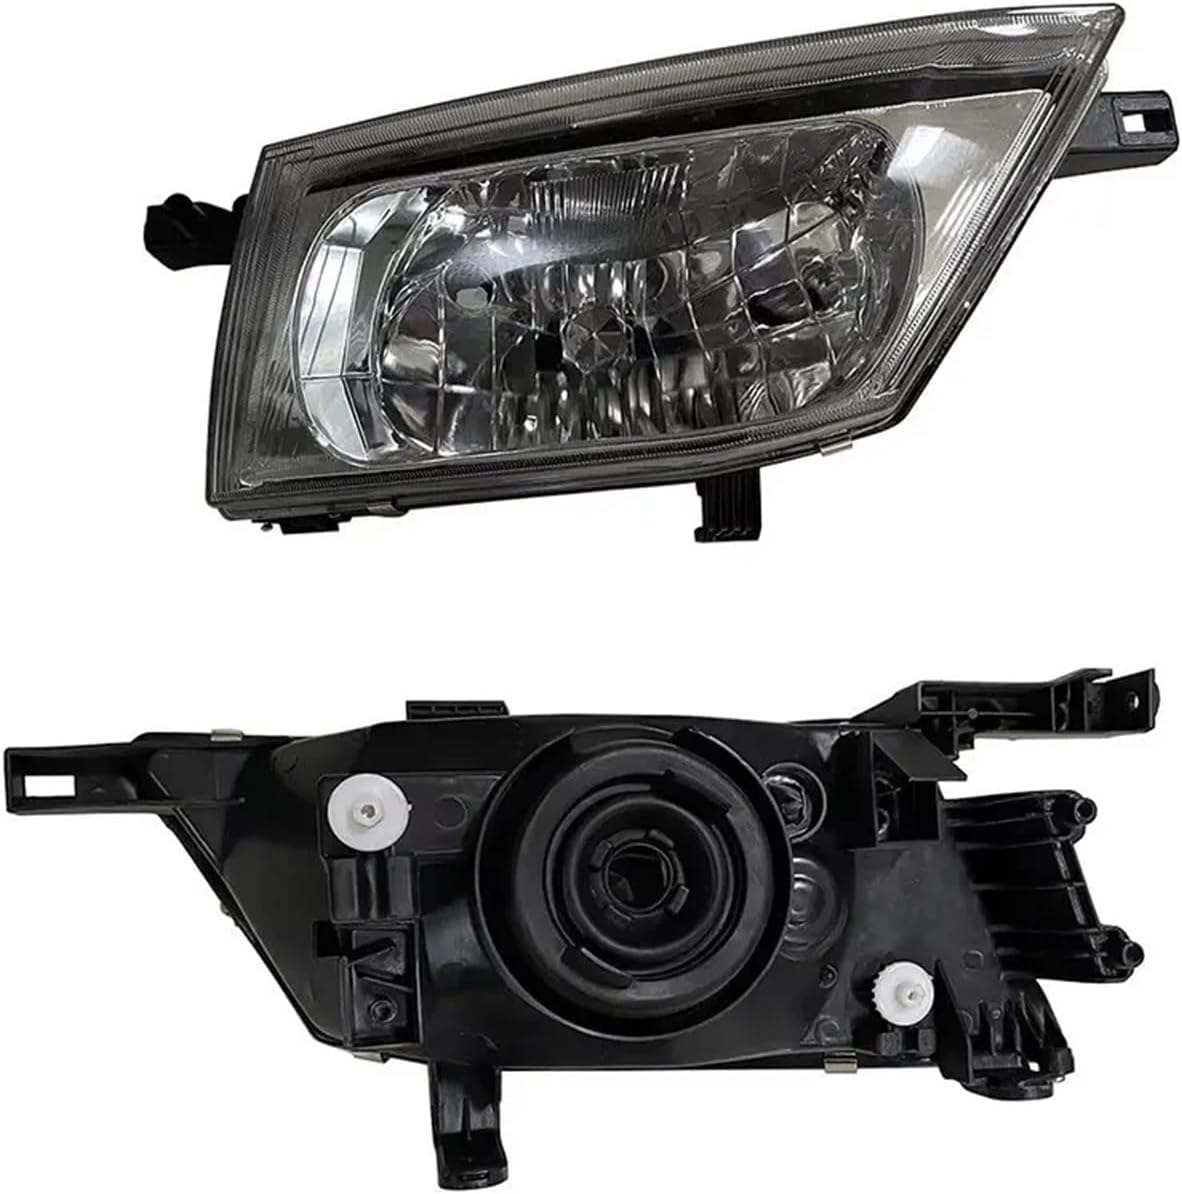
Image: Rear view of a single headlight assembly, highlighting the bulb sockets and adjustment screws. This view is critical for understanding the electrical connections and mounting points during installation.

Image: Side profile of a single headlight assembly, illustrating its depth and the design of the housing. This perspective helps in understanding how the unit fits within the vehicle's fender.
Operating Instructions
The LBAXSXP Headlight Assembly functions as a direct replacement for your vehicle's original headlights. Its operation is controlled by your vehicle's existing headlight switch and electrical system.
- Low Beam: Provides standard illumination for general driving conditions.
- High Beam: Offers increased illumination for driving in dark areas where no oncoming traffic is present.
- Turn Signals: Integrated into the assembly, these provide directional signaling.
- Parking Lights: Provide low-level illumination for visibility when parked.
Ensure your vehicle's electrical system is in good working order for optimal performance of the headlight assembly.
Maintenance
Proper maintenance will extend the lifespan and maintain the clarity of your headlight assemblies.
- Cleaning: Regularly clean the outer lens with a soft cloth and mild automotive soap and water. Avoid abrasive cleaners or harsh chemicals that can damage the lens.
- Inspection: Periodically inspect the headlight assembly for any signs of cracks, moisture intrusion, or damage. Check the electrical connections for corrosion or looseness.
- Bulb Replacement: If a bulb fails, replace it promptly with a bulb of the correct type and wattage as specified by your vehicle manufacturer. Refer to your vehicle's manual for bulb replacement procedures.
- Lens Restoration: Over time, headlight lenses can become hazy due to UV exposure. Use a reputable headlight restoration kit if haziness occurs to restore clarity.
Troubleshooting
If you encounter issues with your headlight assembly, consider the following common problems and solutions:
| Problem | Possible Cause | Solution |
|---|---|---|
| Headlight not illuminating |
|
|
| Dim or flickering light |
|
|
| Moisture inside headlight |
|
|
If problems persist after attempting these solutions, consult a qualified automotive technician.
Specifications
- Brand: LBAXSXP
- Model: YongGangMaoYi SHOP (Manufacturer's internal model number)
- Compatible Vehicles: Nissan AD (VENY11, VEY11, VFY11, VGY11, VHNY11, VY11, WFY11, WHNY11, WHY11, WPY11, WRY11), Nissan Wingroad (VENY11, VEY11, VFY11, VGY11, VHNY11, VY11, WFNY11, WFY11, WHNY11, WHY11, WPY11, WRY11)
- OEM Part Numbers: 26025WE411, 26010WD026
- Material Type: ABS
- Manufacturer Part Number: 16-33-320
- Compatible With Lamp: Headlights
- Origin: Mainland China
- Item Weight: Approximately 1.76 ounces (per unit, as per product data)
- Package Dimensions: Approximately 1.18 x 0.79 x 0.39 inches (as per product data, likely for a single component, not the full assembly)

Image: An angled view of both headlight assemblies, emphasizing their design and the clarity of the lens. This view helps in visualizing the product's appearance when installed.
Warranty Information
Specific warranty details for this product are not provided in the available documentation. Please refer to the seller's return policy or contact the seller directly for information regarding warranty coverage and terms.
Support
For technical assistance, installation queries, or any other support needs, please contact the seller directly through the platform where the product was purchased. The seller's contact information is typically available on your order details page or the product listing.
Manufacturer: YongGangMaoYi SHOP
Related Documents - YongGangMaoYi SHOP
 |
SHOP FOX Model D3244 Heavy Duty Wagon - Assembly Instructions and Parts List Comprehensive guide for the SHOP FOX Model D3244 Heavy Duty Wagon, including detailed assembly instructions, a complete parts breakdown, specifications, and safety precautions. |
 |
D3244 Heavy Duty Wagon Parts Breakdown and Instructions | SHOP FOX Detailed parts breakdown and list for the SHOP FOX D3244 Heavy Duty Wagon, including part numbers and descriptions for assembly and maintenance. |
 |
Polyvance Bumper Mate 3 Plastic Repair Workstation (Model 6077) Polyvance Bumper Mate 3 is a versatile plastic repair workstation designed to securely hold automotive bumpers, headlights, and fenders for efficient repair. Features durable construction, adjustable arms, and secure fastening options. |
 |
LG AKB72914044 Remote Control Comparison: Original vs. Replacement Functions Detailed comparison of the original LG AKB72914044 remote control buttons and their functions against a compatible replacement remote. Find button mappings and features. |
 |
Yamaha Ttr-225 1999-2004 Service Repair Manual: Comprehensive Guide Detailed service and repair manual for the Yamaha Ttr-225, covering model years 1999, 2000, 2001, 2002, 2003, and 2004. Includes step-by-step instructions, illustrations, and troubleshooting for all major components. |
 |
Nissan Workshop Equipment, Tools, and Technical Information Manual This manual provides a comprehensive overview of the equipment, tools, and technical information required for Nissan official workshops. It details general workshop equipment, specialized tools for various vehicle types (passenger cars, 4x4, commercial, electric vehicles), and specific tools for trucks and the Nissan GT-R model. It also outlines requirements for workshop certification and environmental standards. |