1. Setup
1.1 Before Installation
Ensure all components are present and undamaged before beginning installation. Refer to the included Quick Start Guide and User Manual for a complete parts list.

Image: BritMo CFK6001 60-inch Ceiling Fan with remote control and reversible blades.
1.2 Tools Needed (Not Included)
- Ladder
- Phillips Screwdriver
- Wire Stripper
- Drill (Optional)
1.3 Check Room Dimensions and Ceiling Angle
To ensure optimal air circulation and safety, your ceiling fan blades should have approximately 30 inches of clearance from the nearest wall or obstruction. The bottom edge of the fan blades should hang at least 7 feet above the floor. The ceiling angle must be less than or equal to 15 degrees for proper installation.

Image: Diagram illustrating recommended room dimensions and ceiling fan clearance (30 inches from wall, 7 feet from floor).
1.4 Power Disconnection
Before starting any installation, ensure the power to the ceiling fan location is turned OFF at the circuit breaker to prevent electrical shock.
1.5 Unboxing and Component Overview
Carefully unpack all components. The package includes the ceiling fan body, canopy, ceiling bracket, light kit, blades (reversible black and light brown), controller, downrods (6-inch and 10-inch), remote control, and installation hardware.
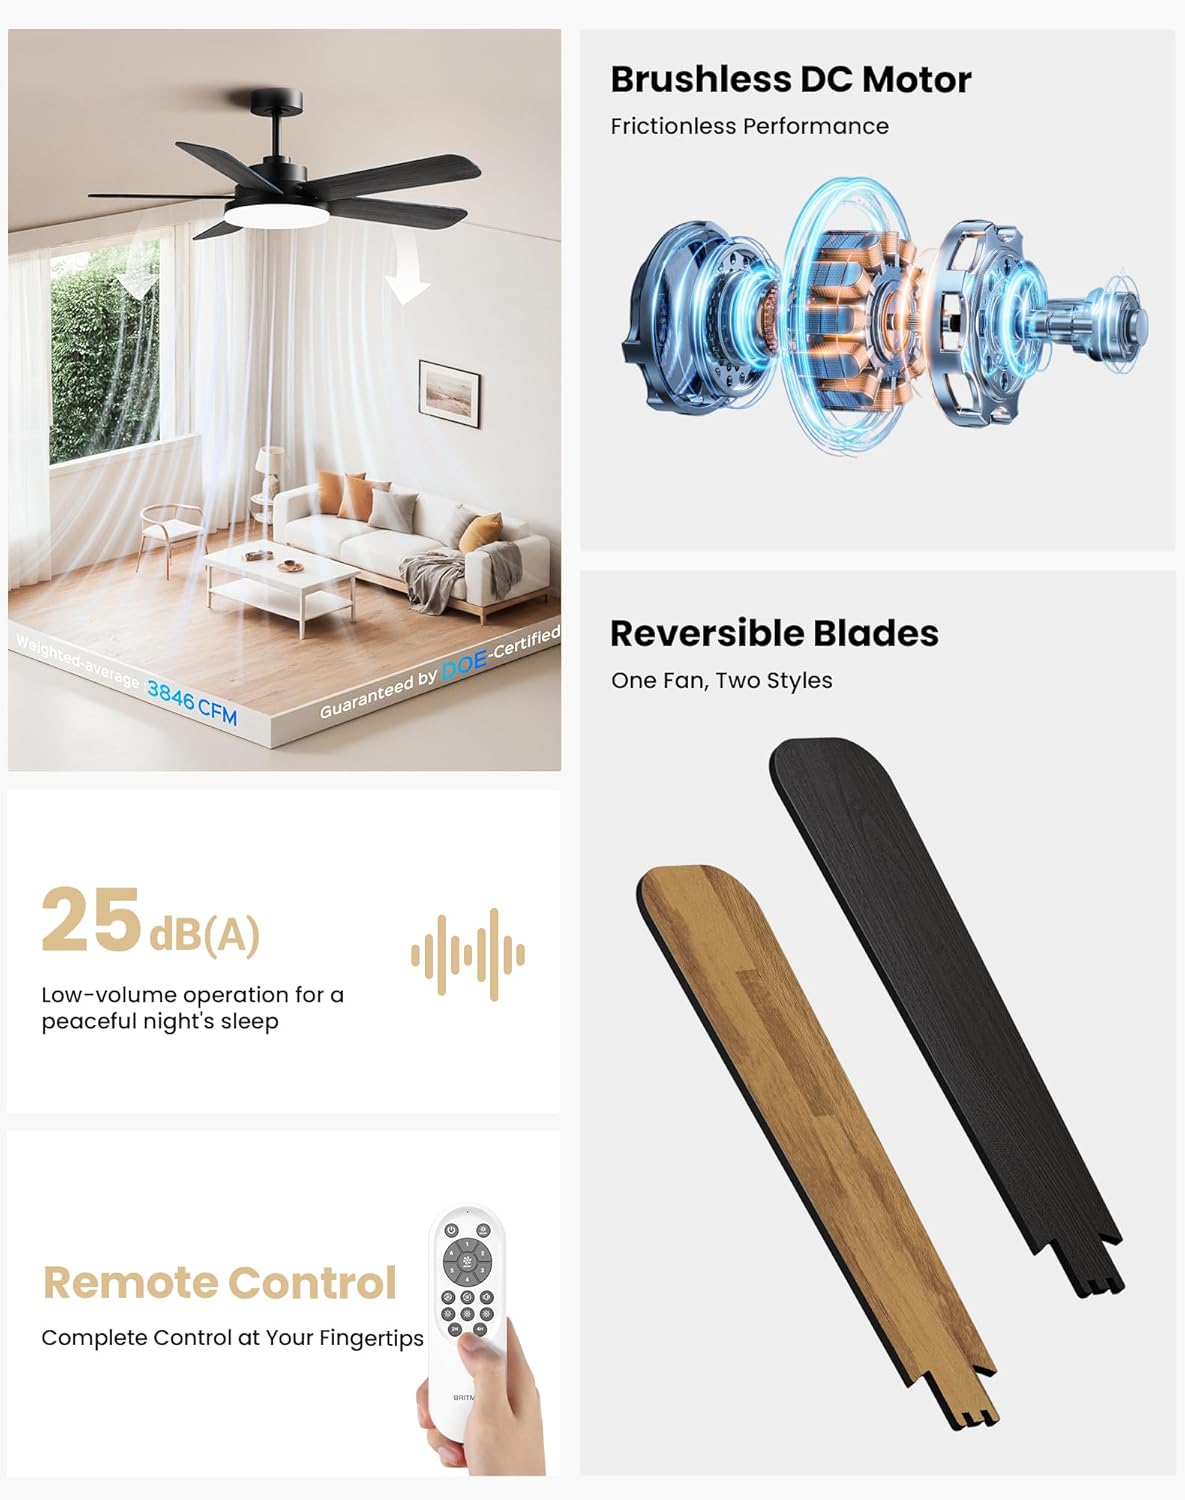
Image: All BritMo CFK6001 ceiling fan components, including blades, motor, light kit, remote, and hardware.
1.6 Ceiling Bracket Installation
Securely install the ceiling bracket to the building structure or a ceiling fan-rated outlet box. For concrete ceilings, use machine screws. For wooden ceilings, use wood screws and washers after drilling pilot holes. Ensure the bracket is firmly attached to support the fan's weight (16.87 pounds).
1.7 Blades Installation
The fan features a Quick-Fit blade system. Unscrew the safety screws from the fan body. Align the blade slots with the protrusions on the motor housing and push in until you hear a pop, indicating it's locked. Rescrew the safety screws to secure the blades. The blades are reversible, offering black or light brown finishes.

Image: Visual guide for blade installation: insert blade, tighten one screw, cover with light panel.
1.8 Downrod Installation (Optional Replacement)
The fan comes with a pre-installed 6-inch downrod. If a 10-inch downrod is preferred, remove the downrod pin and clip, loosen pre-installed screws on the fan top, and remove the 6-inch downrod. Thread the wires through the desired downrod and secure it to the fan body, ensuring the downrod ball slot matches the inner lock. Tighten the setscrew.
1.9 Ceiling Fan Hanging and Wiring
Carefully lift the assembled fan and hang it onto the installed ceiling bracket. Ensure the downrod ball slot securely locks into the groove of the bracket. Connect the fan's black wire to the ground wire and the white wire to the light source wire. Connect the receiver for the remote control, ensuring all wires are properly secured and concealed within the ceiling bracket and canopy.
Video: Official BritMo installation guide for the 60-inch ceiling fan, demonstrating the hanging and wiring process.
1.10 Light Kit Installation
Connect the light kit wires to the corresponding wires from the fan body. Rotate the light kit counter-clockwise until it clicks into place, securing it to the fan.
1.11 Remote Control Holder Installation
Drill two holes in your desired wall location and insert the provided screws. Slide the remote control holder's backboard onto the screws until it clicks firmly into place.
2. Operating
The BritMo CFK6001 ceiling fan is operated using the included remote control, offering comprehensive control over fan speed, light settings, and special functions.

Image: The BritMo remote control with buttons for power, brightness, 6-speed fan control, timer settings, airflow direction, natural wind mode, and light temperature.
2.1 Fan Speed Control
- Use the '1' to '6' buttons on the remote to select desired fan speed. '1' is the lowest speed, and '6' is the highest.
- The fan features a reversible DC motor for year-round comfort. Use the dedicated button on the remote to switch between summer (downward airflow for cooling) and winter (upward airflow for warmth circulation) modes.
- Activate 'Natural Wind Mode' for a gentle, fluctuating breeze.
2.2 Lighting Control
- Press the light ON/OFF button to toggle the LED light.
- Adjust brightness using the brightness control buttons (5 levels available). The light has a memory function to recall your last brightness setting.
- Change the color temperature (3000K-6000K) using the dedicated CCT buttons. Options include warm white (3000K), natural white (4000K), and cool white (6000K).

Image: Visual representation of the 3 adjustable color temperatures (3000K, 4000K, 6000K) provided by the LED light source.
2.3 Timer Function
- Set the fan to automatically turn off after 2 or 4 hours using the respective timer buttons on the remote.
2.4 Quiet Operation
The fan operates at an ultra-quiet level below 25dB, ensuring minimal disturbance.

Image: Noise level comparison chart showing the BritMo fan operating at 25dB, comparable to a whisper.
3. Maintenance
3.1 Cleaning
Regularly clean the fan blades and motor housing with a soft, damp cloth. Avoid using abrasive cleaners that may damage the finish. Ensure the fan is turned off and power is disconnected before cleaning.
3.2 Blade Care
Check blades periodically for any dust buildup or damage. Clean gently to maintain balance and efficient airflow.
4. Troubleshooting
4.1 Fan Not Operating
- Check if the power supply to the fan is on at the circuit breaker.
- Ensure all wiring connections are secure.
- Verify remote control batteries are functional and correctly inserted.
4.2 Light Not Working
- Confirm power supply is active.
- Check light kit wiring connections.
- Ensure the light kit is properly seated and twisted into place.
4.3 Excessive Noise or Wobbling
- Ensure all blade screws are tightened.
- Verify the ceiling bracket is securely installed.
- Check that the downrod is properly seated and secured.
- Use the included balancing kit if wobbling persists.
5. Specifications
| Feature | Detail |
|---|---|
| Brand | BritMo |
| Model Name | CFK6001 |
| Size | 60 inch |
| Color | Black & Light Brown |
| Power Source | DC |
| Number of Blades | 5 |
| Air Flow Capacity | 4530 CFM |
| Noise Level | 25 Decibels |
| Light Brightness | 2844 LM |
| Color Temperature | 3CCT Dimmable (3000K-6000K) |
| Wattage | 64.00 W (Fan), 24W (LED Light) |
| Voltage | 120 Volts |
| Item Weight | 16.87 Pounds |
| Indoor/Outdoor Usage | Indoor, Outdoor |
| Control Method | Remote |
6. Warranty and Support
6.1 Product Warranty
The BritMo CFK6001 ceiling fan is backed by a comprehensive 1-year warranty, ensuring long-lasting performance and peace of mind.
6.2 Customer Support
For any inquiries, technical assistance, or warranty claims, please contact BritMo customer support. 24/7 customer support is available to assist you.