1. Introduction
The EIBOS Polyphemus 3D Printer Filament Dryer is designed to maintain optimal filament conditions for superior 3D printing. Most 3D printing filaments are hygroscopic, meaning they absorb moisture from the air. This absorbed moisture can lead to various printing issues such as stringing, bubbling, poor layer adhesion, and nozzle clogging. The Polyphemus dryer effectively removes moisture from your filament, ensuring consistent print quality and extending the lifespan of your materials.
This manual provides comprehensive instructions for setting up, operating, and maintaining your EIBOS Polyphemus filament dryer. Please read it thoroughly before use to ensure safe and efficient operation.
Video 1: EIBOS Polyphemus Filament Dryer Overview
This video provides a detailed overview of the EIBOS Polyphemus filament dryer, highlighting its key features and benefits for maintaining filament quality.
2. Safety Information
- Always ensure the power supply voltage matches the specifications of the device (110V-120V for US Plug).
- Do not touch the heating elements or internal components while the device is operating or immediately after use, as they may be hot.
- Keep the device away from water or other liquids to prevent electric shock.
- Do not block the air vents during operation to ensure proper heat dissipation.
- Unplug the device from the power outlet when not in use or before cleaning.
- Keep out of reach of children.
3. Package Contents
Verify that all items are present in the package:
- EIBOS Polyphemus Filament Dryer Unit
- Power Adapter (US Plug, 110V-120V)
- PTFE Tube
- Hygrometer
- Desiccant Box
- Rollers and Bearings (for spool support)
- Silicone Stoppers for Filament Outlet Holes
- Spare Geared Motor
- User Manual
4. Setup
4.1 Hygrometer and Desiccant Box Assembly
- Carefully remove the hygrometer from its packaging.
- Open the desiccant box and pour the provided desiccant beads into it.
- Close the desiccant box lid tightly.
- Insert the assembled hygrometer into the designated groove on the side of the drying storage box. Press firmly until it snaps into place.
Video 2: Hygrometer and Desiccant Box Installation (SUNLU FilaDryer SP2)
This video demonstrates the assembly of the hygrometer and desiccant box, and their installation into a similar filament dryer. The process is applicable to the EIBOS Polyphemus.
4.2 Roller and Bearing Installation
- Remove the bearings and rollers from their packaging.
- Insert each roller into two bearings.
- Place the assembled rollers into the recessed grooves at the bottom of the drying storage box. Ensure they rotate smoothly.
4.3 Filament Loading
The Polyphemus supports two main methods for loading filament, depending on spool size:
- Spool Roller Fixed (for 0.25kg, 0.5kg, 1kg spools): Place the filament spool directly onto the fixed spool rollers.
- Roller Fixed (for 1kg, 2kg, 3kg spools): For larger spools, the rollers can be adjusted or an expansion kit can be used to accommodate the size.
Feed the filament through one of the designated outlet holes. For optimal drying, it is recommended to remove the silicone stoppers from the filament outlet holes during the drying process to allow moisture to escape.

Image 1: EIBOS Polyphemus with two 1kg spools.
The dryer can accommodate two standard 1kg filament spools simultaneously.
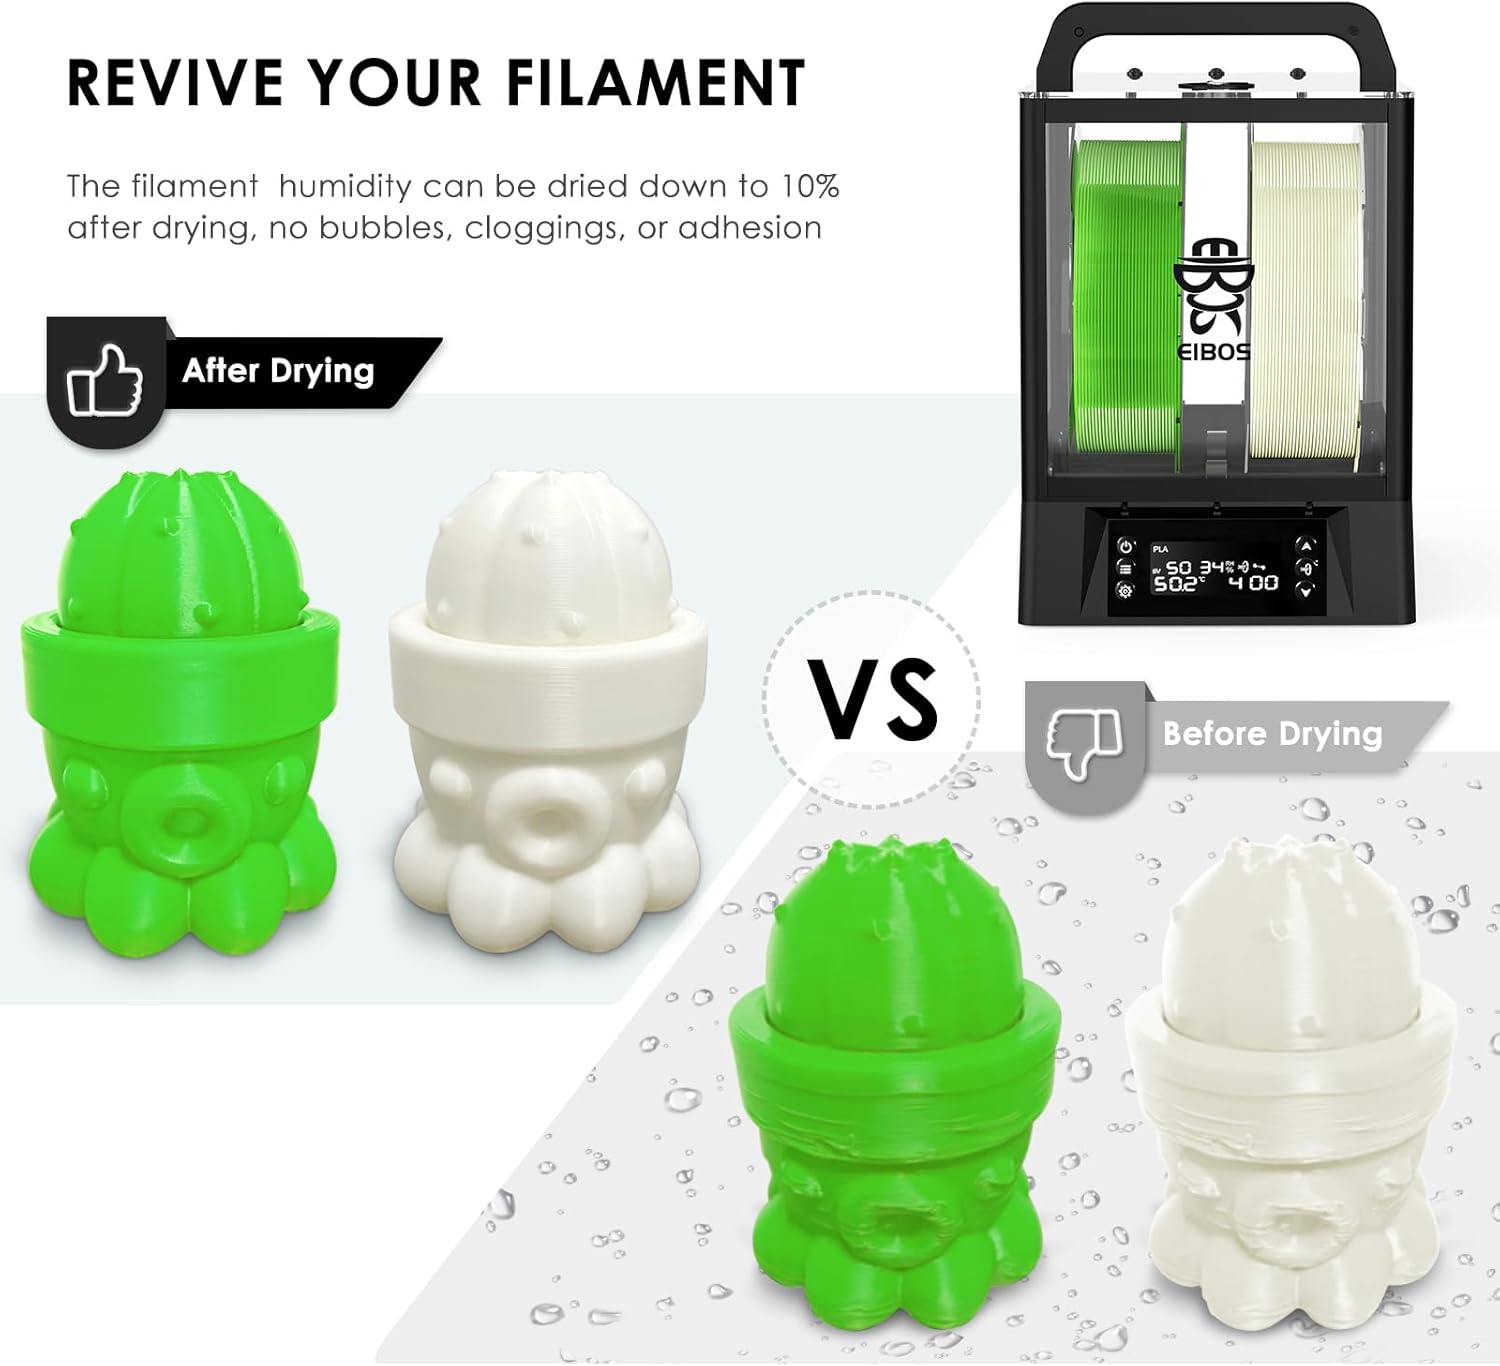
Image 2: EIBOS Polyphemus with a 3kg spool.
An expansion kit allows the dryer to fit larger 3kg spools, providing versatility for various filament sizes.
4.4 Power Connection
Connect the power adapter to the device and then plug it into a suitable power outlet. Flip the power button to the 'ON' position.
Video 3: EIBOS easdry Filament Dryer Setup and Operation
This video demonstrates the initial setup and basic operation of an EIBOS filament dryer, including power connection and filament loading.
5. Operating Instructions
5.1 Control Panel Overview
The EIBOS Polyphemus features an intelligent built-in LCD interface with several buttons for easy control:
- ON/OFF Button: Short press to turn the unit on/off. Long press to reset to factory settings.
- Option Button: Enters material selection mode.
- Setting Button: Customizes temperature, heating level, and drying time. Long press toggles between Celsius and Fahrenheit.
- Up/Down Buttons: Adjust parameters or navigate menus.
- Rotate Button: Activates/deactivates the automatic rotation function.
Image 3: Intelligent Built-in LCD Interface.
The display shows current temperature, humidity, filament type, and remaining drying time, with clearly labeled control buttons.
5.2 Drying Filaments
To begin drying, turn on the device using the ON/OFF button. Use the Option button to select your filament type (e.g., PLA, ABS, PETG, Nylon, PC, TPU, ASA). The device comes with preset drying times and temperatures for common filament types. You can customize these settings using the Setting button and the Up/Down buttons.
| Filament | Temperature | Time |
|---|---|---|
| PLA | 50°C | 4h |
| PVA | 50°C | 4h |
| ABS | 60°C | 2h |
| PETG | 65°C | 2h |
| Nylon | 70°C | 12h |
| PA | 70°C | 12h |
| PC | 70°C | 8h |
| TPU | 55°C | 24h |
| ASA | 60°C | 24h |
5.3 Automatic Rotation Function
The Polyphemus features a geared motor that automatically rotates your filament spool, ensuring 360° surround heating. This eliminates temperature variations and promotes even drying throughout the spool. Activate this mode using the Rotate button on the control panel.
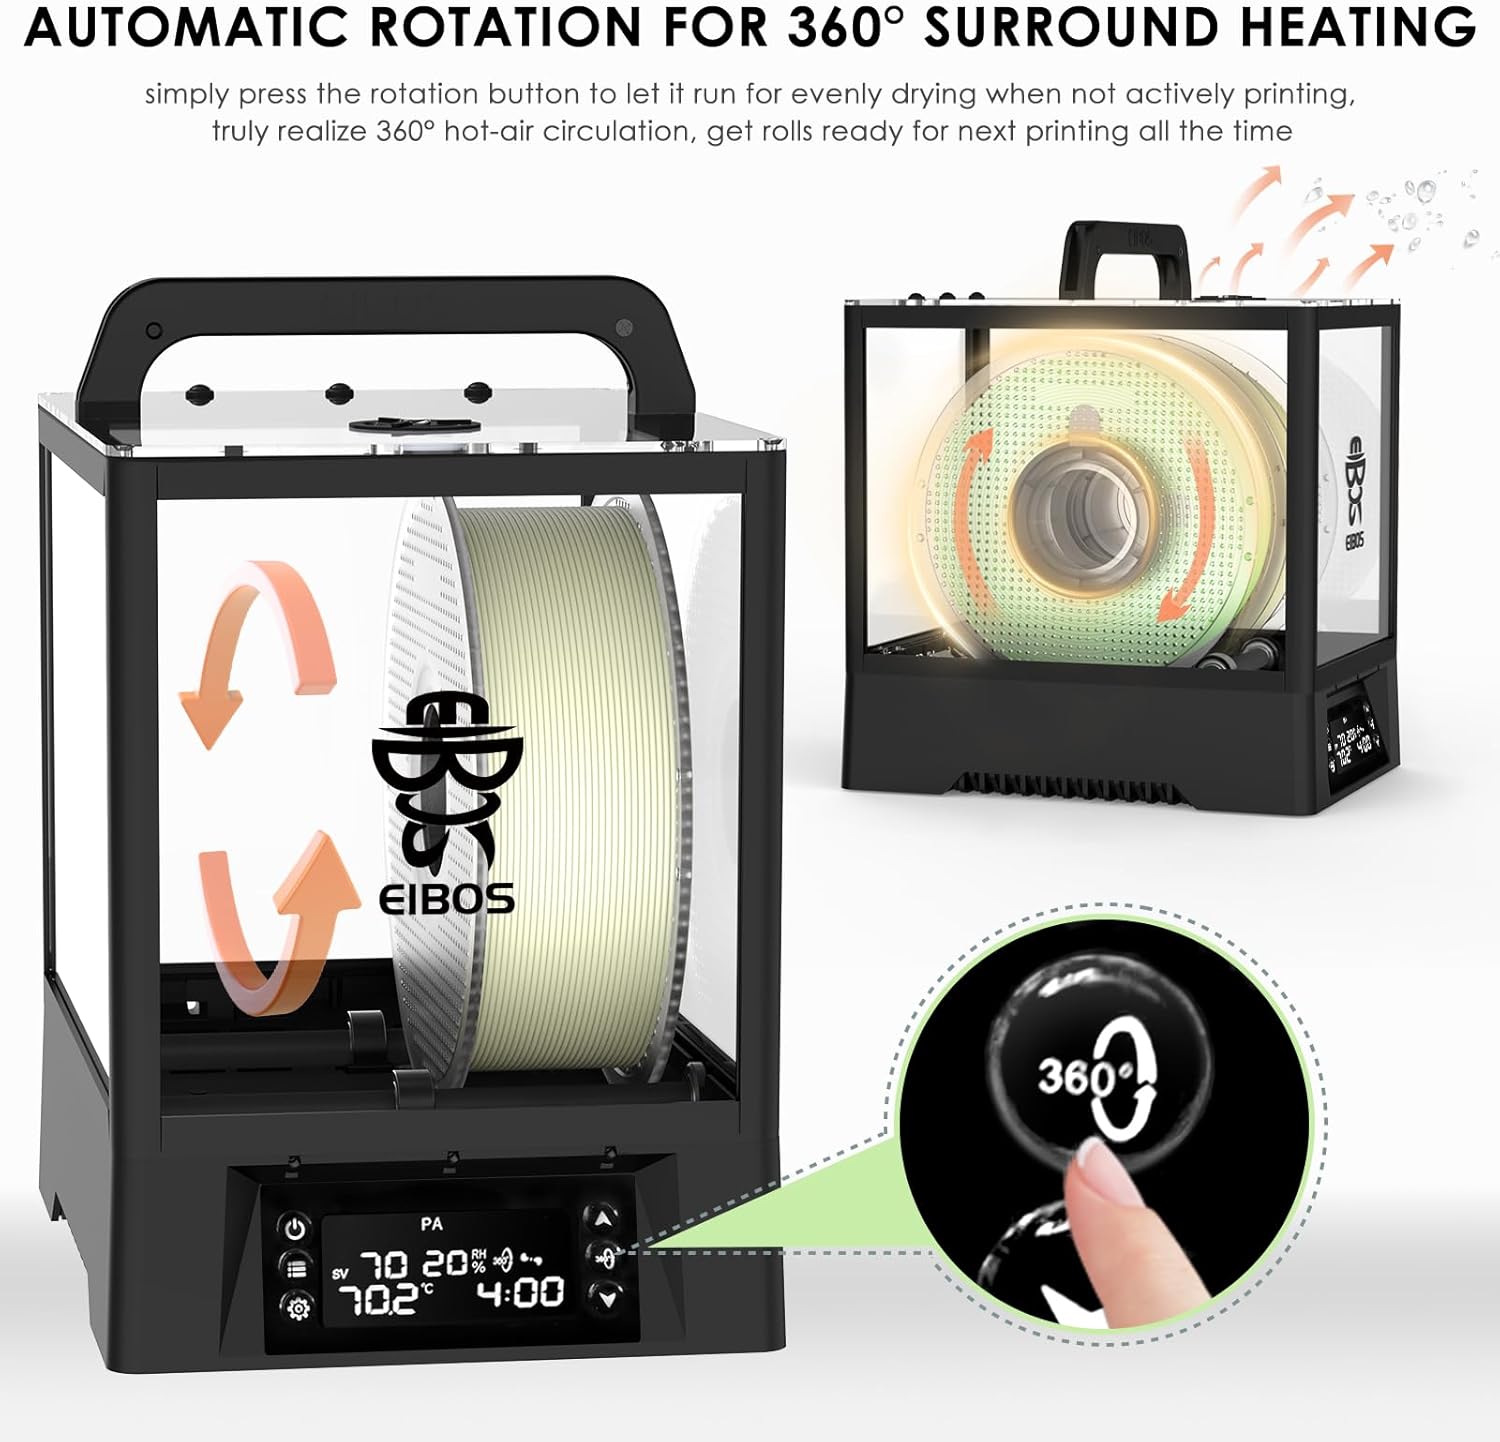
Image 4: Automatic Rotation for 360° Surround Heating.
The auto-rotation feature ensures uniform heat distribution for effective drying.
5.4 Automatic Humidity Hold
The device can maintain a specific relative humidity level inside the chamber. After drying, you can activate the humidity hold function by pressing the ON/OFF button once (after turning it on). This keeps the filament ready for use at all times. You can set the humidity threshold between 10% and 70% relative humidity in 10% increments.

Image 5: Revive Your Filament.
Comparison of 3D printed objects before and after drying filament, demonstrating improved print quality.
Video 4: EIBOS easdry Filament Dryer Low Noise Testing
This video demonstrates the low noise operation of an EIBOS filament dryer, indicating quiet performance during drying cycles.
6. Maintenance
6.1 Desiccant Replacement
The Polyphemus includes two compartments for desiccant packs. Regularly check the desiccant packs and replace them when they are saturated (indicated by a color change, if applicable) to maintain optimal humidity control for long-term storage.
6.2 Cleaning
Ensure the device is unplugged and cooled down before cleaning. Use a soft, dry cloth to wipe the exterior. Do not use abrasive cleaners or solvents. Keep the air vents clear of dust and debris.
7. Troubleshooting
- Filament not drying effectively: Ensure the correct temperature and time settings are selected for your filament type. Verify that the silicone stoppers are removed from the outlet holes during drying.
- Spool not rotating: Check if the automatic rotation function is enabled. Ensure the spool is properly seated on the rollers. Small spools (e.g., 250g) may not engage the rollers properly; in such cases, they can be laid sideways for drying, though this is not ideal for rotation. Damaged spool rims can also prevent smooth rotation.
- Device not turning on: Check the power connection and ensure the power button is in the 'ON' position.
8. Specifications
- Input Voltage: 110V-120V (US Plug)
- Drying Temperature Range: 20°C to 70°C
- Default Drying Time: 30 minutes to 24 hours (can be set to unlimited)
- Heating System: 130W PTC & Forced-Hot Air Circulation
- Filament Capacity: Supports two 1kg spools (210x170mm) or one 3kg spool (250x170mm) with expansion kit.
- Compatible Filament Diameters: 1.75mm, 2.85mm, 3.00mm
- Humidity Hold: Automatic, adjustable from 10% to 70% RH in 10% steps.
- Filament Outlets: 8 vents (2 back, 3 front, 3 top) for flexible feeding.
- Motor Lifespan: Approximately 1500 hours (spare motor included).

Image 6: Extra Large Capacity for 99% of 3KG Filament.
Illustrates the dimensions and capacity of the dryer for both 1kg and 3kg spools, with and without the expansion kit.
9. Warranty and Support
For warranty information, technical support, or service inquiries, please refer to the contact details provided on the EIBOS official website or your purchase documentation. Keep your proof of purchase for warranty claims.