Introduction
This manual provides detailed instructions for setting up, operating, and maintaining your Enstixsm Ymir Luna Controller. Please read this manual thoroughly before using the controller to ensure optimal performance and longevity.
The Enstixsm Ymir Luna Controller is designed for an enhanced gaming experience across multiple platforms, including Amazon Luna, Fire TV, PC, GeForce NOW, Tablets, Phones, Android devices, iPads, and PlayStation (PS4 games only on PS5). It features high-precision ALPS analog sticks, programmable back paddles, a turbo function, dual rumble motors, and motion controls.
Setup and Connection
1. Charging the Controller
Before initial use, fully charge the controller. Connect the supplied USB-C cable to the controller's TYPE-C port and the other end to a compatible USB power source. A full charge typically takes approximately 2 hours and provides up to 10 hours of gameplay.

Image: The controller's internal battery capacity of 1200mAh, indicating 10 hours of play time and 2 hours of charging time.
2. Connecting via Bluetooth (Wireless)
The controller supports Bluetooth 5.0 for wireless connection to compatible devices. The effective wireless distance is up to 33 feet (10 meters).
- Ensure the controller is sufficiently charged.
- Turn on the controller by pressing the Home button.
- Activate Bluetooth pairing mode on the controller (refer to the specific button combination in the quick start guide, usually holding a combination of buttons until an indicator light flashes rapidly).
- On your device (Fire TV, PC, Tablet, Phone, Android, iPad, Tesla), navigate to the Bluetooth settings and search for available devices.
- Select "Enstixsm Ymir Controller" (or similar name) from the list to pair.
- Once paired, the indicator light on the controller will become solid.

Image: Illustration of the controller supporting both Bluetooth wireless and USB-C wired connection modes.
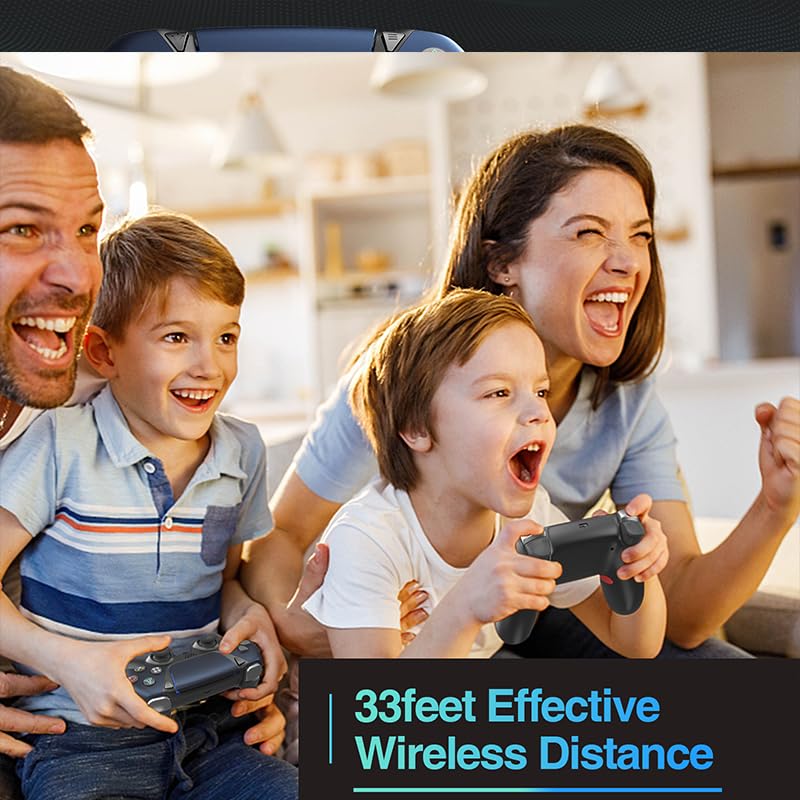
Image: A family playing games with the controller, demonstrating the 33-foot effective wireless range.
3. Connecting via USB-C Wired (for PC)
For PC gaming, you can connect the controller directly using a USB-C cable. This provides a stable, low-latency connection.
- Connect one end of the USB-C cable to the controller's TYPE-C port.
- Connect the other end to an available USB port on your PC.
- The PC should automatically detect and install the necessary drivers.
4. Compatibility Notes
- Supported Platforms: Amazon Luna, Fire TV, PC, GeForce NOW, Tablets, Phones, Android, iPad, PlayStation (PS4 games only on PS5).
- Unsupported Platforms: This controller is not compatible with Xbox or Nintendo Switch series consoles.

Image: The controller displayed with icons representing compatibility with various platforms including PS4, PC, Steam, Phone, Tesla, and TV.
Operating the Controller
1. Basic Controls
The Enstixsm Ymir Luna Controller features a standard gamepad layout, including:
- Dual Analog Sticks: High-precision ALPS analog sticks designed to prevent drift and dead zones.
- Directional Pad (D-Pad): A responsive 4-way directional pad.
- Action Buttons: Standard face buttons (e.g., X, O, Square, Triangle or A, B, X, Y depending on platform mapping).
- Shoulder Buttons & Triggers: L1/R1 (bumpers) and L2/R2 (triggers) for quick actions.
- Touchpad: A clickable touchpad for additional input.

Image: A detailed view of the controller's front, emphasizing the ultra-fast trigger control, 4-way directional pad, clickable touchpad, and responsive action buttons.
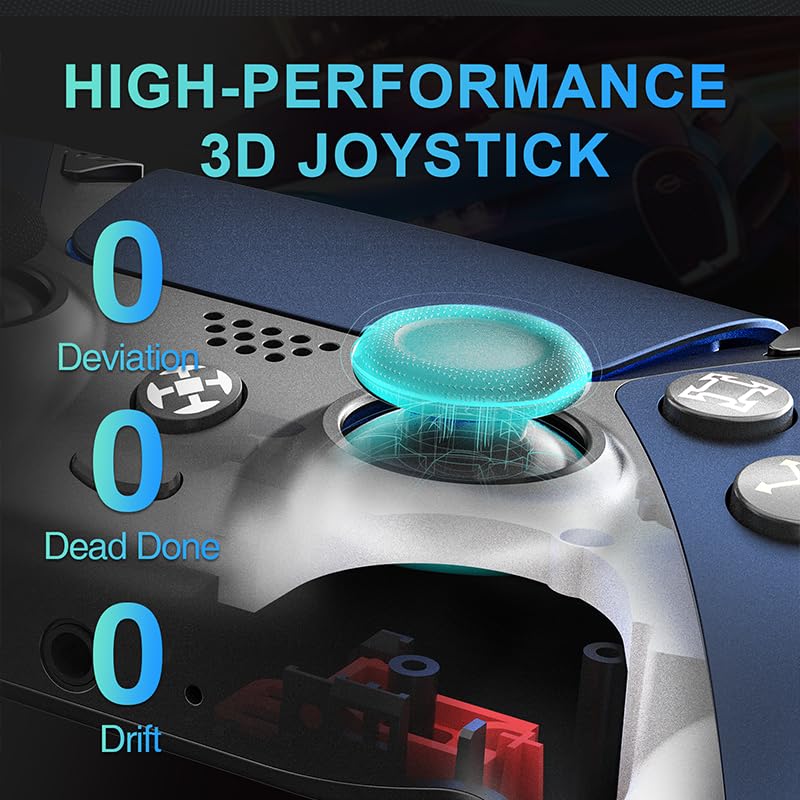
Image: An illustration of the high-performance 3D joystick, highlighting its design for zero deviation, dead zones, and drift.
2. Programmable Back Paddles (MR & ML)
The controller features two programmable back paddles (MR and ML) that allow for custom button mapping, enabling complex actions with ease.
- Entering Programming Mode: Press and hold the 'SET' button (usually a small button on the back or bottom of the controller) until the indicator light changes (e.g., starts blinking).
- Mapping a Button: While in programming mode, press the back paddle (MR or ML) you wish to program, then press the button on the front of the controller you want to map to it.
- Exiting Programming Mode: Press the 'SET' button again to save the mapping and exit programming mode. The indicator light will return to its normal state.

Image: The rear view of the controller, showing the MR and ML back paddles and an example of button mapping for in-game actions.
3. Turbo Function
The turbo function allows for rapid, repeated button presses by holding down a single button.
- Activating Turbo: Press and hold the 'TURBO' button, then press the action button you wish to apply turbo to. Release both buttons. The action button will now repeatedly activate as long as it is held down.
- Deactivating Turbo: To deactivate, press and hold the 'TURBO' button again, then press the action button that has turbo enabled. Release both buttons.

Image: A close-up of the controller highlighting the 'TURBO' button and its function for rapid input.
4. Immersive Features
- Dual Rumble Motors: Provide tactile feedback through vibrations, enhancing immersion in games.
- Motion Controls & Gyro Sensor: Enable responsive gameplay and enhanced steering accuracy, particularly useful in racing games or titles requiring precise movement.
- Audio Integration: Features a 3.5mm headphone jack for immersive sound and a built-in speaker for clear audio.

Image: An X-ray view of the controller showing the dual rumble motors responsible for real-time vibration feedback.

Image: A close-up of the controller's top, indicating the 3.5mm headphone jack, stereo speaker, and built-in microphone.
Maintenance
1. Charging
To maintain battery health, charge the controller regularly, especially if it will not be used for an extended period. Use the provided USB-C cable and a compatible power adapter.
2. Cleaning
Wipe the controller with a soft, dry cloth. Avoid using liquid cleaners, solvents, or abrasive materials, as these can damage the surface and internal components.
3. Storage
Store the controller in a cool, dry place away from direct sunlight, extreme temperatures, and excessive moisture. Avoid placing heavy objects on the controller.
Troubleshooting
- Controller Not Connecting:
- Ensure the controller is charged.
- Verify Bluetooth is enabled on your device and the controller is in pairing mode.
- Try restarting both the controller and your device.
- Remove previous Bluetooth pairings on your device and attempt to pair again.
- Buttons or Joysticks Unresponsive:
- Check battery level and recharge if necessary.
- Reset the controller (refer to the quick start guide for reset instructions, typically a small pinhole button).
- For joystick issues, note that the ALPS analog sticks are designed to minimize drift and dead zones. If issues persist, contact support.
- Vibration Not Working:
- Ensure the game or application supports vibration feedback.
- Check in-game settings to ensure vibration is enabled.
- Audio Issues (Headphone Jack/Speaker):
- Ensure headphones are fully plugged into the 3.5mm jack.
- Check device and in-game audio settings.
Specifications
| Feature | Detail |
|---|---|
| Model Number | f07ef6a0-8afd-404a-97ca-eee34ca86e98 |
| Dimensions | 4.5 x 2.5 x 6.5 inches |
| Weight | 7.2 ounces |
| Battery Capacity | 1200mAh rechargeable |
| Charging Time | Approx. 2 hours |
| Play Time | Up to 10 hours |
| Connectivity | Bluetooth 5.0, USB-C wired |
| Wireless Range | Up to 33 feet (10 meters) |
| Joystick Type | ALPS Analog Sticks (No Drift) |
| Special Features | Programmable Back Paddles, Turbo Function, Dual Rumble Motors, Motion Control, Gyro Sensor, 3.5mm Headphone Jack, Built-in Speaker |
Warranty and Support
Enstixsm stands by its products with a Lifetime Warranty. Our dedicated US-based support team is available to assist you with any issues or questions you may have.
If you encounter any problems with your controller, please contact our support team directly for prompt and hassle-free resolution. We are committed to ensuring your 100% satisfaction.
For support, please refer to the contact information provided with your product packaging or visit the official Enstixsm website.


