1. Introduction
Thank you for choosing the Husgw 15A 12V/24V Intelligent Pulse Repair Car Battery Charger. This manual provides essential information for the safe and effective operation, maintenance, and troubleshooting of your battery charger. Please read this manual thoroughly before using the product and retain it for future reference.
This intelligent charger is designed to charge and maintain various 12V and 24V batteries, including LiFePO4, Lead-Acid (AGM, Gel, SLA, Flooded) batteries, commonly found in cars, trucks, SUVs, motorcycles, lawn mowers, boats, and other marine vehicles.
2. Important Safety Instructions
WARNING: Risk of explosive gases. Working in the vicinity of a lead-acid battery is dangerous. Batteries generate explosive gases during normal battery operation. For this reason, it is of utmost importance that you read this manual and follow the instructions exactly each time you use the charger.
- Always wear eye protection and protective clothing when working with batteries.
- Ensure the charging area is well-ventilated.
- Never smoke or allow a spark or flame in the vicinity of the battery or engine.
- Avoid dropping metal tools onto the battery. This could cause a spark or short-circuit the battery or other electrical parts that may cause an explosion.
- Remove personal metal items such as rings, bracelets, necklaces, and watches when working with a lead-acid battery.
- If battery acid contacts skin or clothing, wash immediately with soap and water. If acid enters the eye, immediately flood the eye with running cold water for at least 10 minutes and get medical attention immediately.
- Never charge a frozen battery.
- Do not use the charger if the AC cord or DC cables are damaged.
- This charger is not intended for use by persons (including children) with reduced physical, sensory or mental capabilities, or lack of experience and knowledge, unless they have been given supervision or instruction concerning use of the appliance by a person responsible for their safety.
3. Product Overview
The Husgw 15A Intelligent Pulse Repair Charger features an intuitive LCD display and multiple charging modes to suit various battery types and conditions.
3.1 Charger Components
- Main Charger Unit with LCD Display
- AC Power Cord
- DC Output Cables with Alligator Clamps (Red for positive, Black for negative)
- Mode Selection Button
3.2 LCD Display and Indicators
The LCD display provides real-time information about the charging process, including voltage, current, temperature, charging mode, and battery charge level.
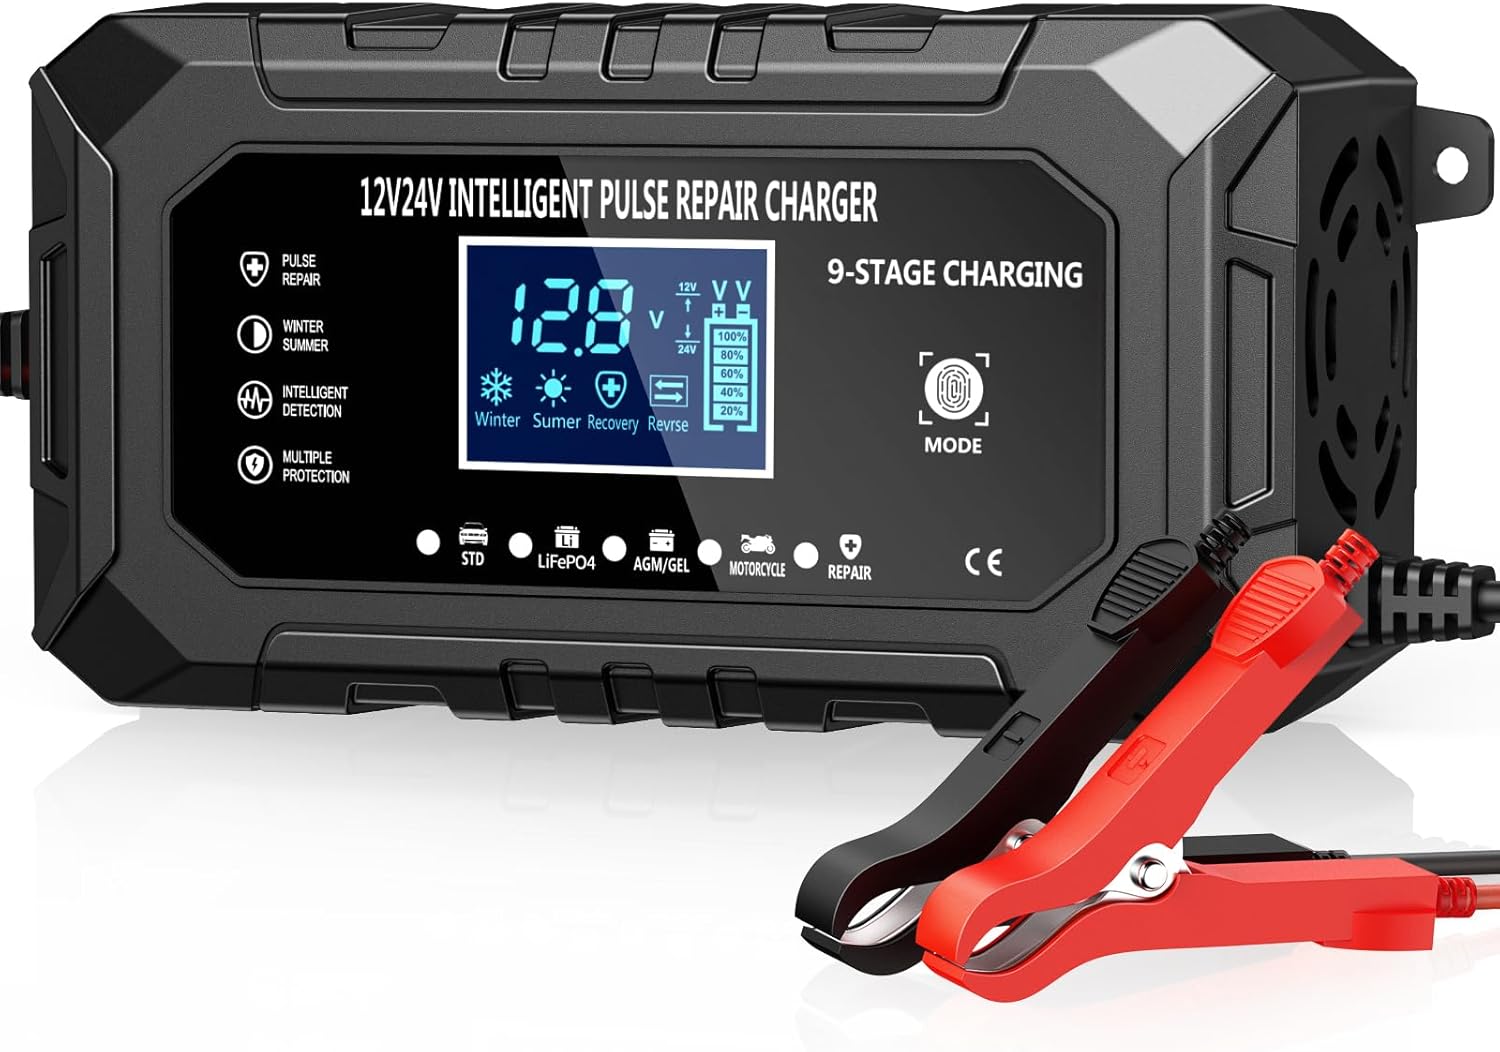
Figure 1: Front view of the Husgw 15A Intelligent Pulse Repair Car Battery Charger, showing the LCD display, mode button, and connected alligator clamps.
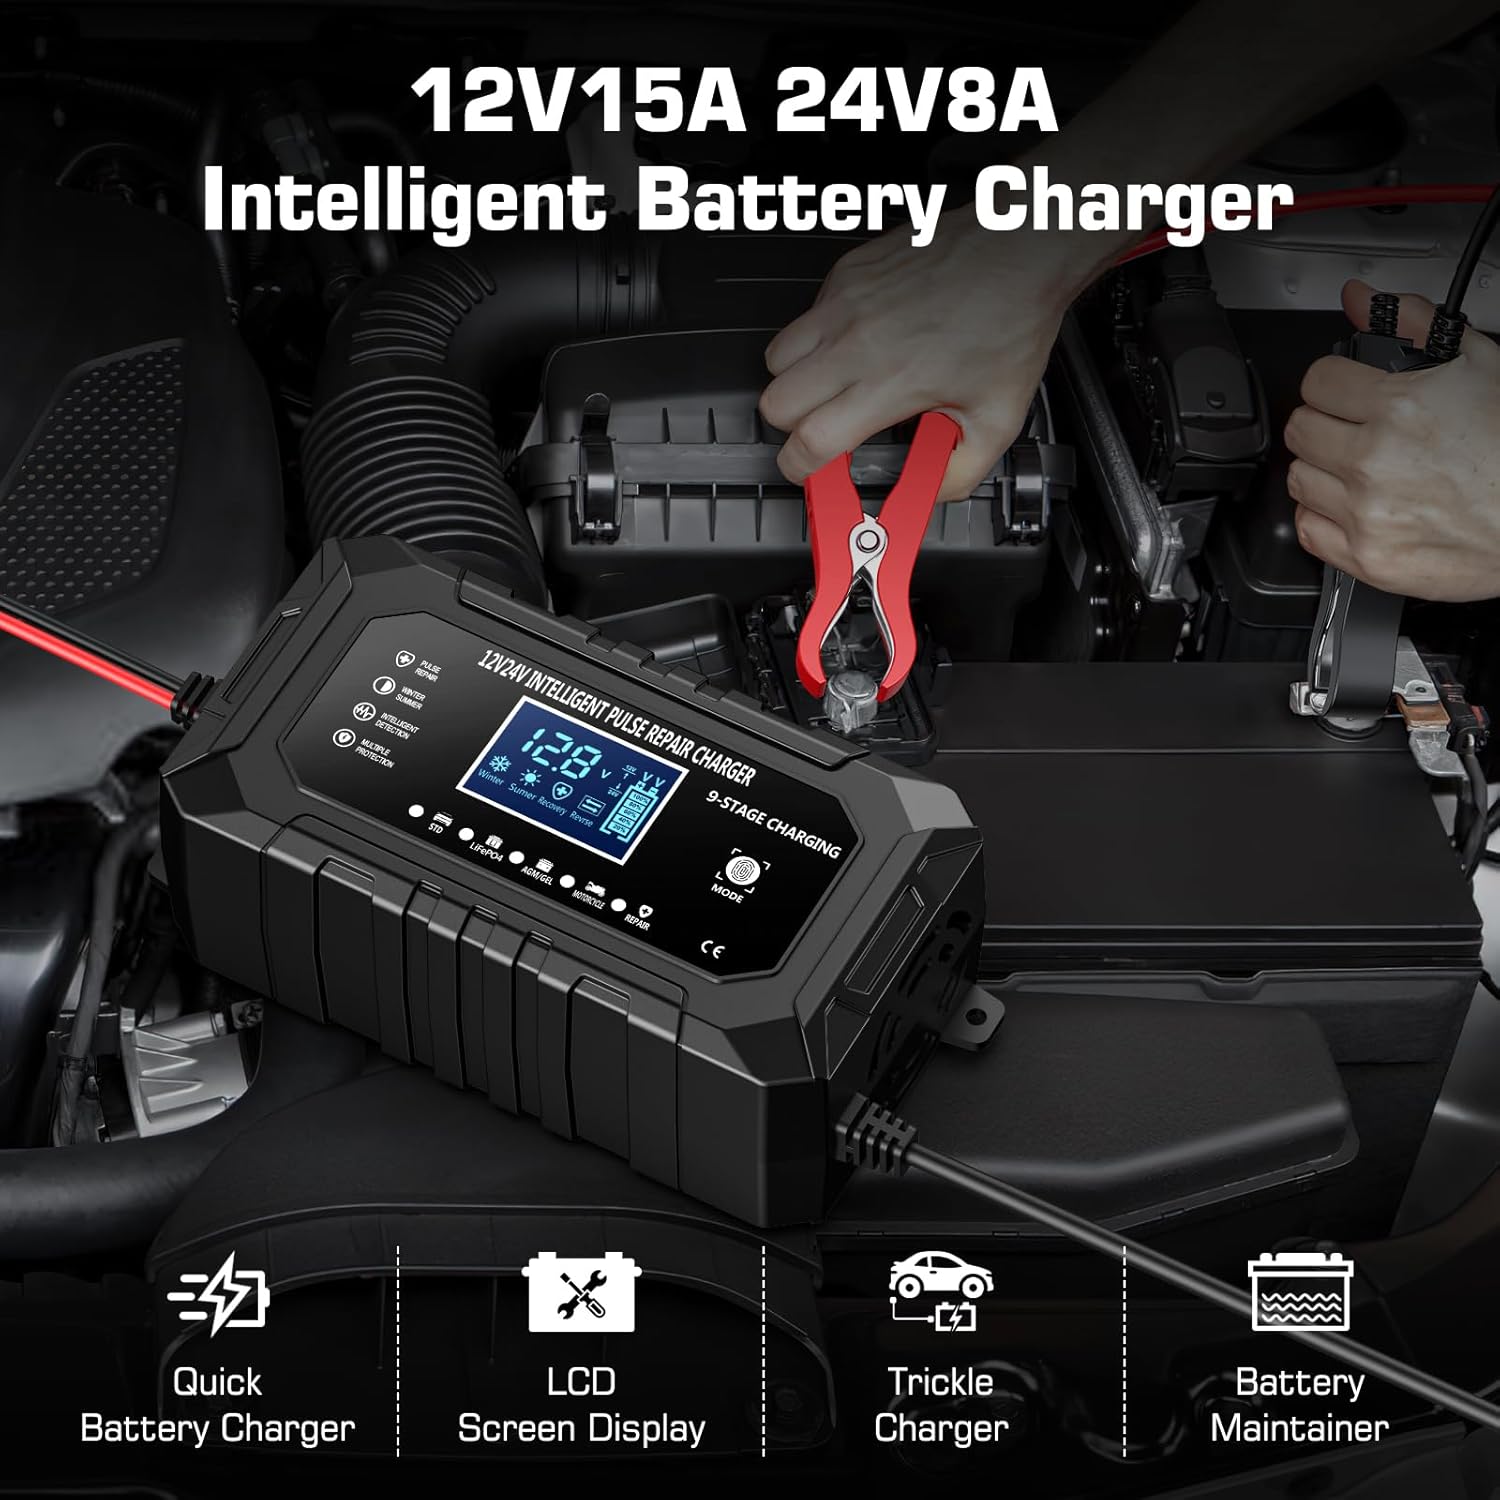
Figure 2: The Husgw 15A charger in use, demonstrating its key features such as quick charging, LCD display, trickle charging, and battery maintenance capabilities.
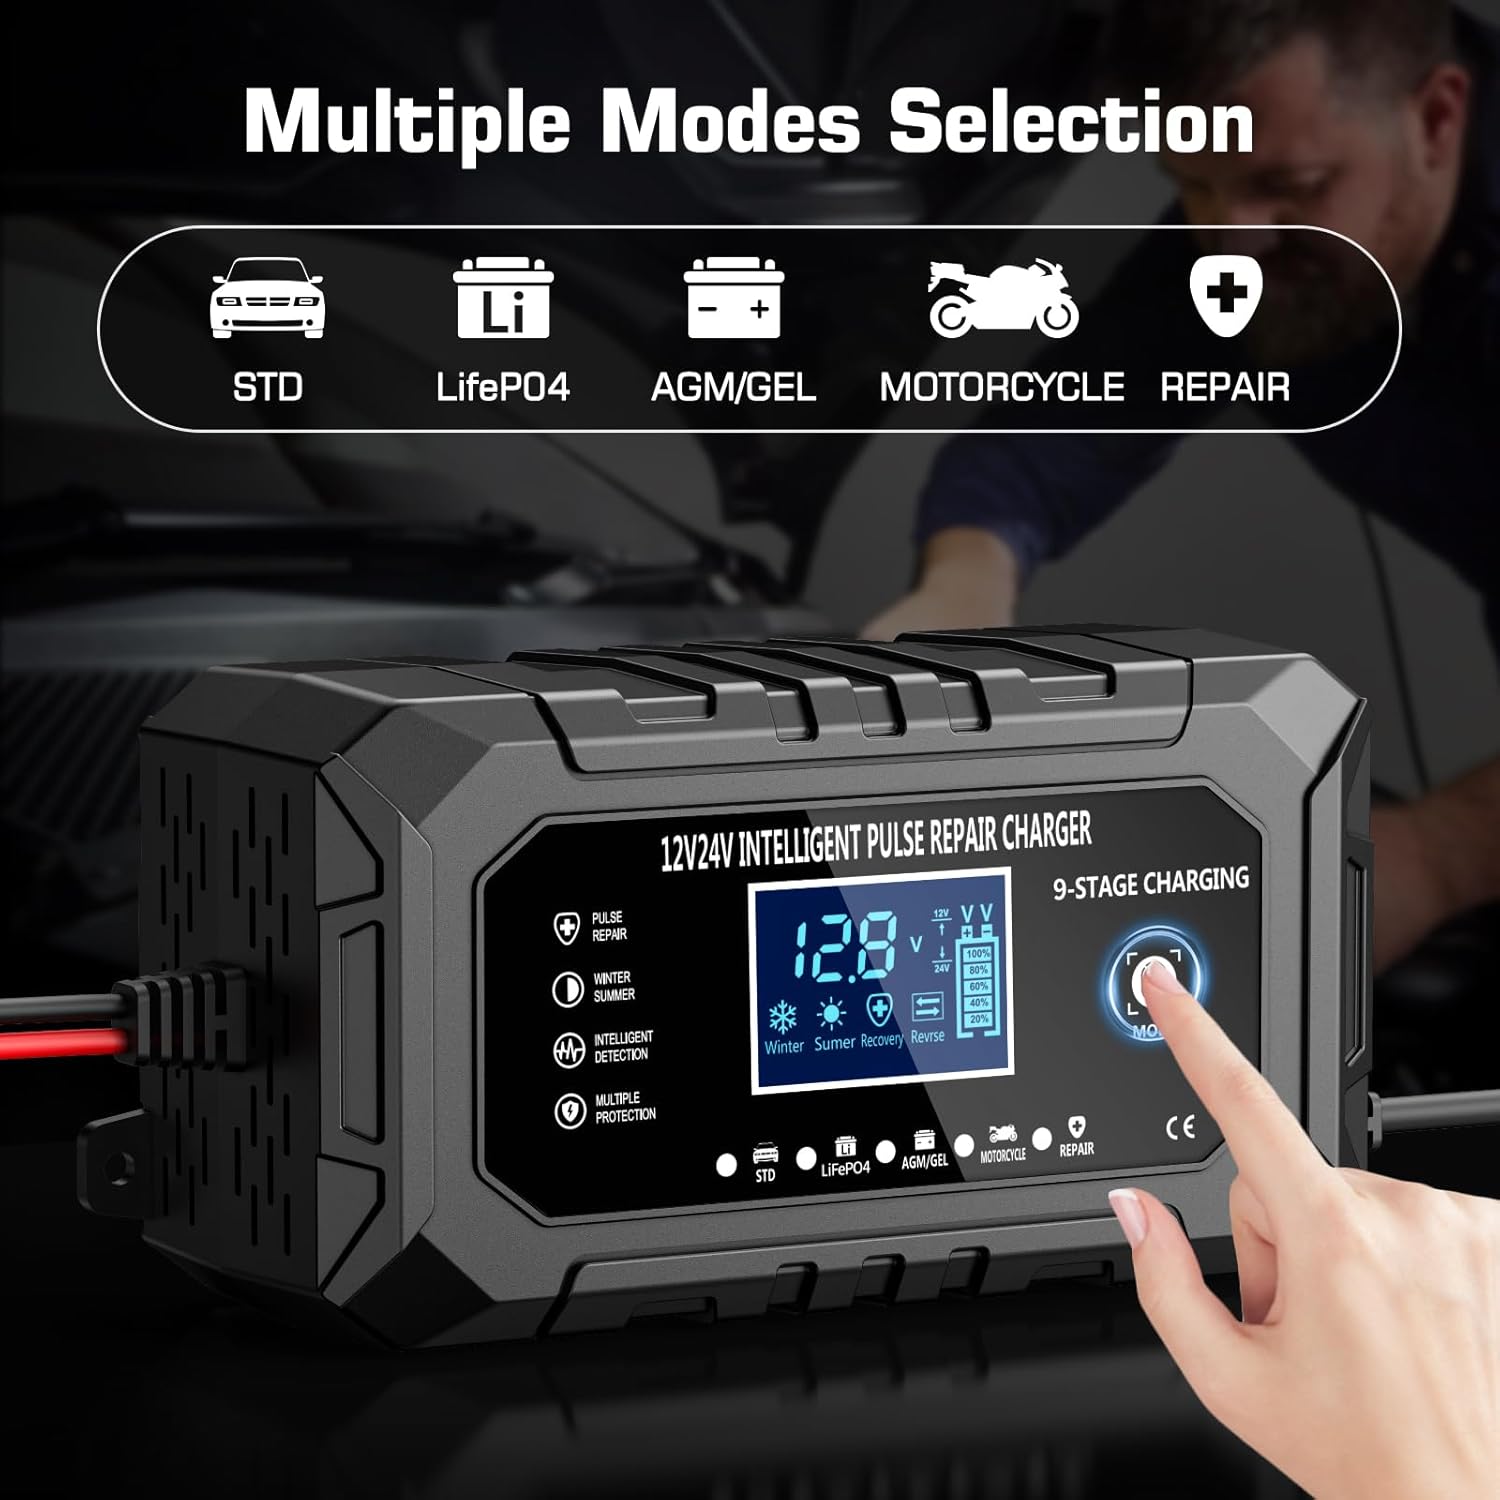
Figure 3: Close-up of the charger's display indicating the various charging modes available for selection.
4. Setup and Connection
Before connecting the charger, ensure the vehicle's ignition is off and the area is well-ventilated.
- Identify Battery Terminals: Locate the positive (+) and negative (-) terminals on your battery. The positive terminal is usually larger and marked with a plus sign.
- Connect Positive Clamp: Connect the RED (+) alligator clamp from the charger to the positive (+) terminal of the battery.
- Connect Negative Clamp: Connect the BLACK (-) alligator clamp from the charger to the negative (-) terminal of the battery. If connecting to a vehicle, connect the black clamp to a metal part of the vehicle chassis away from the battery and fuel line.
- Connect to Power: Plug the AC power cord of the charger into a standard wall outlet (100-240V AC).
- Verify Connection: The charger's display will illuminate, indicating a successful connection and showing battery information.
IMPORTANT: Ensure correct polarity. Reversing the connections can damage the battery or charger.
5. Operating Instructions
5.1 Selecting a Charging Mode
After connecting the charger, press the "MODE" button to cycle through the available charging programs. The charger will automatically detect 12V or 24V, but you must select the correct battery type.
- STD (Standard): For 12V/24V standard lead-acid batteries (e.g., flooded, maintenance-free).
- LiFePO4: Specifically for 12V/24V Lithium Iron Phosphate batteries.
- AGM/GEL: For 12V/24V AGM (Absorbed Glass Mat) and Gel cell batteries.
- Motorcycle: For smaller capacity 12V/24V batteries typically found in motorcycles.
- Repair: A special mode for desulfating and recovering deeply discharged or sulfated batteries. This mode uses pulse technology.
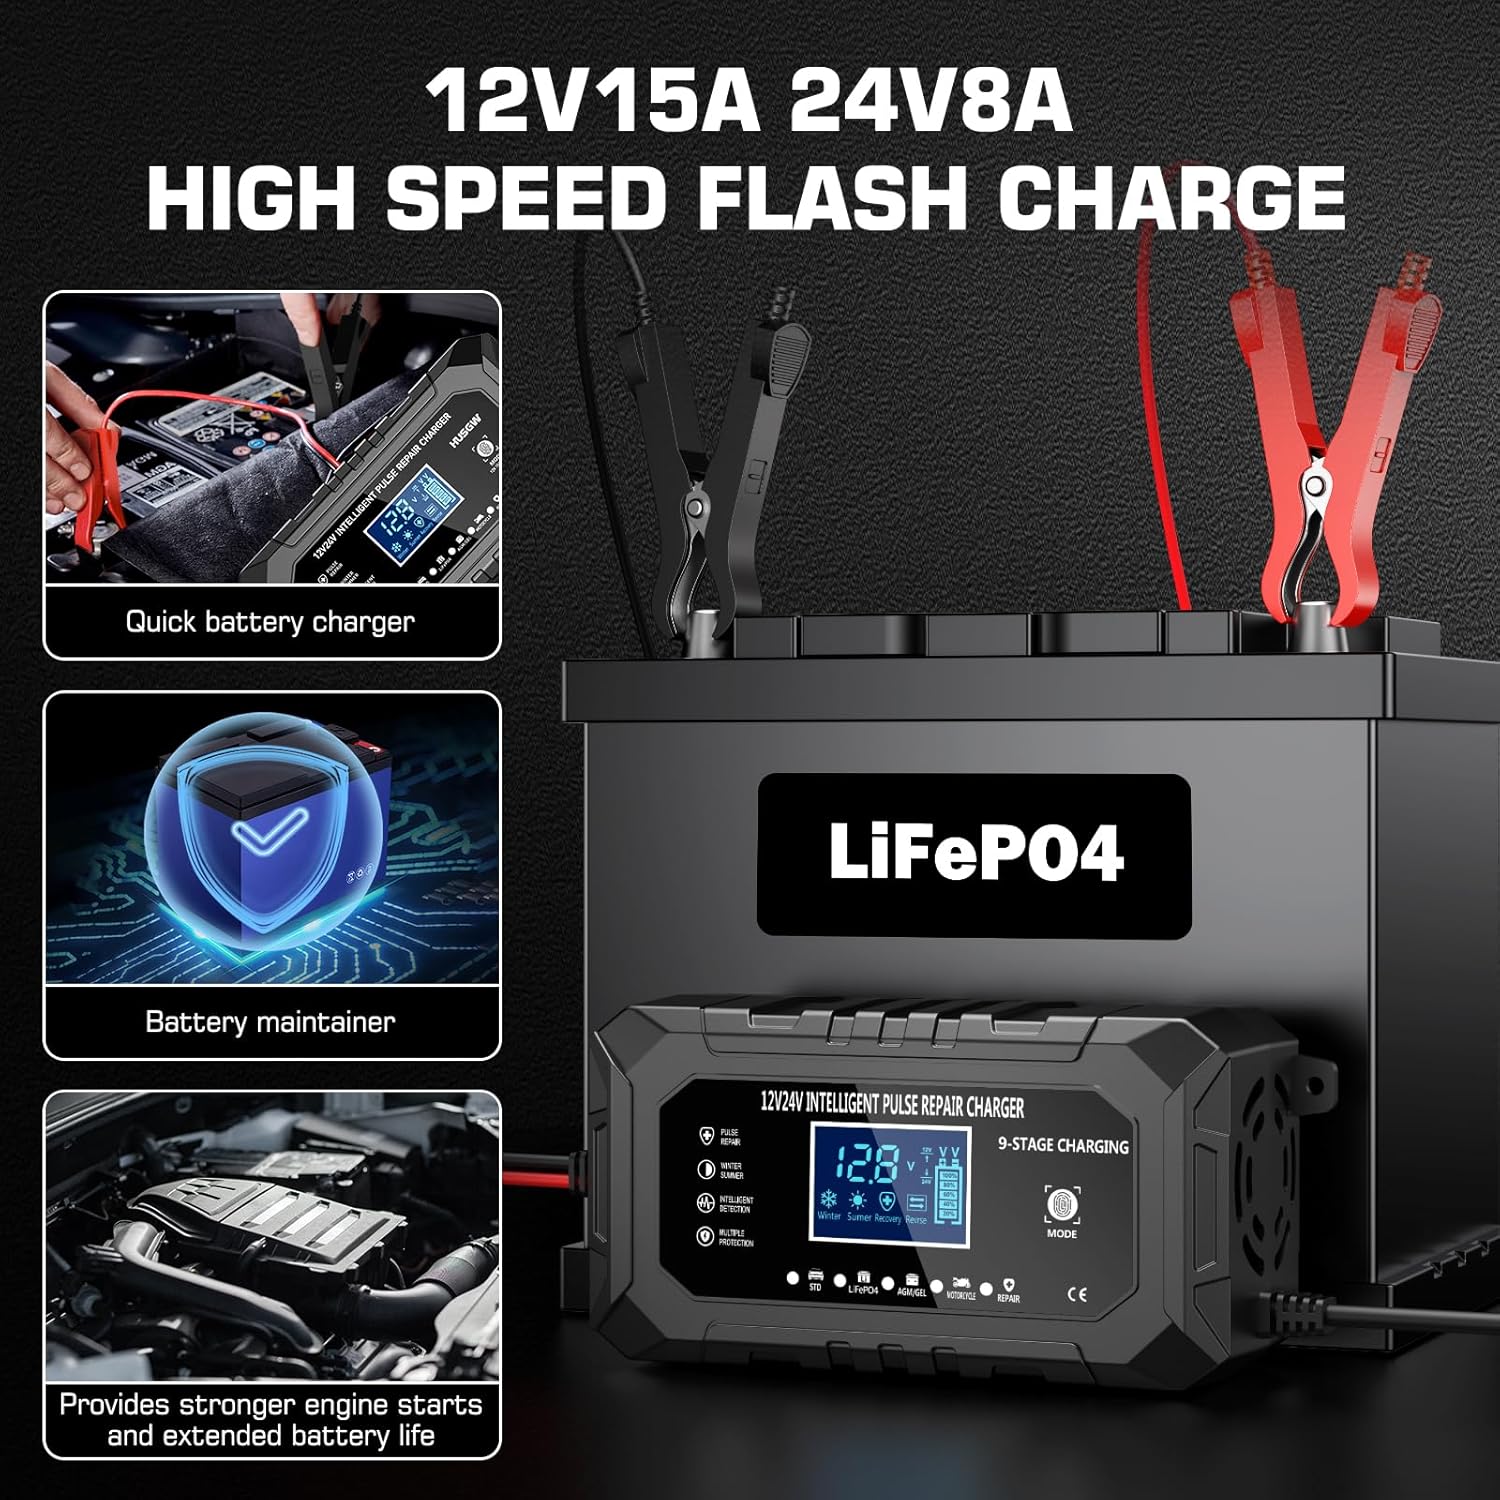
Figure 4: The charger's capabilities for rapid charging and maintaining battery health, leading to stronger engine starts.
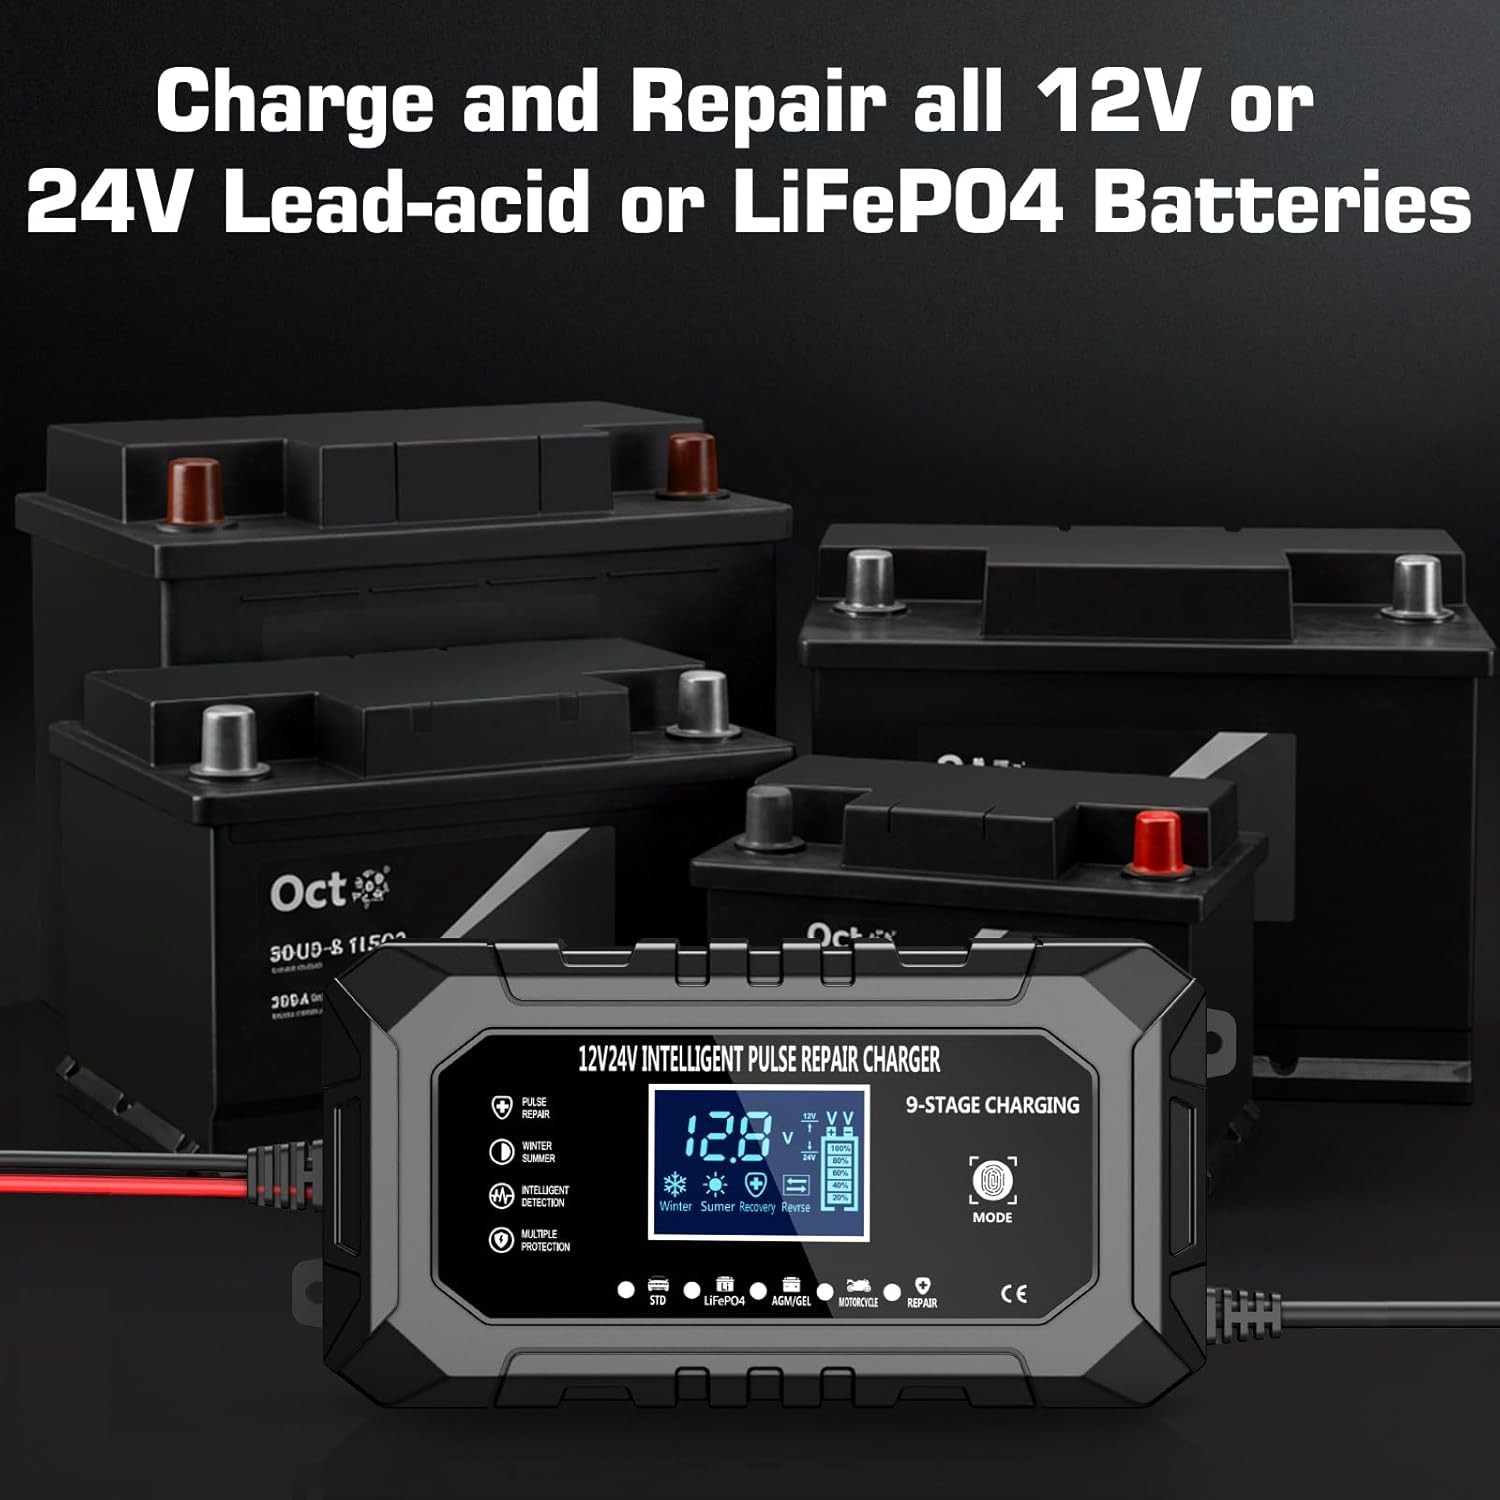
Figure 5: The charger's versatility in handling different battery chemistries and voltages.
5.2 Charging Process
Once a mode is selected, the charger will automatically begin the charging process. The display will show the current charging status.
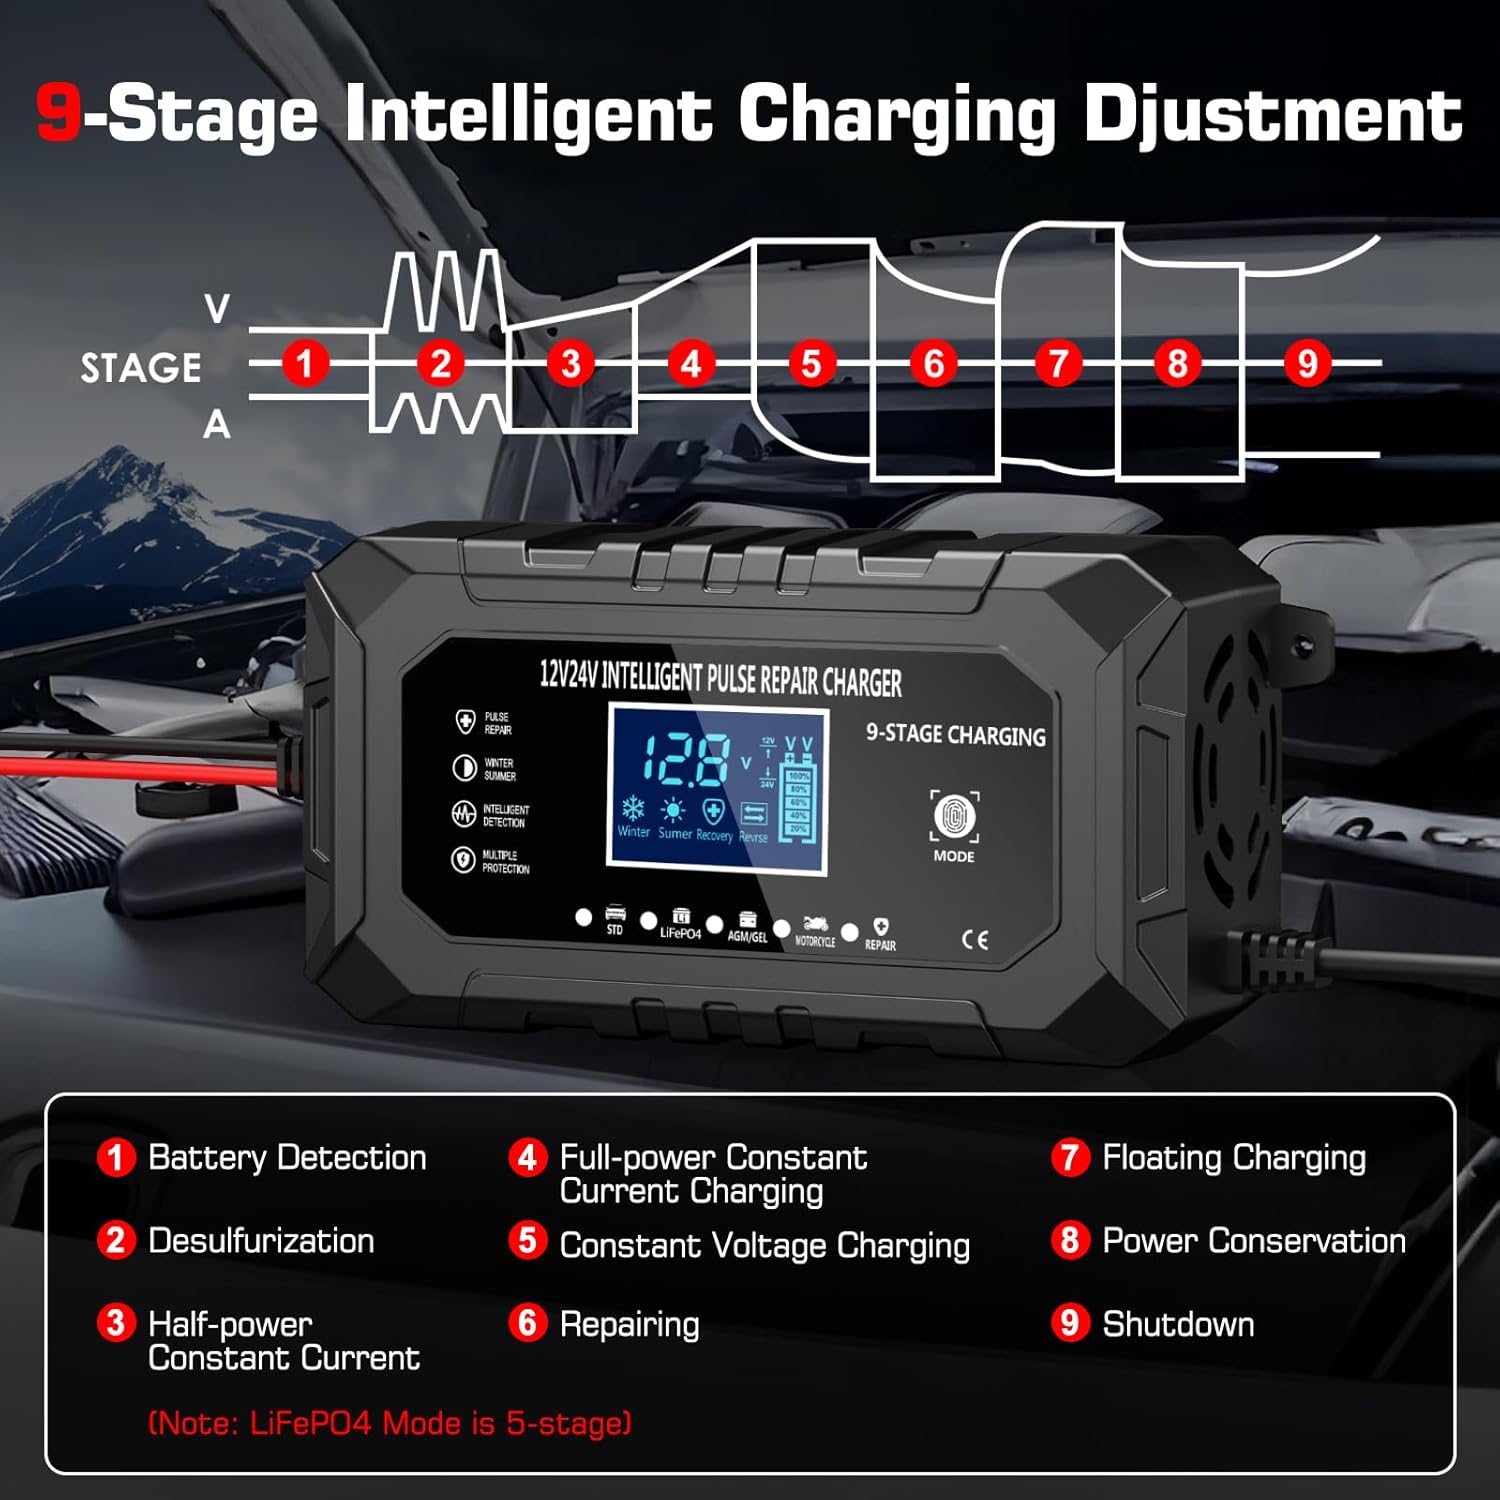
Figure 6: Detailed breakdown of the 9-stage intelligent charging adjustment process. Note: LiFePO4 mode is a 5-stage process.
- Automatic Detection: The charger automatically detects the battery voltage (12V or 24V) and ambient temperature.
- 9-Stage Charging: The charger employs a sophisticated 9-stage charging process (5-stage for LiFePO4) to optimize battery health and longevity. These stages include Battery Detection, Desulfurization, Half-power Constant Current, Full-power Constant Current, Constant Voltage, Repairing, Floating Charging, Power Conservation, and Shutdown.
- Temperature Compensation: The charger features automatic temperature detection, adjusting charging parameters for optimal performance in both winter (below 10°C) and summer (above 28°C) conditions to prevent under or over-charging. This feature is primarily for Car Mode.
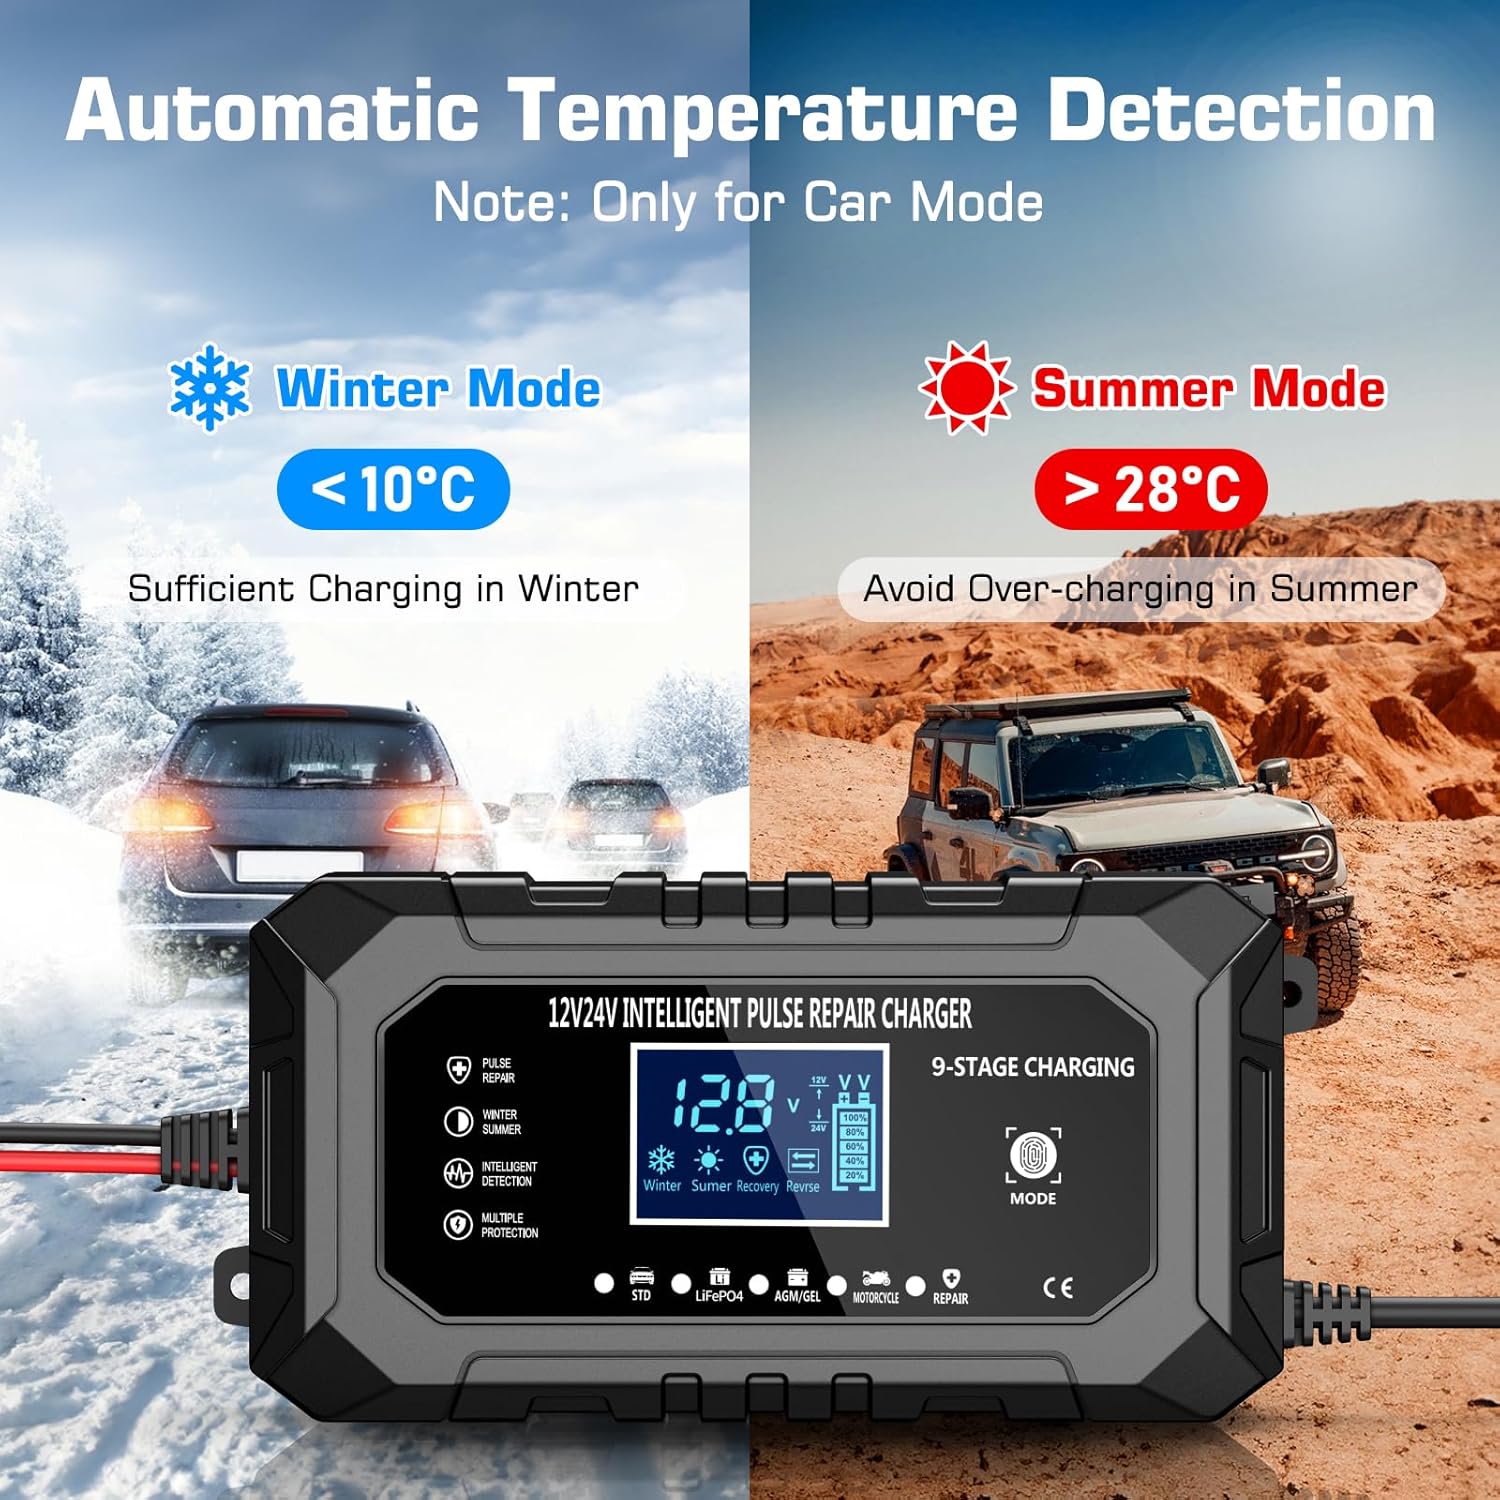
Figure 7: The charger's automatic temperature compensation feature, ensuring sufficient charging in winter and preventing over-charging in summer.
5.3 Disconnecting the Charger
- Unplug the AC power cord from the wall outlet.
- Remove the BLACK (-) alligator clamp from the vehicle chassis or battery negative terminal.
- Remove the RED (+) alligator clamp from the battery positive terminal.
6. Maintenance
- Cleaning: Clean the charger casing with a soft, dry cloth. Do not use abrasive cleaners or solvents.
- Cable Inspection: Regularly inspect the AC power cord and DC output cables for any signs of damage, cuts, or fraying. Do not use the charger if cables are damaged.
- Storage: Store the charger in a cool, dry place when not in use. Keep it away from moisture and direct sunlight.
7. Troubleshooting
| Problem | Possible Cause | Solution |
|---|---|---|
| Charger does not turn on. | No AC power; faulty connection; charger malfunction. | Check AC outlet and power cord. Ensure secure connections. If problem persists, contact support. |
| Charger shows error code or warning. | Incorrect battery connection (reverse polarity); short circuit; battery fault. | Disconnect and re-connect clamps ensuring correct polarity. Inspect cables for damage. Have battery checked by a professional. |
| Battery not charging or charging slowly. | Incorrect mode selected; deeply discharged battery; battery fault. | Ensure correct mode is selected for battery type. For deeply discharged batteries, try "Repair" mode. Battery may be beyond recovery. |
| Charger gets warm during operation. | Normal operation; poor ventilation. | Some warmth is normal. Ensure adequate ventilation around the charger. If it becomes excessively hot, disconnect and contact support. |
8. Specifications
| Feature | Detail |
|---|---|
| Brand | Husgw |
| Model | 15A |
| Input Voltage | 100-240V AC, 50/60Hz |
| Output Voltage | 12V / 24V Auto-detection |
| Output Current | 12V 15A, 24V 8A |
| Battery Types | LiFePO4, Lead-Acid (AGM, Gel, SLA, Flooded) |
| Charging Stages | 9-stage (5-stage for LiFePO4) |
| Thermal Protection | Yes, automatic temperature compensation |
| Dimensions | 23 x 13 x 7 cm |
| Weight | 0.71 kg |
| Safety Compliance | CE |

Figure 8: Examples of universal battery types and applications compatible with the Husgw 15A charger.
9. Warranty and Support
Husgw products are manufactured to high-quality standards. For warranty information, technical support, or service inquiries, please refer to the contact information provided with your purchase or visit the official Husgw website. Please have your model number (15A) and purchase date available when contacting support.