1. Product Overview
The ZIPCIDE 128GB Digital Voice Activated Recorder is a compact and versatile recording device designed for high-quality audio capture. It features intelligent noise reduction, voice activation, and a large storage capacity, making it suitable for lectures, meetings, interviews, and personal notes.
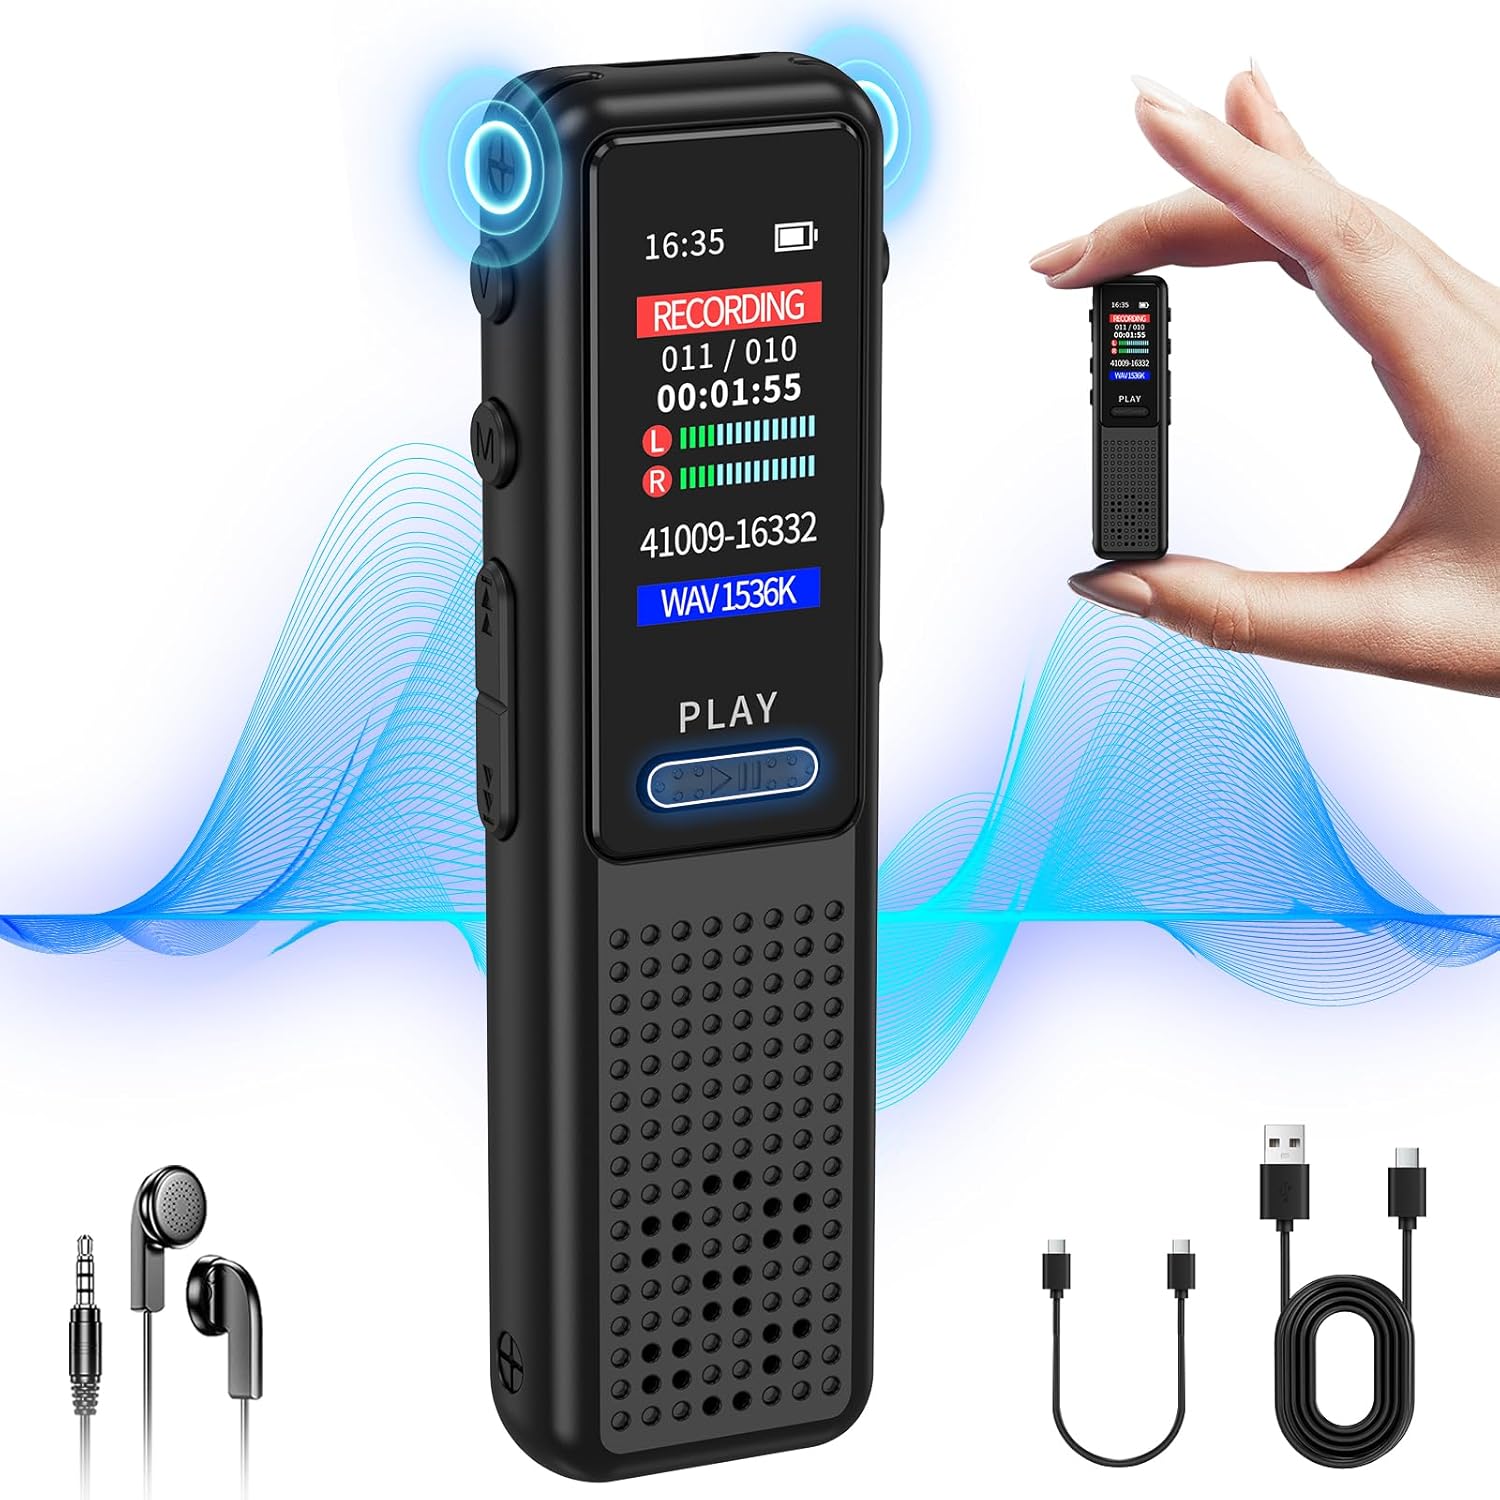
Image: The ZIPCIDE 128GB Digital Voice Recorder shown with its included accessories: headphones, Type-C cable, and Type-C OTG cable. The recorder itself is sleek and black, with a display screen and control buttons.
2. Package Contents
Verify that all items are present in your package:
- 1 x ZIPCIDE 128GB Voice Recorder
- 1 x Type-C Cable
- 1 x Headphone
- 1 x Headphone Adaptor Cable
- 1 x Type-C OTG Cable
- 1 x User Manual (this document)

Image: A visual representation of the package contents, including the 128GB voice recorder, Type-C cable, headphone, headphone adaptor cable, C to C OTG cable, and the manual.
3. Device Layout and Controls
Familiarize yourself with the buttons and ports on your recorder:

Image: A diagram illustrating the various buttons and their corresponding functions on the ZIPCIDE voice recorder. Key controls include Volume Key, Menu/Back Key, Previous/Rewind, Next/Fast Forward, Power/Play/Pause/Confirm Button, Recording/Save Button, Delete Button, and A/B Repeat Button.
- Volume Key: Adjusts playback volume.
- Menu / Back Key: Navigates menus and returns to previous screens.
- Previous / Rewind: Skips to the previous track or rewinds during playback.
- Next / Fast Forward: Skips to the next track or fast forwards during playback.
- Power / Play / Pause / Confirm Button: Powers the device on/off, starts/pauses playback, and confirms selections.
- Recording / Save Button: Initiates and saves recordings.
- Delete Button: Deletes selected files.
- A / B Repeat Button: Repeats a specific section of an audio file.
4. Setup
4.1 Charging the Device
Before first use, fully charge the recorder. Connect the device to a computer's USB port or a USB wall adapter (not included) using the provided Type-C cable. The battery indicator on the screen will show charging status. A full charge provides up to 30 hours of continuous recording.
4.2 Powering On/Off
- To Power On: Press and hold the Power / Play / Pause / Confirm Button until the screen illuminates.
- To Power Off: Press and hold the Power / Play / Pause / Confirm Button until the screen turns off.
5. Operating Instructions
5.1 Basic Recording
The device features a one-touch recording function for quick operation.
- To Start Recording: Slide the Recording / Save Button upwards (towards "REC"). The screen will display "RECORDING" and the timer will start.
- To Save Recording: Slide the Recording / Save Button downwards (towards "SAVE"). The recording will be saved automatically.

Image: A close-up of the ZIPCIDE voice recorder showing the "REC" and "SAVE" positions of the recording slider button, indicating one-click operation for starting and saving recordings.
5.2 Voice Activated Recording (VOR)
The VOR function allows the recorder to start recording automatically when sound is detected and pause when silence occurs, saving memory and battery life.
- To Enable/Disable VOR: Navigate to the settings menu, locate the VOR option, and select your desired sensitivity level (1-7).
- Sensitivity Levels:
- Level 1-3: Low sensitivity (for louder environments, e.g., 50-70+ dB)
- Level 4-5: Medium sensitivity (for moderate environments, e.g., 25-50 dB)
- Level 6-7: High sensitivity (for quiet environments, e.g., 15-25 dB)

Image: An illustration explaining the Voice Activated Recording (VOR) feature, showing how the device starts recording when audible sound is detected and stops during silence. It also displays three levels of voice sensitivity with corresponding decibel ranges.
5.3 Playback
- To Play a Recording: Navigate to the file list, select the desired recording, and press the Power / Play / Pause / Confirm Button.
- To Pause/Resume: Press the Power / Play / Pause / Confirm Button during playback.
- To Adjust Volume: Use the Volume Key.
- To Skip Tracks: Use the Previous / Rewind or Next / Fast Forward buttons.
5.4 File Management
Recordings are saved with a timestamp for easy identification. You can manage files directly on the device or by connecting to a computer.
- Deleting Files: Select the file you wish to delete from the file list and press the Delete Button. Confirm your selection.
- Connecting to Computer: Use the provided Type-C cable to connect the recorder to your computer. The device will appear as a removable disk, allowing you to transfer, copy, or delete files.

Image: A person using a laptop with the ZIPCIDE voice recorder connected via a Type-C cable, demonstrating convenient file download and management on a computer. Icons for PC file management, connecting headphones, and quick transfer are also shown.
6. Advanced Features
6.1 Password Protection
To protect your confidential recordings, you can set a password for the device. Access this feature through the settings menu.
6.2 A-B Repeat
This function allows you to repeat a specific segment of an audio file. During playback, press the A / B Repeat Button once to set point A, and press it again to set point B. The section between A and B will loop.
6.3 MP3 Player Functionality
The device can also function as an MP3 player. Transfer MP3 files to the recorder's memory via a computer. Connect headphones to listen to music.
6.4 Line-in Recording
The recorder supports direct recording from other audio devices using the Line-in input. Refer to the device's menu for specific settings related to Line-in recording.
7. Specifications
| Feature | Detail |
|---|---|
| Model Number | RM |
| Memory Storage Capacity | 128 GB |
| Recording Resolution | 1536kbps HD |
| Battery Life (Continuous Recording) | Up to 30 hours |
| Recording Capacity (at 32kbps) | Up to 9600 hours |
| Product Dimensions | 3 x 0.5 x 0.9 inches |
| Item Weight | 5.3 ounces |
| Hardware Interface | USB Type C |
| Microphone Form Factor | Built-In Dual Noise Reduction Microphones |
| Audio Format | WAV |
| Headphones Jack | 3.5 millimeters |
| Compatible Devices | Earphone, MP3 Player, Personal Computer, Smartphone |
8. Troubleshooting
If you encounter issues with your ZIPCIDE voice recorder, refer to the following common solutions:
- Device not turning on:
- Ensure the device is fully charged. Connect it to a power source for at least 30 minutes.
- Press and hold the Power button for several seconds.
- Poor recording quality:
- Ensure the microphones are not obstructed.
- Adjust the recording sensitivity settings, especially for Voice Activated Recording (VOR).
- Record in a quieter environment if possible.
- Cannot transfer files to computer:
- Ensure the Type-C cable is securely connected to both the recorder and the computer.
- Try a different USB port on your computer.
- Ensure the recorder is powered on when connected.
- On some operating systems, you may need to select "Mass Storage" or "Connect to PC" option on the recorder's screen after connecting.
- Date and time reset:
- This can sometimes occur after a complete battery drain. Reset the date and time through the device's settings menu.
- Playback volume too low/high:
- Adjust the volume using the dedicated Volume Key.
- Ensure headphones are properly connected if using them.
9. Warranty and Support
ZIPCIDE provides a 1-year warranty for this product, ensuring replacement in case of manufacturing defects.

Image: The ZIPCIDE company logo, featuring the brand name in blue text.
For any issues or inquiries, please contact our customer service support. We offer professional support and facilitate returns and exchanges within 30 days of purchase.

Image: An infographic detailing ZIPCIDE's after-sale service support, including contact information for issues, 24-hour professional support, and 30-day returns and exchanges.