1. Introduction
This manual provides detailed instructions for the proper setup, operation, and maintenance of your Generic Inskam315 7-Inch Digital Industrial Microscope. Please read this manual thoroughly before using the device to ensure optimal performance and longevity. This digital microscope is designed for detailed observation with a magnification range of 0-2000x and features a 12-megapixel camera for capturing images and videos.
2. Product Overview
2.1 Key Features
- 7-inch IPS display screen for clear viewing.
- Adjustable magnification from 0x to 2000x.
- 12-megapixel camera for high-resolution image and video capture.
- Dual LED light source with 11 LED lights for enhanced illumination.
- Support for TF card storage.
- Dual power supply options for versatile use.
- Durable construction with high-quality materials.
2.2 Package Contents
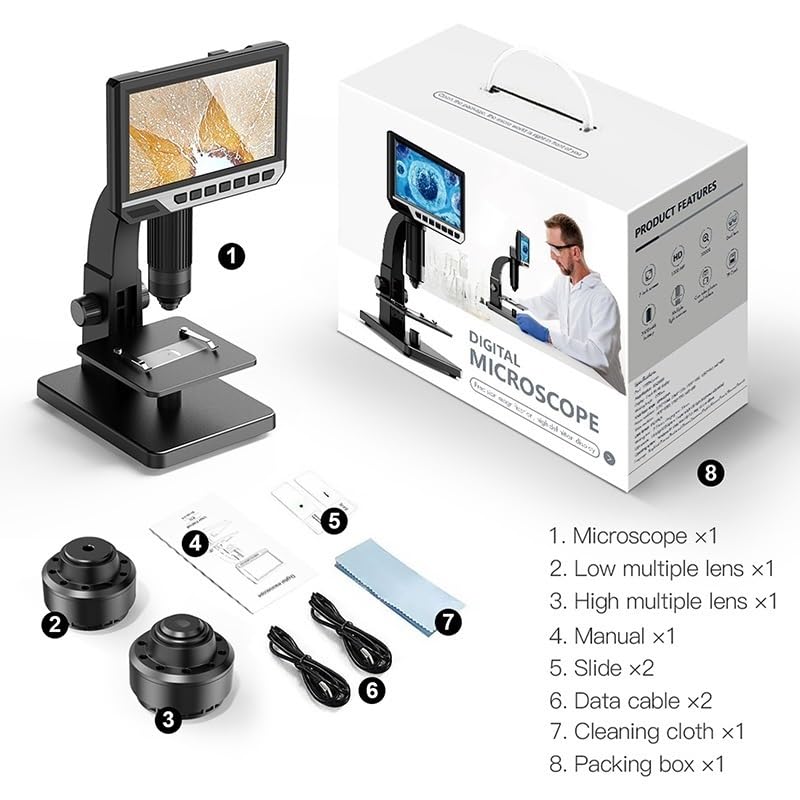
Figure 2.2.1: Package Contents. This image displays all items included in the Inskam315 digital microscope package, ensuring you have all necessary components for setup and operation.
- Microscope unit (x1)
- Low multiple lens (x1)
- High multiple lens (x1)
- User Manual (x1)
- Slide (x2)
- Data cable (x2)
- Cleaning cloth (x1)
- Packing box (x1)
2.3 Component Identification
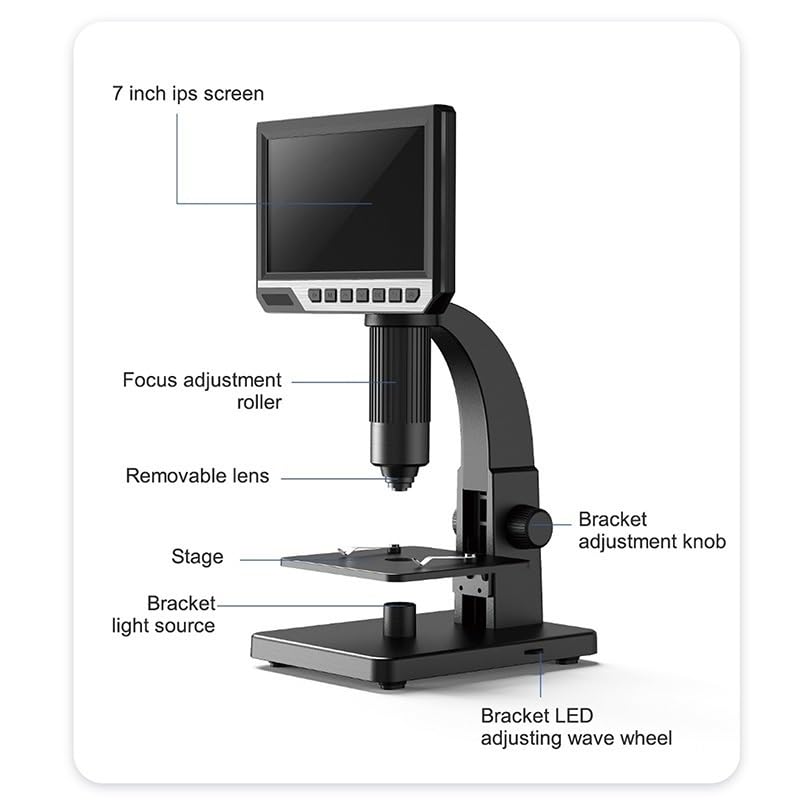
Figure 2.3.1: Labeled Components. This diagram identifies the main parts of the Inskam315 digital microscope, including the 7-inch IPS screen, focus adjustment roller, removable lens, stage, bracket adjustment knob, bracket light source, and bracket LED adjusting wave wheel.
- 7-inch IPS screen: Displays the magnified image.
- Focus adjustment roller: Used to achieve clear focus on the specimen.
- Removable lens: Interchangeable lenses for different magnification ranges.
- Stage: Platform where specimens are placed for observation.
- Bracket adjustment knob: Adjusts the height of the microscope head.
- Bracket light source: Provides illumination from below the specimen.
- Bracket LED adjusting wave wheel: Controls the intensity of the bracket LED light.
3. Setup Instructions
- Unpack the Microscope: Carefully remove all components from the packaging. Refer to the "Package Contents" section to ensure all parts are present.
- Assemble the Microscope:
- Place the microscope base on a stable, flat surface.
- Attach the main microscope body to the stand, securing it with any provided screws or locking mechanisms.
- Insert the desired lens (low or high multiple) into the lens mount. Ensure it is securely fastened.
- Power Connection: Connect the microscope to a power source using one of the provided data cables. The device supports dual power supply.
- Insert TF Card (Optional): If you plan to capture images or videos, insert a compatible TF card into the designated slot on the microscope.
- Initial Power On: Press the power button to turn on the microscope. The 7-inch IPS screen should illuminate.
4. Operating Instructions
4.1 Placing a Specimen
Place your specimen or slide directly onto the microscope stage. Ensure it is centered under the lens for optimal viewing.
4.2 Adjusting Focus and Magnification
- Adjust Height: Use the bracket adjustment knob to raise or lower the microscope head, bringing the lens closer or further from the specimen.
- Fine Focus: Rotate the focus adjustment roller until the image on the 7-inch IPS screen appears clear and sharp.
- Changing Lenses: To change magnification, power off the microscope, carefully remove the current lens, and install the desired low (e.g., 500x) or high (e.g., 2000x) multiple lens. Power on and re-focus.
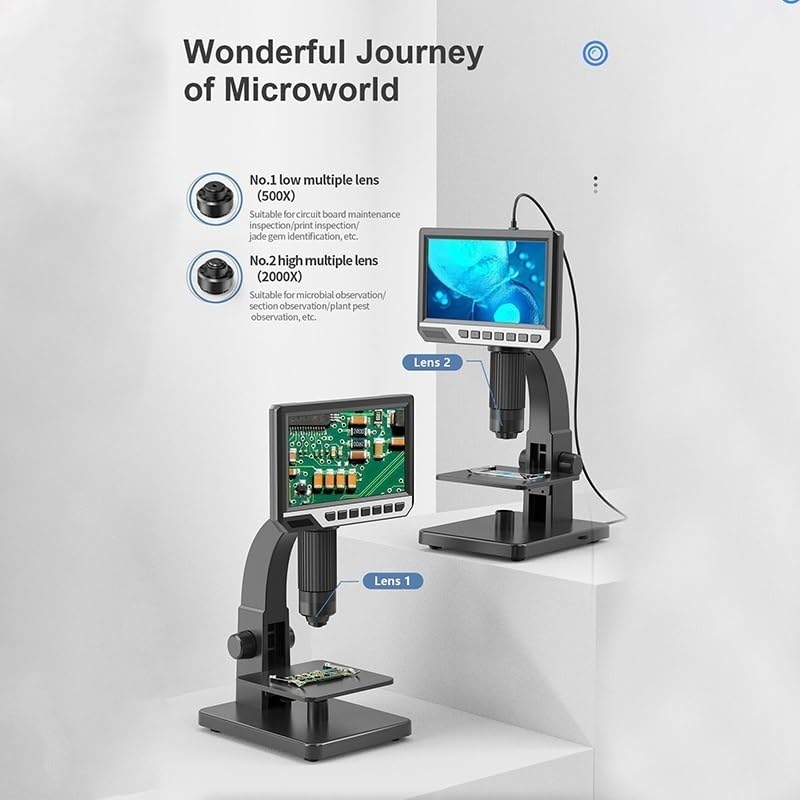
Figure 4.2.1: Lens Application. This image illustrates the use of different lenses: a low multiple lens (e.g., 500x) suitable for circuit board inspection, and a high multiple lens (e.g., 2000x) for microbial observation or plant pest identification.
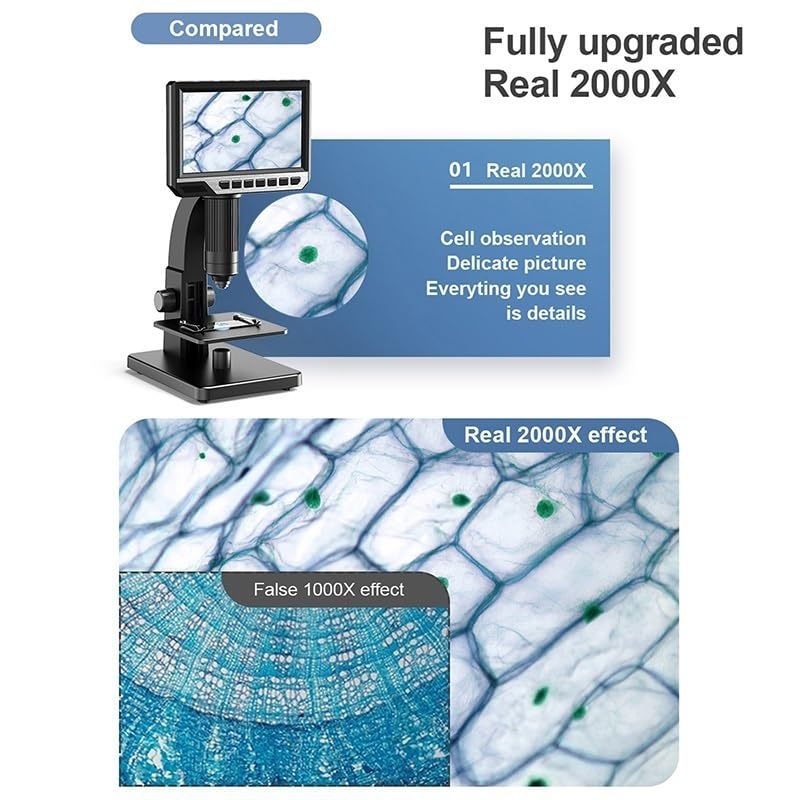
Figure 4.2.2: 2000x Magnification Effect. This image demonstrates the clarity and detail achieved with the 2000x magnification, showing a comparison between a lower magnification and the detailed view of cells at 2000x.
4.3 Adjusting Illumination
The microscope features dual LED light sources. Use the bracket LED adjusting wave wheel to control the intensity of the light coming from below the stage. Additional LED lights around the lens provide top-down illumination. Adjust these to achieve optimal brightness and contrast for your specimen.
4.4 Capturing Images and Videos
With a TF card inserted, you can capture still images or record videos of your observations. Refer to the on-screen menu or dedicated buttons on the microscope for specific instructions on how to initiate recording or capture photos. The 12-megapixel camera ensures high-quality captures.
5. Maintenance
- Cleaning Lenses: Use the provided cleaning cloth or a specialized lens cleaning solution and cloth to gently wipe the lenses. Avoid using abrasive materials or harsh chemicals.
- Cleaning Body: Wipe the microscope body with a soft, dry cloth. Do not use liquid cleaners directly on the device.
- Storage: When not in use, store the microscope in a clean, dry, dust-free environment. It is recommended to cover it to prevent dust accumulation.
- Battery Care: If the microscope has a built-in rechargeable battery, ensure it is charged regularly to maintain battery health. Avoid fully discharging the battery for extended periods.
6. Troubleshooting
| Problem | Possible Cause | Solution |
|---|---|---|
| No image on screen | Microscope not powered on; loose power connection; screen brightness too low. | Ensure power cable is securely connected and device is turned on. Check screen brightness settings. |
| Image is blurry | Incorrect focus; lens dirty; specimen not flat. | Adjust the focus adjustment roller. Clean the lens with a cleaning cloth. Ensure the specimen is flat on the stage. |
| Insufficient illumination | LED lights off or dim; light intensity too low. | Turn on or increase the intensity of the LED lights using the adjusting wave wheel. |
| Cannot save images/videos | No TF card inserted; TF card full; TF card not formatted correctly. | Insert a TF card. Check available storage. Format the TF card if necessary (refer to device menu). |
7. Specifications
| Feature | Detail |
|---|---|
| Model Name | Inskam315 (EHHKQCECD-INSKAM315) |
| Magnification Ratio | 0-2000X |
| Pixel | 12 million pixels |
| Display Screen | 7-inch IPS |
| LED Lights | 11 LED lights (dual light source) |
| Working Height | 0~60mm |
| Focusing Range | 2mm~55mm |
| Material | Plastic (body) |
| Item Weight | 2.2 pounds (approx. 1000 Grams) |
| Package Dimensions | 1.18 x 0.79 x 0.39 inches |
8. Warranty and Support
8.1 Customer Support
For any questions, technical assistance, or support needs regarding your Generic Inskam315 Digital Industrial Microscope, please contact our customer service. We are committed to providing high-quality after-sales service and are available to assist you 24 hours a day.
(Specific contact information such as email or phone number is not provided in the product data. Please refer to your purchase documentation for direct support contacts.)
8.2 Warranty Information
Specific warranty details are typically provided with your purchase documentation. Please retain your proof of purchase for any warranty claims. The manufacturer ensures the use of fine quality materials for durability.


