Introduction
This manual provides instructions for the proper setup, operation, and maintenance of your MatataStudio MT3-2 Digital Compound Microscope. Please read this manual thoroughly before using the device to ensure optimal performance and longevity.
What's in the Box
Upon unpacking, verify that all items listed below are present and in good condition.
- MT3-2 Digital Microscope with 7'' Screen
- 10 prepared slides
- USB & HDMI cable
- Storage bag
- 8GB SD card
- User manual

Figure 1: Included components of the MT3-2 Digital Microscope kit.
Setup Instructions
- Battery Installation:
Locate the battery compartment at the base of the microscope. Insert the provided 18650 Lithium battery. Ensure correct polarity. The battery may have a partial charge; it is recommended to fully charge it before first use.

Figure 2: USB-C charging port for battery charging and power.
- Initial Power-On and Activation:
After installing the battery, connect the microscope to a power source using the USB-C cable. This step is crucial for activating the battery management circuitry upon first use. Press the power button located near the USB-C port. The LCD screen should illuminate.
- Screen Adjustment:
The 7-inch IPS screen is rotatable up to 135 degrees. Adjust the screen to a comfortable viewing angle for individual or group observation.
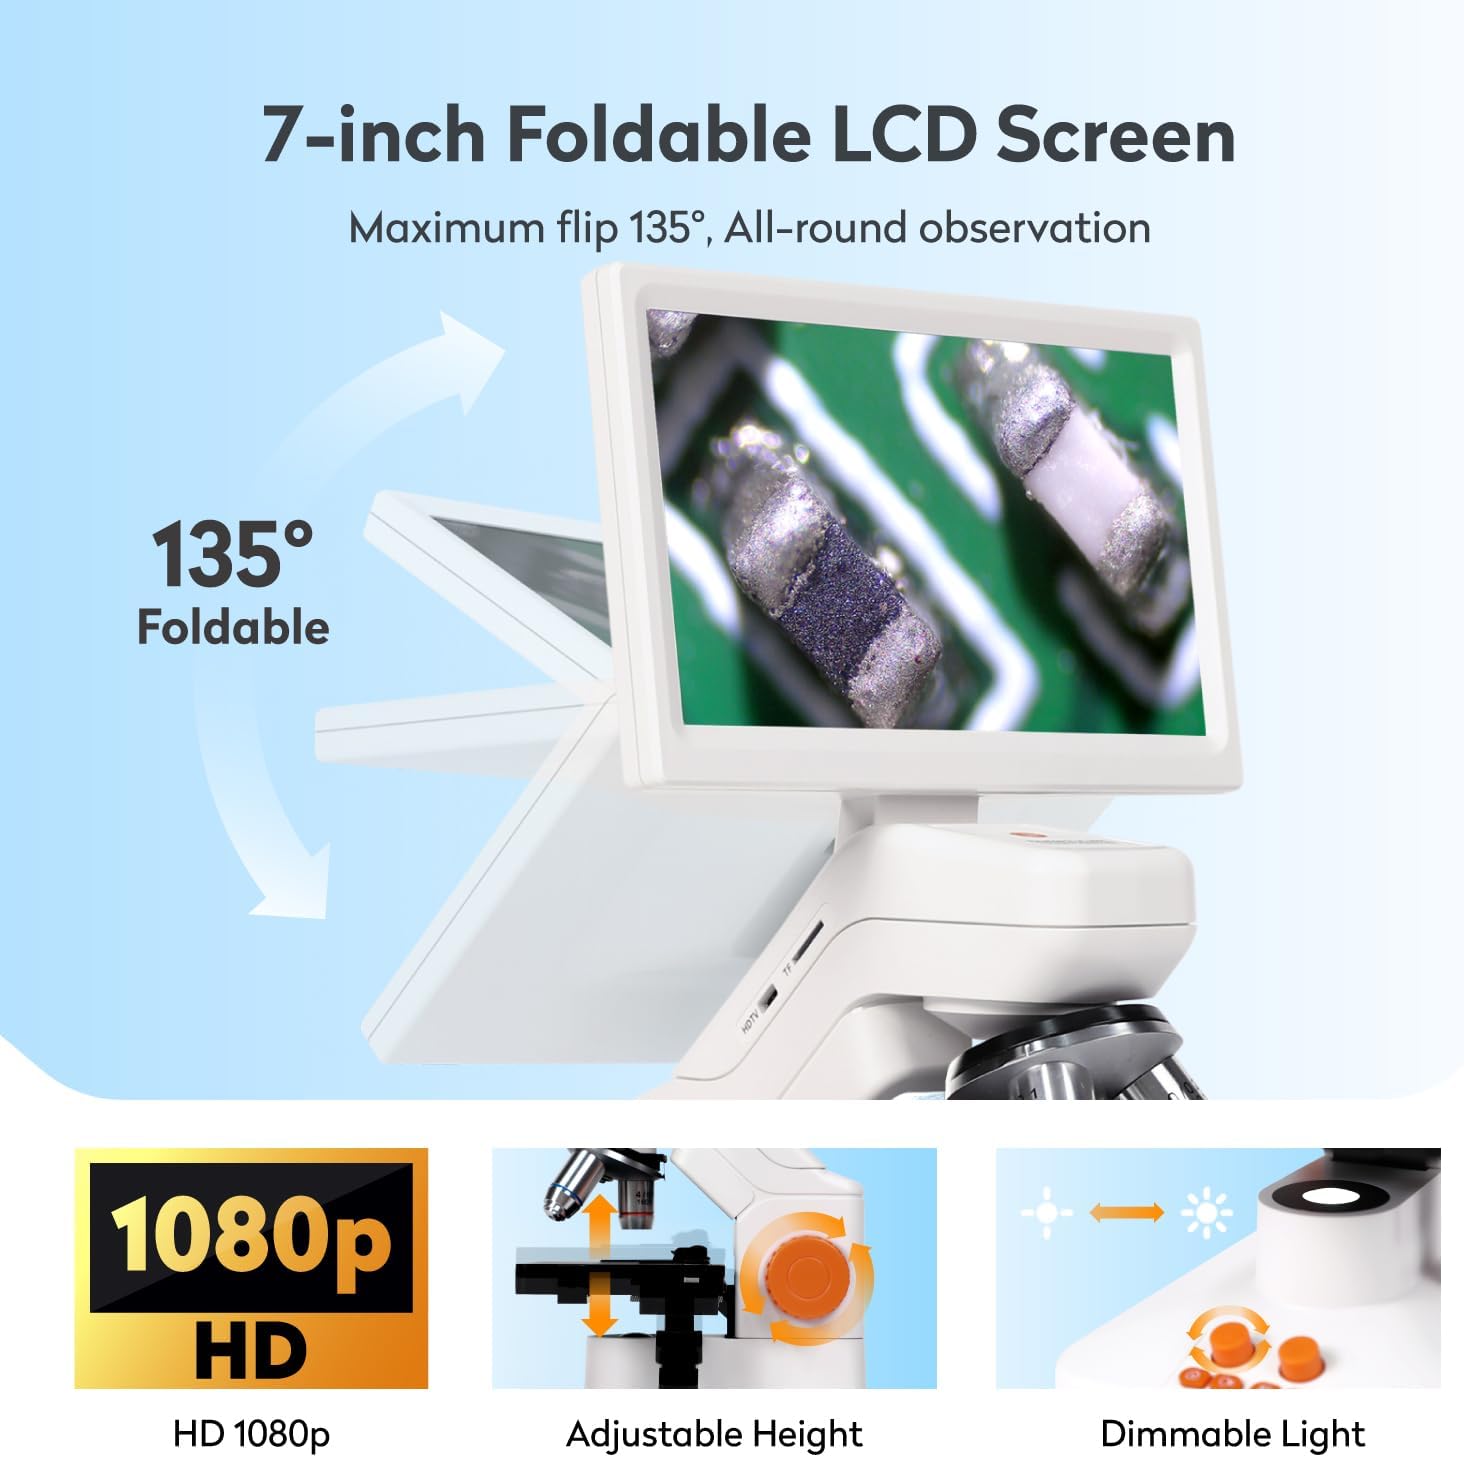
Figure 3: The 7-inch foldable LCD screen can be adjusted for optimal viewing.
- SD Card Insertion:
Insert the provided 8GB SD card into the designated slot on the microscope. This card is used for storing captured photos and videos.

Figure 4: SD card slot for photo and video storage.
Operating Instructions
1. Placing a Specimen
Place a prepared slide or specimen on the mechanical stage. Use the stage clips to secure it. The 3D mechanical stage allows for precise movement of the slide using the adjustment knobs.

Figure 5: Specimen placed on the mechanical stage.
2. Adjusting Magnification
The microscope features three objective lenses (4x, 10x, 40x). Rotate the revolving nosepiece to select the desired objective lens. The 7-inch screen provides digital magnification ranging from 400x to 1200x.

Figure 6: Objective lenses and corresponding magnification levels.
3. Focusing
Use the coarse and fine focus knobs (typically the larger and smaller knobs on the side) to bring the specimen into sharp focus on the screen. The 3D mechanical stage also allows for precise vertical adjustment.

Figure 7: Focus adjustment knobs.
4. Adjusting LED Lights
The microscope is equipped with two LED light sources:
- Transmitted Light (Bottom): Ideal for observing transparent and translucent specimens (e.g., prepared slides).
- Incident Light (Top): Suitable for observing opaque objects like coins, circuit boards, or jewelry.
Use the brightness control knobs on the base to adjust the intensity of both lights. Both lights can be used simultaneously.

Figure 8: Top and bottom LED illumination for various specimen types.
5. Photo and Video Capture
The microscope features a 2MP Aptina CMOS sensor for capturing images and videos. Press the dedicated Photo/Record button on the base to capture. Files are saved to the inserted 8GB SD card.
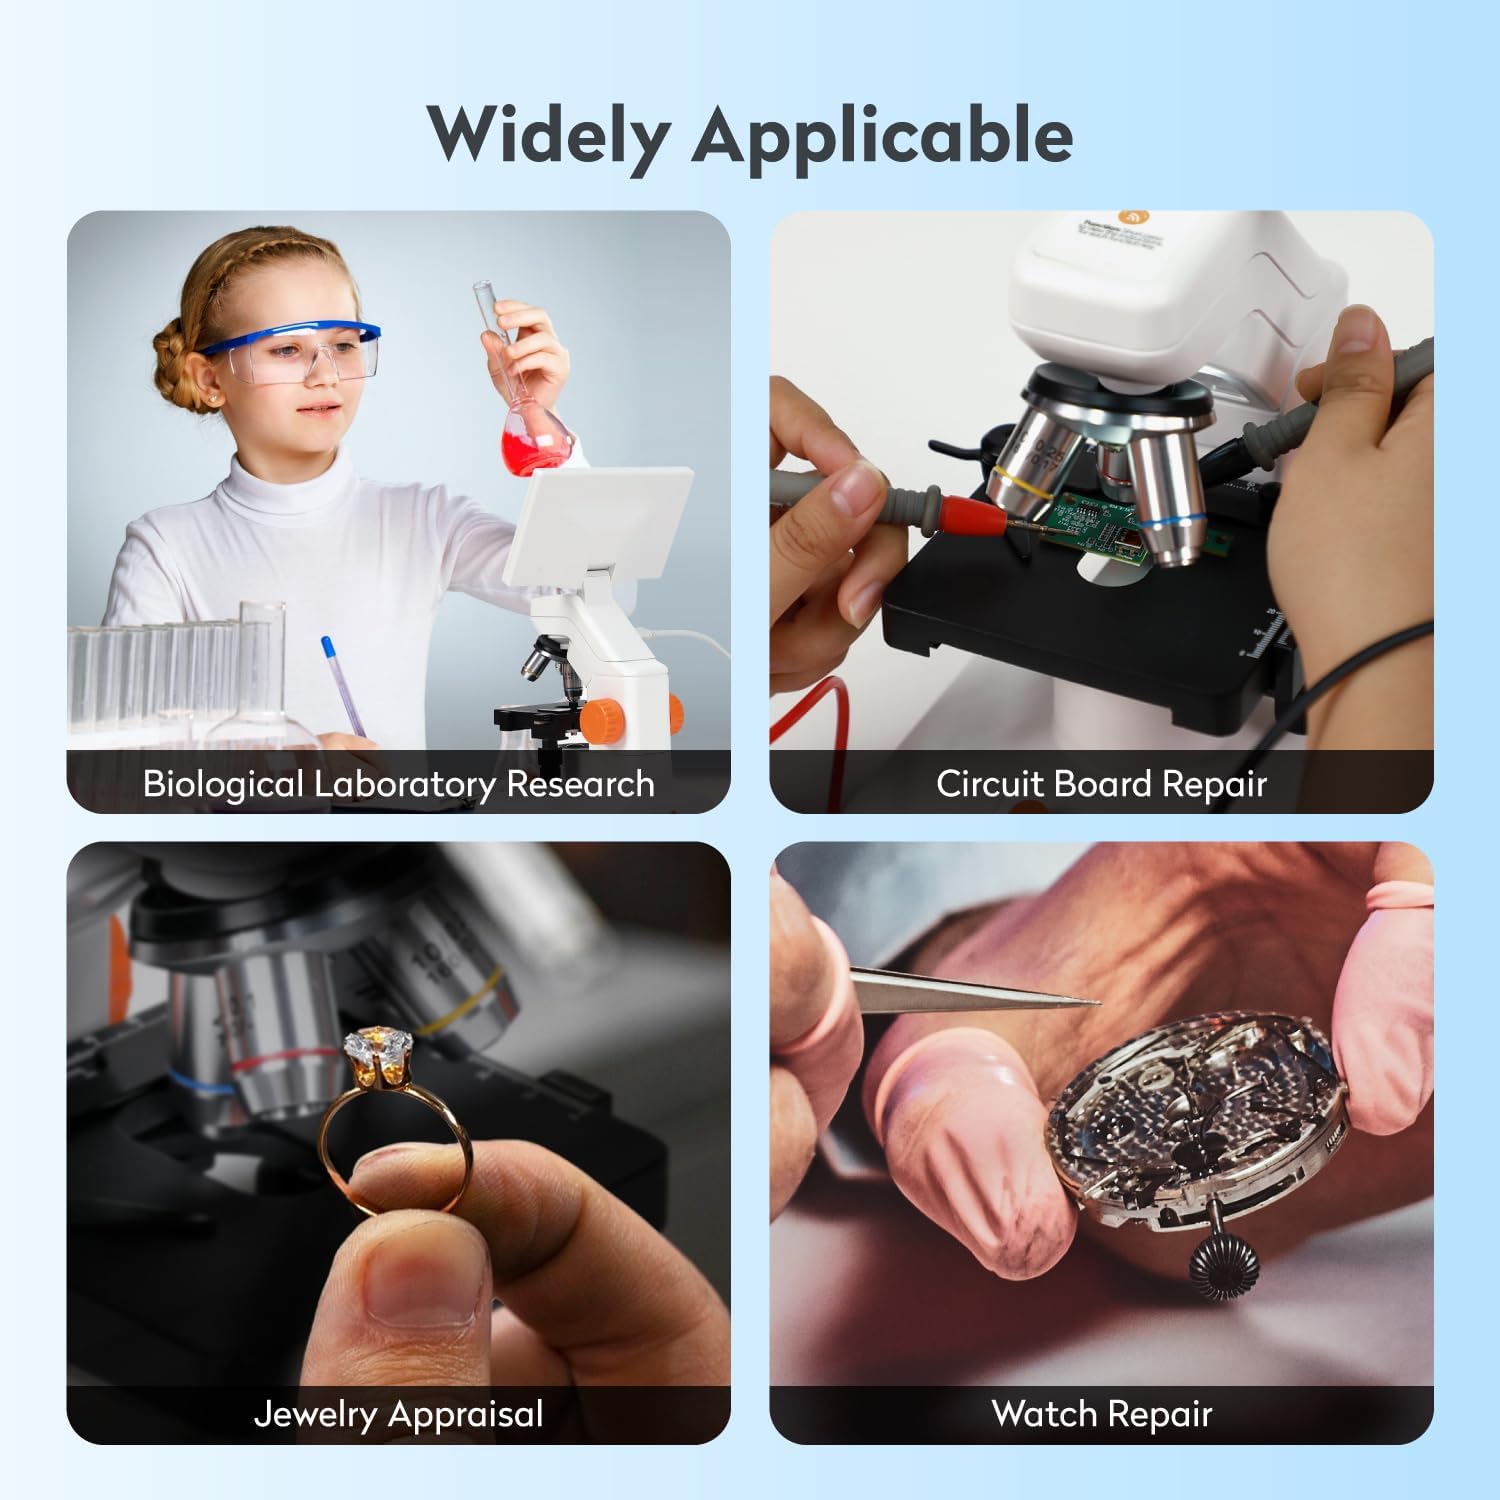
Figure 9: Photo and video capture with 8GB SD card storage.
6. External Device Connectivity
The MT3-2 supports HDMI, USB, and Wi-Fi output for connecting to external devices such as TVs, PCs, smartphones, and tablets. This allows for larger displays and easier sharing.
- HDMI Output: Use the provided HDMI cable to connect to an HDMI-compatible display.
- USB Output: Connect via USB-C to a computer for data transfer or live viewing.
- Wi-Fi Connectivity: Connect to the MatataXplore application on Android/Windows/iOS devices for wireless viewing and measurement functions.

Figure 10: Connecting the microscope to external displays.
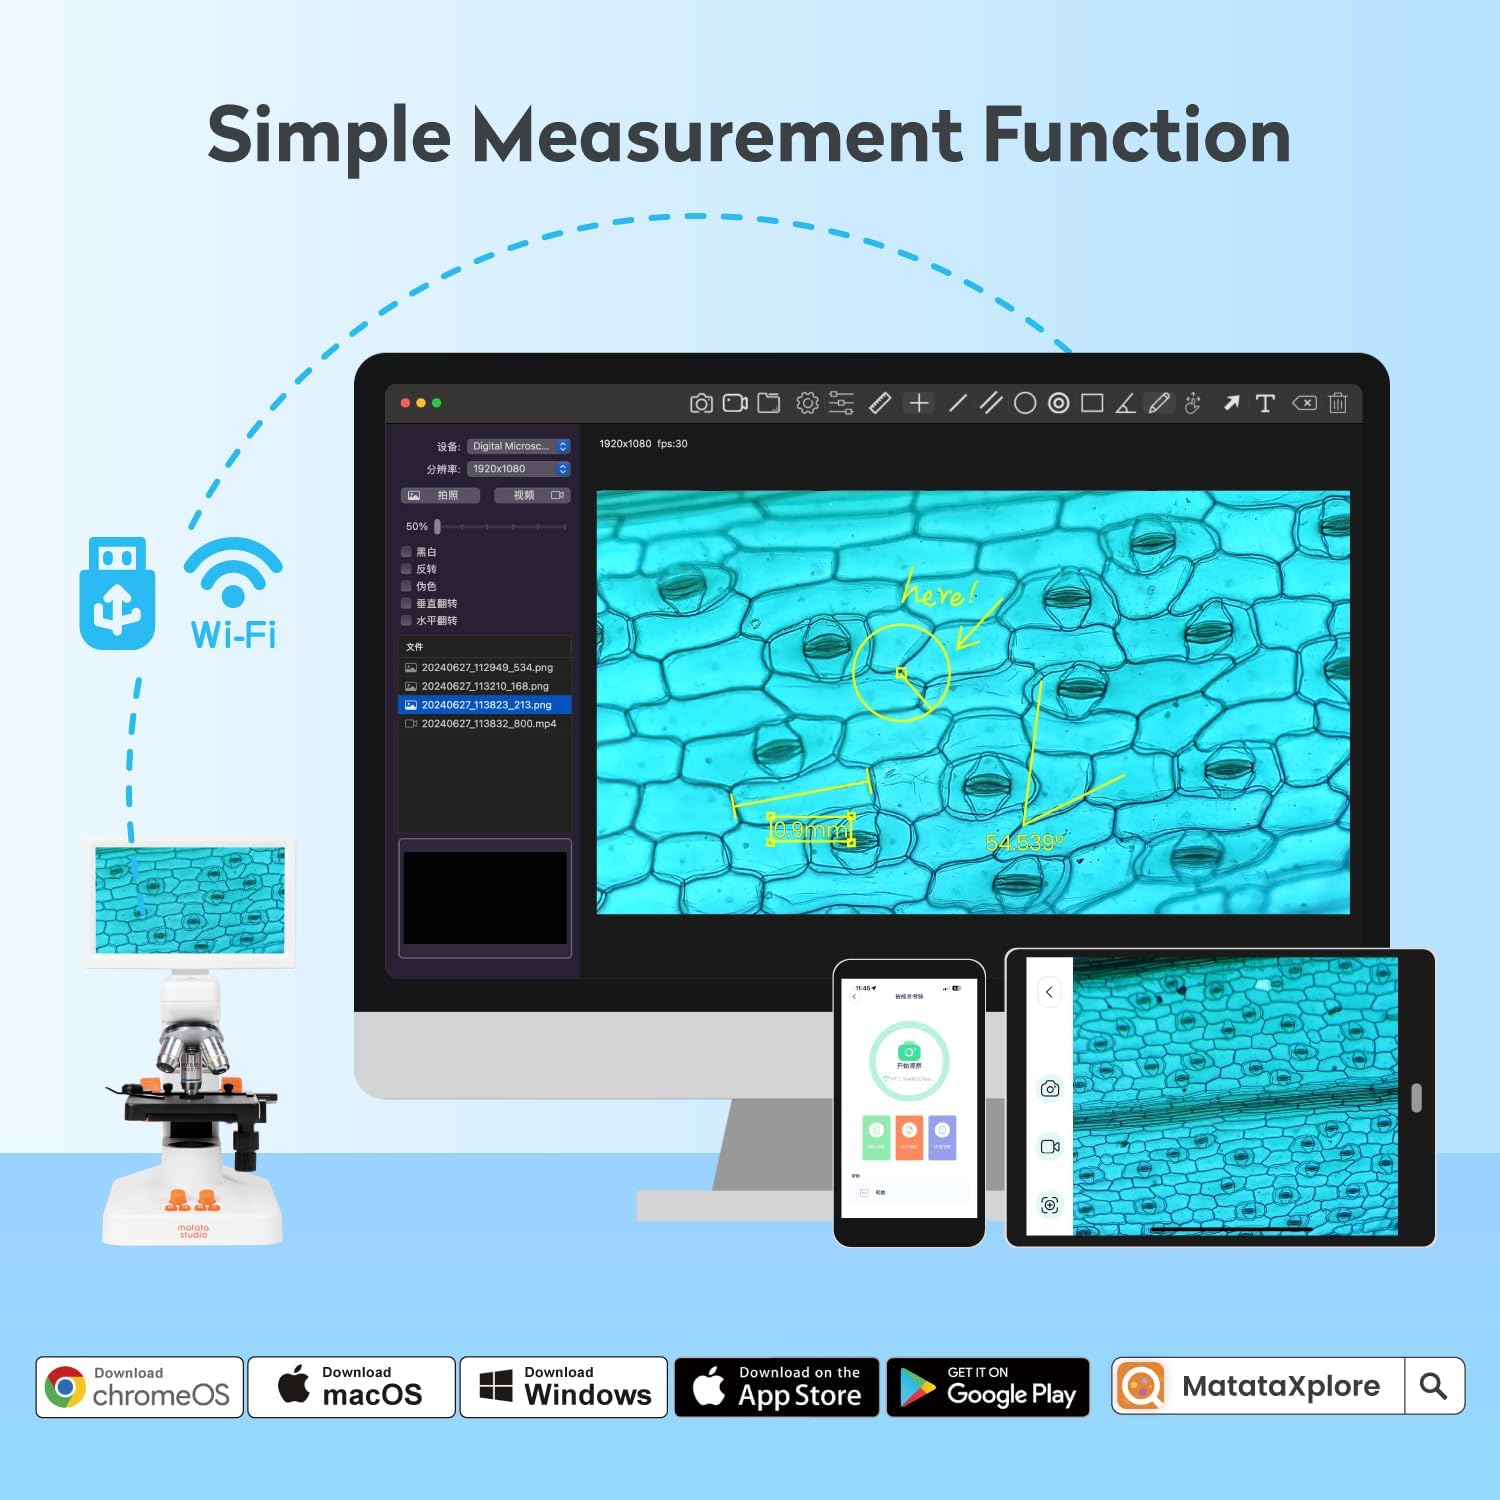
Figure 11: Wi-Fi connectivity and MatataXplore app for advanced functions.
7. Measurement Function
When connected via Wi-Fi to the MatataXplore application, the microscope supports a measurement function, allowing you to accurately measure the size of observed objects.
Maintenance
- Cleaning Lenses: Use a soft, lint-free cloth specifically designed for optical lenses. For stubborn smudges, a small amount of lens cleaning solution can be applied to the cloth, not directly to the lens.
- Cleaning Screen and Body: Wipe the screen and microscope body with a soft, dry cloth. Avoid abrasive cleaners or solvents.
- Battery Care: Store the battery in a cool, dry place. If the microscope will not be used for an extended period, it is advisable to remove the battery.
- Storage: Always store the microscope in its provided storage bag or a clean, dry environment to protect it from dust and damage.
Troubleshooting
| Problem | Possible Cause | Solution |
|---|---|---|
| Microscope does not power on. | Battery not installed or discharged; battery management not activated. | Ensure battery is correctly installed. Connect to power via USB-C to activate/charge the battery. |
| Image is blurry. | Incorrect focus; objective lens not properly engaged; dirty lens. | Adjust coarse and fine focus knobs. Rotate nosepiece until objective clicks into place. Clean objective lens. |
| No light from LEDs. | LEDs turned off; brightness set too low; power issue. | Check LED power buttons and brightness controls. Ensure microscope is powered on. |
| Cannot connect to external display/app. | Incorrect cable connection; Wi-Fi not enabled; app not installed. | Verify cables are securely connected. Ensure Wi-Fi is enabled on microscope and device. Install MatataXplore app. |
| SD card error. | SD card not inserted correctly; card is full or corrupted. | Reinsert SD card. Check card capacity. Try formatting the card (this will erase all data). |
Specifications
| Feature | Detail |
|---|---|
| Model Name | MT3-2 1200X digital microscope |
| Magnification Maximum | 1200x |
| Objective Lenses | 4x, 10x, 40x (Achromatic) |
| Display | 7-inch IPS LCD, 135-degree rotatable |
| Camera Sensor | 2MP Aptina CMOS |
| Storage | 8GB SD card (included) |
| Light Source Type | LED (Transmitted and Incident) |
| Connectivity | HDMI, USB, Wi-Fi (Android/Windows/iOS compatible) |
| Battery | 1 Lithium Polymer battery (included) |
| Material | Metal, Plastic |
| Item Weight | 5.08 pounds |
| Package Dimensions | 12.32 x 10.04 x 8.62 inches |
Warranty and Support
For warranty information and technical support, please refer to the documentation included with your product or contact MatataStudio customer service. Details for contacting MatataStudio can typically be found on their official website or through the retailer where the product was purchased.
Optional protection plans are available for purchase separately to extend coverage beyond the standard warranty period. Please check with your retailer for details on available protection plans.