DCA ADJZ2035i13
DCA 20V Cordless Hammer Drill Set ADJZ2035i13 User Manual
Model: ADJZ2035i13 | Brand: DCA
1. Important Safety Instructions
Always follow basic safety precautions when using this power tool to reduce the risk of fire, electric shock, and serious personal injury.
General Power Tool Safety Warnings
- Work Area Safety: Keep your work area clean and well-lit. Cluttered or dark areas invite accidents. Do not operate power tools in explosive atmospheres, such as in the presence of flammable liquids, gases, or dust.
- Electrical Safety: Avoid body contact with earthed or grounded surfaces such as pipes, radiators, ranges, and refrigerators. There is an increased risk of electric shock if your body is earthed or grounded.
- Personal Safety: Always wear eye protection. Use safety glasses, goggles, or a face shield. Wear hearing protection when operating the tool for extended periods. Dress properly; do not wear loose clothing or jewelry. Keep hair, clothing, and gloves away from moving parts.
- Tool Use and Care: Do not force the power tool. Use the correct power tool for your application. Disconnect the battery pack from the power tool before making any adjustments, changing accessories, or storing power tools.
2. Product Overview
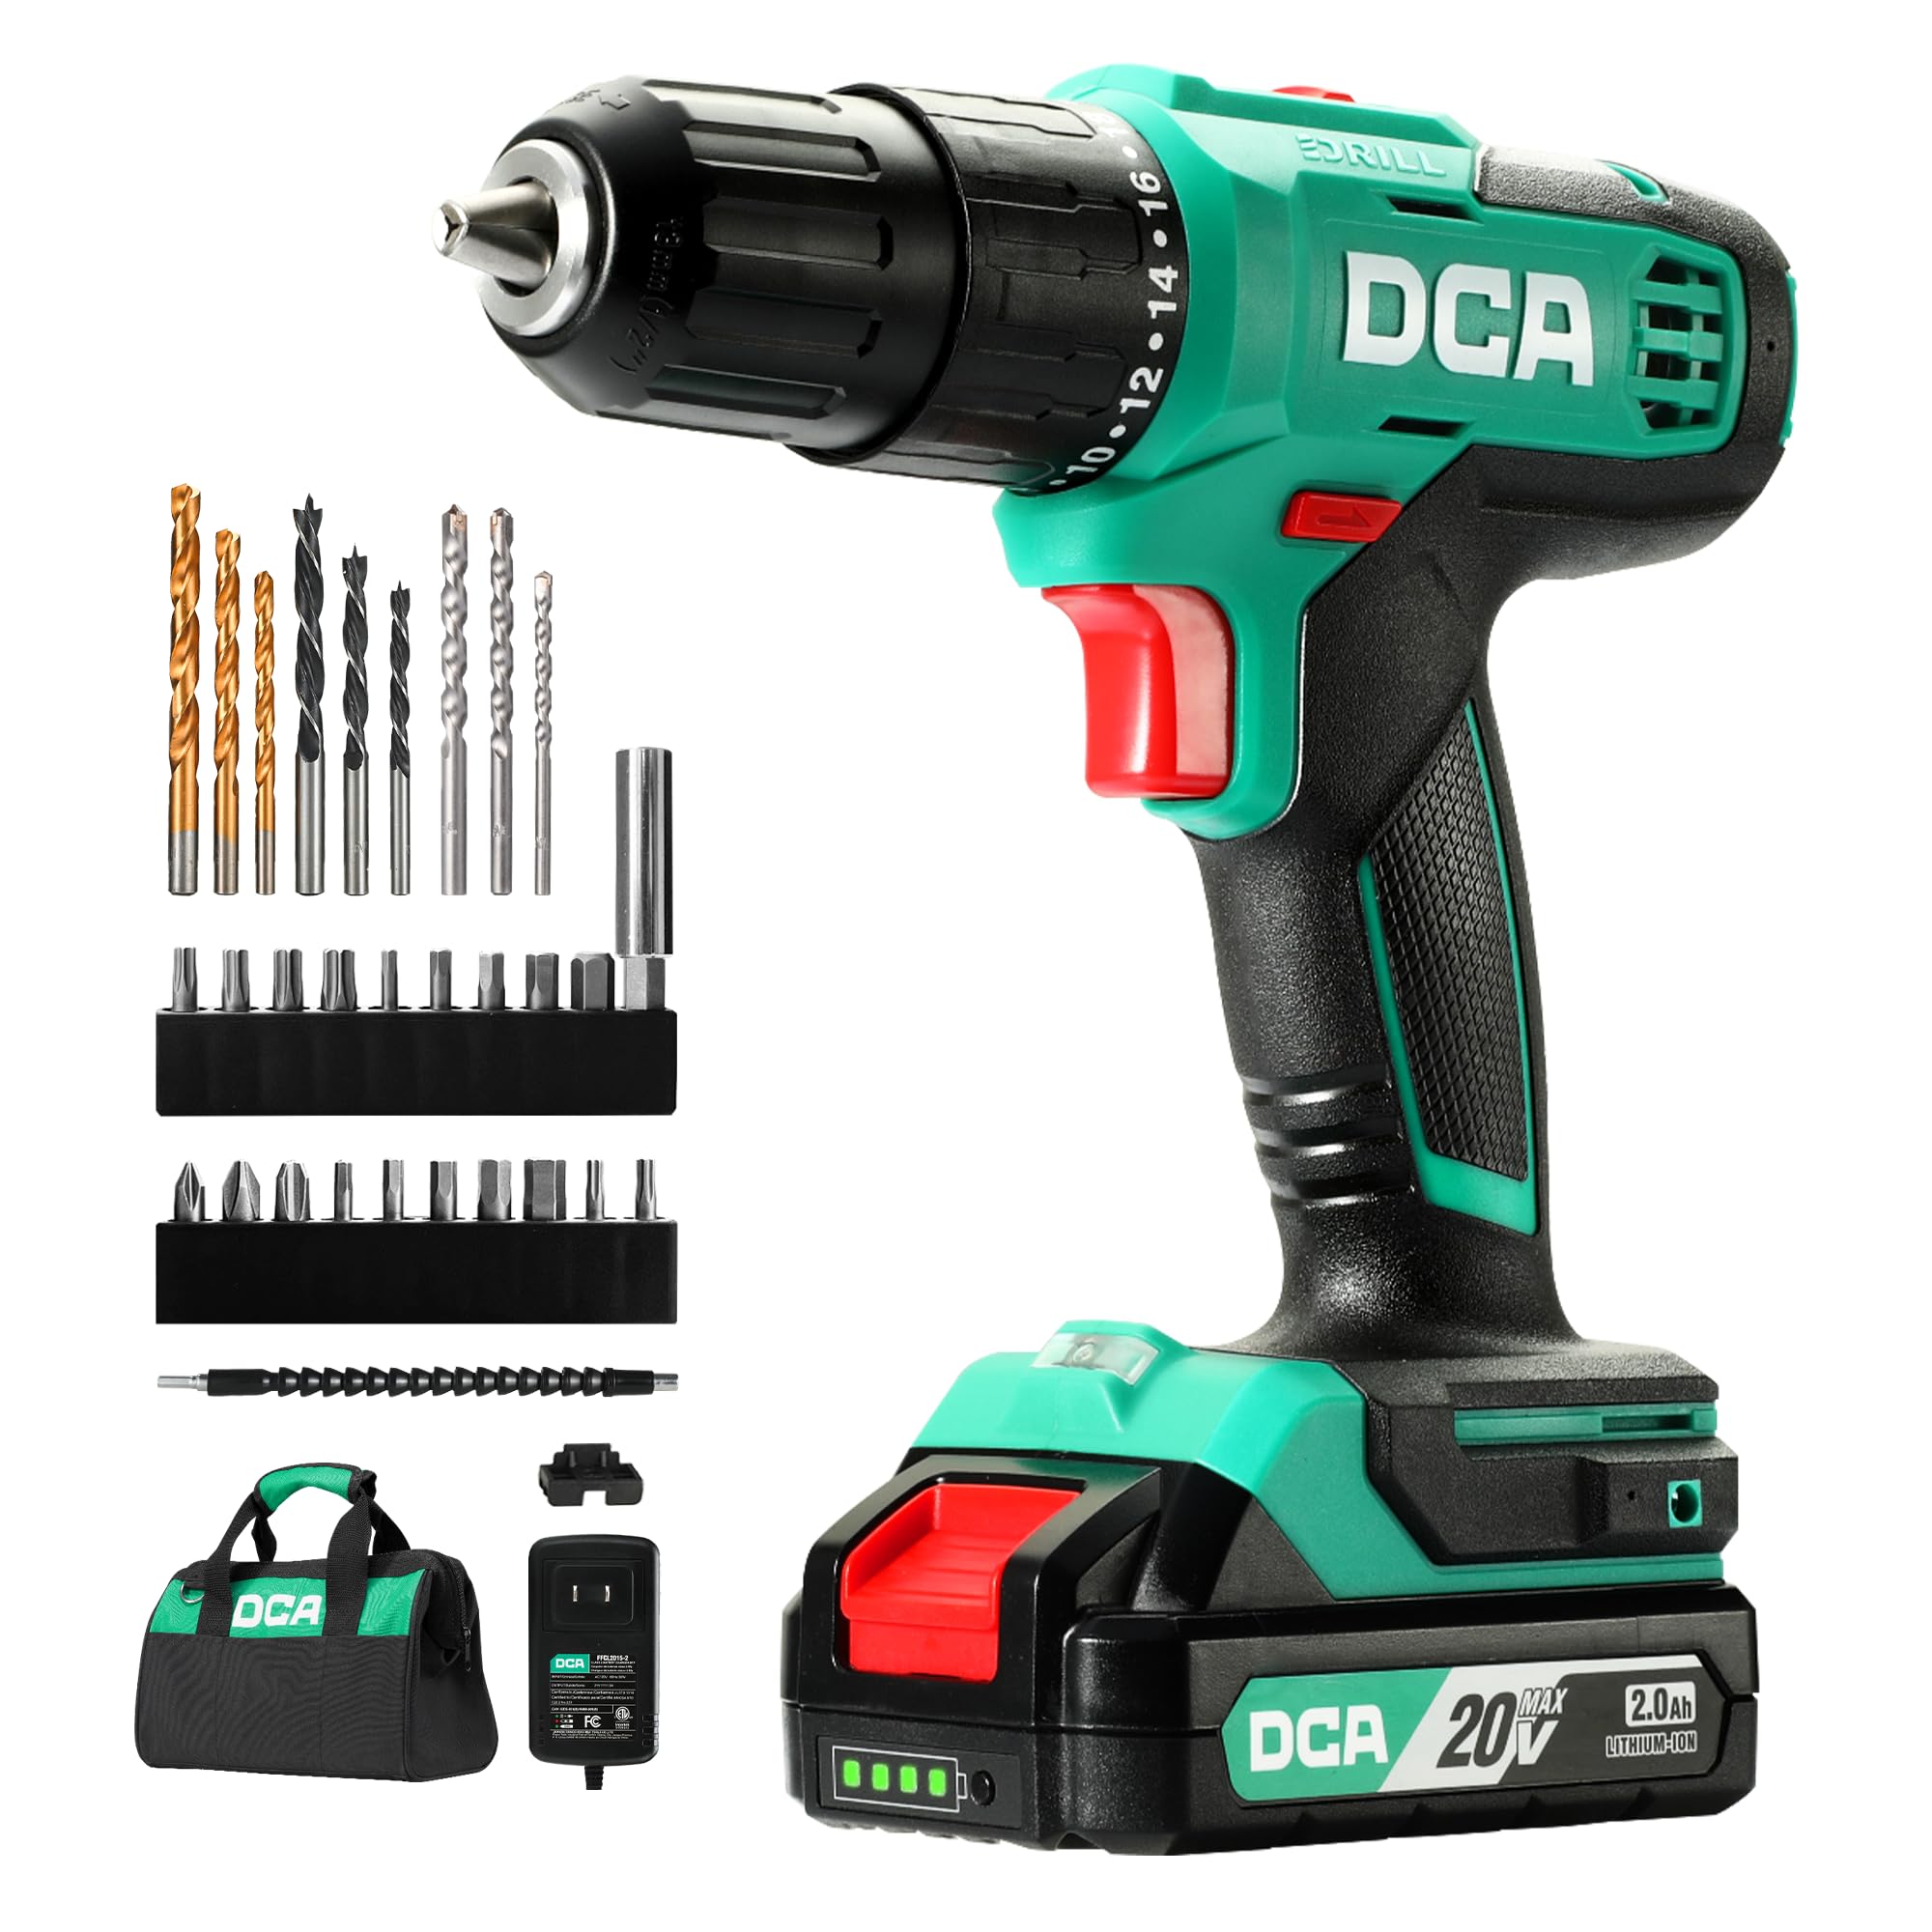
Figure 2.0: The DCA 20V Cordless Hammer Drill Set, model ADJZ2035i13.
The DCA 20V Cordless Hammer Drill Set (Model ADJZ2035i13) is a versatile tool designed for drilling into various materials including wood, metal, and masonry, as well as for driving screws. It features a high-performance motor, variable speed control, and multiple clutch settings for precise operation.
Key Features:
- High-Performance Motor: Equipped with a pure copper motor, delivering 354 in-lbs of torque for strong power and extended lifespan.
- Hammer Function: Features a 22,500 IPM impact rate for efficient drilling into tough materials like brick walls.
- 2 Variable Speeds: Offers speed settings of 0-400 RPM for precision fastening and 0-1500 RPM for high-speed drilling.
- 18+1+1 Clutch Settings: Provides 18 torque settings for screwdriving, 1 drill setting, and 1 hammer drill setting for versatile applications.
- 1/2" Keyless Chuck: Allows for quick and easy bit changes.
- 2.0Ah Lithium-Ion Battery: Provides long-lasting power for extended use.
- Integrated LED Work Light: Illuminates the work area for improved visibility.
- Compact and Lightweight Design: Weighs only 4.9 pounds for comfortable handling.
Components:
- Cordless Hammer Drill
- 2.0Ah Li-ion Battery
- 1.5A Charger
- Carry Bag
- 9-Piece Drilling Bits
- 19-Piece Screwdriver Bits
- 1-Piece Extension Bit Holder
- 1-Piece Flexible Shaft
- 1-Piece On-board Bits Holder
- 1 Belt Hook

Figure 2.1: Included components of the DCA 20V Cordless Hammer Drill Set.
3. Setup
3.1 Charging the Battery
- Connect the charger to a standard power outlet.
- Slide the battery pack onto the charger. Ensure it clicks into place.
- The charger's indicator light will show the charging status. A red light typically indicates charging, while a green light indicates a full charge.
- Once fully charged, disconnect the battery from the charger.
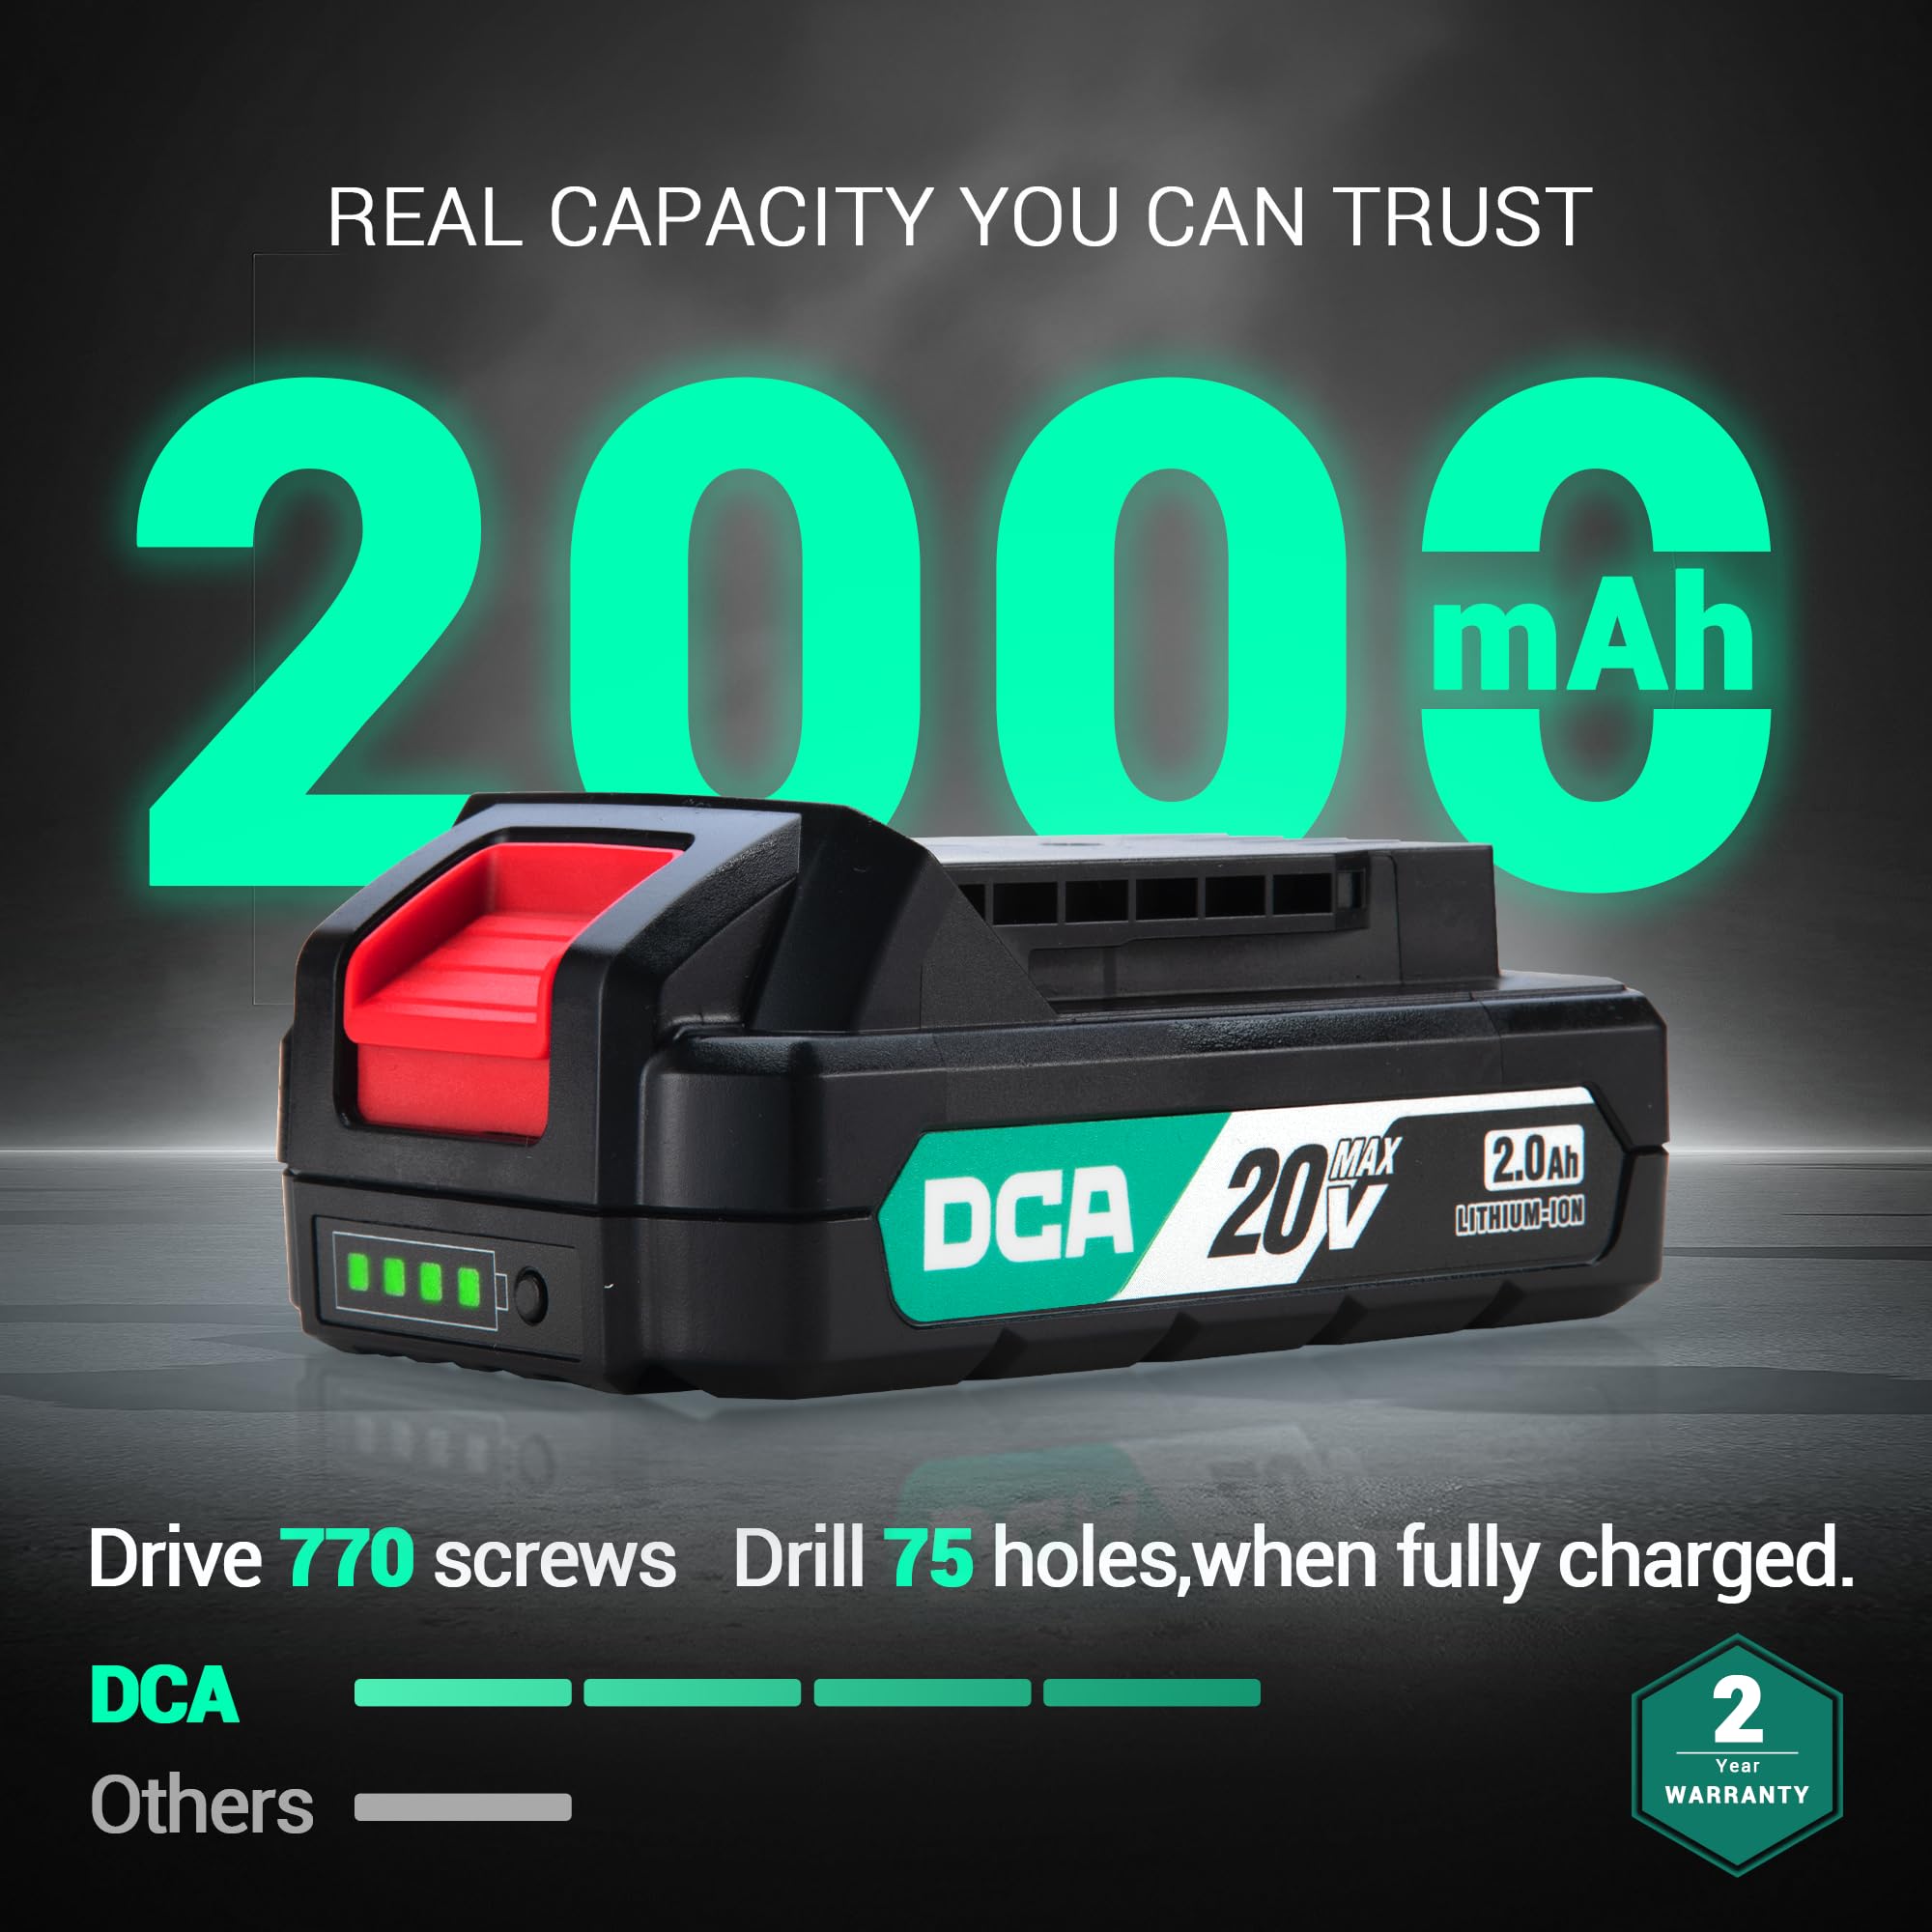
Figure 3.1: The 2000mAh battery and its charge indicator lights.
3.2 Installing and Removing Bits
- Ensure the drill is off and the forward/reverse switch is in the center (locked) position.
- Rotate the chuck counter-clockwise to open the jaws.
- Insert the desired drill bit or screwdriver bit into the chuck. Ensure the bit is fully seated.
- Rotate the chuck clockwise to tighten the jaws securely around the bit. Hand-tighten firmly.
- To remove a bit, rotate the chuck counter-clockwise until the jaws open, then pull the bit out.

Figure 3.2: The 1/2-inch keyless chuck for quick bit changes.

Figure 3.3: Included drill bit and screwdriver bit pack.
Video 3.1: Official product video demonstrating the DCA Hammer Drill ADJZ2035i13 in various applications.
4. Operating Instructions
4.1 Selecting Operating Mode and Torque
The drill features an 18+1+1 clutch system, allowing you to select between screwdriving, drilling, and hammer drilling modes.
- Screwdriver Mode (1-18 Torque Settings): Rotate the torque adjustment ring to select a setting from 1 to 18. Lower numbers are for smaller screws and softer materials, while higher numbers are for larger screws and harder materials. This prevents overdriving screws.
- Drill Mode (Drill Icon): Rotate the ring to the drill icon for general drilling into wood, plastic, and metal without impact.
- Hammer Drill Mode (Hammer Icon): Rotate the ring to the hammer icon for drilling into masonry, brick, and concrete with impact action.
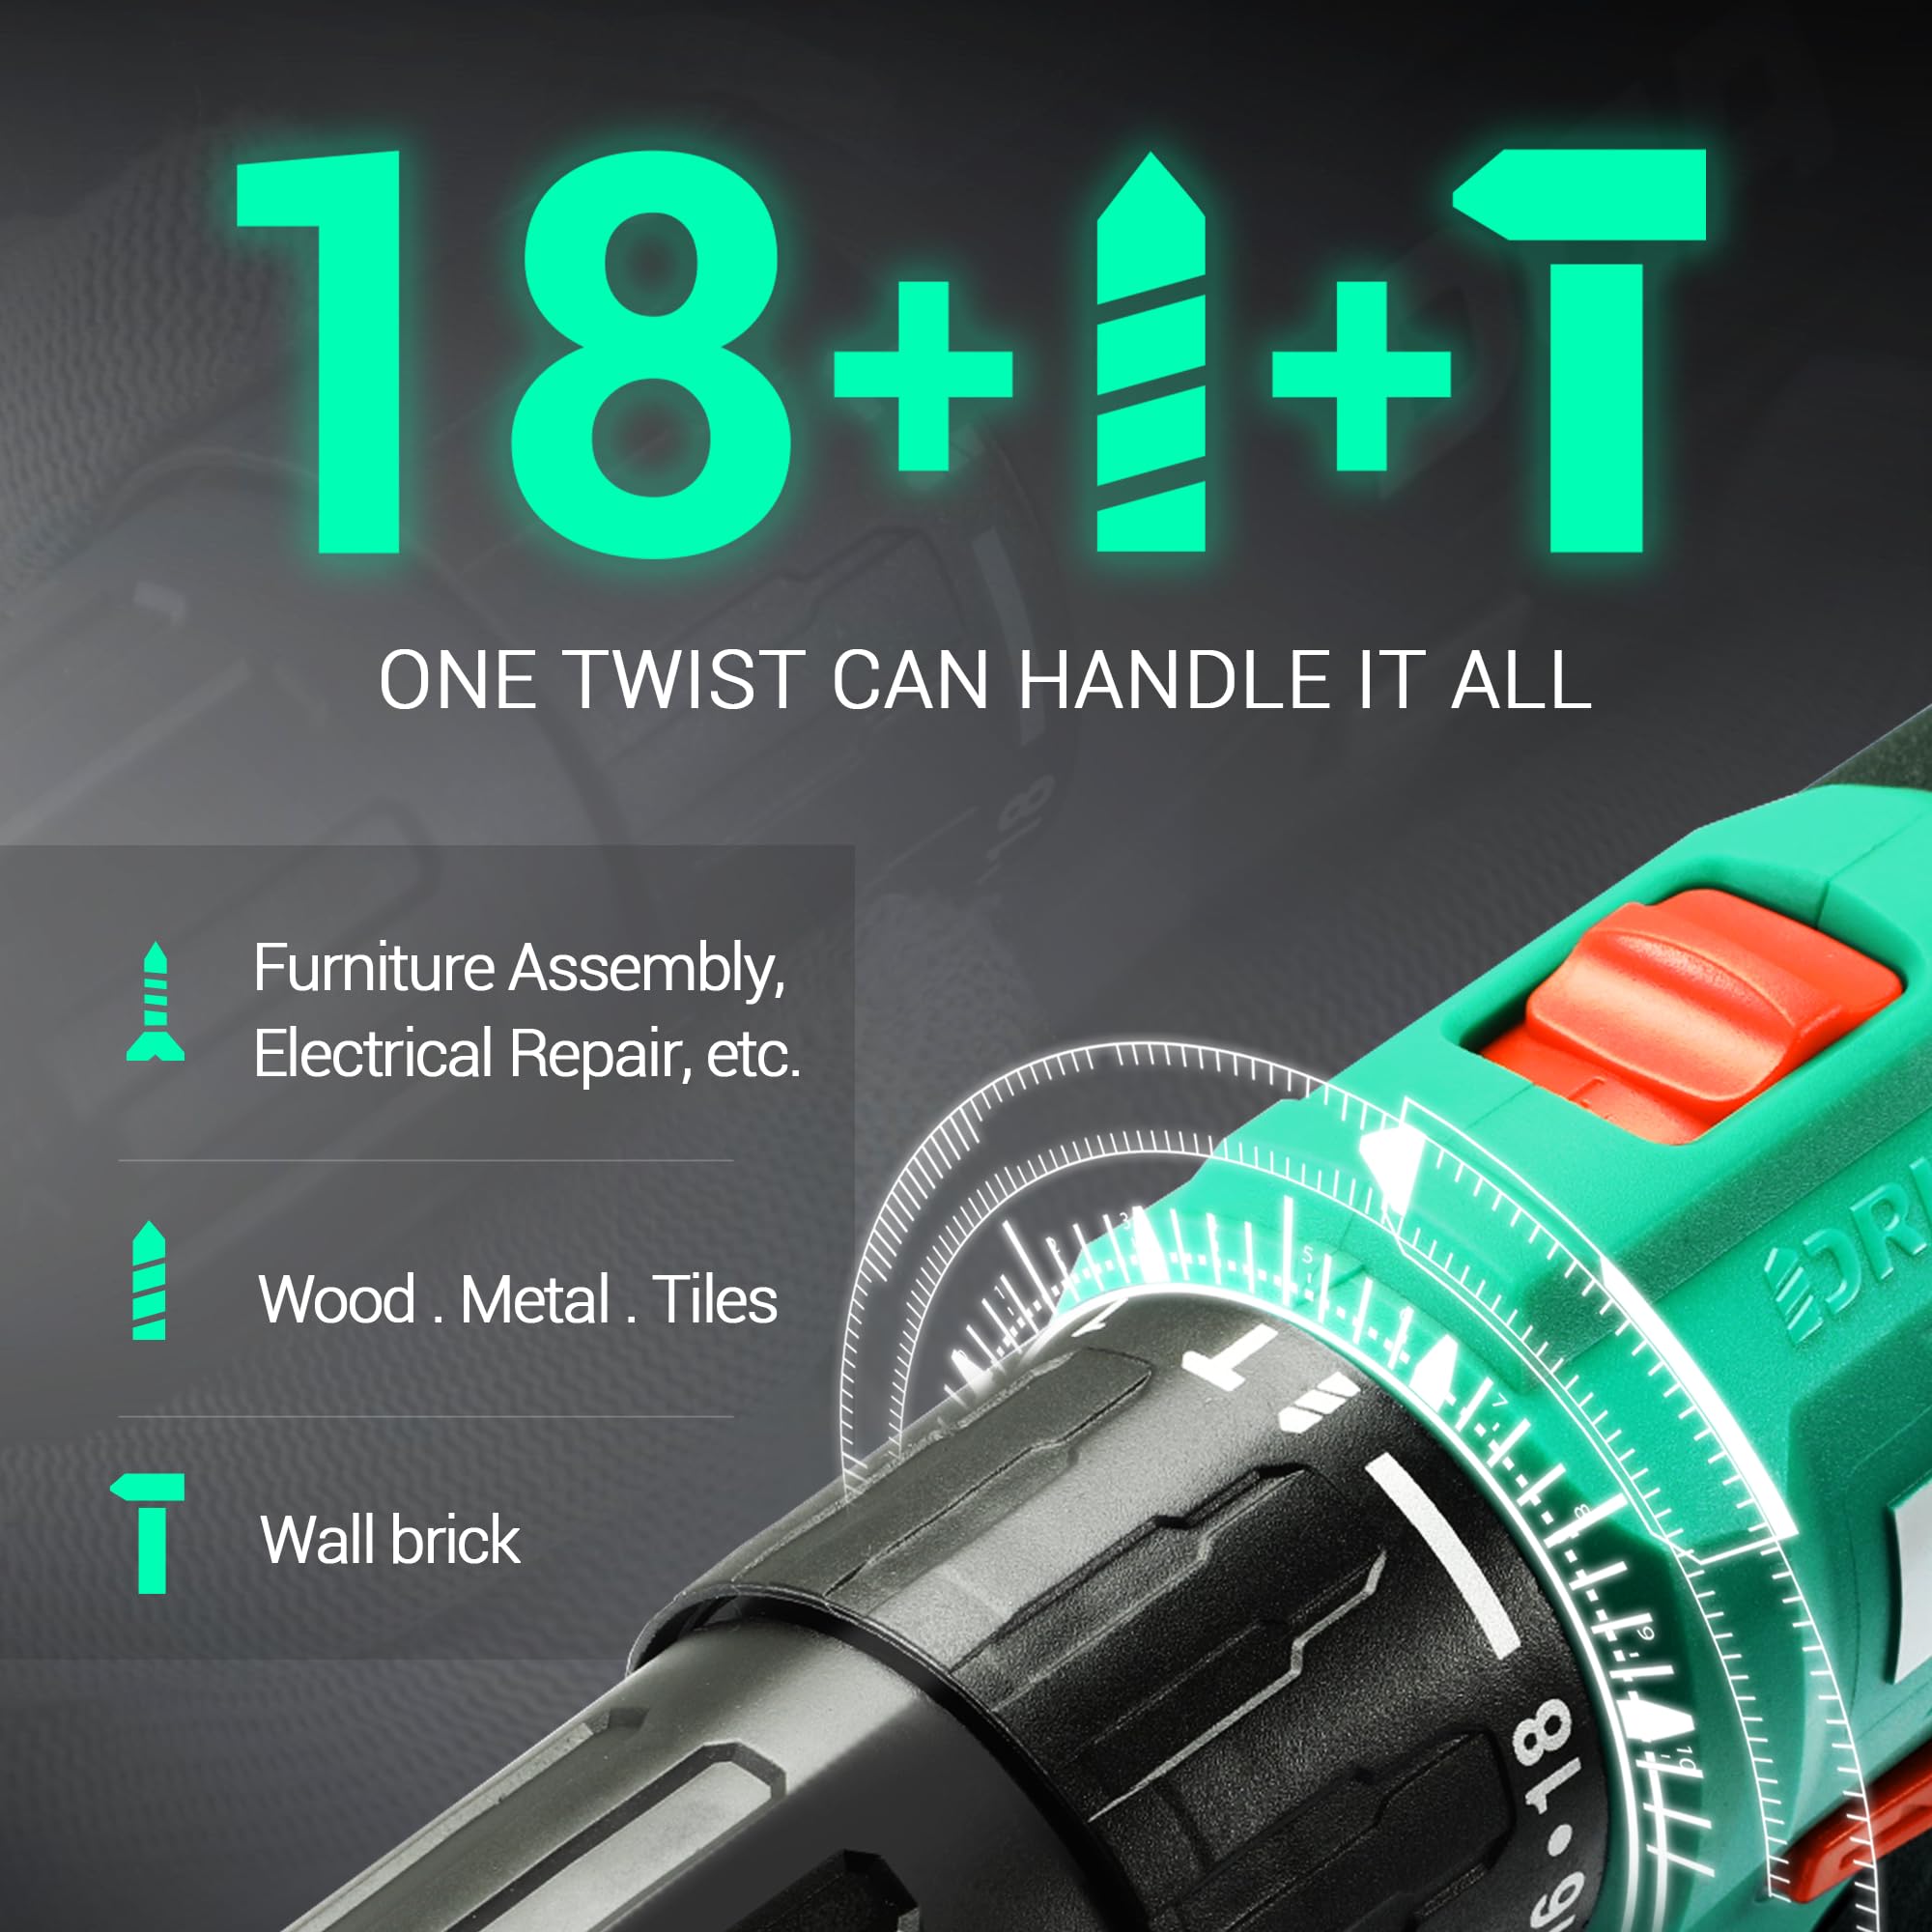
Figure 4.1: The 18+1+1 clutch and mode selector ring.
4.2 Variable Speed Control
The drill offers two mechanical speed settings and a variable speed trigger.
- Speed Selector Switch: Located on top of the drill, slide it to position '1' for low speed (0-400 RPM) and high torque, ideal for screwdriving. Slide it to position '2' for high speed (0-1500 RPM) and lower torque, suitable for drilling.
- Variable Speed Trigger: The trigger allows for fine control over the speed. Pressing the trigger lightly results in lower speed, while pressing it fully increases the speed to the maximum selected by the speed selector switch.

Figure 4.2: The two variable speed settings and impact frequency of the drill.

Figure 4.3: The variable speed trigger for precise control.
4.3 Forward/Reverse Switch
The forward/reverse switch is located above the trigger. Push it to the left for forward rotation (drilling/driving) and to the right for reverse rotation (removing screws/bits). Position it in the center to lock the trigger and prevent accidental starting.

Figure 4.4: Forward and reverse rotation for driving and removing fasteners.
4.4 LED Work Light
The integrated LED work light automatically illuminates when the trigger is pressed, providing better visibility in dimly lit work areas.

Figure 4.5: The LED work light in action.
4.5 Using the Flexible Shaft
The included flexible shaft allows you to reach screws or drill in tight, awkward spaces where the main drill body cannot fit directly.
- Insert the flexible shaft into the drill's chuck and tighten securely.
- Insert the desired screwdriver or drill bit into the end of the flexible shaft.
- Use the drill as normal, guiding the flexible shaft to the desired work area.

Figure 4.6: Using the flexible shaft for accessing confined areas.
4.6 General Applications
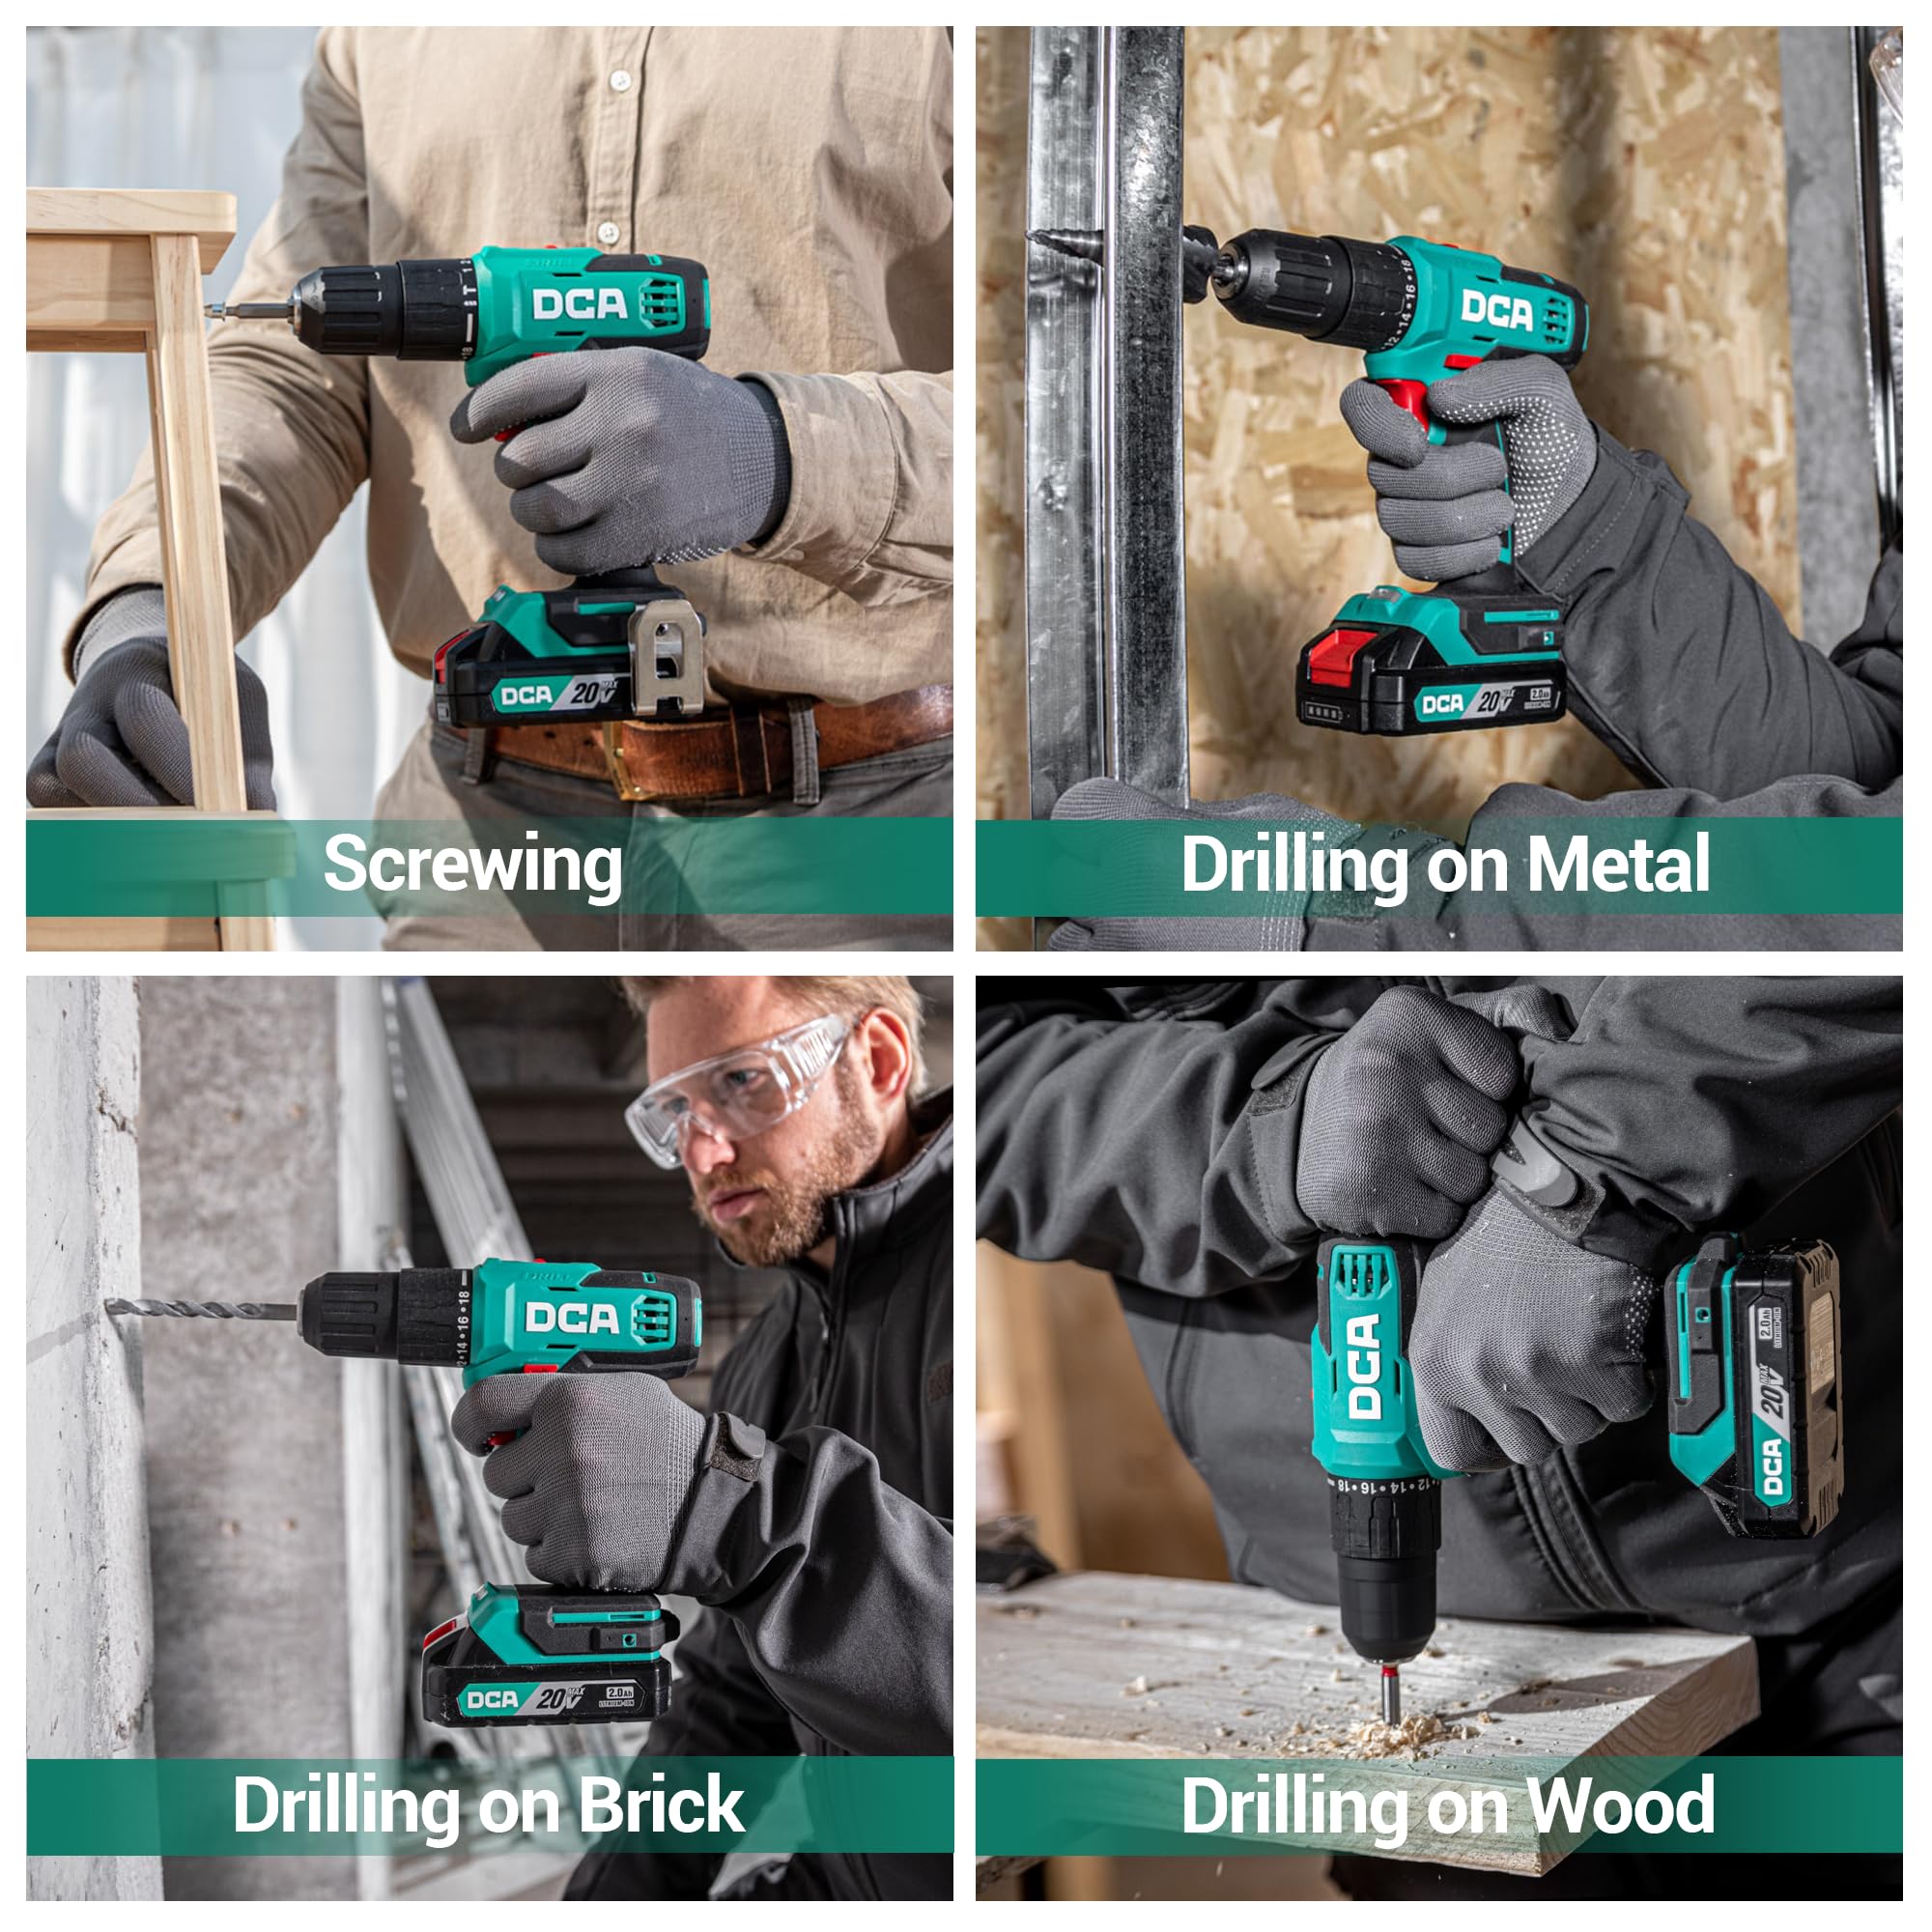
Figure 4.7: The DCA hammer drill performing various tasks: screwing, drilling into metal, brick, and wood.
5. Maintenance
5.1 Cleaning
- Always disconnect the battery pack before cleaning.
- Use a soft, damp cloth to clean the exterior of the tool. Do not use harsh chemicals or abrasive cleaners.
- Clear any dust or debris from the ventilation openings using compressed air or a soft brush to ensure proper motor cooling.
- Clean the chuck jaws regularly to ensure proper gripping of bits.
5.2 Battery Care and Storage
- Store the battery pack in a cool, dry place away from direct sunlight and extreme temperatures.
- For long-term storage, charge the battery to approximately 50% capacity.
- Do not store the battery pack with metal objects that could short the terminals.
- Avoid fully discharging the battery before recharging, as this can reduce its lifespan.
5.3 General Storage
- Store the drill and all accessories in the provided carry bag to protect them from dust and damage.
- Keep the tool out of reach of children.
6. Troubleshooting
| Problem | Possible Cause | Solution |
|---|---|---|
| Drill does not start. | Battery not charged or improperly inserted. Forward/reverse switch in center (locked) position. | Charge battery and ensure it is securely inserted. Move switch to forward or reverse position. |
| Loss of power during operation. | Battery charge is low. Overload protection activated. | Recharge the battery. Reduce pressure on the tool or use a lower speed setting. Allow tool to cool if overheated. |
| Bit slips in chuck. | Chuck not tightened sufficiently. Bit shank is dirty or damaged. | Retighten chuck firmly. Clean or replace the bit. |
| Excessive vibration or noise. | Loose bit or accessory. Internal component issue. | Ensure bit is properly secured. If problem persists, contact customer support. |
7. Specifications
| Feature | Detail |
|---|---|
| Model Number | ADJZ2035i13 |
| Brand | DCA |
| Power Source | Battery Powered |
| Voltage | 20 Volts |
| Battery Type | Lithium-Ion |
| Battery Capacity | 2.0Ah (2000 Milliamp Hours) |
| Maximum Torque | 354 Inch Pounds |
| No-Load Speed (Low) | 0-400 RPM |
| No-Load Speed (High) | 0-1500 RPM |
| Impact Rate (IPM) | 0-22,500 IPM |
| Chuck Size | 1/2 Inch Keyless |
| Clutch Settings | 18+1+1 (Screwdriver, Drill, Hammer Drill) |
| Drilling Capacity (Wood) | 7/8 inch (22 mm) |
| Drilling Capacity (Steel) | 1/2 inch (13 mm) |
| Drilling Capacity (Brick Wall) | 5/16 inch (8 mm) |
| Item Weight | 4.9 Pounds |
| Item Dimensions (L x W x H) | 13.3" x 9.2" x 3.5" |
8. Warranty and Support
This DCA 20V Cordless Hammer Drill Set is covered by a 2-year warranty. For warranty claims, technical assistance, or general inquiries, please contact DCA customer support through the retailer where the product was purchased or visit the official DCA website for contact information.
Please retain your proof of purchase for warranty validation.
Ask a question about this manual
Ask about setup, troubleshooting, compatibility, parts, safety, or missing instructions. Manuals+ will review the question and use this page’s manual context to help answer it.