1. Overview
The NEEWER Basics TP08 is a versatile 2-in-1 camera tripod and monopod designed for photographers and videographers seeking stability and portability. Constructed from durable aluminum alloy with a high-strength plastic head, it supports DSLR cameras up to 13lb (6kg). Its compact and lightweight design makes it ideal for travel and various shooting environments. Key features include a 360° rotatable ball head, an Arca-type quick release plate, adjustable and reversible legs, and an inverted central axis for low-angle and macro photography.
2. Safety Information
- Always ensure the tripod is placed on a stable, level surface before mounting equipment.
- Do not exceed the maximum load capacity of 13lb (6kg) to prevent damage to the tripod or your camera.
- Secure all locking mechanisms tightly after adjusting the height or angle.
- Avoid using the tripod in strong winds or extreme weather conditions without additional stabilization (e.g., a weight hook).
- Keep hands clear of moving parts when adjusting the tripod.
- Store the tripod in its carrying bag when not in use to protect it from dust and damage.
3. Package Contents
Verify that all items are present in the package:
- 1 x 2-in-1 Tripod & Monopod
- 3 x L-Shaped Hex Wrench
- 1 x Carrying Bag
- 1 x User Manual
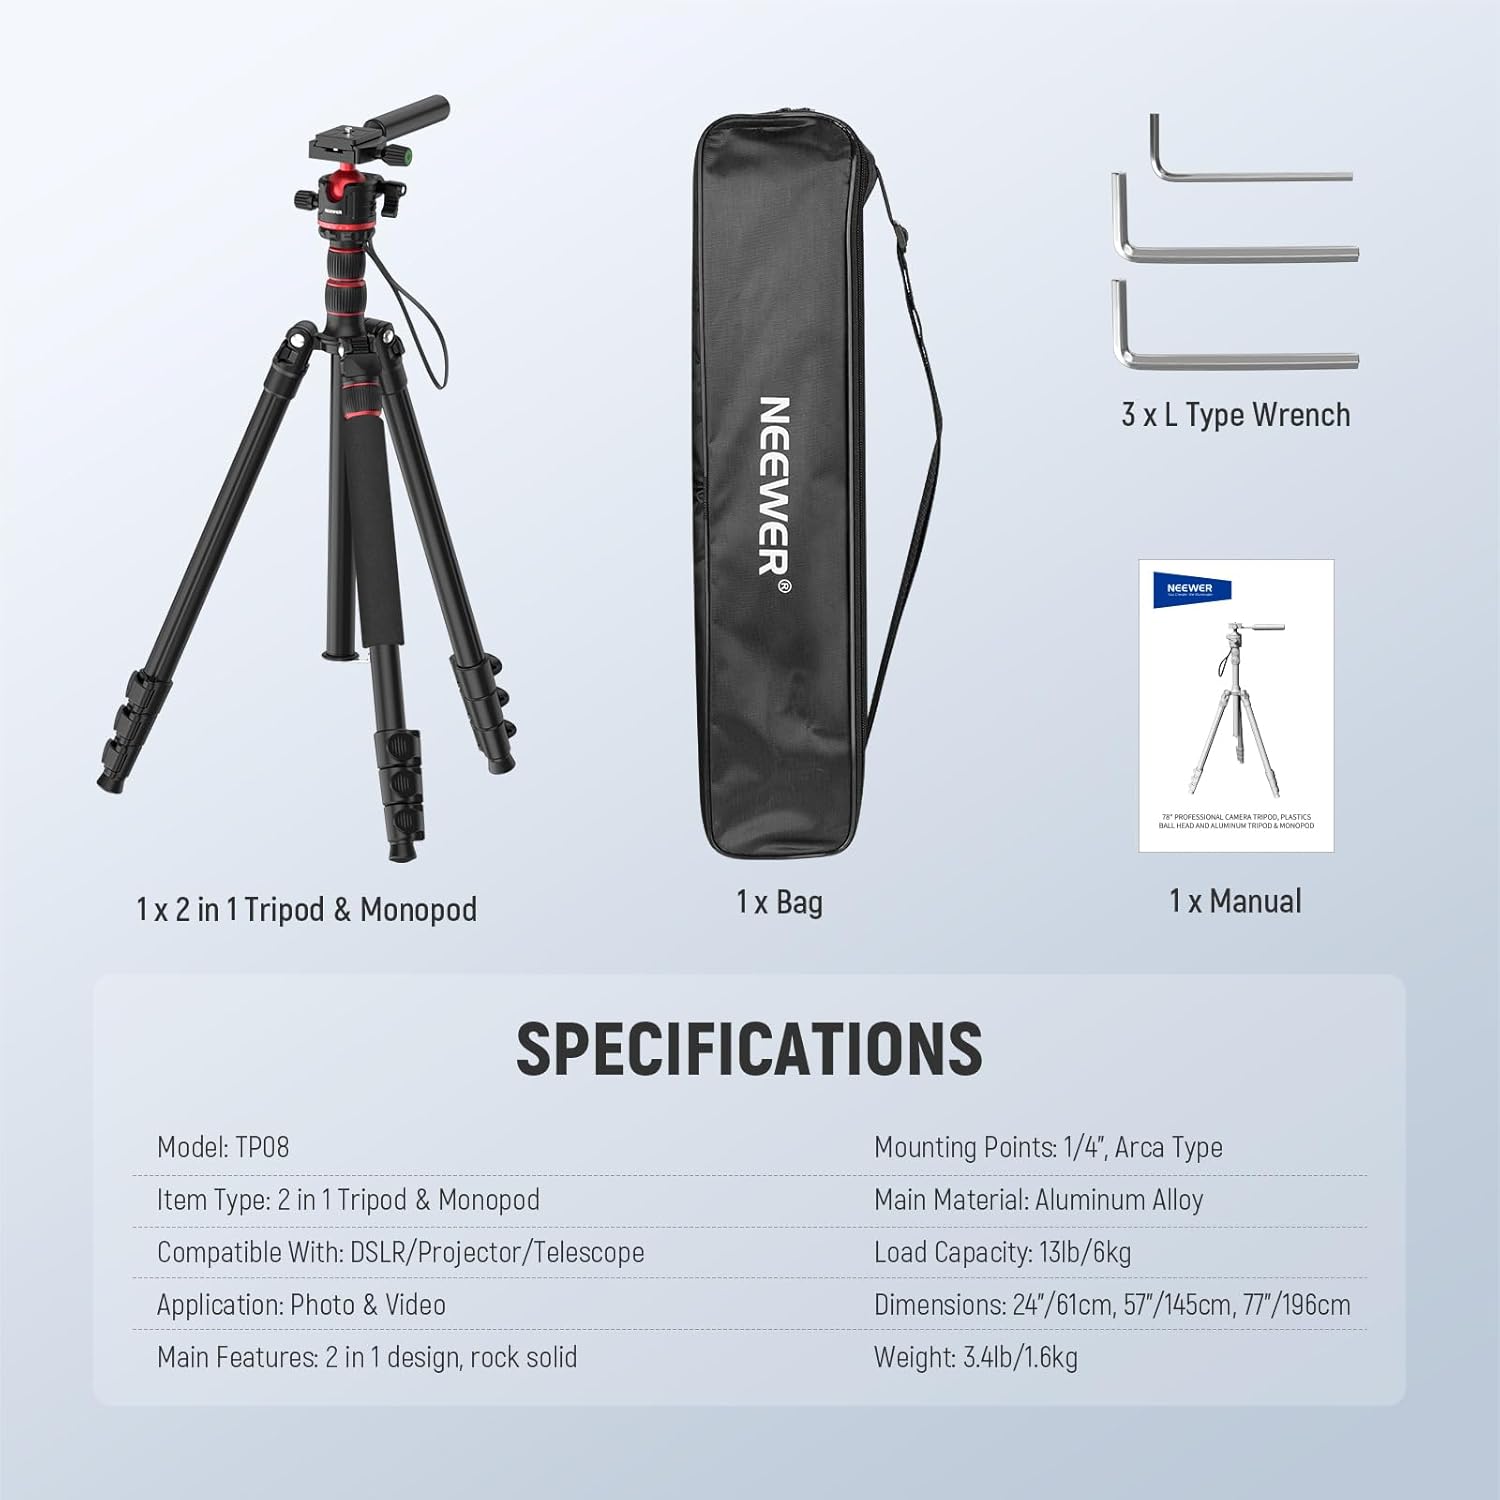
Image: NEEWER Basics TP08 package contents.
4. Setup
4.1 Unfolding the Tripod
- Release the leg locking buckles on each leg.
- Extend the tripod legs to the desired length.
- Adjust the leg angles using the leg adjustment locks at the top of each leg.
- Secure all leg locking buckles and adjustment locks firmly.

Image: The NEEWER Basics TP08 tripod set up for outdoor photography.
4.2 Attaching the Ball Head and Quick Release Plate
- Ensure the ball head is securely attached to the tripod's central column.
- Locate the Arca-type quick release plate.
- Attach the quick release plate to the bottom of your camera or device using the 1/4" screw. Tighten securely.
- Slide the quick release plate with your camera into the clamp on the ball head.
- Tighten the quick release plate locking knob to secure your camera.

Image: Detail of the ball head and quick release plate, showing compatibility with various cameras.
4.3 Monopod Conversion
- To convert to a monopod, unscrew the central column from the tripod base.
- One of the tripod legs is detachable. Unscrew this leg from the tripod.
- Attach the central column to the detachable leg to form a monopod.
- The ball head can be transferred to the monopod for use.

Image: Visual guide for transforming the tripod into a monopod.
5. Operation
5.1 Adjusting Height and Leg Angles
- Height Adjustment: Loosen the leg locking buckles, extend or retract the leg sections, and then firmly close the buckles. The central column can also be extended by loosening its locking knob.
- Leg Angle Adjustment: Press the leg adjustment lock at the top of each leg to select one of the available angle positions.
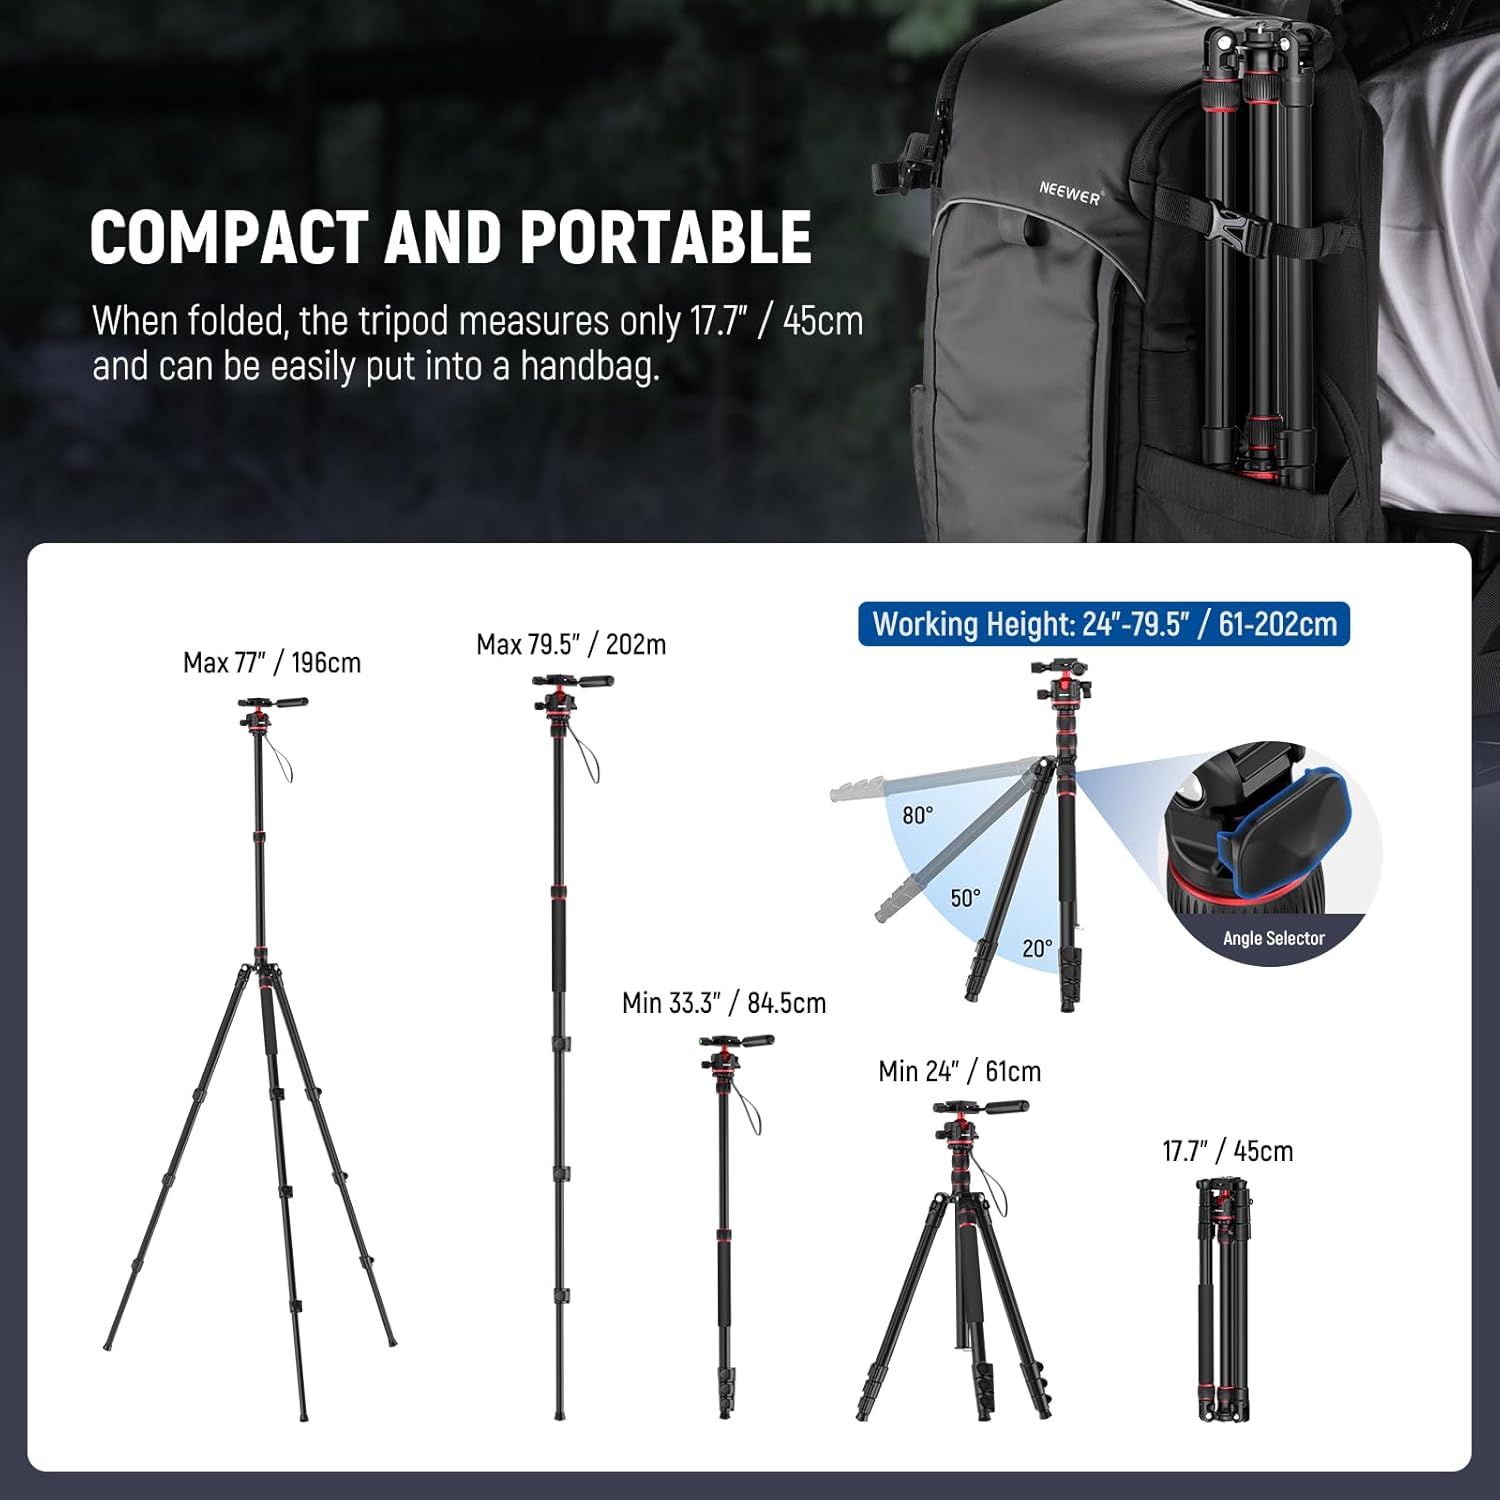
Image: Different height and angle configurations of the tripod.
5.2 Using the Ball Head
- 360° Rotation: Loosen the ball head locking knob to allow the camera to rotate horizontally for panoramic shots. Tighten to secure.
- 90° Tilt: The ball head allows for tilting the camera up to 90 degrees for vertical shooting. Use the integrated handle for precise adjustments.
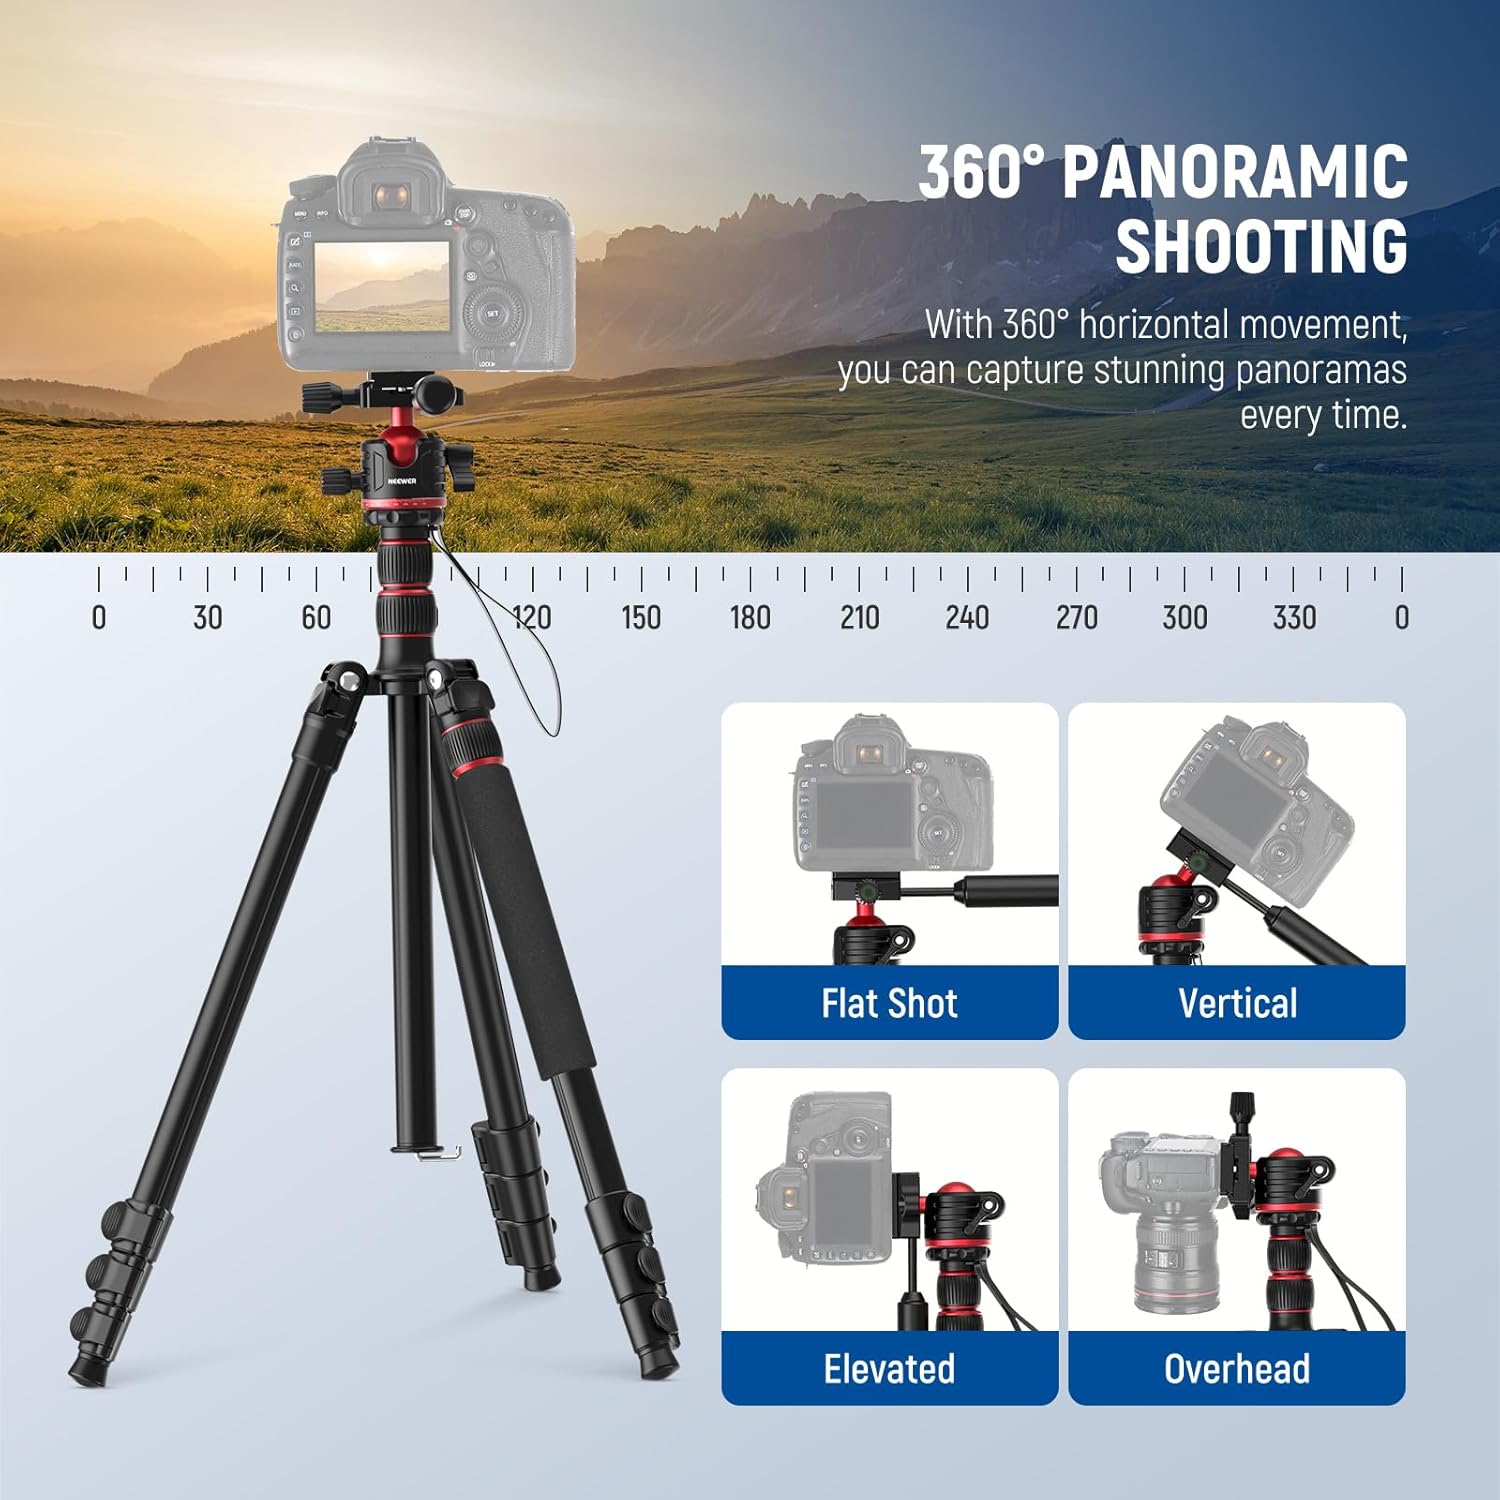
Image: Panoramic shooting and different camera positions using the ball head.
5.3 Low Angle and Inverted Axis Shooting
- For ultra-low angles, the central column can be removed entirely.
- For macro photography, the central column can be inverted and re-installed upside down, allowing the camera to be positioned very close to the ground.

Image: Low angle and macro shooting configurations.
5.4 Stability Features
- Non-slip Feet: The rubber foot pads provide enhanced grip on various surfaces.
- Weight Hook: A hook is provided on the central column to hang additional weight (e.g., a camera bag) for increased stability, especially in windy conditions.
- Bubble Level: Use the integrated bubble level on the quick release plate to ensure your setup is perfectly horizontal.
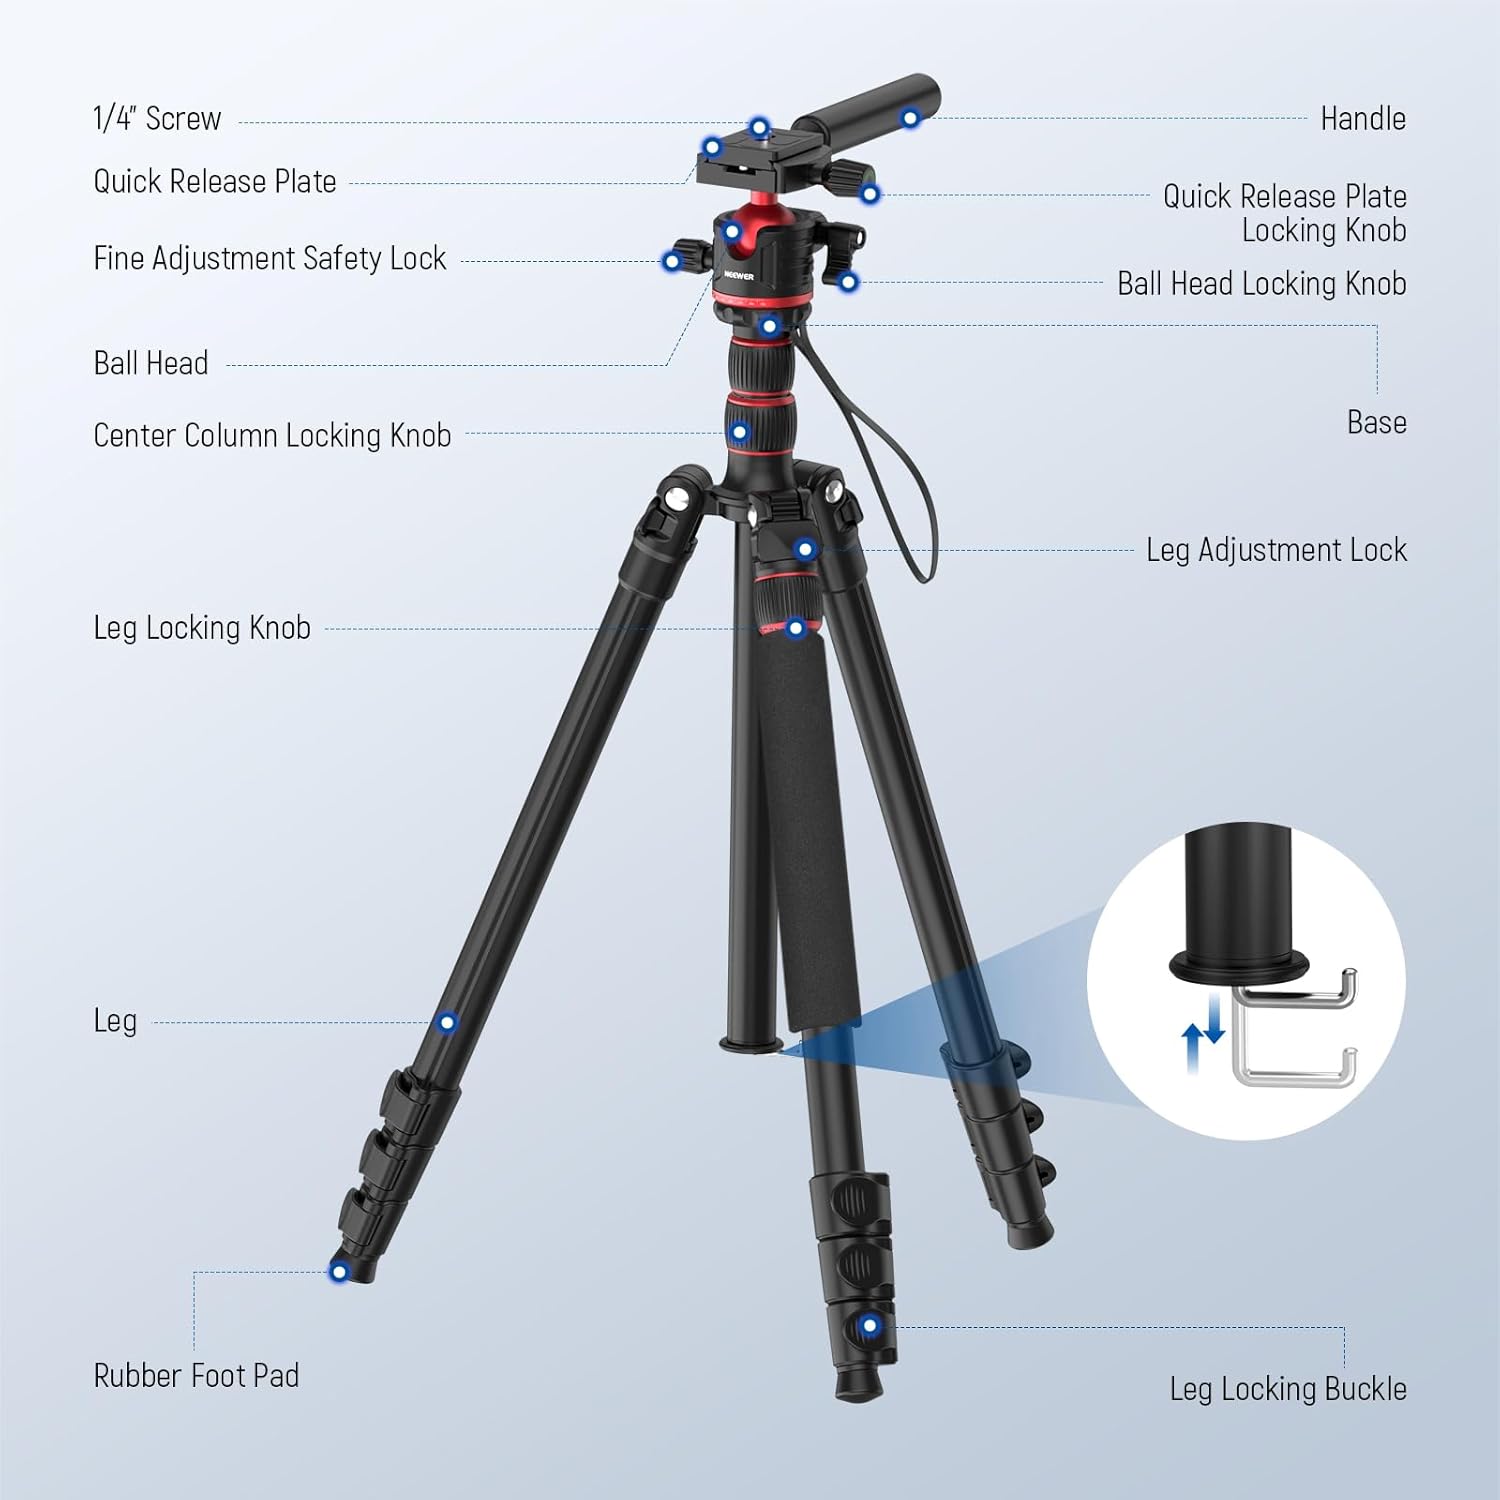
Image: Key stability and leveling features of the tripod.
6. Maintenance
- Cleaning: Wipe the tripod with a soft, dry cloth after each use. For stubborn dirt, use a slightly damp cloth and mild soap, then dry thoroughly. Avoid harsh chemicals or abrasive cleaners.
- Lubrication: Periodically check the leg locks and ball head for smooth operation. If stiff, apply a small amount of silicone-based lubricant to the moving parts, avoiding contact with rubber components.
- Storage: Store the tripod in its provided carrying bag in a cool, dry place away from direct sunlight and extreme temperatures. Ensure it is fully collapsed before storage.
- Inspection: Regularly inspect all screws, bolts, and locking mechanisms for tightness. Tighten any loose parts using the provided hex wrenches.
7. Troubleshooting
- Tripod is unstable:
- Ensure all leg sections are fully extended and their locking buckles are securely fastened.
- Verify that the leg angles are set evenly.
- Check if the central column locking knob is tightened.
- Add weight to the hook on the central column for increased stability.
- Ball head movement is stiff or loose:
- Adjust the tension of the ball head locking knob.
- Clean any debris from the ball head mechanism.
- Quick release plate not securing camera:
- Ensure the 1/4" screw on the plate is fully tightened to your camera.
- Verify the quick release plate is correctly seated in the ball head clamp and the locking knob is fully tightened.
If you encounter issues not listed here or if problems persist, please contact NEEWER customer support for assistance.
8. Specifications
| Feature | Detail |
|---|---|
| Model | TP08 |
| Item Type | 2-in-1 Tripod & Monopod |
| Main Material | Aluminum Alloy |
| Load Capacity | 13lb / 6kg |
| Maximum Height | 77 Inches / 196cm |
| Minimum Height | 24 Inches / 61cm |
| Folded Dimensions | 19.88 x 4.92 x 4.72 inches (approx.) |
| Item Weight | 4.14 pounds / 1.6kg |
| Tripod Head Type | Ball Head |
| Mounting Points | 1/4", Arca Type |
| Compatible Devices | DSLR Cameras, Camcorders, Phones (with adapter), Telescopes |
| Color | Black and Red |
9. Warranty & Support
NEEWER products are designed for reliability and performance. This product comes with a standard manufacturer's warranty against defects in materials and workmanship. For specific warranty details, including duration and coverage, please refer to the warranty card included in your package or visit the official NEEWER website.
For technical support, troubleshooting assistance, or any inquiries regarding your NEEWER Basics TP08 tripod monopod, please contact NEEWER customer service through their official website or the contact information provided in your product documentation.
Please retain your proof of purchase for warranty claims.


