1. Introduction
Thank you for choosing the Netzu Alarm Clock 6206ZD. This digital alarm clock is designed to provide a reliable wake-up experience, especially for heavy sleepers and individuals with hearing impairments, through its powerful vibrating bed shaker, loud alarm, and bright wake-up light. This manual will guide you through the setup, operation, and maintenance of your new alarm clock.
2. Safety Information
- Ensure the power adapter is connected to a suitable power outlet.
- Do not expose the device to water or excessive moisture.
- Keep the device away from heat sources and direct sunlight.
- Use only the provided power adapter.
- For battery backup, insert 2 AAA batteries (not included) correctly, observing polarity.
- Do not attempt to disassemble or repair the device yourself. Contact customer support for assistance.
3. Package Contents
Please check the package for the following items:
- Netzu Alarm Clock (Model 6206ZD)
- Vibrating Bed Shaker
- Power Adapter
- User Manual

Figure 3.1: Product Components
4. Product Overview
Familiarize yourself with the main components of your Netzu Alarm Clock:
- Front Display: Large RGB LED time display.
- Top Panel: Snooze button, light bar, control buttons (Time Set, Alarm Set, Brightness, Color, Volume, DST).
- Rear Panel: Power input port, bed shaker port, battery compartment.
- Vibrating Bed Shaker: Connects to the alarm clock for silent or combined wake-up.
5. Setup
5.1 Power Connection
- Connect the provided power adapter to the DC input port on the back of the alarm clock.
- Plug the power adapter into a standard electrical outlet. The display will light up.
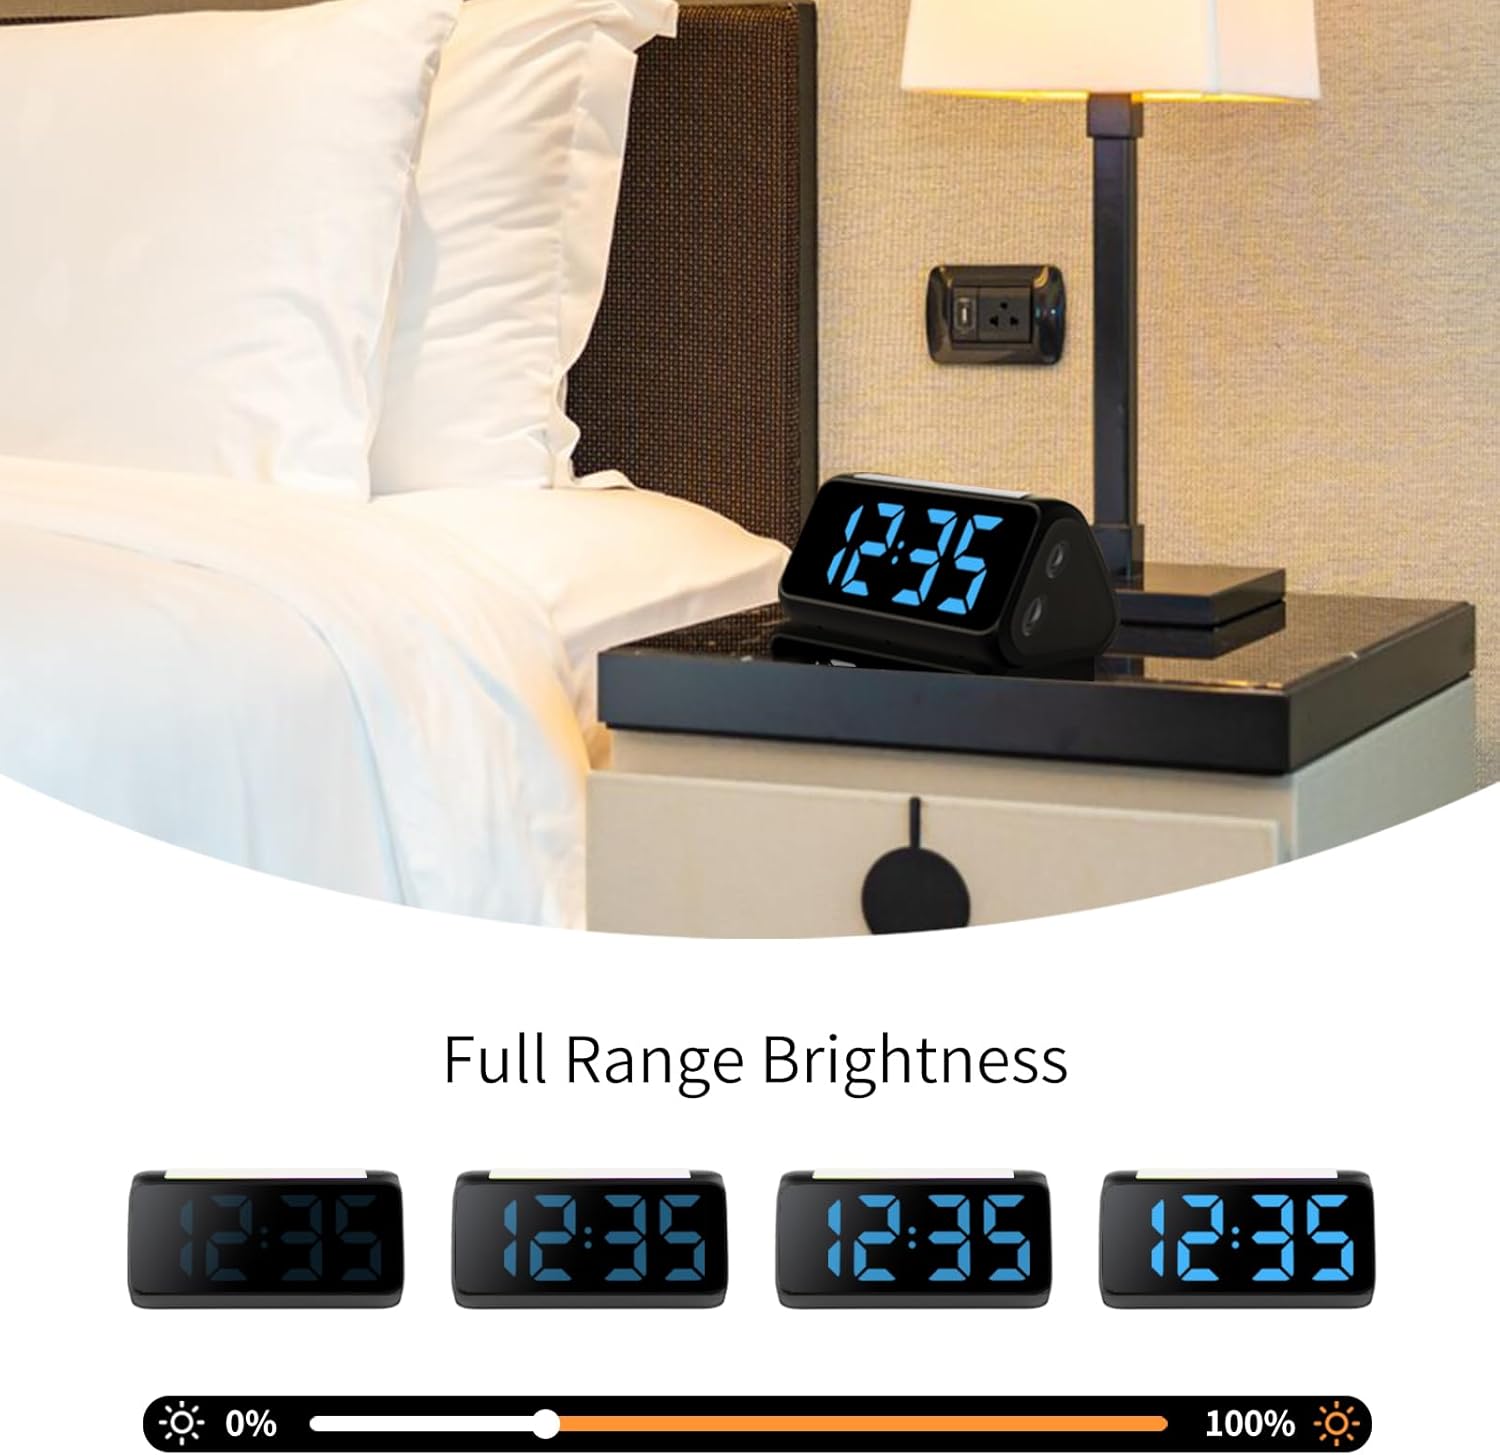
Figure 5.1: Power Connection
5.2 Battery Installation (for Power Loss Memory)
To retain time and alarm settings during a power outage, install backup batteries:
- Open the battery compartment cover on the bottom of the alarm clock.
- Insert 2 new AAA batteries (not included), ensuring correct polarity (+ and -).
- Close the battery compartment cover securely.
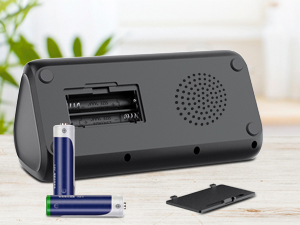
Figure 5.2: Battery Compartment
5.3 Connecting the Bed Shaker
Plug the cable of the vibrating bed shaker into the dedicated port on the back of the alarm clock. Place the shaker under your pillow or mattress for optimal vibration.
6. Operating Instructions
6.1 Setting the Time
- Press and hold the TIME SET button (usually located on the top or back) until the hour digits flash.
- Use the +/- buttons (or similar adjustment buttons) to set the hour. Pay attention to AM/PM indicators if in 12-hour format.
- Press TIME SET again to confirm the hour and move to minutes.
- Use the +/- buttons to set the minutes.
- Press TIME SET one last time to save the time.
- To switch between 12-hour and 24-hour display, briefly press the TIME SET button when not in setting mode.
- To adjust for Daylight Saving Time (DST), long press the DST button to add or subtract an hour.
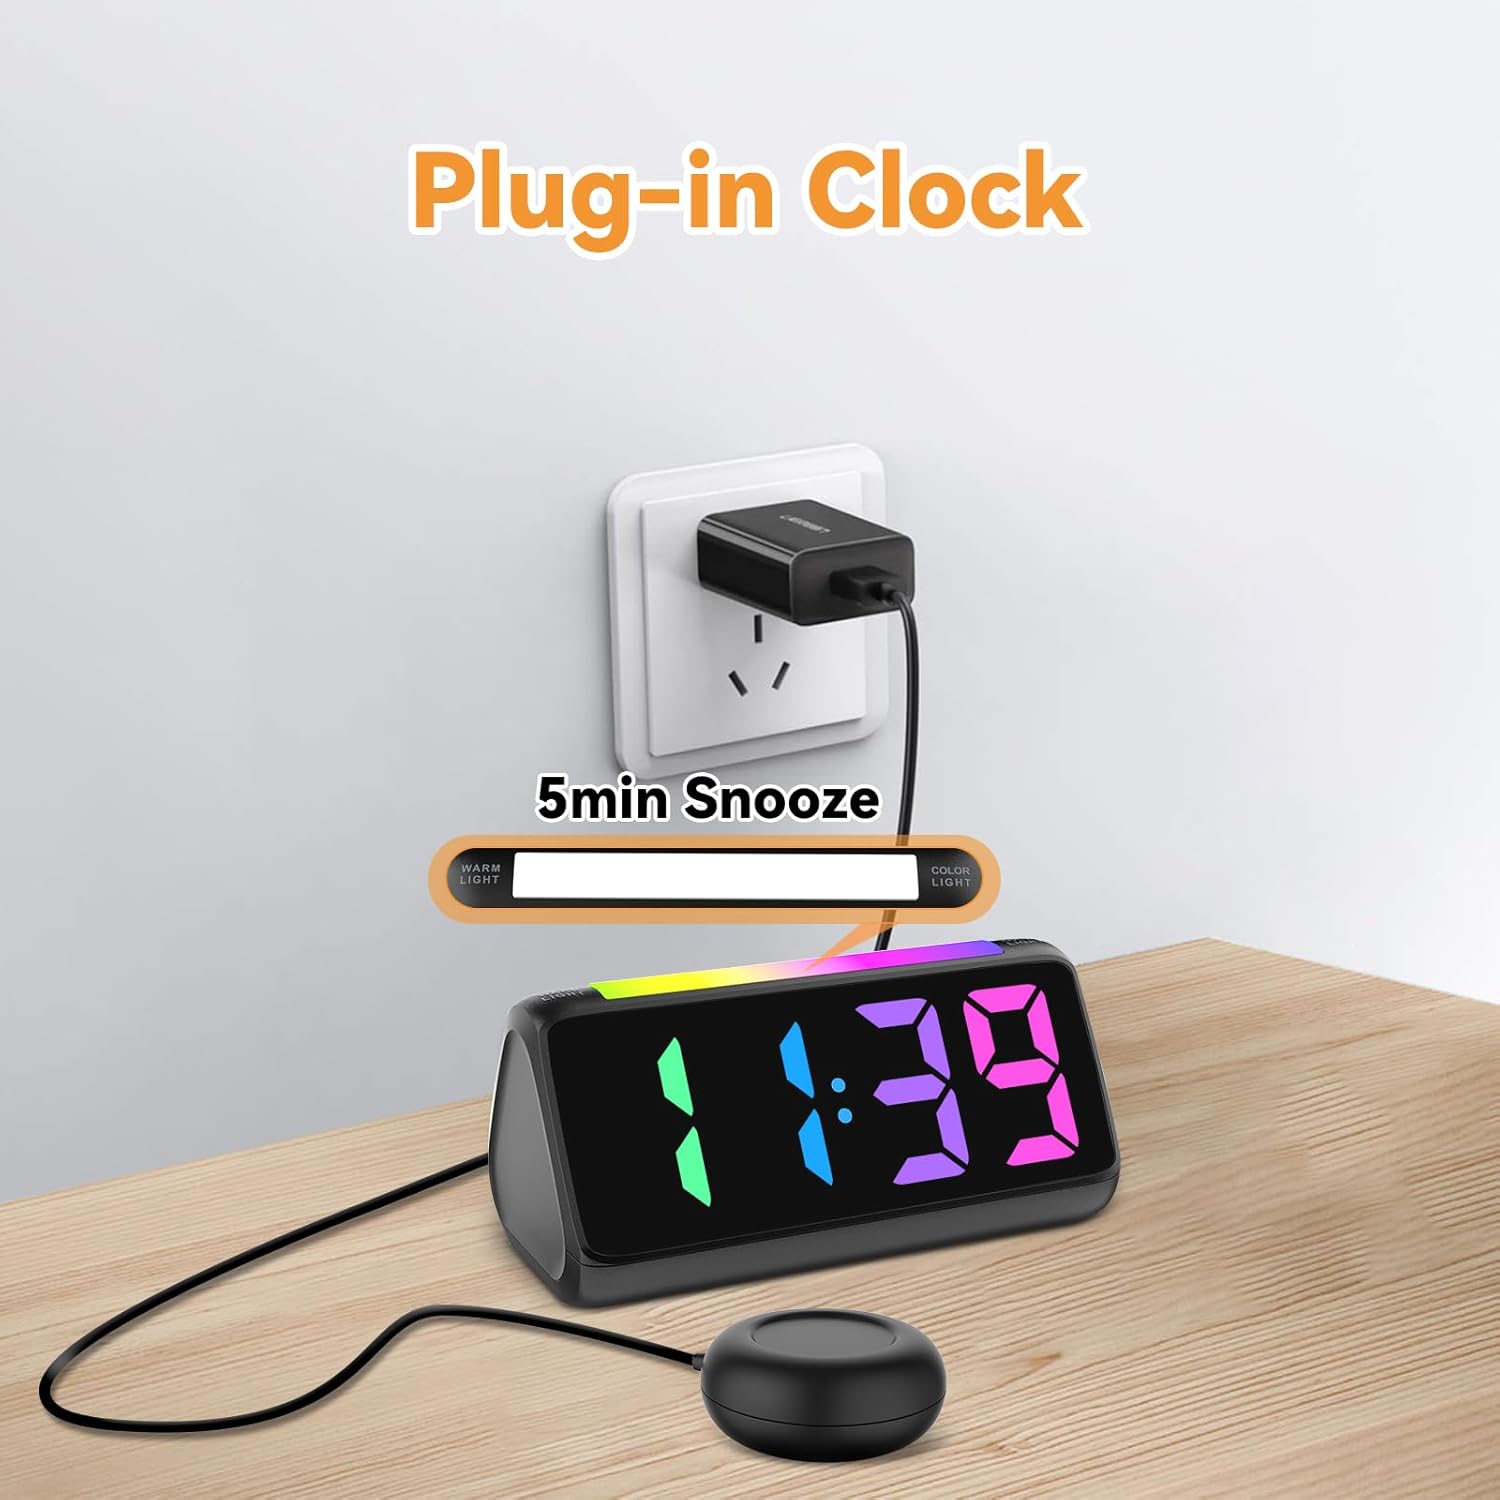
Figure 6.1: Time Format Display
6.2 Setting the Alarm
The alarm clock offers three wake-up modes: Ring Only, Vibration Only, or Ring + Vibration.
- Press and hold the ALARM SET button until the alarm hour digits flash.
- Use the +/- buttons to set the desired alarm hour.
- Press ALARM SET again to confirm the hour and move to minutes.
- Use the +/- buttons to set the desired alarm minutes.
- Press ALARM SET again to select the wake-up mode: Ring Only, Vibration Only, or Ring + Vibration. An icon on the display will indicate the selected mode.
- Press ALARM SET one last time to save the alarm settings.
- To adjust alarm volume (4 levels, up to 110 dB), use the VOLUME button (or +/- during alarm setting).

Figure 6.2: Three Wake-up Modes
6.3 Snooze Function
When the alarm sounds, press the large SNOOZE button on the top of the clock to temporarily silence the alarm for 5 minutes. The alarm will sound again after the snooze period.
6.4 Adjusting Display Brightness and Color
The alarm clock features an RGB display with 11 color options and adjustable brightness (10%-100%).
- Press the BRIGHTNESS button (or a dedicated dimmer button) to cycle through brightness levels for the time display.
- Press the COLOR button to cycle through the 11 available display colors.
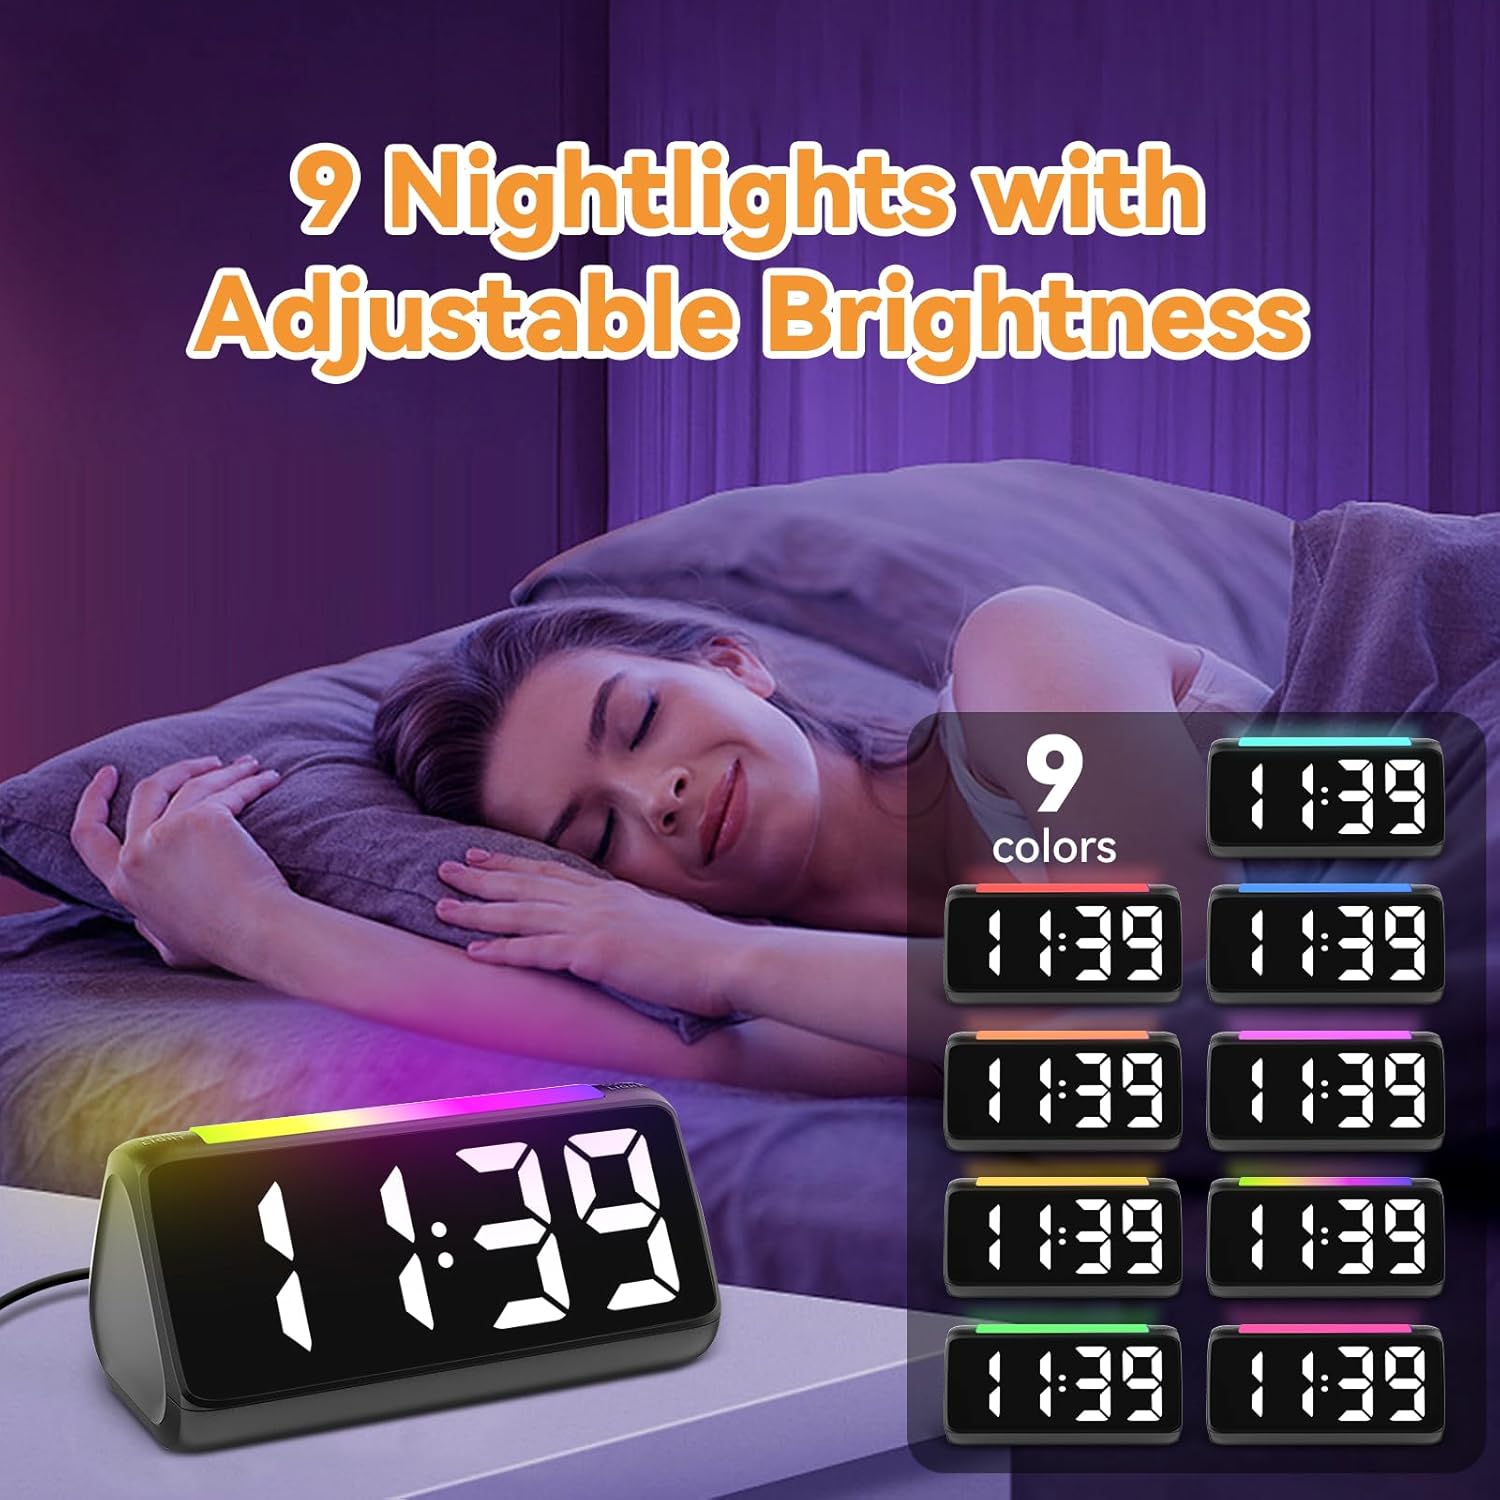
Figure 6.3: Colorful Display Options
6.5 Using the Night Light
The integrated light bar offers 9 color modes and adjustable brightness, functioning as a calming night light.
- Press the NIGHT LIGHT button (or a dedicated light bar button) to turn the night light on/off and cycle through color modes.
- Use the +/- buttons (or a separate brightness control for the night light) to adjust its brightness.

Figure 6.4: Night Light with Adjustable Brightness
7. Maintenance
To ensure the longevity and proper functioning of your alarm clock:
- Clean the device with a soft, dry cloth. Do not use abrasive cleaners or solvents.
- Keep the bed shaker clean and free from dust.
- If not using the clock for an extended period, remove the AAA backup batteries to prevent leakage.
8. Troubleshooting
| Problem | Possible Cause | Solution |
|---|---|---|
| Clock display is off. | No power or power outage. | Ensure the power adapter is securely plugged in. Check the power outlet. If using battery backup, ensure batteries are fresh and correctly installed. |
| Alarm does not sound/vibrate. | Alarm not set, incorrect mode, or volume too low. | Verify alarm time and mode (Ring Only, Vibration Only, or Ring + Vibration) are correctly set. Increase alarm volume. Ensure the bed shaker is properly connected. |
| Display is too bright/dim. | Brightness setting needs adjustment. | Press the BRIGHTNESS button to cycle through brightness levels. |
| Time is incorrect. | Time not set or DST not adjusted. | Follow instructions in Section 6.1 to set the correct time. Adjust DST if applicable. |
| Night light not working. | Night light is off or brightness is too low. | Press the NIGHT LIGHT button to turn it on and cycle through modes. Adjust its brightness. |
9. Specifications
| Feature | Detail |
|---|---|
| Brand | Netzu |
| Model Number | 6206ZD |
| Display Type | Digital LED (RGB) |
| Power Source | Corded Electric |
| Battery Backup | 2 AAA batteries (not included) |
| Alarm Volume | 4 levels, up to 110 dB |
| Snooze Duration | 5 minutes |
| Display Colors | 11 options |
| Night Light Colors | 9 modes |
| Product Dimensions | 6.3"W x 3.15"H |
| Material | Plastic |
| Item Weight | 13.7 ounces |
10. Warranty and Support
Netzu products are designed for reliability and performance. For warranty information or technical support, please refer to the contact details provided with your purchase or visit the official Netzu website. Please have your model number (6206ZD) ready when contacting support.