Phanteks M25-140 Gen2
Phanteks M25-140 Gen2 Triple Pack 140mm ARGB High Performance Cooling Fans
Instruction Manual
1. Introduction
This manual provides comprehensive instructions for the installation, operation, and maintenance of your Phanteks M25-140 Gen2 Triple Pack ARGB High Performance Cooling Fans. Please read this manual thoroughly before installation to ensure proper setup and optimal performance. These fans are designed for efficient thermal management in computer systems, featuring daisy-chain connectivity, integrated D-RGB lighting, and a single cable solution for simplified management.
2. Package Contents
- 3x Phanteks M25-140 Gen2 Fans
- Fan Screws
- Installation Guide (this document)
3. Key Features
- Daisy-Chain Unified Fan Design: Connect multiple fans easily for a streamlined setup and reduced cable clutter.
- Single Cable Solution (Linq6): Consolidates both fan power (PWM) and lighting controls (D-RGB) into one cable for a cleaner build.
- Integrated D-RGB Lighting: Features smooth lighting on fan blades and an infinity mirror effect in the hub for aesthetic customization.
- Sleek Aesthetic: Includes screw covers to provide a polished, professional appearance.
- Versatile Airflow Options: Available in regular and reverse airflow models to optimize system configuration.
- High Cooling Performance: Engineered for effective cooling on radiators and heat sinks.
4. Safety Information
- Ensure your computer system is powered off and unplugged from the wall outlet before installation.
- Handle components carefully to avoid damage.
- Refer to your motherboard manual for specific fan header locations and D-RGB connection instructions.
- Do not force connectors; ensure proper alignment before plugging in.
- Keep small parts away from children.
5. Setup and Installation
5.1. Prepare Your System
Before beginning installation, ensure your computer is completely powered down and disconnected from the power supply. Open your PC case to access the fan mounting locations.
5.2. Daisy-Chain Connection
The M25-140 Gen2 fans feature a unified frame design allowing them to be daisy-chained together. Align the connectors on the side of each fan and gently push them together until they click into place. This creates a single block of fans, simplifying installation and cable management.
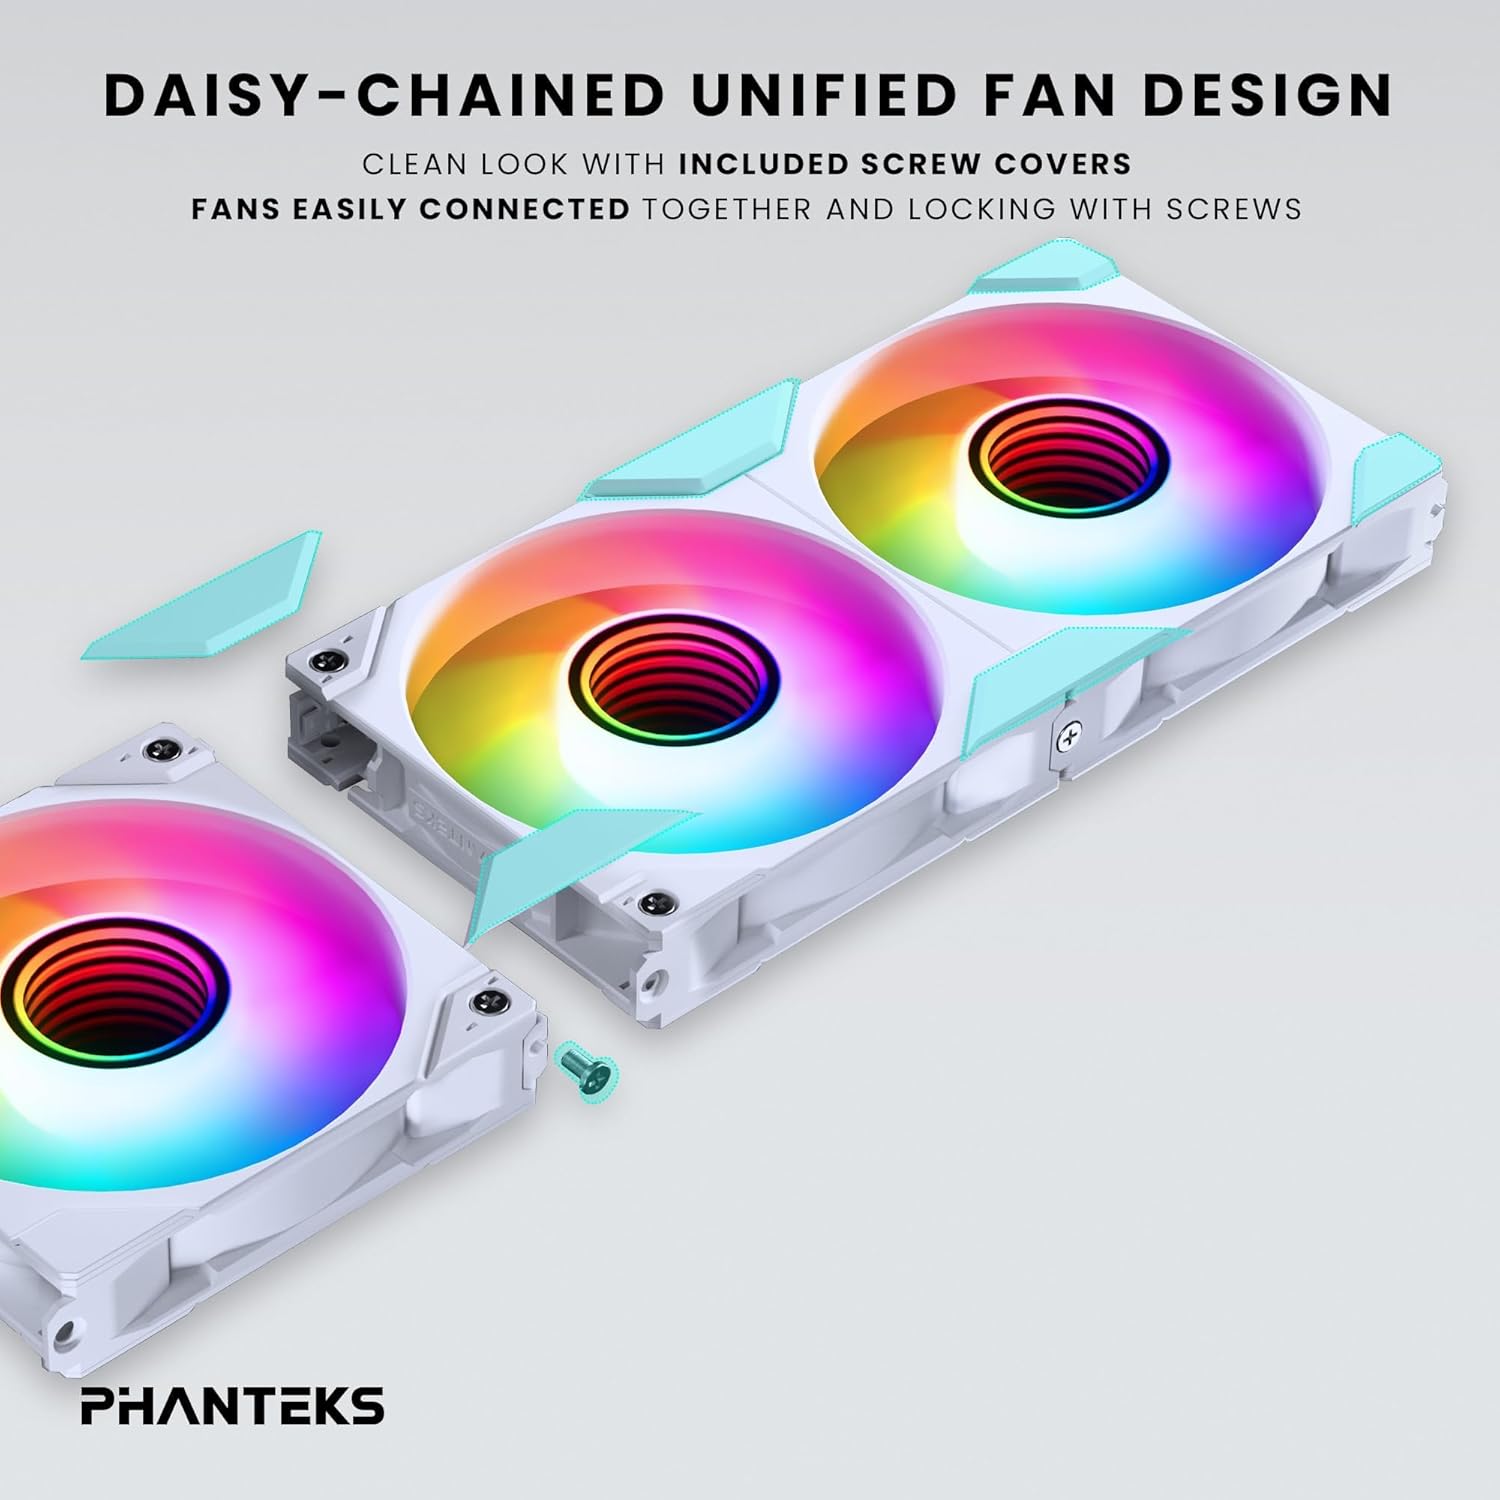
Image: Daisy-chaining Phanteks M25-140 Gen2 fans and applying screw covers.
5.3. Secure Fans
Mount the daisy-chained fan unit to your desired location (e.g., case front, top, or radiator) using the provided fan screws. Ensure the fans are securely fastened to prevent vibration. Once secured, attach the included screw covers for a clean, finished look.
5.4. Cable Connection (Linq6)
Connect the single Linq6 cable from the daisy-chained fan unit to a compatible fan/ARGB controller or motherboard header. This single cable manages both PWM fan speed control and D-RGB lighting. Refer to your motherboard or controller manual for specific connection points.

Image: Detail of the Linq6 single cable solution for fan and D-RGB control.
5.5. Airflow Configuration
The M25-140 Gen2 fans are available in regular and reversed airflow models. Ensure you install the correct fan type for your desired airflow direction. Regular fans pull air from the front to the rear, while reversed fans push air from the rear to the front.

Image: Diagram showing regular and reversed airflow directions for M25-140 Gen2 fans.
6. Operation
6.1. ARGB Lighting Control
Once connected, the D-RGB lighting can be controlled via your motherboard's RGB software (e.g., ASUS Aura Sync, MSI Mystic Light Sync, Gigabyte RGB Fusion 2.0, ASRock Polychrome Sync) or a compatible Phanteks D-RGB controller (e.g., NEXLINQ). Customize colors, effects, and brightness to match your system's aesthetic.

Image: Close-up of the integrated D-RGB lighting with infinity mirror effect in the fan hub.
6.2. Fan Speed Control
The fan speed (PWM) is controlled through the same Linq6 cable. You can adjust fan curves and speeds via your motherboard's BIOS/UEFI settings or dedicated fan control software provided by your motherboard manufacturer. This allows for optimization between cooling performance and noise levels.
7. Maintenance
Regular maintenance ensures optimal performance and longevity of your fans.
- Cleaning: Periodically clean the fan blades and frame to remove dust buildup. Use compressed air or a soft, dry cloth. Ensure the system is powered off before cleaning.
- Inspection: Check cables for any signs of wear or damage. Ensure all connections remain secure.
- Do not use liquid cleaners directly on the fans or electrical components.
8. Troubleshooting
| Issue | Possible Cause | Solution |
|---|---|---|
| Fans not spinning | Loose power connection, incorrect header, insufficient power. | Check Linq6 cable connection to motherboard/controller. Ensure power supply is adequate. Verify BIOS settings for fan headers. |
| ARGB lighting not working | Loose D-RGB connection, incompatible header, software issue. | Ensure Linq6 cable is properly connected to a 3-pin 5V D-RGB header (not 4-pin 12V RGB). Check motherboard RGB software settings. |
| Fans making unusual noise | Obstruction, loose mounting, faulty fan. | Inspect for cables or debris obstructing fan blades. Tighten mounting screws. If noise persists, contact support. |
| Fans not detected by software | Incorrect connection, outdated software/drivers. | Verify Linq6 connection. Update motherboard BIOS and chipset drivers. Ensure RGB software is the latest version. |
9. Specifications
| Feature | Detail |
|---|---|
| Model | M25-140 Gen2 (PH-F140M25_G2_DWT01_3P) |
| Fan Dimensions | 140mm x 140mm x 25mm |
| Rotational Speed | Up to 1800 RPM |
| Air Flow Capacity | 101.78 Cubic Feet Per Minute (CFM) |
| Noise Level | 36.4 dB |
| Power Connector Type | 6-Pin (Linq6) |
| Voltage | 12V (Fan), 5V (ARGB) |
| Wattage | 10 watts (total for pack) |
| Material | Polybutylene Terephthalate, Polycarbonate |
| Compatible Devices | Desktop, Gaming PC, Server |
10. Warranty and Support
Phanteks products are manufactured to the highest quality standards. This product comes with a limited warranty against defects in materials and workmanship. For specific warranty terms and conditions, please refer to the official Phanteks website or contact your local retailer.
For technical support, troubleshooting assistance, or to inquire about replacement parts, please visit the official Phanteks support page: www.phanteks.com/support.html
Related Documents - M25-140 Gen2
 |
Phanteks M25 Gen2 Fan Installation Guide This guide provides detailed instructions for installing Phanteks M25 Gen2 series computer fans, covering model compatibility, scope of delivery, connection steps, and important safety information. |
 |
Phanteks REVOLT Power Supply Installation Guide Comprehensive installation guide for the Phanteks REVOLT series power supplies, detailing cable connection, PSU installation, and hybrid fan control features. |
 |
Phanteks Glacier One M25 G2 Liquid CPU Cooler Installation Guide Comprehensive installation guide for the Phanteks Glacier One M25 G2 liquid CPU cooler, covering model compatibility, scope of delivery, mounting hardware, step-by-step assembly instructions, and safety information. |
 |
Phanteks M25 Gen2 Fan Installation Guide Installation instructions and safety guidelines for Phanteks M25 Gen2 series fans, including LINQ6 cable setup and D-RGB configuration. |
 |
Phanteks Rebate Offer: Save on PC Components from Newegg Details of a mail-in rebate offer from Phanteks for various PC components purchased at Newegg.com and Newegg.ca. Includes product list, redemption instructions, and terms and conditions. |
 |
Phanteks Rebate Offer Instructions - Newegg Purchase Detailed instructions for redeeming Phanteks product rebates purchased from Newegg.com and Newegg.ca, including eligible products, submission steps, and terms and conditions. |
Ask a question about this manual
Ask about setup, troubleshooting, compatibility, parts, safety, or missing instructions. Manuals+ will review the question and use this page’s manual context to help answer it.