Introduction
This instruction manual provides essential information for the proper installation, operation, and maintenance of the ZMYUXME 320AB03C2LV0.3 Tcon Board. This Tcon (Timing Controller) board is a critical component responsible for processing video signals and transmitting them to the TV panel, ensuring clear and accurate image display. It is designed for specific 32-inch television models.
Compatibility
The ZMYUXME 320AB03C2LV0.3 Tcon Board is compatible with the following 32-inch TV logic board models:
- LJ94-02832K
- 32S550A
- LTZ320AP01
Verify your TV's existing Tcon board model number before proceeding with installation to ensure compatibility.
Safety Information
Always prioritize safety when working with electronic components. Failure to follow these guidelines may result in personal injury or damage to the product or TV.
- Disconnect Power: Always unplug the TV from the power outlet before beginning any repair or installation work.
- Static Electricity: Wear an anti-static wrist strap or frequently touch a grounded metal object to discharge static electricity, which can damage sensitive electronic components.
- Handle with Care: Hold the Tcon board by its edges to avoid touching components or connectors directly.
- Professional Assistance: If you are unsure about any step, consult a qualified technician.
Setup and Installation
This section outlines the general steps for replacing a Tcon board. Specific TV models may have slight variations.
1. Preparation
- Ensure the TV is unplugged from all power sources.
- Place the TV face down on a soft, clean surface to protect the screen.
- Gather necessary tools: screwdrivers (Phillips, flathead), anti-static wrist strap, plastic prying tools (optional).
2. Accessing the Tcon Board
- Remove the back cover of the TV by unscrewing all retaining screws. Carefully detach the cover.
- Locate the existing Tcon board. It is typically a rectangular circuit board located at the top or bottom center of the TV panel, often covered by a metal shield.
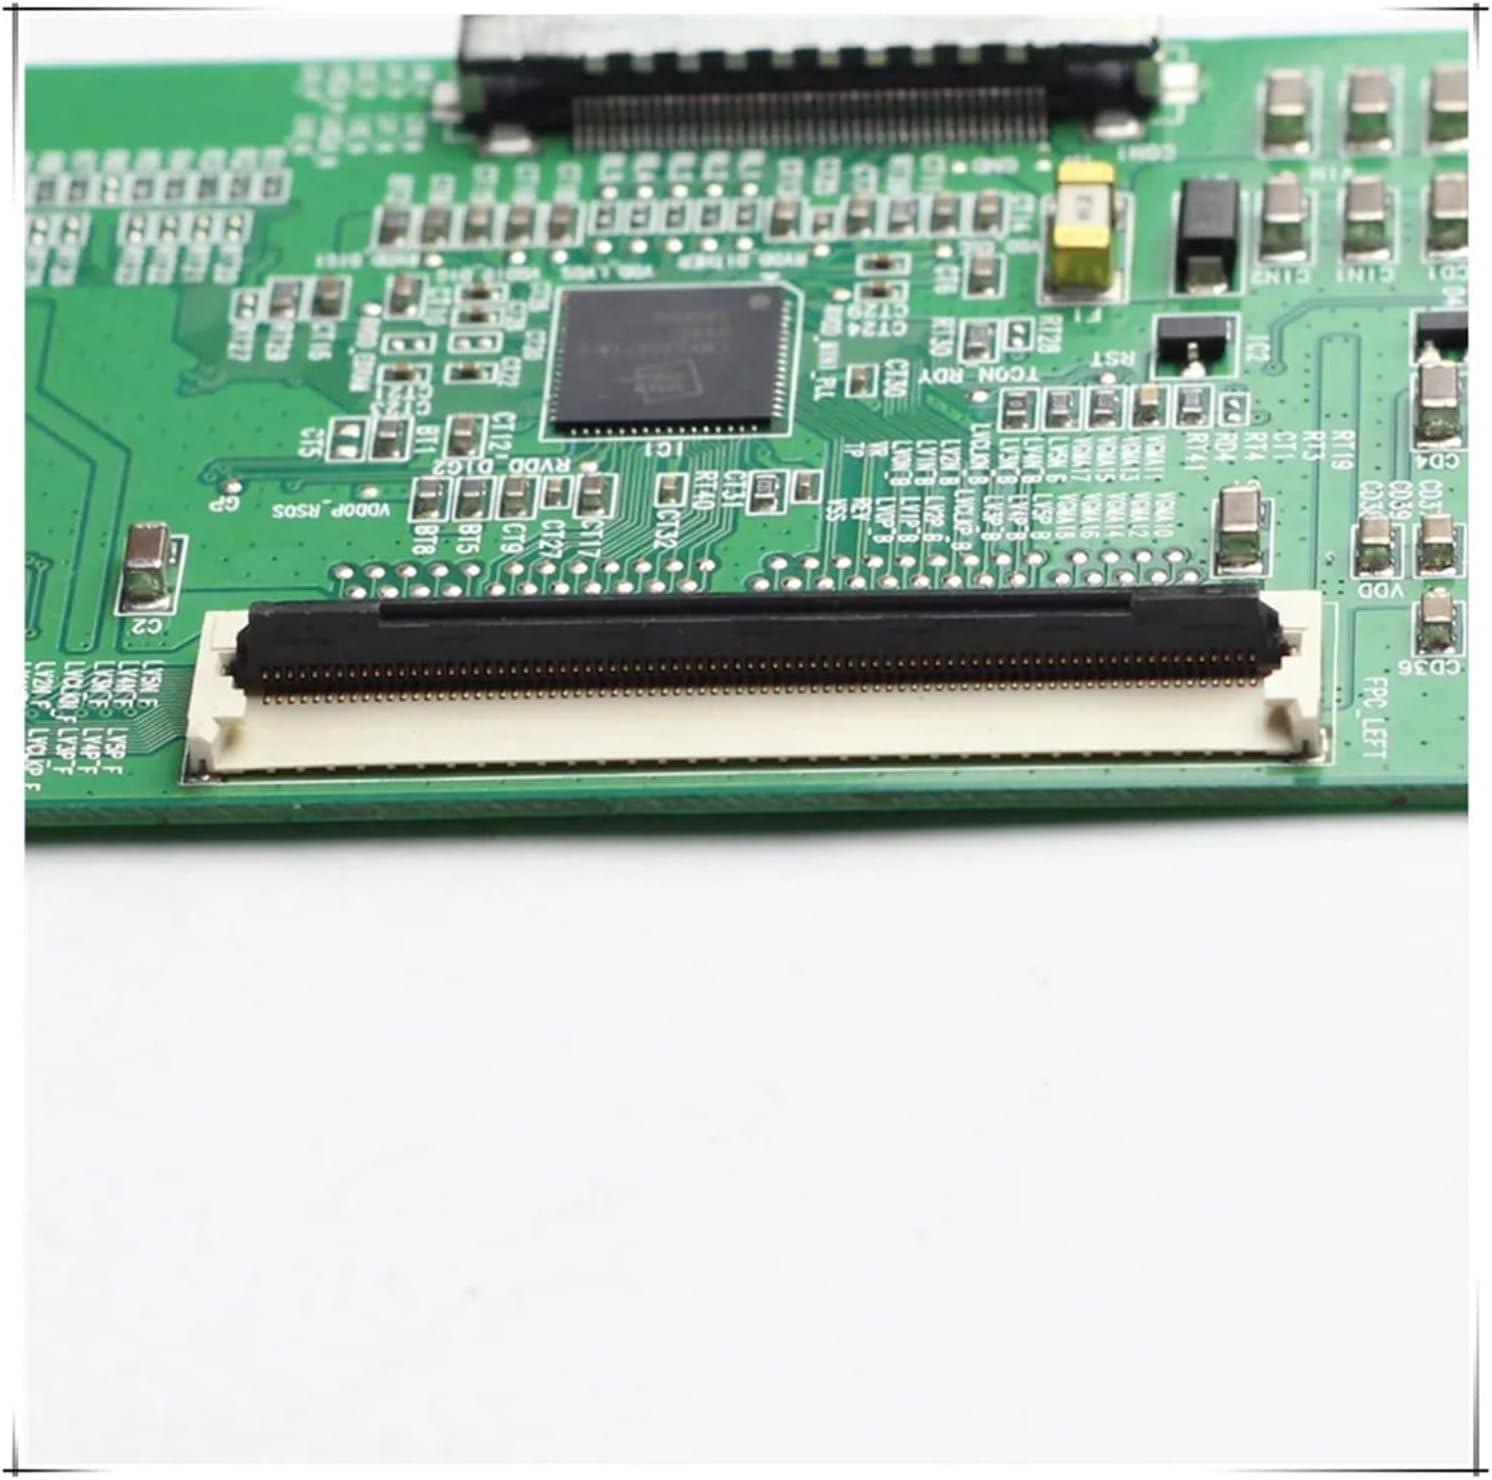
Image: Top view of the ZMYUXME 320AB03C2LV0.3 Tcon board. This image displays the layout of the board, including various integrated circuits, capacitors, resistors, and the main ribbon cable connectors. Note the model number "320AB03C2LV0.3" printed on the board.
3. Removing the Old Tcon Board
- Carefully disconnect the ribbon cables (LVDS cables) that connect the Tcon board to the main board and to the TV panel. These usually have small locking tabs that need to be gently lifted or slid.

Image: Close-up view of the FPC (Flexible Printed Circuit) connector on the Tcon board. This connector is used to attach the ribbon cables that transmit signals to the TV panel. Ensure these are handled with extreme care during disconnection and reconnection.
- Unscrew any screws securing the Tcon board to the TV chassis.
- Gently lift and remove the old Tcon board.
4. Installing the New Tcon Board
- Position the new ZMYUXME 320AB03C2LV0.3 Tcon board in the same location as the old one.
- Secure it with the screws previously removed. Do not overtighten.
- Carefully reconnect the ribbon cables. Ensure they are fully seated and the locking tabs are secured. Improper connection can lead to display issues.

Image: Detailed view of another connector on the Tcon board, possibly an LVDS input. This image shows the precision required when handling these connections. Always ensure proper alignment before securing.

Image: Rear view of the Tcon board. This side typically contains solder points and circuit traces. It is important not to touch these areas directly to prevent damage.

Image: Angled perspective of the ZMYUXME 320AB03C2LV0.3 Tcon board, providing a comprehensive view of its dimensions and the arrangement of components on the circuit board. This view helps in identifying the board's physical characteristics.
5. Reassembly and Testing
- Before replacing the back cover, temporarily plug in the TV and power it on to check if the display is working correctly. Look for a clear image without distortions or lines.
- If the display is satisfactory, unplug the TV again.
- Reattach the TV's back cover and secure all screws.
- Plug in the TV and power it on for final testing.
Operating (Post-Installation Check)
Once the Tcon board is installed, its operation is integrated with the TV's main functions. The primary "operation" is to ensure the TV displays a clear and stable image.
- Power On: Turn on the TV using the remote control or power button.
- Image Quality: Observe the screen for proper image display, correct colors, and absence of flickering, lines, or other artifacts.
- Input Sources: Test various input sources (HDMI, AV, etc.) to confirm consistent image quality across all inputs.
Maintenance
The Tcon board itself requires no routine maintenance. However, general care for your television can prolong the life of all internal components, including the Tcon board.
- Ventilation: Ensure the TV's ventilation openings are not blocked to prevent overheating.
- Cleanliness: Keep the TV and its surroundings free from dust. Dust accumulation inside the TV can lead to overheating and component failure.
- Power Surges: Consider using a surge protector to safeguard against electrical fluctuations.
Troubleshooting
If you encounter issues after installing the new Tcon board, refer to the following troubleshooting steps:
| Problem | Possible Cause | Solution |
|---|---|---|
| No image or distorted image (e.g., lines, flickering, incorrect colors) |
|
|
| TV powers on but no backlight |
|
|
For persistent issues, it is recommended to seek assistance from a qualified television repair technician.
Specifications
| Feature | Detail |
|---|---|
| Model Number | 320AB03C2LV0.3 |
| Compatible TV Size | 32 inches |
| Compatible Logic Boards | LJ94-02832K, 32S550A, LTZ320AP01 |
| Package Dimensions | 1.18 x 0.79 x 0.39 inches |
| Item Weight | 1.76 ounces |
| Manufacturer | zmy655 (Brand: ZMYUXME) |
Support
For further assistance or inquiries regarding the ZMYUXME 320AB03C2LV0.3 Tcon Board, please contact the seller or manufacturer through the platform where the product was purchased. Provide your product model number and a detailed description of the issue for efficient support.