Product Overview
The CHKOSDA CH3387 is an 18.7-inch LED digital wall clock designed for clear visibility and precise timekeeping. It features automatic time synchronization via GPS satellites, ensuring accuracy without manual adjustments. This multi-functional clock includes a large display, adjustable brightness, alarm, and timer functions, making it suitable for various environments such as homes, offices, classrooms, and gyms.

Image: The CHKOSDA CH3387 digital wall clock displaying its dimensions (17.72 inches wide, 5.91 inches high, 0.984 inches deep) and an overview of its features including time display, calendar, temperature, alarm, remote control, count up, count down, auto dimmer, GPS automatic time calibration, and 12/24 hour format.
What's in the Box
Please verify that all components are present upon unboxing:
- CHKOSDA CH3387 Digital Wall Clock
- Remote Control (with 1x CR2025 button battery installed)
- USB-A Power Cord (approximately 10 ft long)
- AC Power Adapter
- Instruction Manual
- Spare CR2025 button battery for remote control
- 1x CR2032 button battery (for clock's memory backup)
Setup
Power Connection
Connect the provided USB-A power cord to the clock and then to the AC power adapter. Plug the adapter into a standard electrical outlet. The clock requires continuous AC power for operation. For temporary use, the USB cable can be connected to a computer or mobile power supply.
Mounting Options
The clock offers versatile placement options:
- Desk/Shelf Placement: Utilize the integrated double easel kickstands on the back of the clock to prop it up on a flat surface.
- Wall Mounting: Use the keyholes provided on the back of the clock for secure wall installation. Appropriate tools (e.g., drill, screws) will be required for wall mounting.
Initial Time Synchronization
Upon connecting to power, the clock will automatically attempt to synchronize its time with GPS satellites. This process ensures accurate timekeeping without manual adjustment. A small green light will illuminate on the clock's display once the satellite signal is successfully received and time is synchronized.

Image: Illustration of the GPS Automatic Time Sync feature, showing a satellite signal being received by the clock, resulting in a small green light indicating successful synchronization. This ensures accurate time display without manual setting.
Operating Instructions
All advanced settings and adjustments for the clock are primarily controlled via the included remote control. Refer to the remote control's button layout in the manual for specific functions.
Time Synchronization
The clock features automatic GPS satellite time synchronization. This function ensures the clock always displays the precise time. Manual time setting is generally not required.
Adjusting Brightness
The clock offers 8 levels of manual brightness adjustment and an automatic dimming mode:
- Manual Adjustment: Use the remote control to cycle through 8 distinct brightness levels to suit your preference or ambient lighting conditions.
- Automatic Dimming Mode: Activate this mode via the remote control. The clock will intelligently adjust its display brightness based on the surrounding light, ensuring optimal visibility without causing eye strain.

Image: The clock demonstrating its automatic dimming feature in a dimly lit room and illustrating the 8 distinct levels of manual brightness adjustment, from brightest to dimmest.
Using the Timer Functions
The clock includes both countdown and stopwatch functions, managed via the remote control:
- Countdown Timer: Set a specific duration for tasks, workouts, or events. The clock will count down the remaining time. The countdown can be set for up to 999 days, 23 hours, 59 minutes, and 59 seconds.
- Stopwatch: Use this function to precisely track elapsed time for activities, sports, or other time-sensitive measurements. The stopwatch can measure up to 99 hours and 59 minutes.
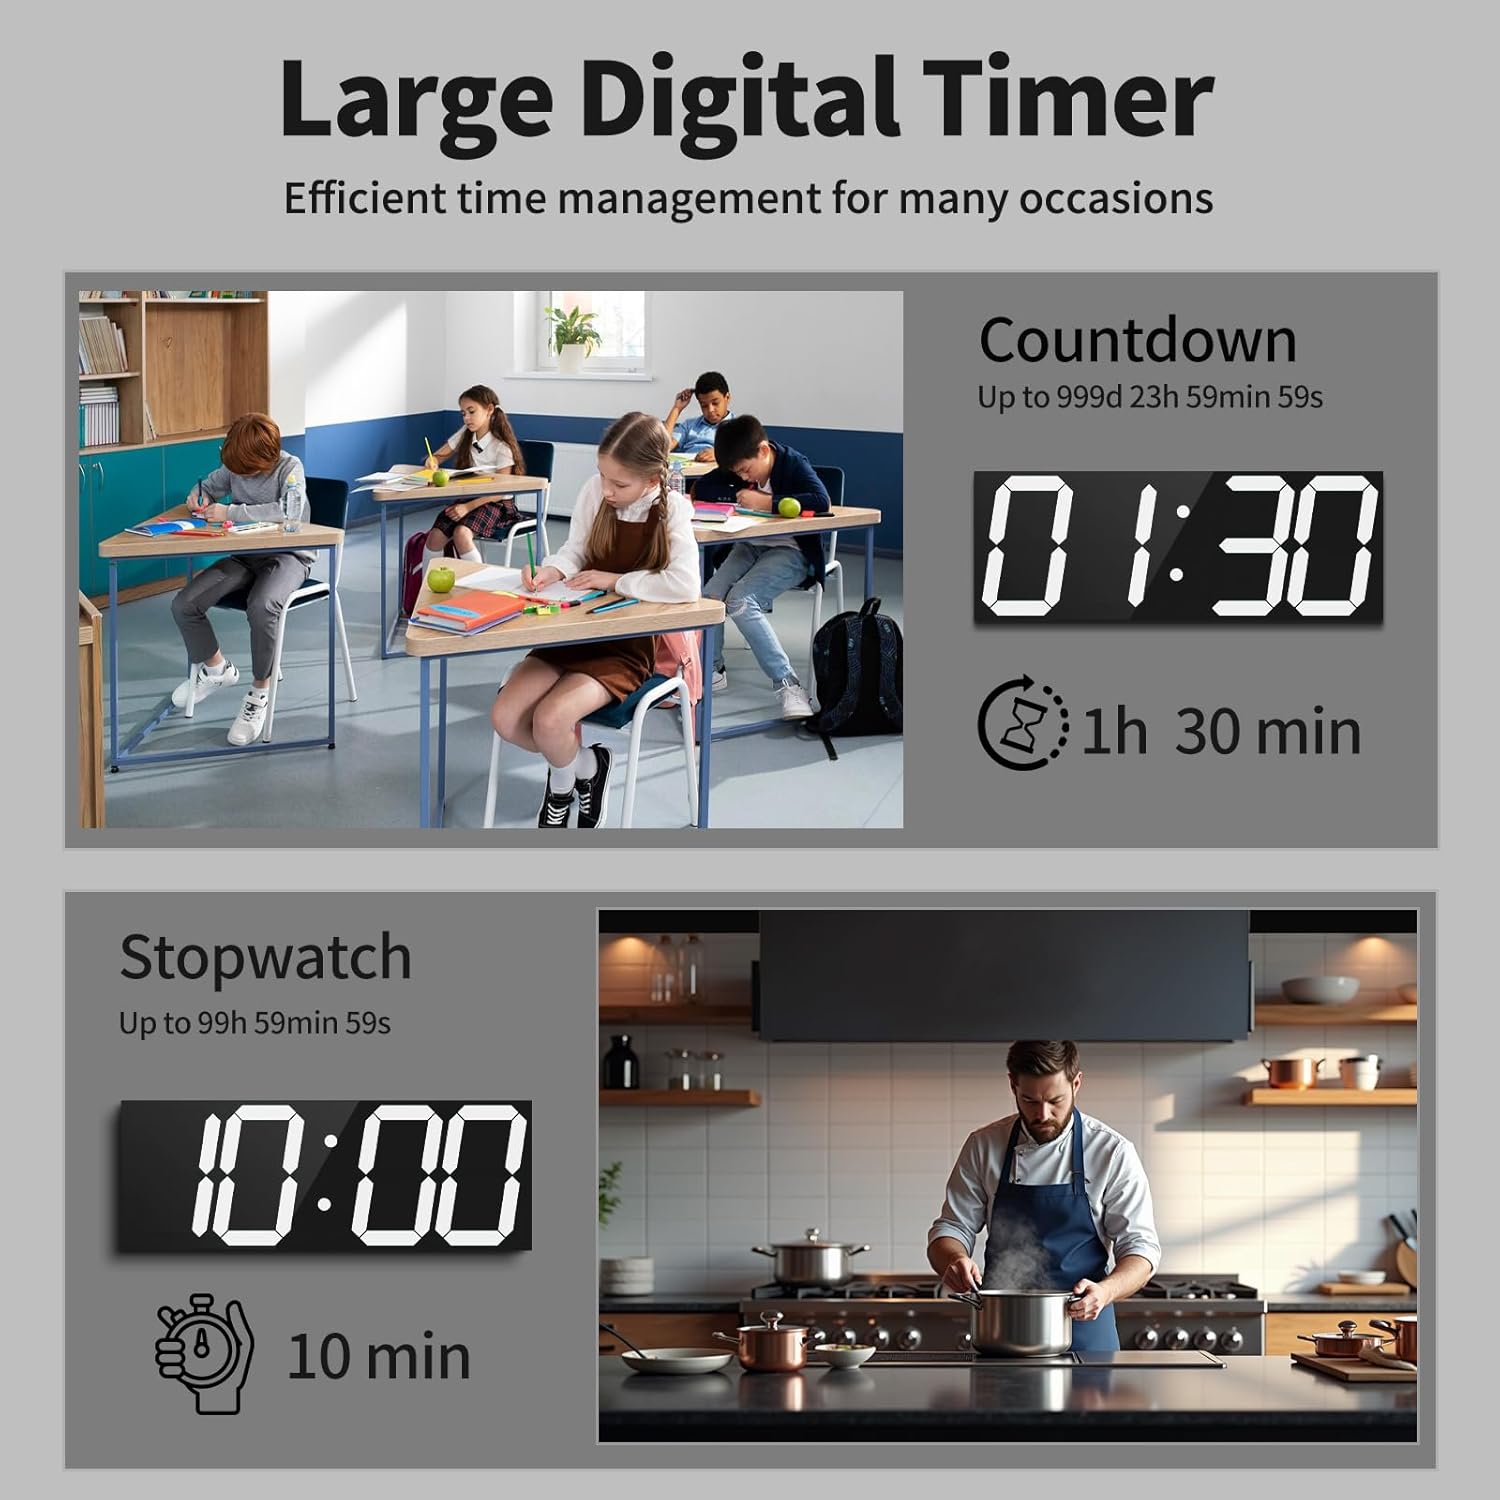
Image: The clock illustrating its countdown function (e.g., 1 hour 30 minutes remaining) in a classroom setting, and its stopwatch function (e.g., 10 minutes elapsed) in a kitchen setting.
Setting Alarms
The clock supports setting multiple alarms. Use the remote control to access the alarm settings, set desired times, and activate/deactivate alarms. The clock can support up to 16 individual alarms.
Time, Date, and Temperature Display Cycle
The clock can cycle through displaying the current time, date, and ambient temperature. Use the remote control to configure this display mode and switch between 12-hour and 24-hour time formats.

Image: The clock demonstrating its ability to cycle through displaying the current time (10:30), date (04 02), and temperature (25°C), along with an option for 12/24 hour format.
Maintenance
To ensure the longevity and optimal performance of your CHKOSDA CH3387 Digital Wall Clock, follow these maintenance guidelines:
- Cleaning: Gently wipe the display and casing with a soft, dry, or slightly damp cloth. Avoid using abrasive cleaners, solvents, or chemical sprays, as these can damage the surface.
- Power Supply: Ensure the power cord is not bent, pinched, or damaged. Use only the provided power adapter.
- Battery Replacement: The remote control uses a CR2025 button battery. Replace it when the remote's functionality diminishes. The clock itself uses a CR2032 battery for memory backup during power outages; replace this battery periodically to ensure settings are retained.
- Placement: Avoid placing the clock in direct sunlight for extended periods or in areas with extreme temperatures or high humidity.
Troubleshooting
| Problem | Possible Cause | Solution |
|---|---|---|
| Clock does not power on. | No power, loose connection, faulty adapter/cord. | Check power outlet, ensure all connections are secure. Try a different outlet. Verify power adapter and cord are undamaged. |
| Time is incorrect or not syncing. | Poor GPS signal, initial sync in progress, interference. | Ensure the clock has a clear view of the sky (indirectly, if indoors near a window). Allow time for initial GPS sync. Avoid placing near large metal objects or electronics that may cause interference. |
| Remote control not working. | Battery depleted, incorrect battery insertion, obstruction. | Replace the CR2025 battery in the remote. Ensure battery is inserted with correct polarity. Remove any obstructions between the remote and the clock. |
| Display is too dim or too bright. | Brightness settings need adjustment, automatic dimming mode active. | Use the remote control to manually adjust brightness levels. If in automatic dimming mode, ambient light conditions will dictate brightness; adjust manually if preferred. |
| Settings are lost after power outage. | CR2032 backup battery depleted or missing. | Replace the CR2032 button battery inside the clock. Ensure it is correctly installed. |
Specifications
| Feature | Detail |
|---|---|
| Model Number | CH3387 |
| Brand | CHKOSDA |
| Display Type | Digital LED |
| Color | White (LED display) |
| Product Dimensions | 17.6" W x 6.3" H |
| Power Source | Corded Electric (USB) |
| Mounting Type | Wall Mount, Desk/Shelf (with kickstand) |
| Special Features | Adjustable Brightness (8 levels + Auto Dimmer), Alarm, LED Display, Large Display, Timer (Countdown/Stopwatch), GPS Automatic Time Sync, Date, Temperature |
| Operation Mode | Atomic |
| Material | Acrylonitrile Butadiene Styrene (ABS) Plastic |
| 2.64 pounds (1.2 kg) |
Support
For further assistance, troubleshooting, or product inquiries, please visit the official CHKOSDA store or contact customer support through the retailer where the product was purchased.
CHKOSDA Store: https://www.amazon.com/stores/CHKOSDA/page/F1703156-4BC0-48D4-8506-39D78DE1A2D1