Introduction
Welcome to the user manual for your new OKANEN 80-Stitch Computerized Sewing Machine. This machine is designed for both beginners and experienced sewers, offering 80 unique stitch patterns, quilting capabilities, and user-friendly features such as an automatic needle threader and a drop-in bobbin. Please read this manual thoroughly before operating your machine to ensure safe and efficient use.
Important Safety Instructions
- Always unplug the sewing machine from the electrical outlet immediately after use and before cleaning, removing covers, or making any user servicing adjustments.
- Do not operate the machine with wet hands or while standing on a wet surface.
- Keep fingers away from all moving parts. Special care is required around the sewing machine needle.
- Use only attachments recommended by the manufacturer as contained in this manual.
- Never operate the sewing machine if it has a damaged cord or plug, if it is not working properly, or if it has been dropped or damaged.
- Do not pull or carry by cord, use cord as a handle, close a door on cord, or pull cord around sharp edges or corners. Keep cord away from heated surfaces.
- Never drop or insert any object into any opening.
- This appliance is not intended for use by persons (including children) with reduced physical, sensory or mental capabilities, or lack of experience and knowledge, unless they have been given supervision or instruction concerning use of the appliance by a person responsible for their safety.
Product Overview
Familiarize yourself with the main components of your OKANEN sewing machine.
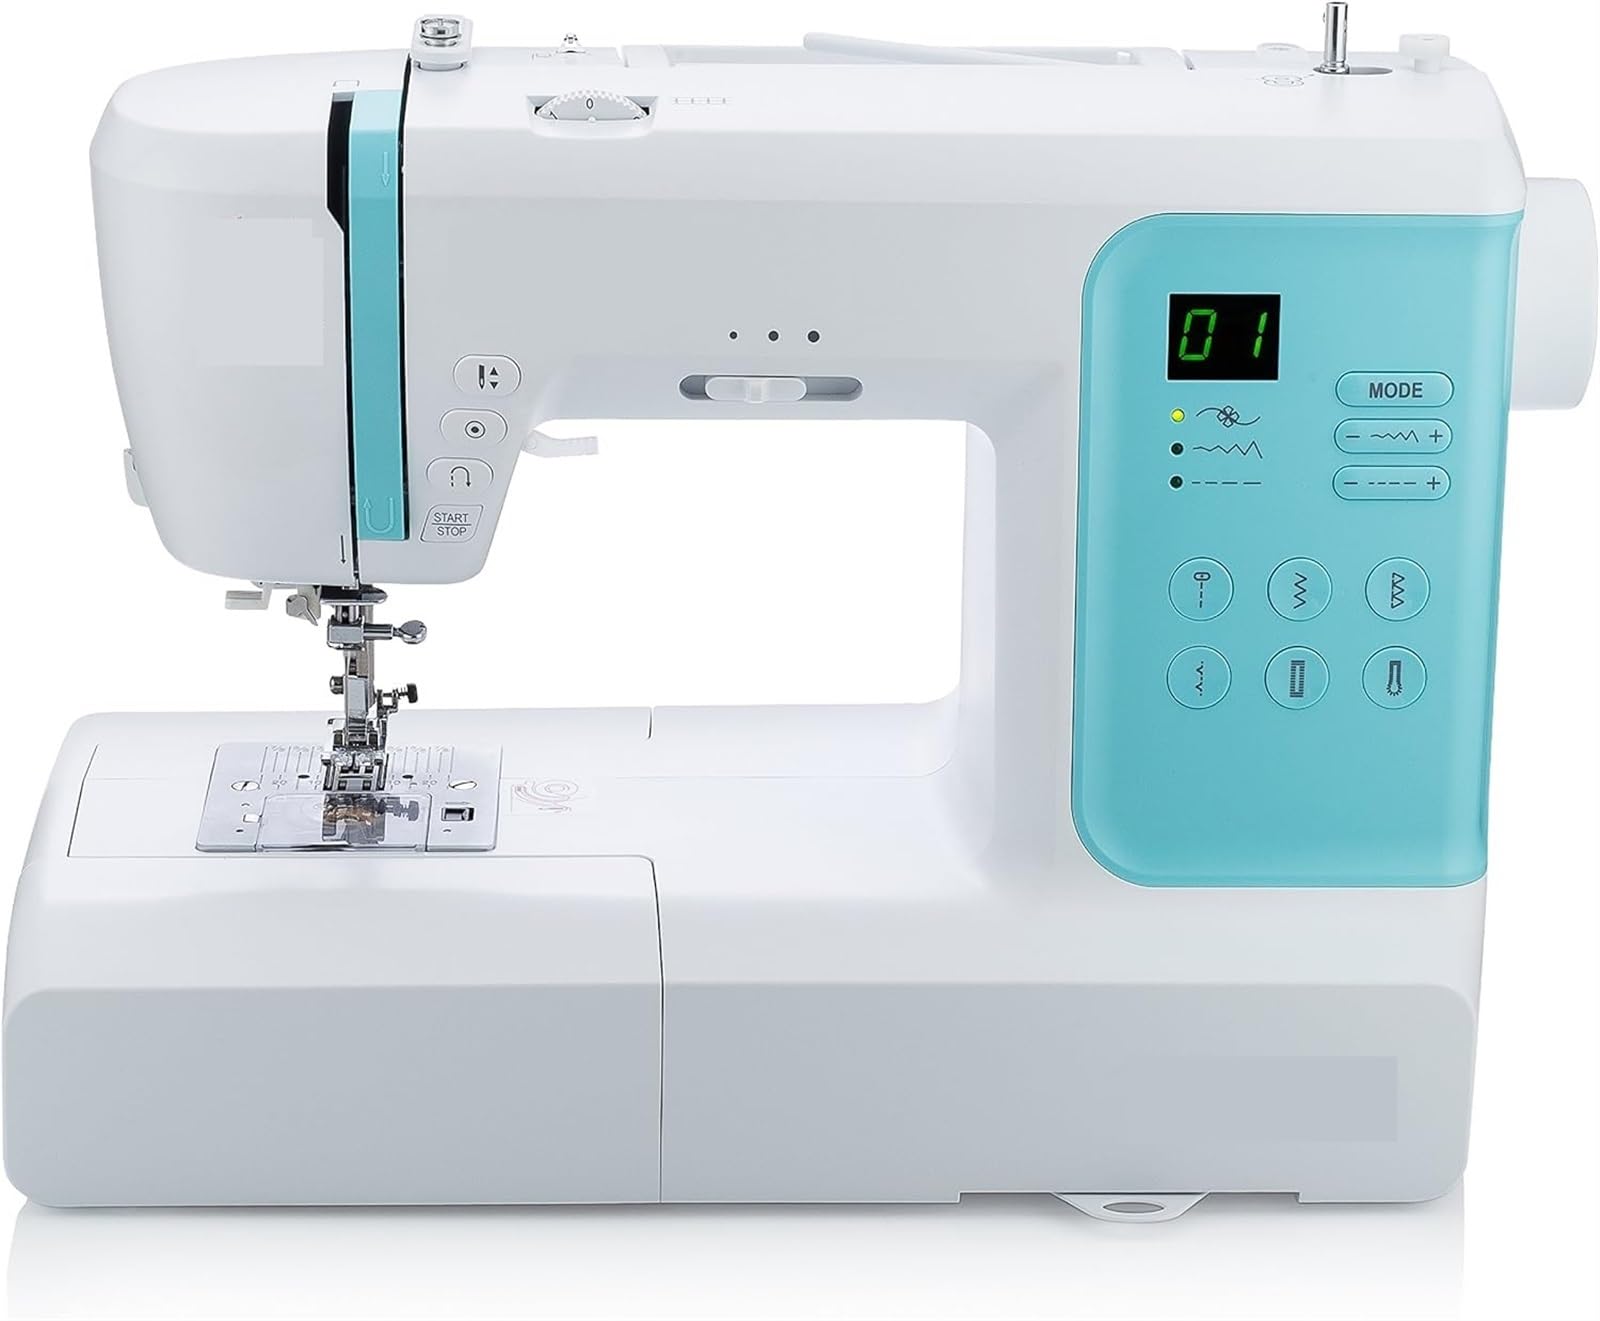
Figure 1: Front view of the OKANEN 80-Stitch Computerized Sewing Machine. This image displays the machine's overall design, including the needle area, presser foot, stitch selection panel, and main body.
Key Components:
- Spool Pin: Holds the thread spool.
- Bobbin Winder: For winding thread onto the bobbin.
- Tension Dial: Adjusts upper thread tension.
- Needle Clamp: Secures the needle.
- Presser Foot: Holds fabric firmly in place while sewing.
- Feed Dogs: Moves fabric under the presser foot.
- Stitch Selection Panel: Digital display and buttons for choosing stitch patterns and adjusting settings.
- Start/Stop Button: Initiates and halts sewing without the foot pedal.
- Speed Control Slider: Adjusts sewing speed.
- Reverse Lever/Button: For back-tacking and reinforcing stitches.
- Foot Pedal Jack: Connects the foot pedal for speed control.
- Power Switch/Cord Socket: For connecting to power and turning the machine on/off.
Setup
1. Unpacking and Placement
- Carefully remove the machine from its packaging. Retain all packing materials for future storage or transport.
- Place the machine on a stable, flat surface. Ensure there is adequate space around the machine for fabric handling.
2. Power Connection
- Ensure the power switch is in the "OFF" position.
- Insert the power cord into the machine's power socket, then plug the other end into a suitable electrical outlet.
3. Foot Pedal Connection
- Insert the foot pedal plug into the foot pedal jack on the machine.
- The foot pedal provides variable speed control; pressing harder increases speed.
4. Winding the Bobbin
- Place an empty bobbin onto the bobbin winder spindle.
- Place a spool of thread onto the spool pin.
- Follow the bobbin winding thread path indicated on the machine.
- Push the bobbin winder spindle to the right.
- Start the machine (using the Start/Stop button or foot pedal) until the bobbin is full.
- Cut the thread and push the bobbin winder spindle back to the left.
5. Threading the Upper Thread
- Raise the presser foot lifter.
- Place a spool of thread onto the spool pin.
- Follow the numbered thread guides on the machine, ensuring the thread passes through the tension discs correctly.
- Thread the needle from front to back.
6. Installing the Bobbin
- Open the bobbin cover plate.
- Insert the wound bobbin into the bobbin case, ensuring the thread unwinds in the correct direction (usually counter-clockwise).
- Pull the thread through the bobbin case tension spring.
- Replace the bobbin cover plate.
- Turn the handwheel towards you to bring the bobbin thread up through the needle plate opening.
Operating Instructions
1. Basic Sewing
- Turn on the machine using the power switch.
- Place your fabric under the presser foot.
- Lower the presser foot using the presser foot lifter.
- Begin sewing by pressing the Start/Stop button or gently pressing the foot pedal.
- Adjust the sewing speed using the speed control slider or the speed adjustment buttons (3 levels).
- To reverse stitch, press and hold the reverse button.
- When finished, press the Start/Stop button or release the foot pedal. Raise the needle to its highest position, lift the presser foot, and gently pull the fabric away. Cut threads using the thread cutter.
2. Stitch Selection and Adjustment
Your machine offers 80 different stitch patterns. Use the stitch selection panel to choose and modify stitches.

Figure 2: Close-up of the digital stitch selection panel. This panel allows users to select from 80 stitch patterns and adjust settings like stitch length and width.
- Selecting Stitches: Use the "MODE" button and the "+" / "-" buttons to navigate through the available stitch patterns displayed on the LED screen.
- Adjusting Stitch Length/Width: Dedicated buttons on the control panel allow for fine-tuning stitch length and width up to a maximum of 7mm width.

Figure 3: Examples of various decorative and utility stitches produced by the OKANEN sewing machine. This image showcases the versatility of the 80-stitch package.
3. Quilting and Free Motion Features
This machine is equipped with a 6.5-inch wide sewing space and a feed dog drop feature, making it suitable for quilting and free-motion sewing.

Figure 4: A user engaged in quilting with the OKANEN sewing machine, demonstrating the ample sewing space and suitability for larger projects.
- Feed Dog Drop: Consult your machine's specific instructions for locating and engaging the feed dog drop lever/switch, which allows for free-motion quilting and embroidery.
- Quilting Foot: Use an appropriate quilting presser foot (often included or sold separately) for best results.
4. Automatic Needle Threader
To use the automatic needle threader, ensure the needle is in its highest position. Follow the specific threading path for the needle threader, then gently push the threader lever down and forward to engage the hook through the needle eye. Loop the thread under the hook and release the lever to pull the thread through.
5. Presser Feet
Your machine comes with 7 standard presser feet, each designed for specific sewing tasks. Refer to the included accessory guide for details on each foot's function and how to change them.
Maintenance
1. Cleaning
- Always unplug the machine before cleaning.
- Remove the needle, presser foot, and needle plate.
- Use the small brush provided (or a soft brush) to remove lint and dust from the bobbin area, feed dogs, and tension discs.
- Wipe the exterior of the machine with a soft, dry cloth. Do not use harsh chemicals or abrasive cleaners.
2. Storage
- Ensure the machine is clean and dry before storing.
- Lower the presser foot and needle.
- Cover the machine with a dust cover to protect it from dust and debris.
- Store in a cool, dry place away from direct sunlight and extreme temperatures.
Troubleshooting
| Problem | Possible Cause | Solution |
|---|---|---|
| Machine not starting | Power cord not properly connected; Power switch off; Foot pedal not connected. | Check power cord connection; Ensure power switch is ON; Connect foot pedal securely. |
| Thread breaking | Incorrect threading; Needle bent or dull; Thread tension too high; Poor quality thread. | Re-thread the machine correctly; Replace needle; Adjust upper thread tension; Use good quality thread. |
| Skipped stitches | Incorrect needle size/type for fabric; Needle bent or dull; Incorrect threading. | Use correct needle for fabric; Replace needle; Re-thread machine. |
| Fabric jamming | Incorrect presser foot pressure; Fabric not placed correctly; Lint buildup. | Adjust presser foot pressure (if available); Ensure fabric is flat; Clean feed dogs and bobbin area. |
| Uneven stitches | Incorrect thread tension; Improper bobbin winding; Fabric being pulled. | Adjust tension; Re-wind bobbin evenly; Guide fabric gently without pulling. |
Specifications
- Model Number: 1005007204547318
- Stitch Count: 80
- Maximum Sewing Speed: 750 stitches per minute (rpm)
- Maximum Stitch Width: 7mm
- Sewing Space: 6.5 inches wide
- Dimensions (L x W x H): Approximately 375mm x 175mm x 275mm (14.76" x 6.89" x 10.83")
- Weight: Approximately 5.9 kg (13 lbs)
- Material: Engineering ABS + Metal Movement
- Power Source: AC
- Features: Automatic Needle Threader, Drop-in Bobbin with Clear Cover, LED Stitch Panel, Feed Dog Drop, 7 Standard Presser Feet, 3-level Speed Adjustment Button.
Warranty and Support
For warranty information, please refer to the warranty card included with your product or contact the manufacturer directly. Keep your proof of purchase for warranty claims.
For technical support or service inquiries, please contact OKANEN customer service through their official website or the contact information provided in your product packaging.