
VEVOR JW-V50
VEVOR JW-V50 3/4HP Continuous Feed Garbage Disposal User Manual
Model: JW-V50
1. Introduction
Thank you for choosing the VEVOR JW-V50 3/4HP Continuous Feed Garbage Disposal. This manual provides essential information for the safe and efficient installation, operation, and maintenance of your new appliance. Please read this manual thoroughly before installation and retain it for future reference.

Image 1: VEVOR JW-V50 3/4HP Continuous Feed Garbage Disposal. This image displays the main unit of the garbage disposal along with various components such as the drain elbow, drain stopper, sealing rings, and screws, providing a complete view of the product and its accessories.
2. Important Safety Instructions
WARNING: Failure to follow these instructions could result in electric shock, fire, or serious injury.
- Always disconnect power before attempting to install or service the disposal.
- Do not put hands or fingers into the disposal opening.
- Do not dispose of glass, metal, plastic, or large bones.
- Never pour harsh chemicals or flammable materials into the disposal.
- Ensure the splash guard is properly installed before operating.
- This appliance is not intended for use by persons (including children) with reduced physical, sensory or mental capabilities, or lack of experience and knowledge, unless they have been given supervision or instruction concerning use of the appliance by a person responsible for their safety.
3. Package Contents
Verify that all components are present before beginning installation:
- 1 x VEVOR JW-V50 Garbage Disposal Unit
- 1 x User Manual
- 1 x Drain Elbow
- 1 x Gasket
- 1 x Drain Stopper
- 1 x Sealing Ring
- 1 x Connector
- 2 x Screws
- 1 x Connector Sealing Ring

Image 2: Package Contents and Dimensions. This image illustrates all the components included in the package, such as the disposal unit, user manual, drain elbow, gasket, drain stopper, sealing rings, connector, and screws. It also provides key dimensions of the disposal unit.
4. Specifications
| Feature | Specification |
|---|---|
| Model Number | JW-V50 |
| Horsepower | 3/4 HP |
| Motor Type | DC Motor |
| RPM | 3250 RPM |
| Noise Level | ≤72 dB |
| Main Materials | ABS + Stainless Steel |
| Item Weight | 10.25 lbs / 4.65 kg |
| Product Dimensions (L x W x H) | 7.28" x 7.28" x 15.55" (185 x 185 x 395 mm) |

Image 3: Powerful DC Motor. This diagram illustrates the internal DC motor of the VEVOR garbage disposal, highlighting its 3/4 HP power and 3250 RPM speed for efficient grinding.
5. Setup and Installation
The VEVOR JW-V50 features an EZ mount twist-and-lock installation system for quick and secure setup. Follow these steps carefully:
- Prepare the Sink: Ensure the sink drain opening is clean and free of debris. If replacing an old disposal, remove the existing unit and mounting hardware.
- Disassemble Mounting Ring and Flange: Separate the mounting ring, support ring, and fiber gasket from the sink flange.
- Install Sink Flange: Apply plumber's putty around the underside of the sink flange. Insert the flange into the sink drain opening.
- Secure Mounting Assembly: From underneath the sink, slide the fiber gasket, backup flange, and mounting ring onto the sink flange. Secure with the screws provided, ensuring a tight seal.
- Connect Drainage Pipe: Attach the drain elbow to the disposal unit. Connect the disposal's drain outlet to your household drain pipe using the provided connector and sealing rings.
- Attach Disposal to Mounting Assembly: Align the disposal unit with the mounting ring. Twist the disposal until it locks securely into place with the 3-point locking mechanism.
- Electrical Connection: Connect the disposal to a grounded electrical outlet. If hardwiring, ensure power is off at the circuit breaker and follow local electrical codes.
- Test for Leaks: Fill the sink with water and then drain it through the disposal to check for any leaks.

Image 4: Triple Noise Reduction System. This diagram illustrates the three layers of noise reduction in the VEVOR disposal: soundproof cotton, splash guard, and a thickened ABS shell, designed to minimize operational noise.

Image 5: EZ Mount Twist-Lock Installation. This image demonstrates the ease of installing the VEVOR disposal using its twist-and-lock mechanism, highlighting the secure 3-point locking system compared to less stable alternatives.
6. Operating Instructions
The VEVOR JW-V50 is a continuous feed disposal, meaning it operates while food waste is being fed into it.
- Turn on Cold Water: Before turning on the disposal, run a strong stream of cold water into the sink. Continue running cold water for a few seconds after the grinding is complete.
- Turn on Disposal: Flip the wall switch or press the air switch to activate the disposal.
- Feed Food Waste: Gradually feed food waste into the disposal opening. Do not overload the unit.
- Grinding Process: The disposal will grind the food waste into fine particles that are flushed away with the water.
- Turn off Disposal: Once all waste is ground and only the sound of water and the motor is heard, turn off the disposal.
- Flush: Continue running cold water for approximately 15 seconds to flush the drain line thoroughly.
Note: The disposal features a One-Button Reset located on the bottom of the unit. If the disposal stops operating, check for jams, clear them, and then press the reset button.
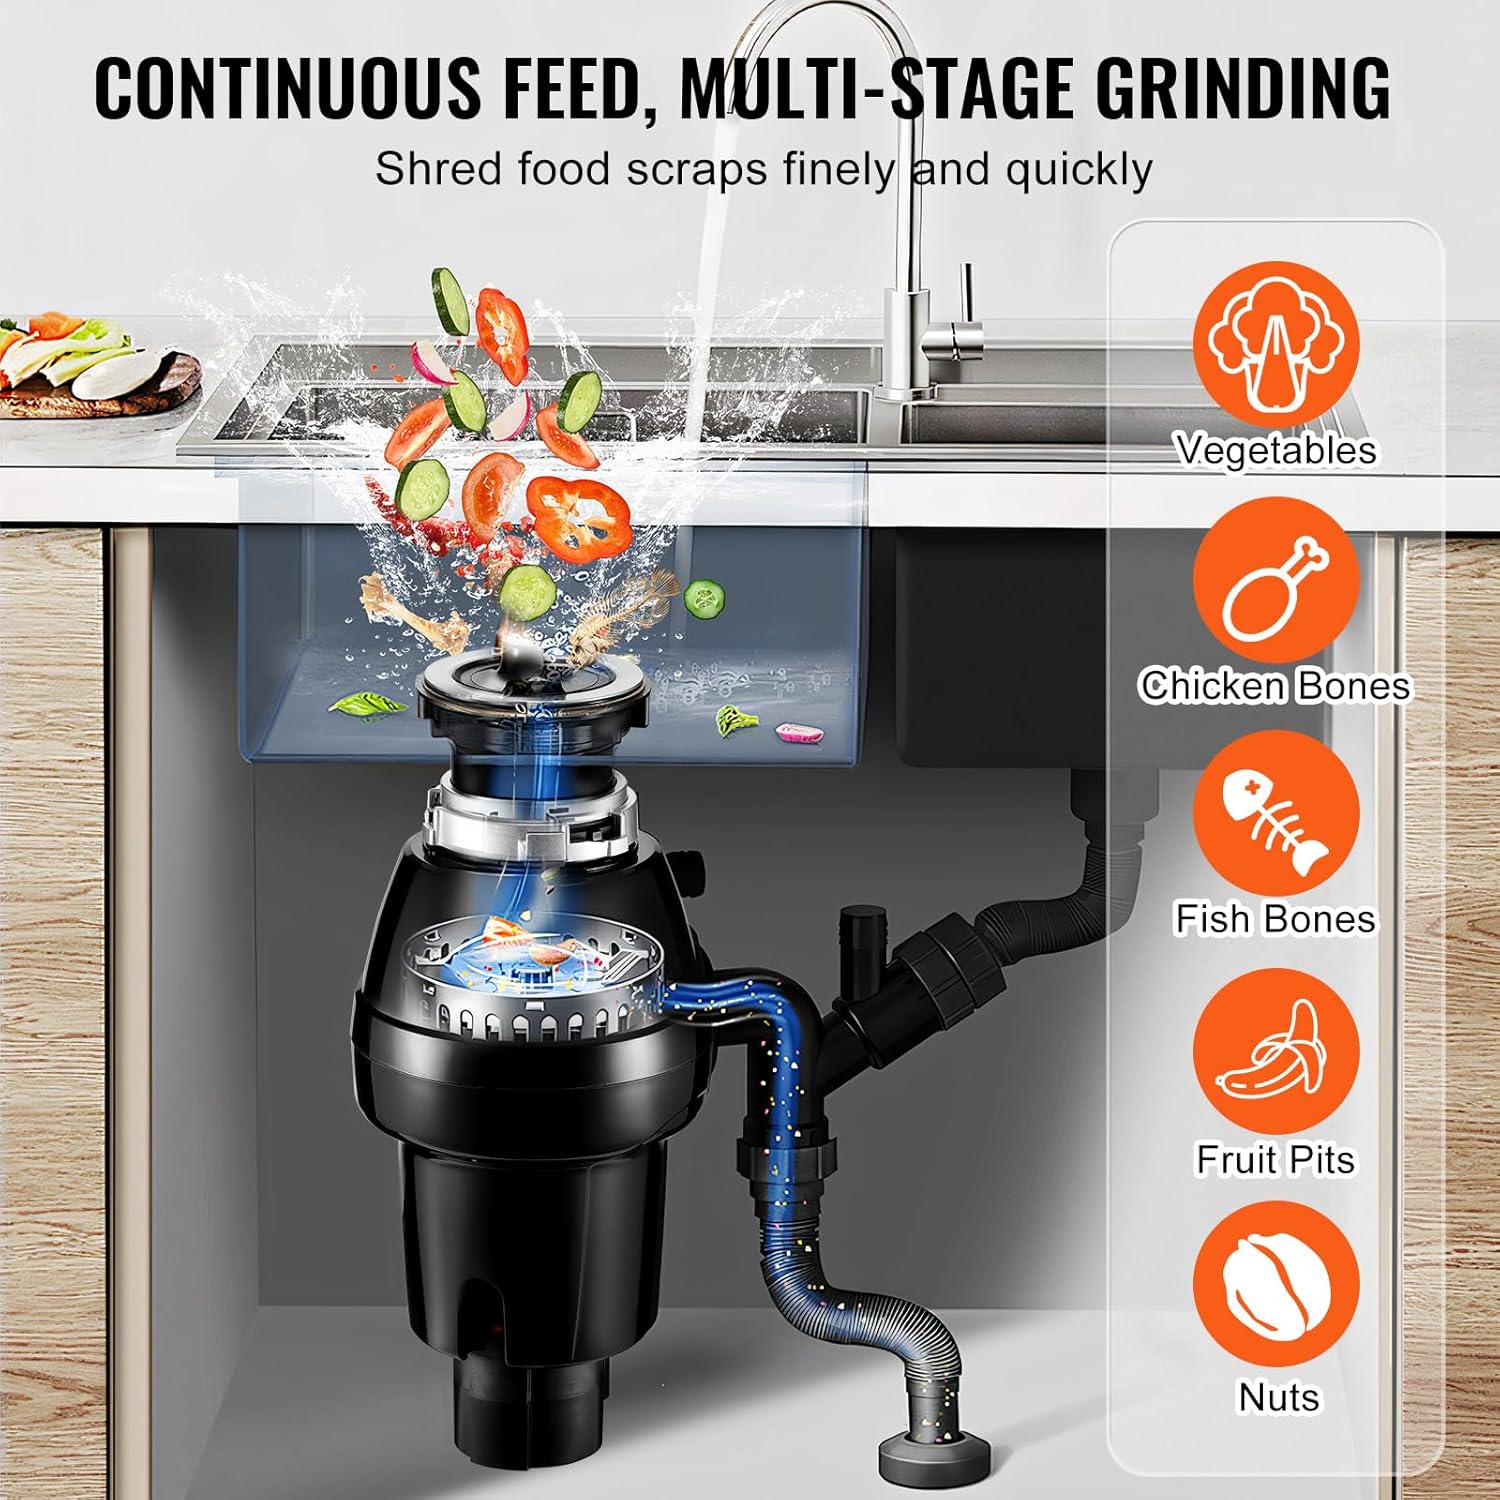
Image 6: Continuous Feed Multi-Stage Grinding. This illustration shows how the VEVOR disposal processes various food scraps like vegetables, chicken bones, fish bones, fruit pits, and nuts through its continuous feed, multi-stage grinding system.
7. Maintenance
- Regular Cleaning: To keep the disposal clean and odor-free, grind citrus peels (lemon, orange) periodically.
- Deep Cleaning: For a deeper clean, fill the disposal with ice cubes and a cup of rock salt. Run cold water and turn on the disposal until the ice and salt are gone. This helps to scour the grinding chamber.
- Avoid Grease: Never pour grease or oil down the disposal, as it can solidify and clog pipes.
- Check Splash Guard: Periodically inspect the splash guard for wear or damage and replace if necessary to maintain proper function and noise reduction.

Image 7: Premium ABS and Stainless Steel Construction. This cutaway view highlights the durable construction of the VEVOR disposal, featuring a waterproof and corrosion-resistant ABS shell and a robust stainless steel grinding system for extended service life.
8. Troubleshooting
| Problem | Possible Cause | Solution |
|---|---|---|
| Disposal does not start. | No power; Motor jammed; Overload protector tripped. | Check circuit breaker/fuse. Ensure power cord is plugged in. Clear any jam (see below). Press the red reset button on the bottom of the unit. |
| Disposal hums but does not grind. | Grinding chamber is jammed. | Turn off power. Use an Allen wrench (not included) in the center hole on the bottom of the disposal to free the motor. Remove the object with tongs. NEVER use hands. |
| Leaks from the disposal. | Loose connections; Improperly sealed sink flange; Cracked housing. | Tighten all connections. Re-seal sink flange with plumber's putty. If housing is cracked, replacement may be necessary. |
| Unpleasant odors. | Food particles trapped in grinding chamber or drain. | Clean the disposal by grinding citrus peels or ice and rock salt (see Maintenance section). |
9. Warranty and Support
VEVOR products are designed to provide reliable performance. For warranty information, technical support, or service inquiries, please refer to the warranty card included with your product or visit the official VEVOR website. Please have your model number (JW-V50) and purchase date available when contacting support.
Official VEVOR Website: www.vevor.com
Ask a question about this manual
Ask about setup, troubleshooting, compatibility, parts, safety, or missing instructions. Manuals+ will review the question and use this page’s manual context to help answer it.