1. Product Overview
The TECHPICCO Hood Struts are designed to provide hydraulic assistance for lifting and holding open the hood of your Toyota Tacoma (2024, 2025, 2026+) or Toyota 4Runner (2025+). This system replaces the factory prop rod, offering a more convenient and stable hood opening experience. The struts are engineered for a direct bolt-on installation without requiring any drilling.
2. Safety Information
- Always ensure the vehicle is parked on a level surface with the engine off and parking brake engaged before working under the hood.
- Use appropriate personal protective equipment, such as safety glasses and gloves, during installation.
- Never attempt to compress the gas springs by hand. They contain high-pressure gas and can cause injury if mishandled.
- Ensure the hood is securely supported during installation, especially when removing factory components.
- Keep hands and clothing clear of moving parts when opening or closing the hood.
- Do not modify the hood struts or their mounting hardware.
3. Package Contents
Verify that all components are present and undamaged before beginning installation.
- 2x Hood Struts (Gas Springs)
- 1x Hardware Kit (includes brackets and necessary fasteners)

Figure 3.1: Components of the TECHPICCO Hood Strut kit. This image displays the individual parts: connectors, the main cylinder body, the piston rod, and the ball mount plates, highlighting their construction and features.
4. Installation Instructions
The TECHPICCO Hood Struts are designed for a straightforward, no-drill installation utilizing existing factory attachment points. Installation typically takes 30 minutes or less.
4.1 Tools Required (Not Included)
- 12mm Socket Wrench
- Ratchet
- Extension (optional, for easier access)
- Flathead Screwdriver (for prying off clips, if necessary)
4.2 General Installation Steps
- Prepare Vehicle: Park the vehicle on a level surface, engage the parking brake, and turn off the engine. Open the hood and secure it with the factory prop rod or an alternative support.
- Remove Factory Components: Carefully remove any existing hood prop rod or related components as instructed in your vehicle's service manual.
- Install Brackets: Attach the provided mounting brackets to the designated factory attachment points on the hood and fender. Ensure all bolts are tightened securely according to the instructions in the detailed manual.
- Attach Struts: Connect the ends of the hood struts to the ball studs on the newly installed brackets. Apply firm, even pressure until the strut ends snap securely onto the ball studs. Do not force.
- Test Operation: Carefully remove any temporary hood support. Slowly lower and raise the hood to ensure the struts operate smoothly and hold the hood securely in the open position. Check for any obstructions or binding.
For detailed, step-by-step instructions with diagrams, please refer to the official installation manual provided with your product or download the PDF from the product page: Download Installation Manual (PDF)

Figure 4.1: Illustration of the bolt-on installation process. This image highlights that no drilling is required, and the struts attach directly to existing points.

Figure 4.2: TECHPICCO Hood Struts installed on a Toyota Tacoma. This image provides an overall view of the product in its operational state, supporting the hood.

Figure 4.3: Various installed views of the hood struts. This composite image shows the struts from different perspectives within the engine bay, demonstrating their fit and function.
4.3 Installation Video
Video 4.1: Installation overview for Tacoma hood struts. This video provides a visual guide to the installation process for the hood struts on a Toyota Tacoma, demonstrating key steps.
5. Operating Instructions
5.1 Opening the Hood
To open the hood, release the primary hood latch from inside the vehicle. Then, locate the secondary latch under the front edge of the hood and release it. The hood struts will then assist in lifting the hood to its fully open position, holding it securely without the need for a manual prop rod.
5.2 Closing the Hood
To close the hood, gently pull it downwards. The struts will offer resistance, controlling the descent. Continue to push the hood down until both primary and secondary latches engage securely. Ensure the hood is fully latched before driving.
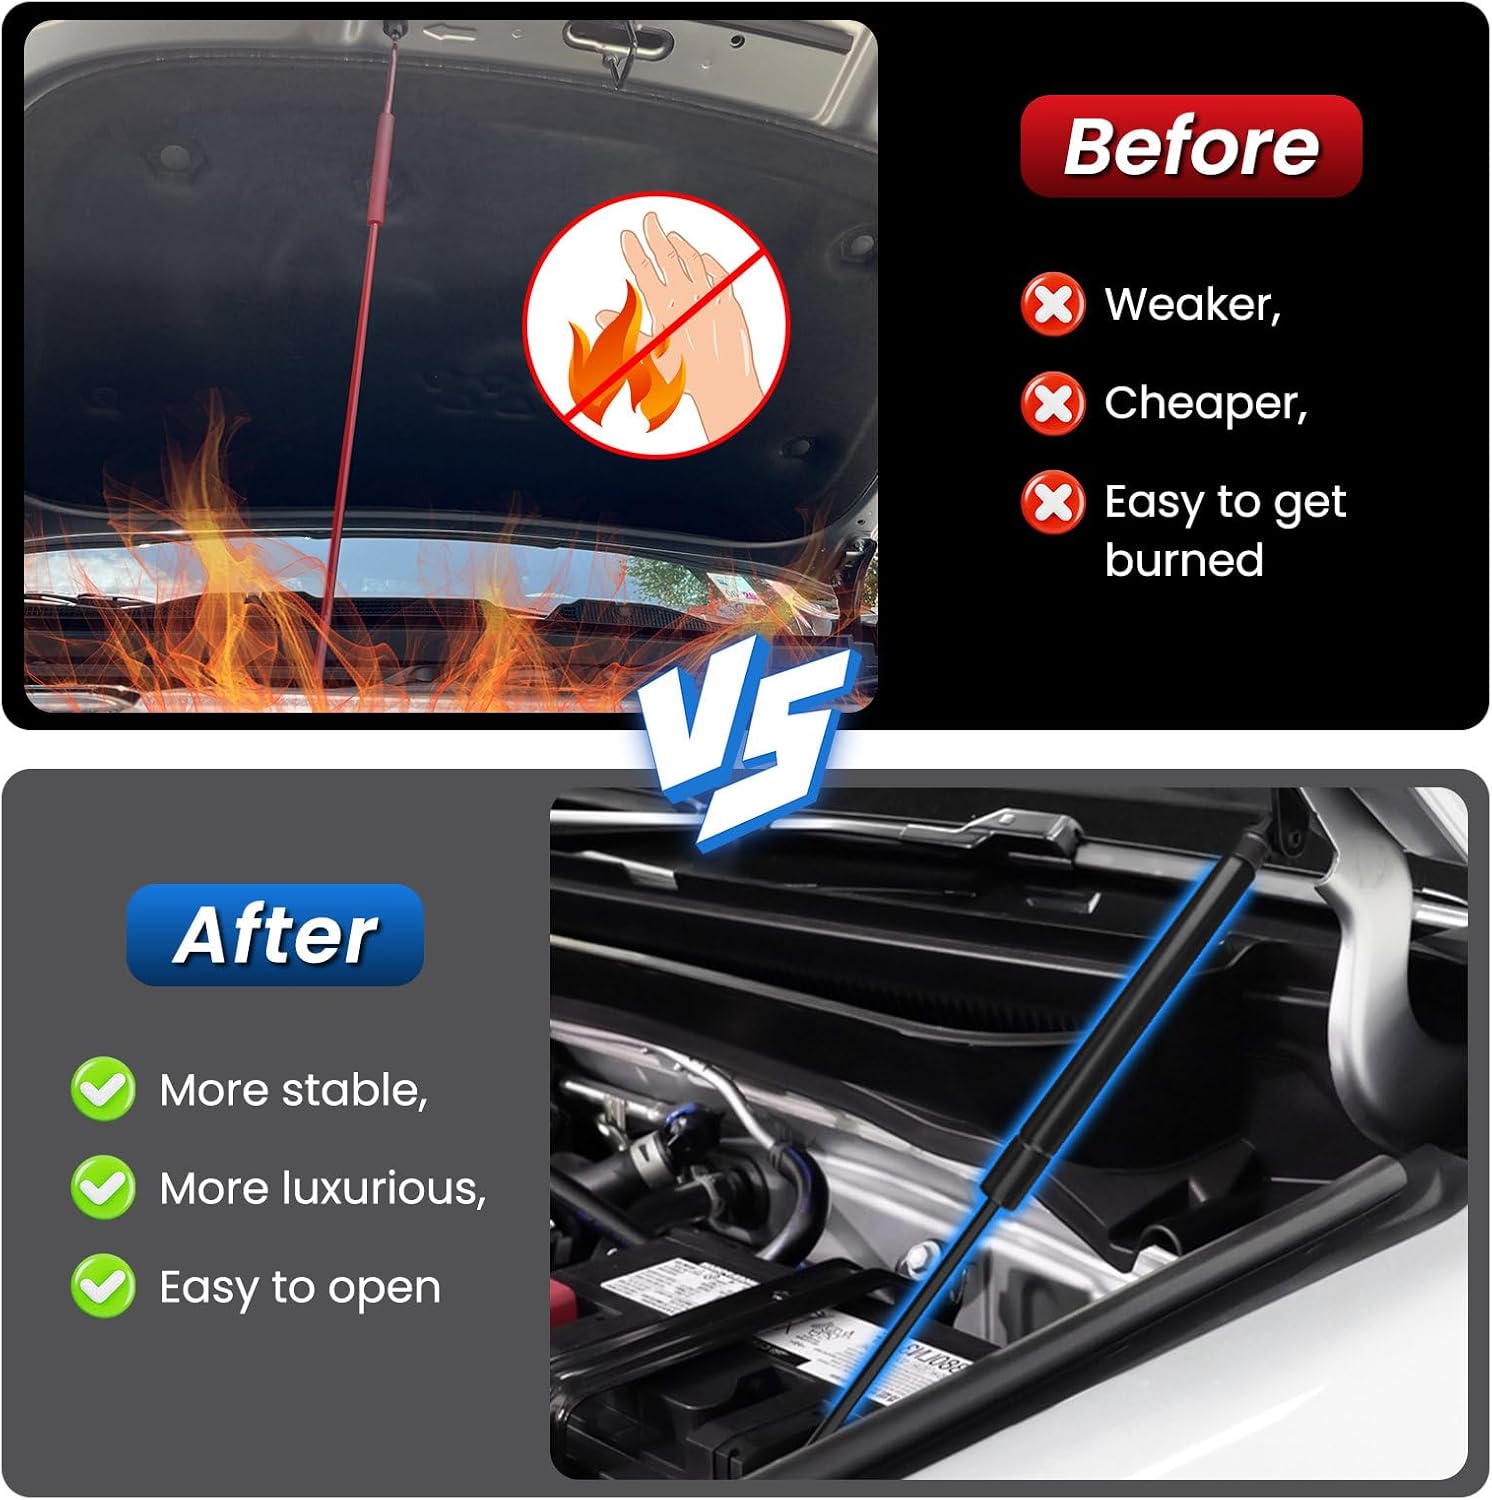
Figure 5.1: Comparison of hood support methods. This image illustrates the difference between using a traditional prop rod and the stability provided by the installed gas struts.
6. Maintenance
The TECHPICCO Hood Struts are designed for minimal maintenance. Follow these guidelines to ensure longevity:
- Regular Inspection: Periodically inspect the struts and mounting points for any signs of wear, damage, or loose connections.
- Cleaning: Keep the piston rods clean and free from dirt, dust, or debris. Wipe them with a clean, damp cloth if necessary. Avoid using harsh chemicals or abrasive cleaners.
- Lubrication: No lubrication is typically required for gas springs. Do not apply grease or oil to the piston rod, as this can attract dirt and compromise seals.
- Temperature Effects: Extreme cold temperatures may temporarily reduce the lifting force of the struts. This is normal and performance should return to normal in warmer conditions.

Figure 6.1: Upgraded cylinder design. This diagram shows the internal structure of the gas spring, including oil, damping range, and nitrogen injection for rust protection, indicating its durable construction.
7. Troubleshooting
| Problem | Possible Cause | Solution |
|---|---|---|
| Hood does not lift fully or falls slowly. | Struts are worn or damaged; extreme cold weather. | Inspect struts for damage. Allow vehicle to warm up in cold weather. If persistent, consider replacement. |
| Hood is difficult to close. | New struts are stiff; incorrect installation. | New struts may require a break-in period. Verify correct installation and alignment of brackets. |
| Noise during operation. | Loose mounting hardware; debris on piston rod. | Check and tighten all mounting bolts. Clean piston rods. |
8. Product Specifications
- Brand: TECHPICCO
- Model Number: YQCG-TACO24+-2-BK
- Compatible Vehicles: Toyota Tacoma 2024, 2025, 2026+; Toyota 4Runner 2025+
- Material: Durable 3mm carbon steel with 2-stage satin textured black powder coat finish
- Item Weight: Approximately 1.3 pounds
- Package Dimensions: Approximately 16.26 x 3.07 x 1.38 inches
- Position: Front Hood
- Installation Type: No-drill, bolt-on
9. Warranty Information
TECHPICCO products typically come with a limited warranty covering manufacturing defects. For specific warranty terms and conditions, please refer to the documentation included with your purchase or contact TECHPICCO customer support. Keep your proof of purchase for warranty claims.
10. Customer Support
If you have any questions regarding the installation, operation, or maintenance of your TECHPICCO Hood Struts, please contact our customer support team. You can find contact information on the official TECHPICCO brand store or through your retailer.
Visit the TECHPICCO Store: TECHPICCO Official Store