1. Product Overview
The LDD.M3663.A75 is a versatile three-in-one TV motherboard designed to integrate essential television functions into a single, compact unit. This board is engineered for compatibility with displays requiring a 1366x768 resolution and operates efficiently with a 75V, 300mA power supply. It is an ideal component for repairing, replacing, or upgrading various television models, offering reliable performance for both professional technicians and DIY enthusiasts.

Figure 1: Top-down view of the LDD.M3663.A75 TV motherboard, showing various components and ports.
2. Key Features
- Integrated Design: Three-in-one functionality for streamlined TV system integration.
- Display Compatibility: Supports 1366x768 resolution displays for clear and vibrant picture quality.
- Power Specifications: Operates on a 75V, 300mA power supply, suitable for a range of TV models.
- Quality Assurance: Each unit is rigorously tested and verified to ensure optimal performance and reliability.
- Application: Ideal for television repair, replacement, or upgrade projects.

Figure 2: Close-up view of the LDD.M3663.A75 model number printed on the circuit board, alongside a connector labeled "CONL1 KEY&IR".
3. Setup and Installation
Installation of a TV motherboard requires technical expertise and should ideally be performed by a qualified professional. Incorrect installation can lead to damage to the motherboard or the television. Always ensure the TV is disconnected from the power source before beginning any installation or repair work.
3.1 Pre-Installation Checklist
- Verify the compatibility of the LDD.M3663.A75 motherboard with your specific TV model and panel.
- Gather necessary tools, including screwdrivers, anti-static wrist strap, and multimeter.
- Ensure a clean, static-free work environment.
3.2 Installation Steps (General Guidelines)
- Disconnect Power: Unplug the TV from the wall outlet.
- Access TV Internals: Carefully remove the back cover of the television.
- Disconnect Old Board: Disconnect all cables (LVDS, power, speakers, buttons, IR, etc.) from the existing motherboard.
- Remove Old Board: Unscrew and remove the old motherboard from the TV chassis.
- Install New Board: Carefully place the LDD.M3663.A75 motherboard into position and secure it with screws.
- Reconnect Cables: Reconnect all cables to their corresponding ports on the new motherboard. Pay close attention to the LVDS cable orientation.
- Initial Test: Before reassembling the TV, connect the power cord and perform a brief test to ensure basic functionality.
- Reassemble: Once confirmed working, disconnect power and reattach the TV back cover.

Figure 3: Another top-down perspective of the LDD.M3663.A75 TV motherboard, highlighting the layout of integrated circuits, capacitors, and input/output ports.
4. Operating Instructions
Once the LDD.M3663.A75 motherboard is correctly installed, the television will operate as per its original design. The motherboard manages video processing, audio output, and input/output functionalities. Refer to your television's original user manual for specific operating instructions related to its features, remote control, and menu navigation.
- Power On/Off: Use the TV's power button or remote control to turn the television on or off.
- Input Selection: Use the input/source button on your remote to switch between connected devices (HDMI, VGA, AV, etc.).
- Channel Tuning: If using an antenna, perform a channel scan through the TV's menu to find available channels.
5. Maintenance
The LDD.M3663.A75 motherboard is designed for long-term reliability and typically requires minimal maintenance. However, following general electronic component care practices can extend its lifespan.
- Dust Removal: Periodically, and with the TV unplugged, gently clean any accumulated dust from the motherboard and TV vents using compressed air or a soft brush. Dust can impede heat dissipation and affect performance.
- Ventilation: Ensure the television's ventilation openings are not blocked to allow for proper airflow and prevent overheating.
- Environmental Conditions: Operate the TV in a stable environment, avoiding extreme temperatures, high humidity, and direct sunlight.

Figure 4: Rear view of the LDD.M3663.A75 TV motherboard, showing the solder points and the heat sink plate.
6. Troubleshooting
If you encounter issues after installing the LDD.M3663.A75 motherboard, consider the following common troubleshooting steps. For complex issues, professional assistance is recommended.
- No Power:
- Check if the power cable is securely connected to both the TV and the wall outlet.
- Verify the power supply unit (PSU) is functioning correctly.
- No Picture/Sound:
- Ensure all internal cables, especially the LVDS cable, are correctly and securely connected to the motherboard and the panel.
- Confirm the correct input source is selected on the TV.
- Test with a different input device or source.
- Distorted Picture:
- Check the LVDS cable for damage or improper connection.
- Verify the panel settings in the TV's service menu (if accessible and you are qualified to adjust them).
- Remote Control Not Responding:
- Ensure the IR sensor cable is properly connected to the motherboard.
- Check the remote control batteries.
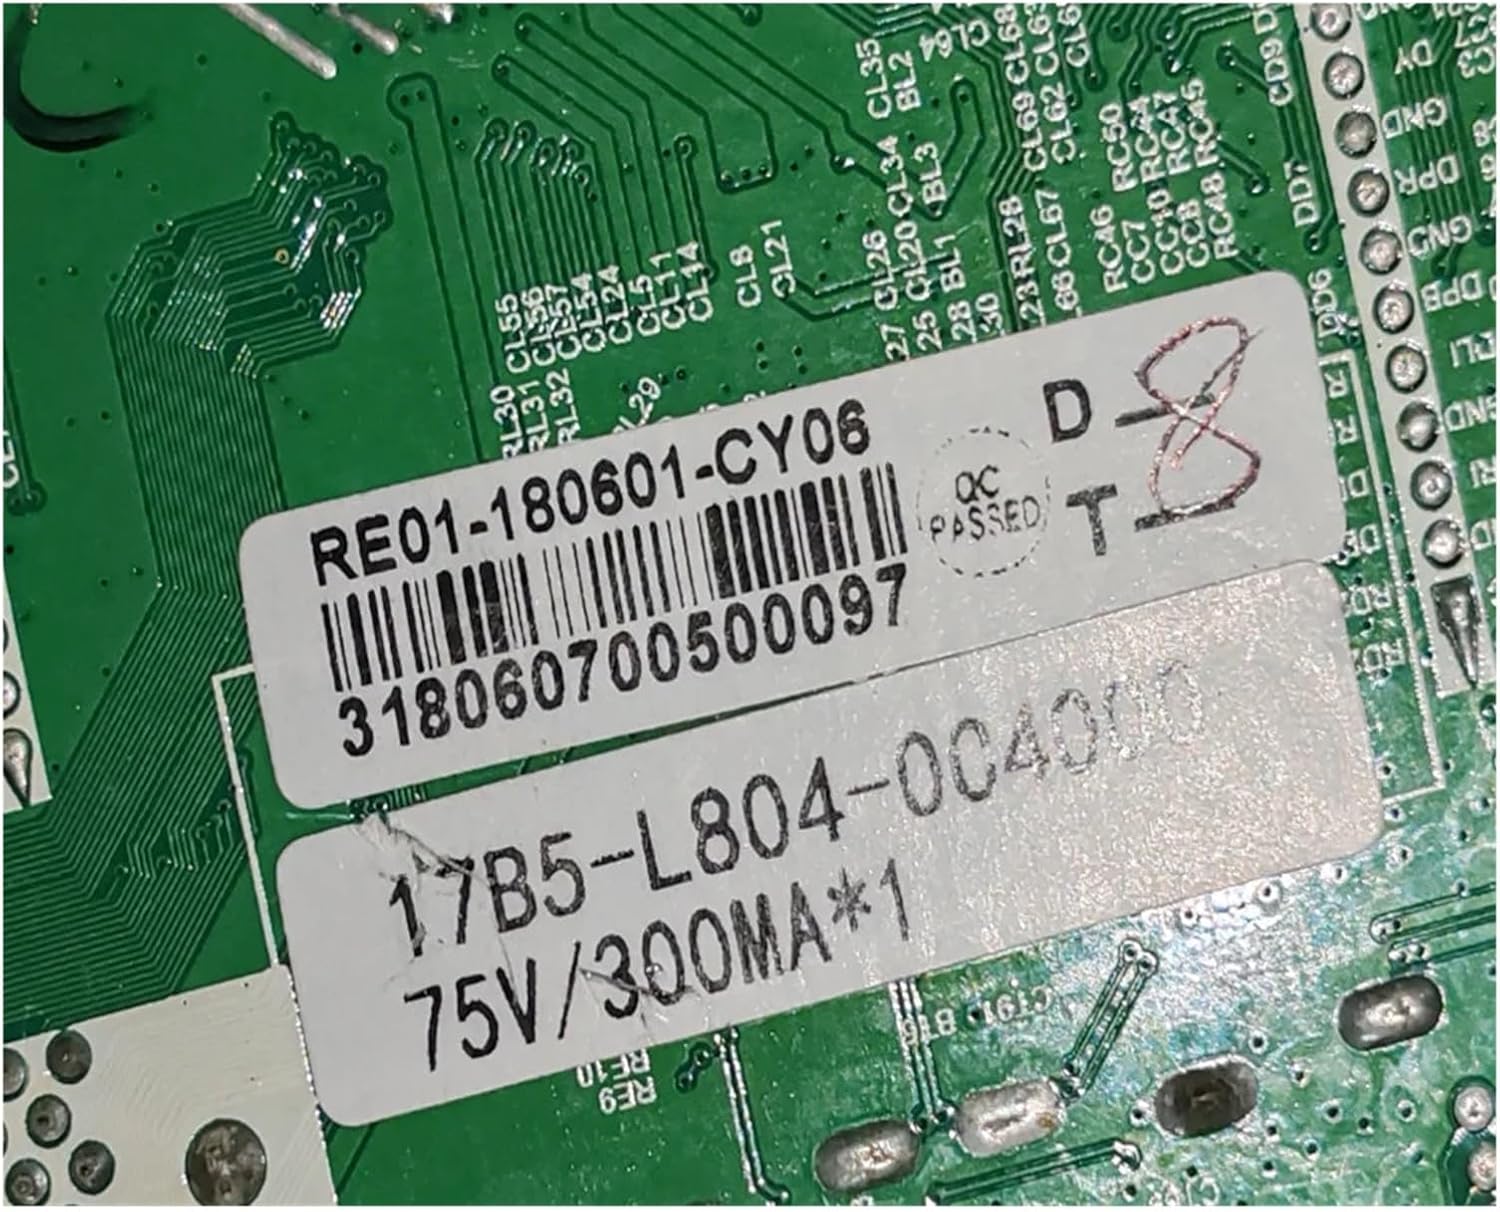
Figure 5: Detailed close-up of labels on the back of the motherboard, indicating "RE01-180601-CY06" and power specifications "75V/300MA".
7. Specifications
| Specification | Value |
|---|---|
| Model Number | LDD.M3663.A75 |
| Compatible Resolution | 1366x768 |
| Power Supply | 75V, 300mA |
| Package Dimensions | 1.18 x 0.79 x 0.39 inches |
| Item Weight | 1.76 ounces |
| Manufacturer | zmy655 |
| Country of Origin | China |
8. Warranty and Support
For specific warranty information regarding your LDD.M3663.A75 motherboard, please refer to the terms and conditions provided by your original point of purchase or contact the seller directly. As a replacement part, warranty terms may vary.
For technical support or inquiries, please contact the manufacturer or seller. You can often find support contact information on the seller's page or through your order details.
Visit the ZMYUXME Amazon Store for more products and information.