
1. Introduction
Thank you for choosing the 2NLF Outdoor WiFi Security Camera. This manual provides detailed instructions for the installation, operation, and maintenance of your new security camera. Please read this manual carefully before use and keep it for future reference.
1.1 Product Overview
The 2NLF Outdoor WiFi Security Camera is designed to provide comprehensive surveillance for your home or business. It features dual-band WiFi connectivity (2.4GHz and 5GHz), 360-degree pan, tilt, and zoom (PTZ) capabilities, automatic motion tracking, two-way audio communication, and advanced night vision modes. Its IP66 weather-resistant design ensures reliable performance in various outdoor conditions.

Image 1.1: The 2NLF Outdoor WiFi Security Camera, showcasing its dual antenna design and a smartphone displaying the live camera feed with 5G/2.4G WiFi indicator.
1.2 Package Contents
Please check the package for the following items:
- 2NLF Outdoor WiFi Security Camera Body
- Power Adapter
- Mounting Screws
- Instruction Manual (this document)
2. Safety Information
To ensure safe and proper operation, please observe the following safety precautions:
- Use only the provided power adapter.
- Do not expose the camera to extreme temperatures or humidity beyond its operating range.
- Avoid direct exposure to sunlight for prolonged periods, which may affect image quality.
- Ensure the camera is securely mounted to prevent accidental falls.
- Do not attempt to disassemble or modify the camera. This will void the warranty.
- Keep the camera and its accessories out of reach of children.
3. Setup
3.1 Physical Installation
The camera is designed for screw-in wall mounting.
- Choose a suitable location for installation, ensuring a clear field of view and proximity to a power outlet.
- Mark the drilling points on the wall using the camera's mounting base as a template.
- Drill holes and insert wall anchors if necessary.
- Secure the camera's mounting base to the wall using the provided screws.
- Attach the camera body to the mounted base.
3.2 Power Connection
Connect the power adapter to the camera's power input port and then plug it into a standard electrical outlet. The camera will power on automatically.

Image 3.2: The camera supports 24/7 recording and requires a continuous power supply via its plug-in power adapter.
3.3 App Download and WiFi Connection
To control and monitor your camera, you need to download the dedicated mobile application (e.g., EseeCloud, if applicable, based on image 71lXa5a4BqL).
- Scan the QR code on the camera packaging or in the quick start guide to download the app, or search for the app name in your smartphone's app store.
- Register a new account and log in.
- Follow the in-app instructions to add your camera. This typically involves scanning a QR code on the camera or manually entering its ID.
- Connect the camera to your WiFi network. The camera supports both 2.4GHz and 5GHz WiFi bands for stable and fast connection. Ensure your smartphone is connected to the same WiFi network during the initial setup.

Image 3.3: The camera supports both 2.4 GHz and 5 GHz WiFi bands, providing improved speed and connection stability for your home network.
4. Operating
4.1 Live View and PTZ Control
Once connected, open the app to access the live view of your camera. You can control the camera's pan, tilt, and zoom (PTZ) functions directly from the app to adjust its viewing angle.
- Pan: Rotate the camera horizontally up to 360 degrees.
- Tilt: Adjust the camera vertically.
- Zoom: Digitally zoom in or out on the live feed.

Image 4.1: The camera offers 360° PTZ rotation control, allowing you to monitor all angles of your outdoor environment.
4.2 Two-Way Audio
The camera features a built-in microphone and speaker, enabling two-way audio communication. You can listen to the environment around the camera and speak through the camera using the app.
- Tap the microphone icon in the app to speak.
- Ensure the speaker icon is enabled to hear audio from the camera.

Image 4.2: The two-way audio feature allows for clear communication with visitors, such as instructing a delivery driver to leave a package at the door.
4.3 Motion Detection and Alerts
The camera is equipped with advanced motion detection and automatic tracking capabilities. When motion is detected, the camera can:
- Send push notifications to your mobile device.
- Activate a siren alarm.
- Turn on a spotlight to deter intruders.
- Automatically track the detected movement.
You can configure these alert settings within the app.

Image 4.3: The camera features motion detection and automatic tracking, with options for siren, spotlight, and mobile notifications upon detection.
4.4 Night Vision Modes
The camera offers three advanced night vision modes for clear imaging in low-light or no-light conditions:
- Color Mode: Provides full-color night vision when sufficient ambient light is available or the spotlight is activated.
- Infrared Mode: Uses infrared LEDs for black and white vision in complete darkness.
- Smart Mode: Automatically switches between infrared and color mode based on detected motion or light conditions.

Image 4.4: The camera provides day and night security with advanced color night vision, ensuring clear images even in darkness.
4.5 Recording and Storage
The camera supports flexible recording and storage options:
- SD Card Storage: Insert a microSD card (up to 128GB, not included) into the designated slot for local storage of recordings.
- Cloud Storage: Subscribe to a cloud storage plan through the app for secure, remote storage of your video footage.
You can review recorded footage and manage storage settings via the mobile app.
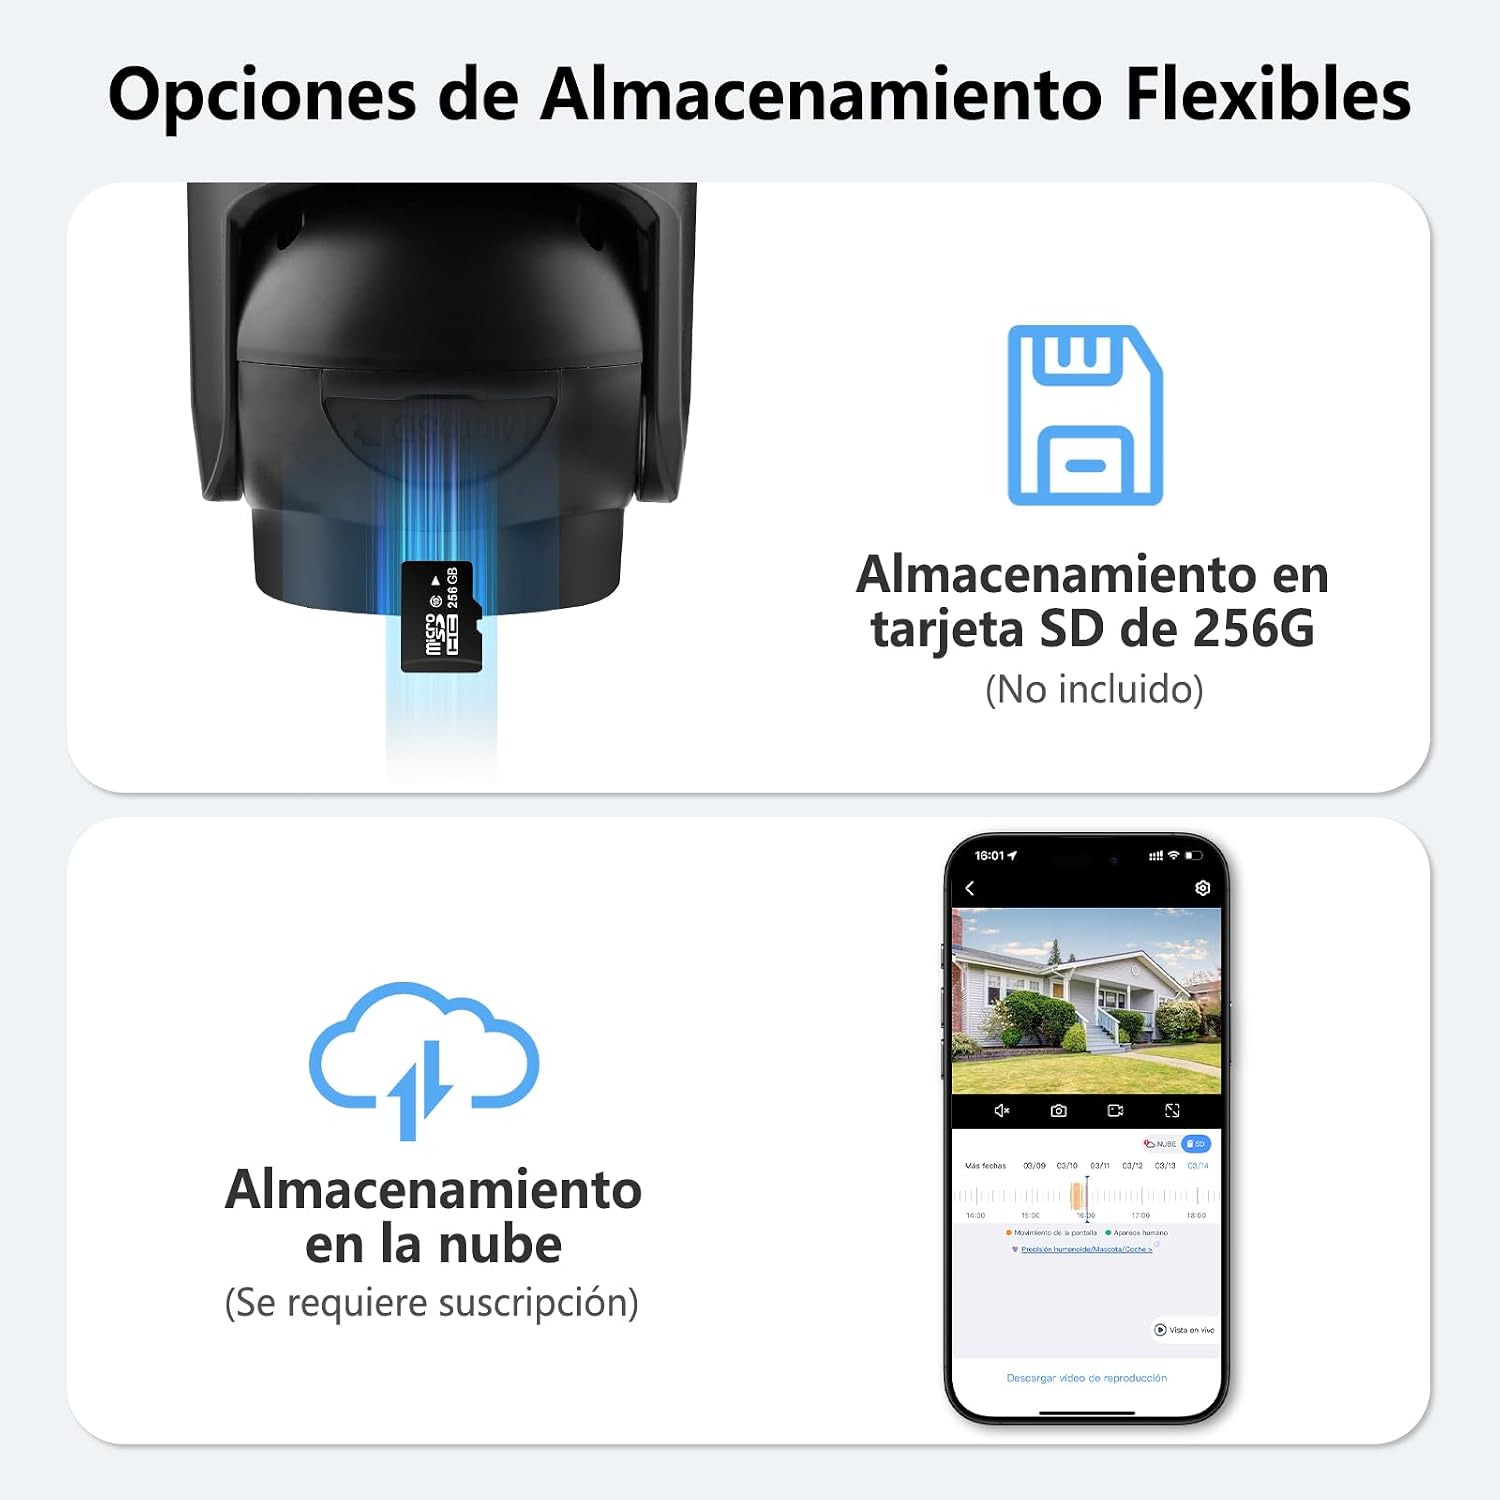
Image 4.5: Flexible storage options include local storage on an SD card (up to 256GB, not included) and cloud storage (subscription required).
4.6 User Sharing
You can share access to your camera's live feed and recordings with multiple users through the mobile application. This allows family members or trusted individuals to monitor the property.
5. Maintenance
5.1 Cleaning
To maintain optimal image quality, periodically clean the camera lens with a soft, dry cloth. Do not use harsh chemicals or abrasive materials.
5.2 Firmware Updates
Regularly check for firmware updates through the mobile app. Updates often include performance improvements, new features, and security enhancements. Follow the in-app instructions for firmware updates.
6. Troubleshooting
If you encounter issues with your camera, refer to the following common problems and solutions:
| Problem | Possible Cause | Solution |
|---|---|---|
| Camera offline | No power; WiFi disconnected; Weak WiFi signal | Check power connection; Restart camera and router; Ensure camera is within WiFi range. |
| Cannot connect to WiFi | Incorrect WiFi password; Router settings; Camera too far from router | Verify WiFi password; Check router's 2.4GHz/5GHz settings; Move camera closer to router. |
| Poor image quality | Dirty lens; Low light; Network bandwidth issues | Clean the lens; Ensure adequate lighting or proper night vision mode; Check internet speed. |
| Motion detection not working | Settings disabled; Obstructions in view | Enable motion detection in app settings; Clear any obstructions. |
| Two-way audio issues | Microphone/speaker disabled; Volume too low; Network delay | Check audio settings in app; Adjust volume; Ensure stable network connection. |
7. Specifications
| Feature | Detail |
|---|---|
| Model Number | GAD1008BK1 |
| Video Capture Resolution | 1080p |
| Color | Black |
| Wireless Communication | WiFi (2.4GHz / 5GHz) |
| Connectivity Protocol | Wi-Fi |
| Power Source | Electric Cable (Wired Power) |
| Form Factor | Dome |
| Installation Type | Screw-in (Wall Mount) |
| Night Vision Range | 15 Meters |
| Material | Acrylonitrile Butadiene Styrene (ABS) |
| Dimensions (L x W x H) | 15 x 14.5 x 9.9 cm (5.9 x 5.7 x 3.9 inches) |
| Water Resistance Level | IP66 (Waterproof) |
| Special Features | Two-way audio, Motion detector, Weather resistant, PTZ technology, Night vision |
| Usage | Surveillance (Outdoor/Indoor) |
| Compatible Devices | Smartphone |
| Batteries Required | No |
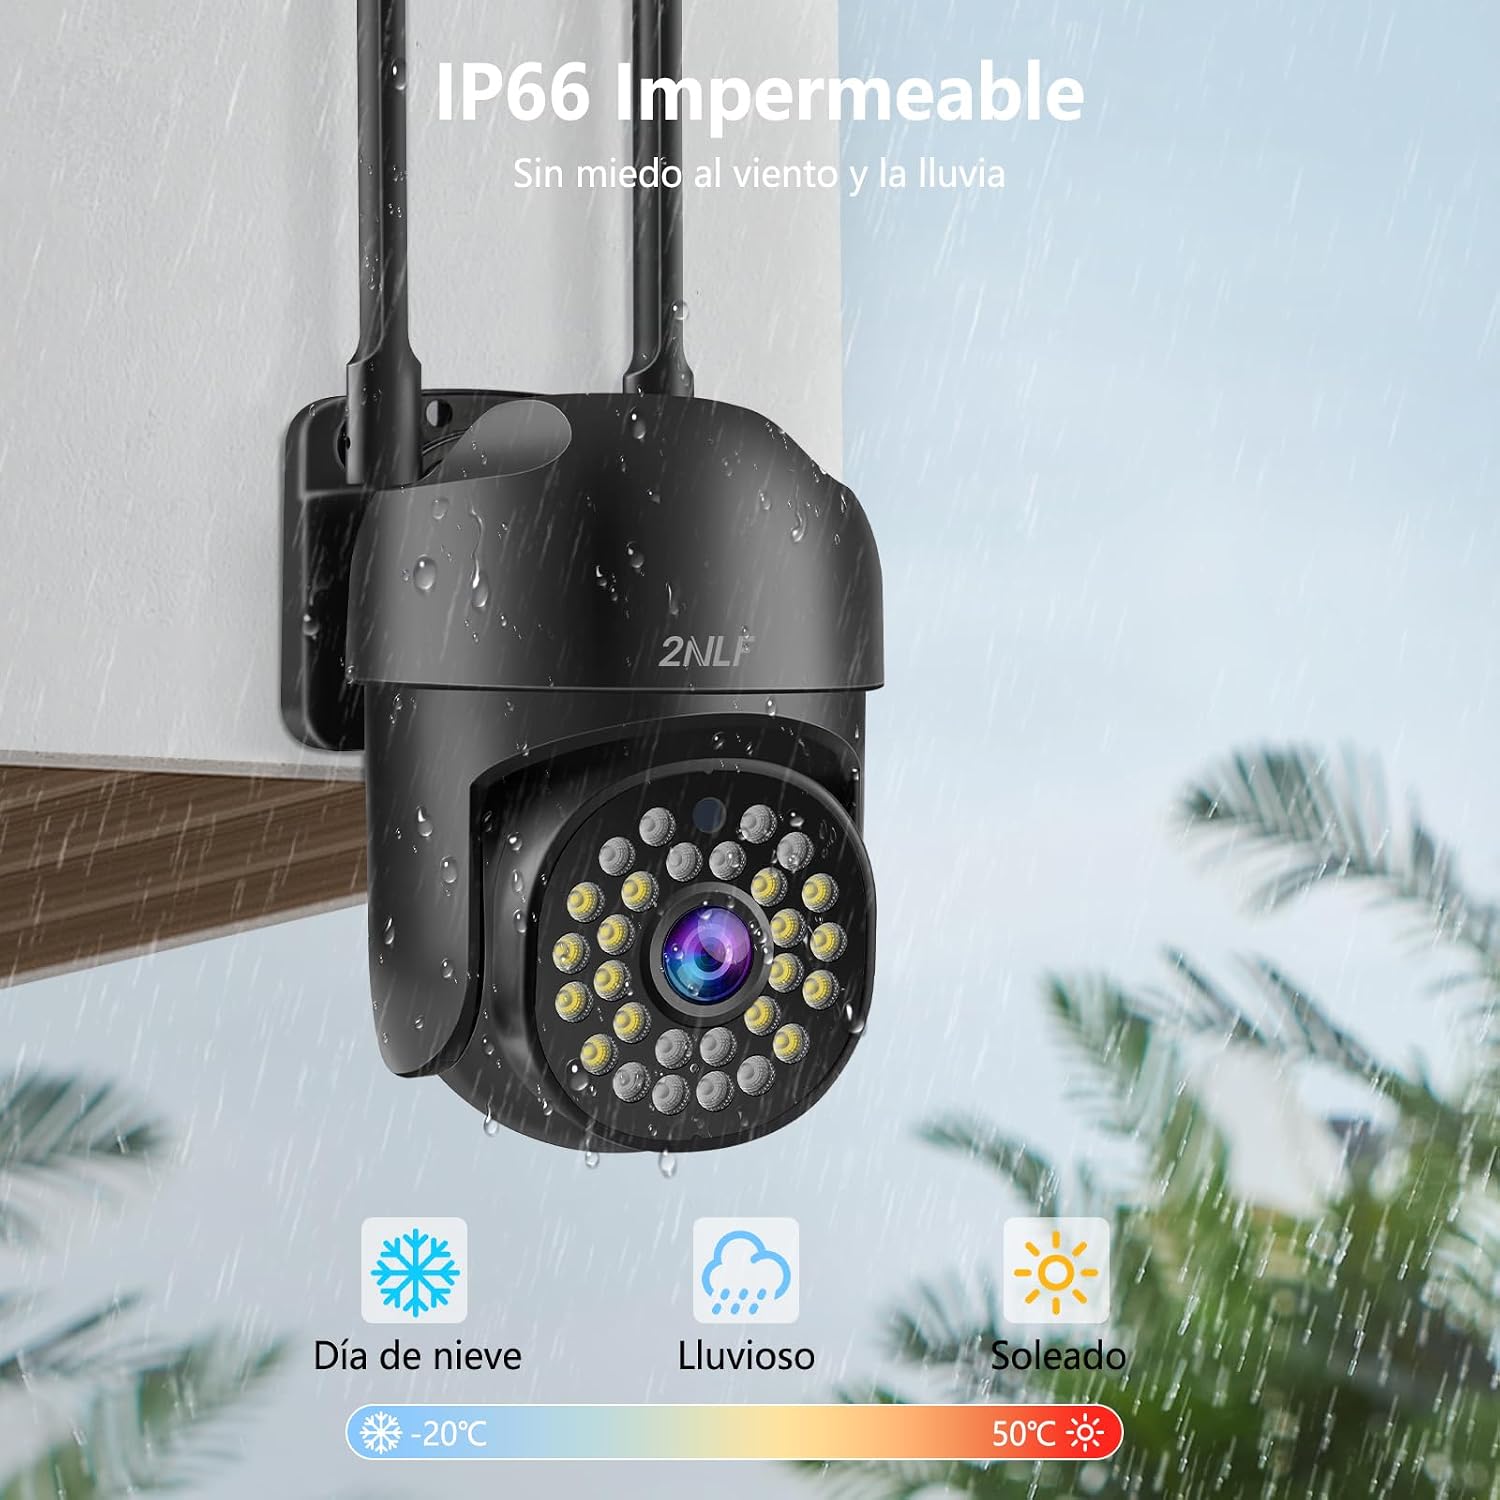
Image 7.1: The camera boasts an IP66 waterproof rating, making it resistant to wind and rain, suitable for various weather conditions from -20°C to 50°C.
8. Warranty and Support
For warranty information and technical support, please refer to the product packaging or contact 2NLF customer service through the contact details provided on the official website or within the mobile application. Keep your purchase receipt as proof of purchase for warranty claims.